This content originally appeared on Bits and Pieces - Medium and was authored by Kyle Le

Authentication is an important part of our applications. From time to time, there are many ways to handle authentication. With each requirement, we find the suitable approach to handle authentication.
This article is a simple tutorial on how to implement authentication with NestJS, before go into the guide, I’m going to demonstrate the technologies that are going to be used in the guide
- JWT or JSON Web Token is an industry standard RFC 7519 method for representing claims securely between two parties.
- Passport is the most popular Node authentication library, well-known by the community and successfully used in many production application, NestJS has supported it outside the box with @nestjs/passport
Installation
First, we create the project
nest new your-project-name
Then we add the dependencies
yarn add @nestjs/passport passport passport-local passport-jwt @nestjs/jwt
We are going to use mongoose to store the data
yarn add mongoose @nestjs/mongoose
Generate modules, services and controllers
For the authentication, we need 2 modules AuthModule and UserModule , each of them need controller and service files
Auth module:
nest g module auth
nest g service auth
nest g controller auth
User module
nest g module users
nest g service users
nest g controller users
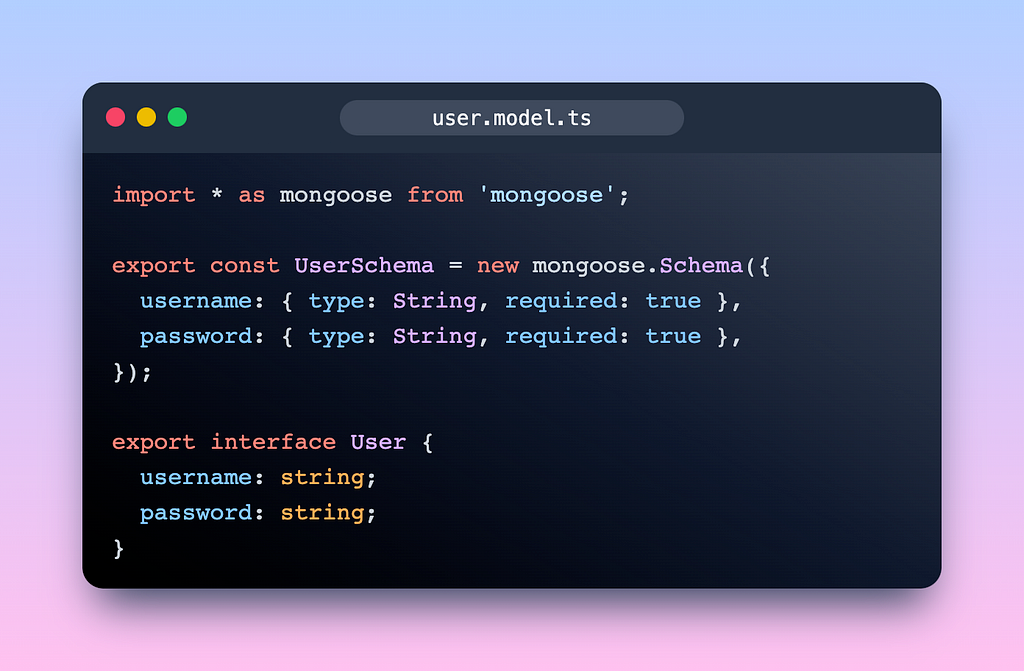
Define schema and interface
We need an UserSchema and an User interface, let’s create the user.model.ts file
Create User Service
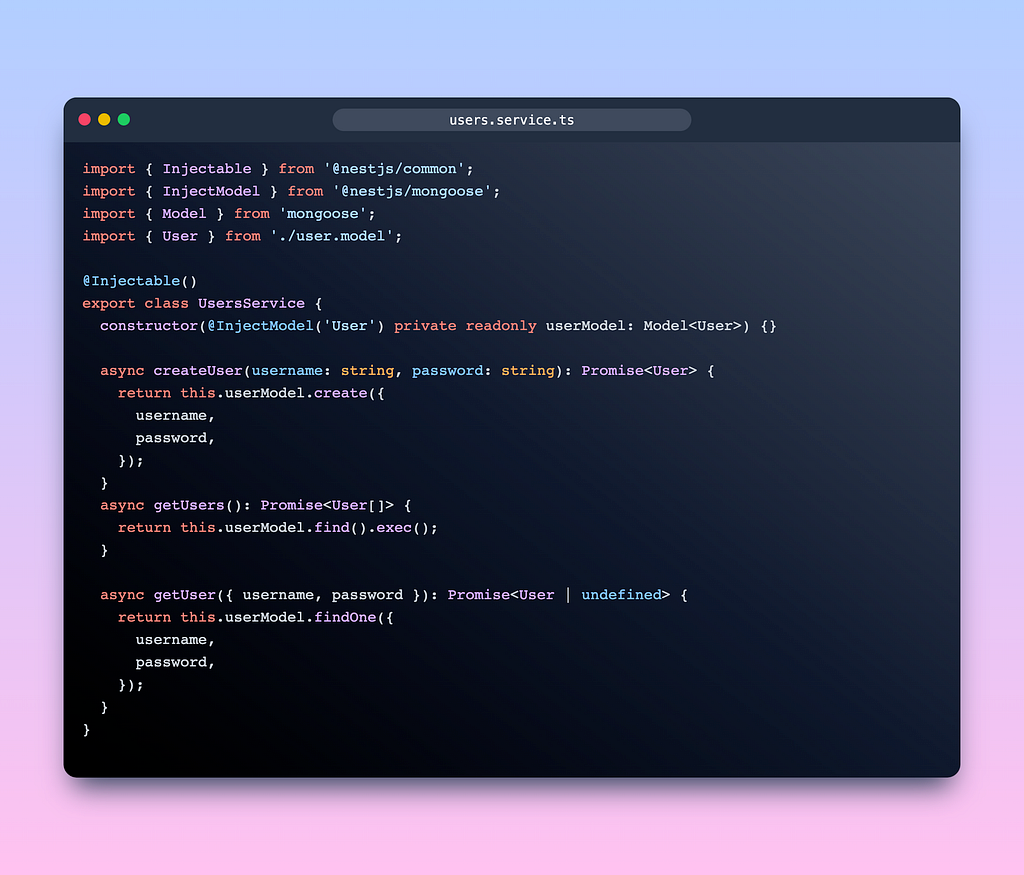
We created the users.service.ts before, next we create 3 methods for the sign up ( createUser ), get all users ( getUsers ) and get an user ( getUser )
Create User Module an Controller
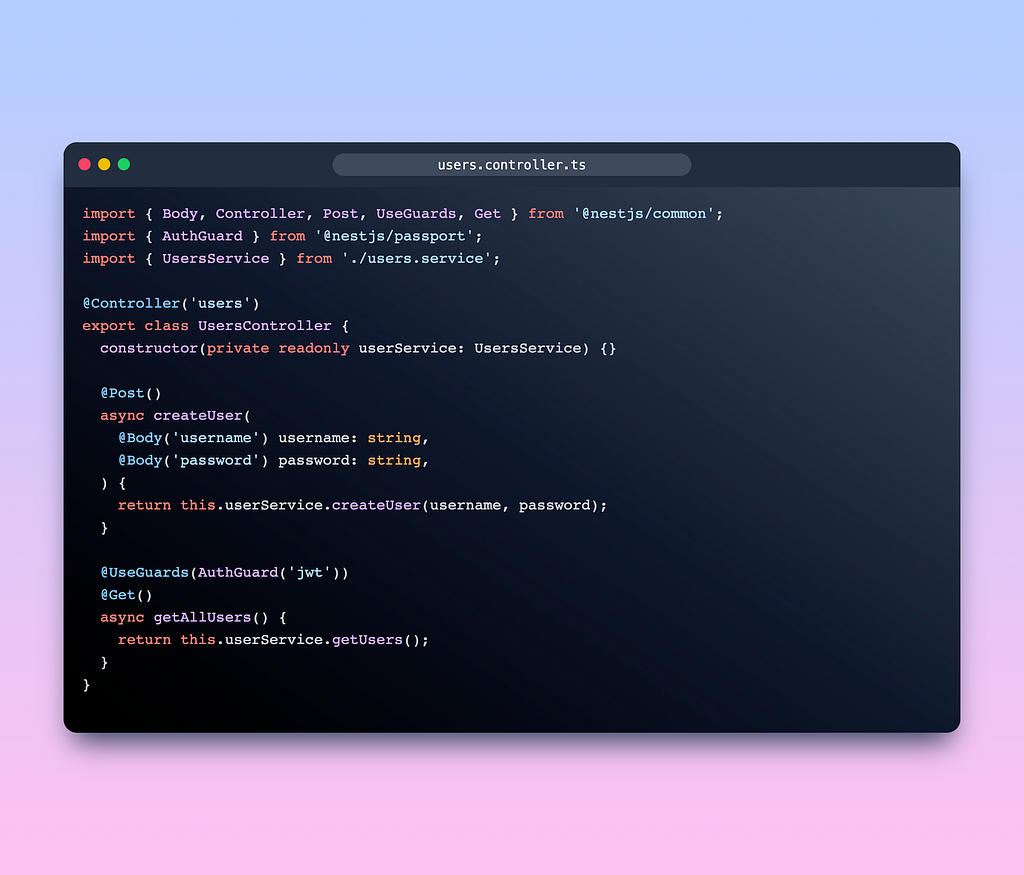

Nothing much to say about these files, I created 2 routes in the UsersController to sign up and get all users and import all we have with users to the users.module.ts file
Only thing to keep in mind is the @UseGuards(AuthGuard('jwt)) part, which means we can’t access this route without logged in and have the jwt
Auth Service
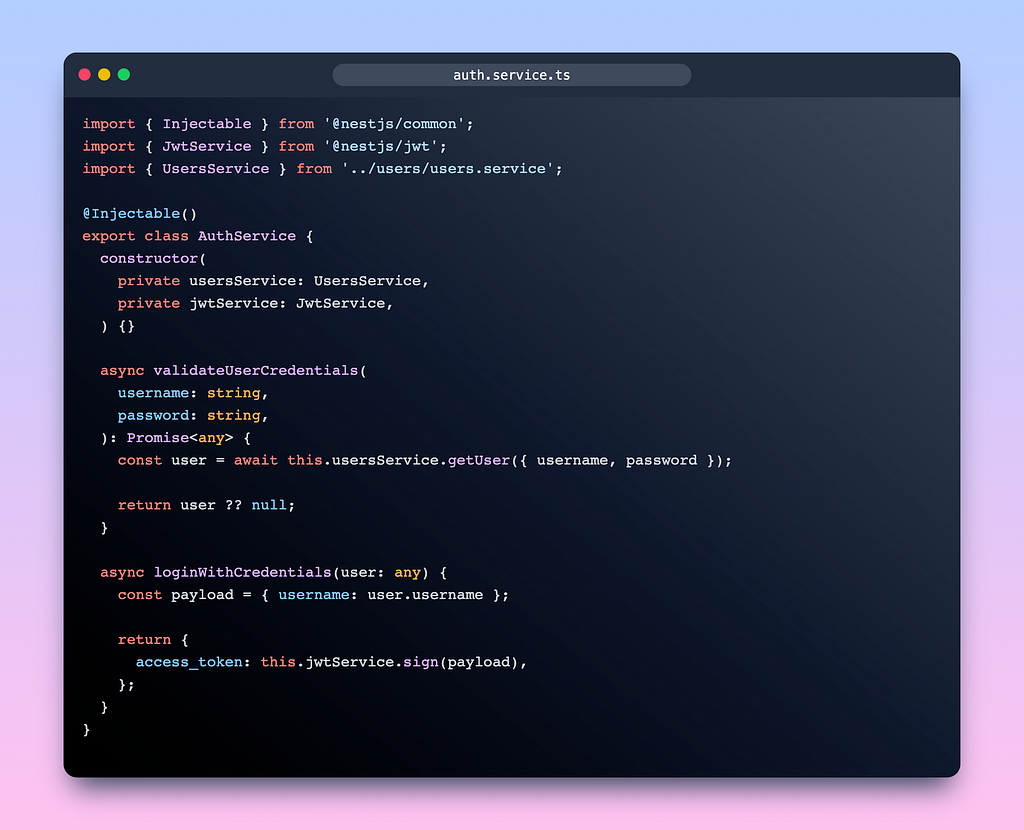
There are 2 methods in the AuthService , one is to validate if the user exist in our database with correct credentials, the other one is to return an access_token which is a JWT assigned with an username
Strategies
We have to create the strategies, in this guide I will create 2 strategies, one is LocalStrategy and the other is JwtStrategy
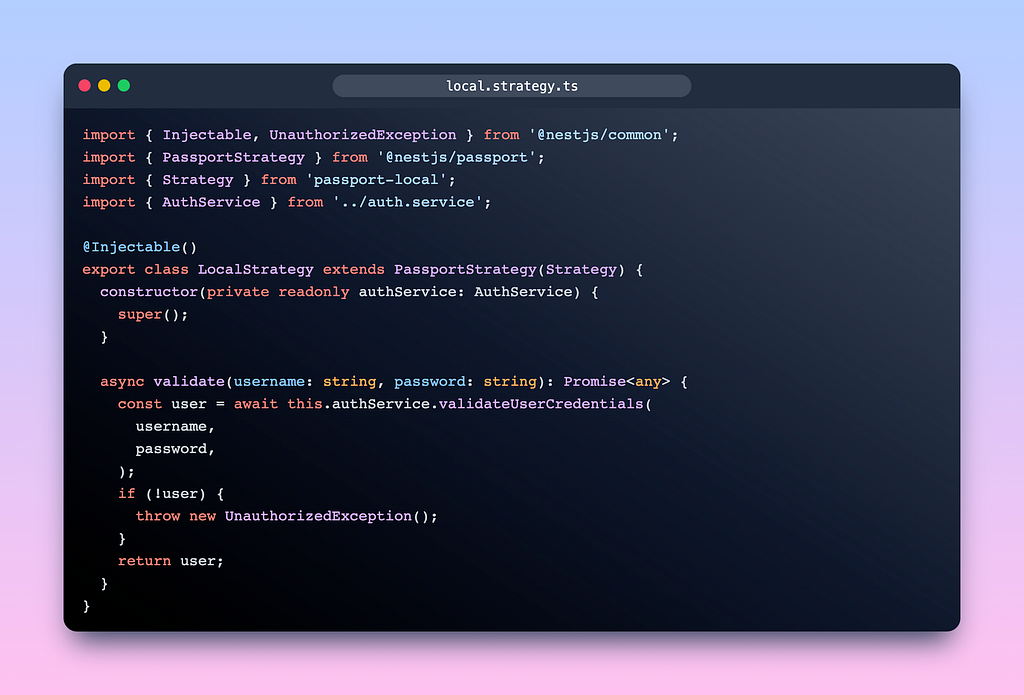
The LocalStrategy serves a purpose when we need to validate the username and password before going deeper into the controller. In this case, I create the built-in validation method with the validateUserCredentials from the AuthService
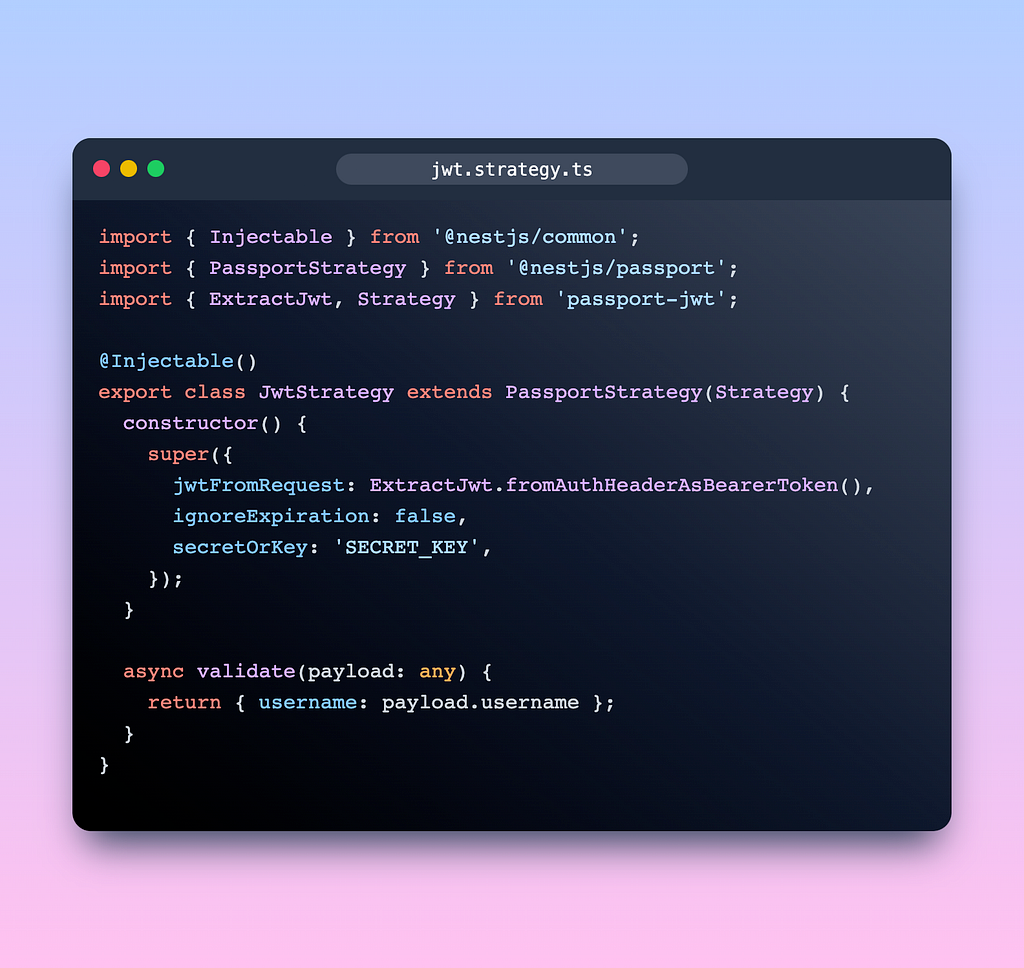
For the JwtStrategy we extend the PassportStrategy from the @nestjs/passport library just like above, then we return an object consists the username . The constructor need to extract the JWT from Header Bearer token (the access_token). We also need a secret key for JWT Strategy, mine is SECRET_KEY but I suggest you to use a more secure way to store keys.
Auth module and controller
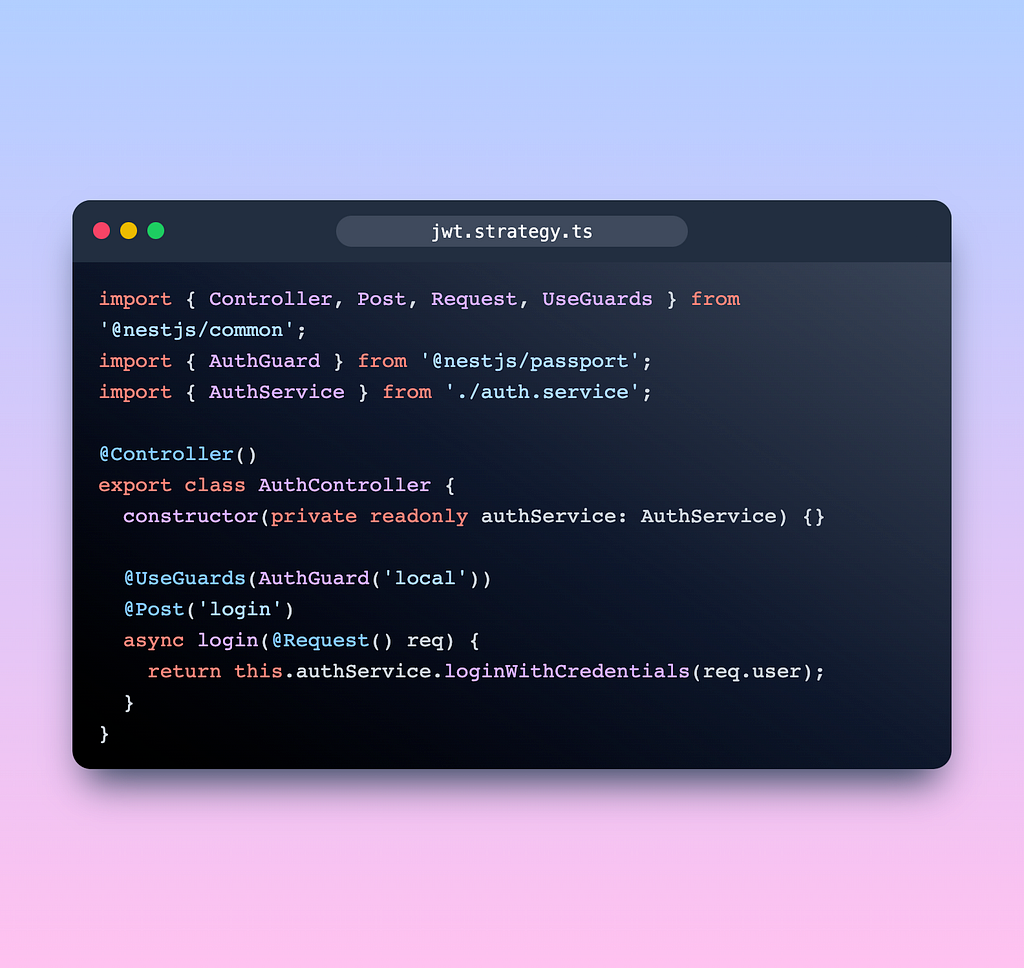
Like the UserController above, we define the route for authentication, in this controller is the login route. You can see I used AuthGuard('local') from the LocalStrategy above. So we only proceed to login after the validation succeeded.
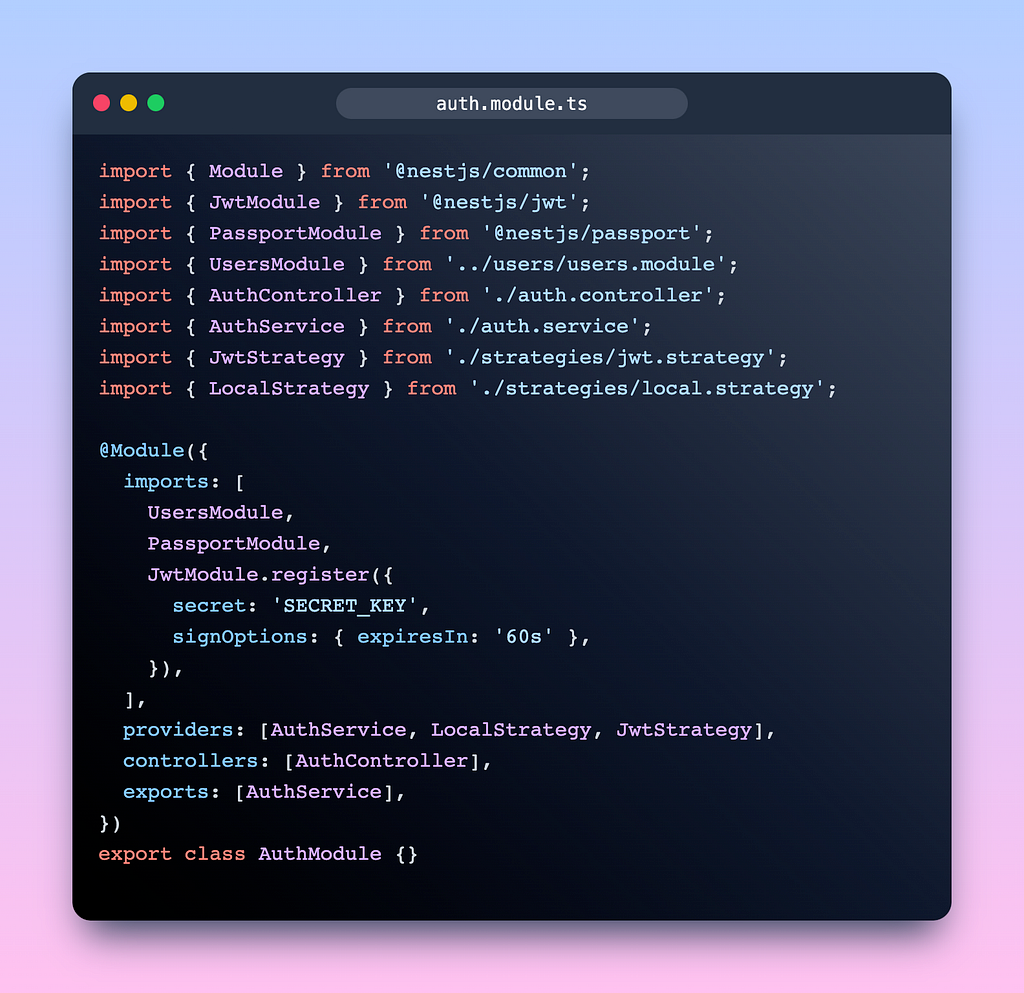
Nothing much to say about the auth.module.ts file, we import all the modules we need assign the providers , controllers
App module
Every NestJS project comes with the app.module.ts file that centralize all the modules
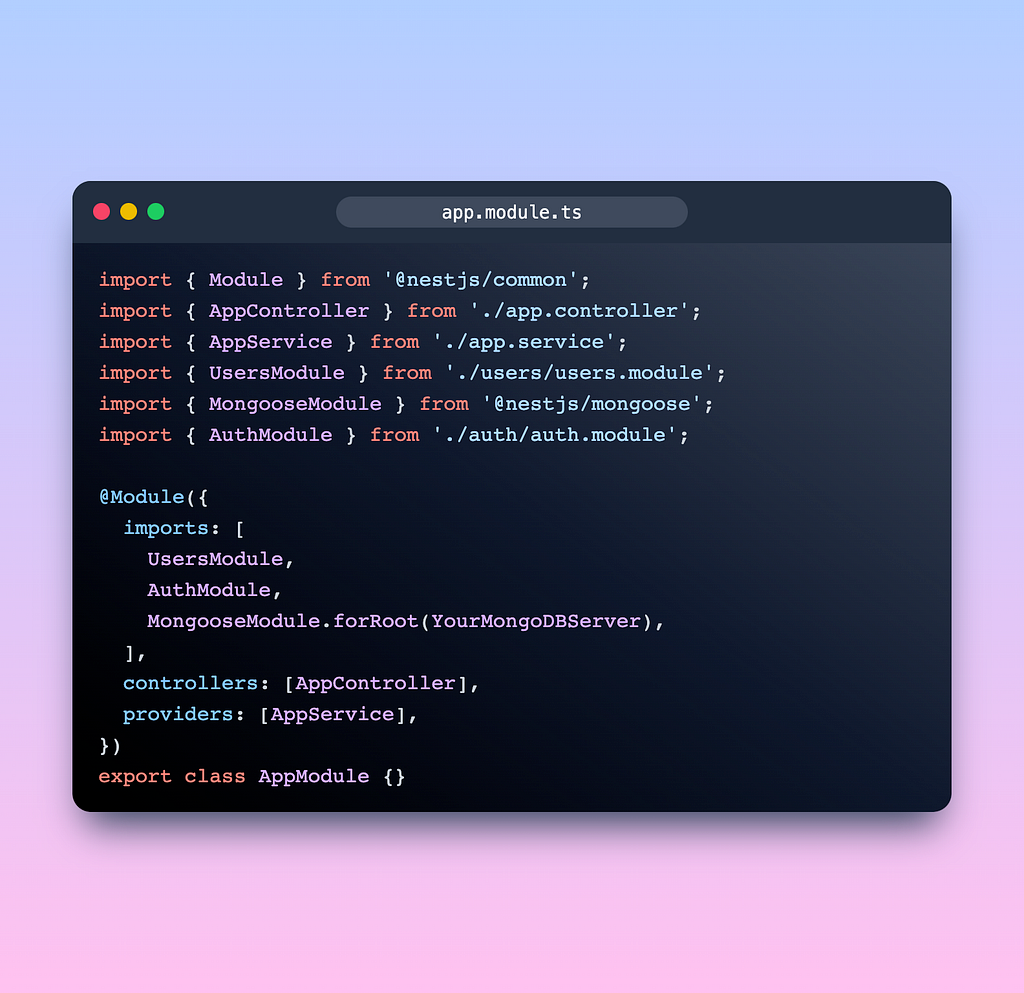
Note: I used MongoDB Atlas to create a cloud database, but you can decide what database to use
Conclusion
Let’s try our APIs in Postman to see if it works
First, start the server with:
yarn start:dev
Then open Postman, we’re gonna start with the login route
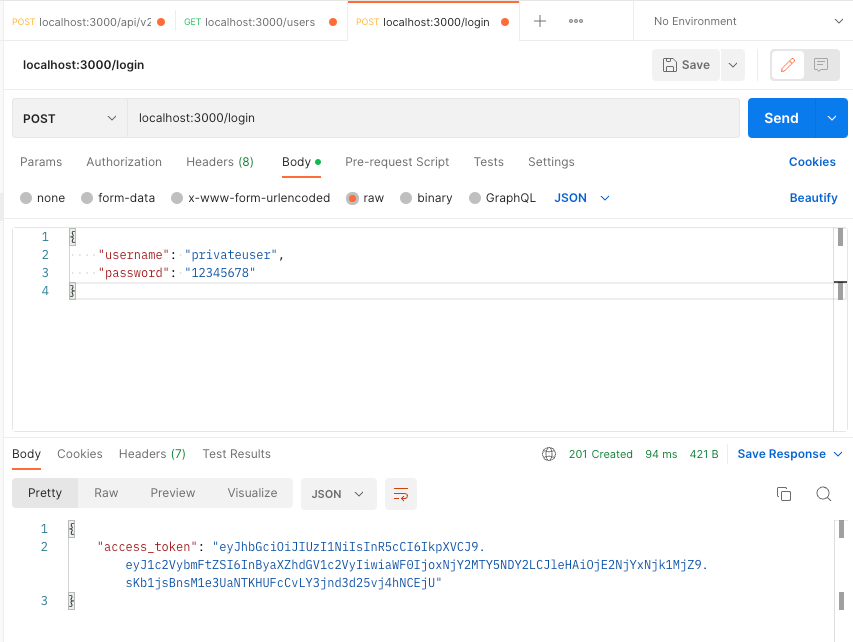
We can see the server returns access_token for us, we will copy this into every guarded API, like the getUsers from UserController
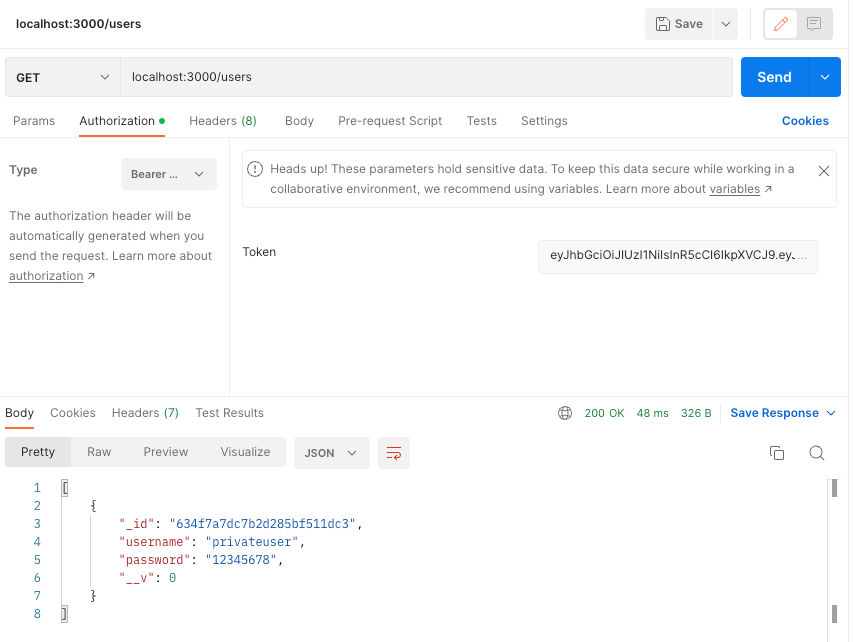
That’s all, isn’t that hard right, you can check out my source code here.
Build apps with reusable components like Lego

Bit’s open-source tool help 250,000+ devs to build apps with components.
Turn any UI, feature, or page into a reusable component — and share it across your applications. It’s easier to collaborate and build faster.
Split apps into components to make app development easier, and enjoy the best experience for the workflows you want:
→ Micro-Frontends
→ Design System
→ Code-Sharing and reuse
→ Monorepo
Learn more
- How We Build Micro Frontends
- How we Build a Component Design System
- The Bit Blog
- 5 Ways to Build a React Monorepo
- How to Create a Composable React App with Bit
How to Add JWT Authentication to NestJS Apps was originally published in Bits and Pieces on Medium, where people are continuing the conversation by highlighting and responding to this story.
This content originally appeared on Bits and Pieces - Medium and was authored by Kyle Le
Kyle Le | Sciencx (2022-10-19T17:52:41+00:00) How to Add JWT Authentication to NestJS Apps. Retrieved from https://www.scien.cx/2022/10/19/how-to-add-jwt-authentication-to-nestjs-apps/
Please log in to upload a file.
There are no updates yet.
Click the Upload button above to add an update.
