
This content originally appeared on Level Up Coding - Medium and was authored by Tara Prasad Routray
Learn to add authentication in your React app, and secure the routes from unauthorized user access.

Handling user authentication is the foundation of application security. The right people should be allowed in, and the wrong people should be kept out. This is done by validating the identity of the person seeking access and then checking whether the person is authorized to enter or not.
In this article, I will give you a step-by-step walkthrough for creating a login page to authenticate the credentials and protect the routes in React application. I will also demonstrate how to limit access to certain web pages, to keep private data safe from guest users.
Add Authentication and Secure the Routes in 9 Easy Steps
- Start a New React App.
- Install React Router.
- Install React Bootstrap UI Library.
- Install Axios.
- Create a Login Page.
- Perform an API Call From Login Page and Store User Token.
- Create a Protected Route Utility.
- Create a Portal Home Page and Protect the Route.
- Register Routes and Protect Them.
Step 1: Start a New React App
Let’s begin by creating a new React application. For that, navigate to the directory of your choice, open a terminal or command prompt in that path, and execute the following command.
npx create-react-app react-auth-demo
Step 2: Install React Router
Next, we need to install a package named react-router-dom, for enabling routing in the application. For that, open a terminal and execute the following command.
npm install react-router-dom
Step 3: Install React Bootstrap UI Library
Next, we need to install two packages named react-bootstrap and bootstrap, to build the layout (UI) of our application. For that, open a terminal and execute the following command.
npm install react-bootstrap bootstrap
Now, open the index.js file and add the following code snippet to the beginning of the file.
import 'bootstrap/dist/css/bootstrap.min.css';
Step 4: Install Axios
Next, we need to install a package named axios, to send XMLHttpRequests from the web browser. It enables to do API calls in the background. For that, open a terminal and execute the following command.
npm install axios
Step 5: Create a Login Page
Let’s create a folder named auth in src. Inside it, create three more folders named navbar, footer, and login. And, create a file named Auth.js. The folder structure will look like this.
src
|_auth
  |_navbar
  |_footer
  |_login
  |_Auth.js
Next, create a file named AuthNavbar.js inside the navbar folder and add the following code snippet.
Next, create a file named AuthFooter.js inside the footer folder and add the following code snippet.
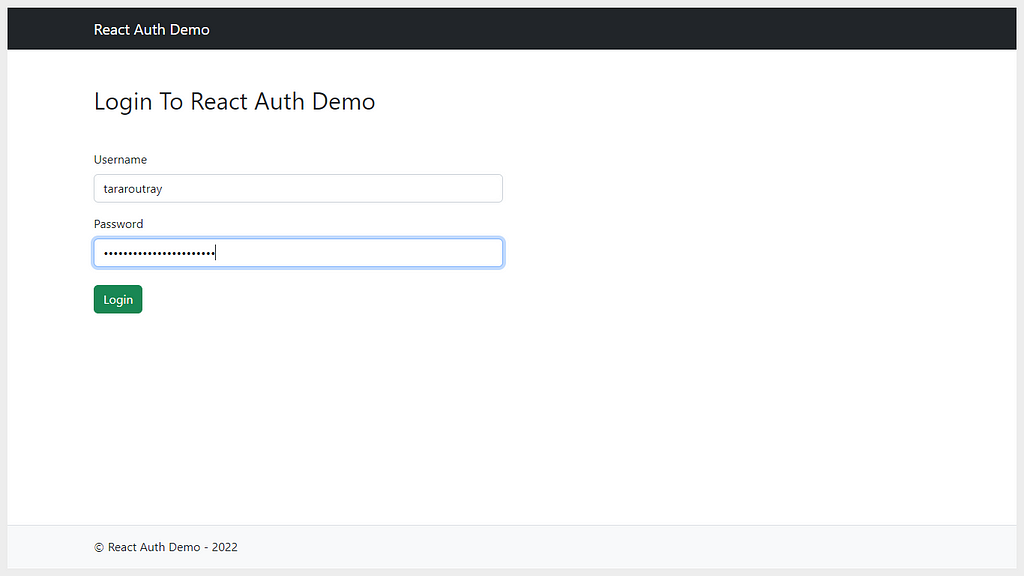
Next, create a file named Login.js inside the login folder and add the following code snippet. It will create the UI of the login form. In the upcoming step, we will learn how to do an API call to submit the login form data and receive a valid JWT token for our application.
Next, create a file named Auth.js inside the auth folder. This file will define the layout of our auth pages, like login, signup, forgot password, etc. Add the following code snippet to it.
Step 6: Perform an API Call From Login Page and Store User Token
Next, we need to implement the feature to handle the login form submission. For that, inside the Login function, create another function named submitLoginForm and add a parameter named event. Add the following code snippet to the Login.js file.
Note: I’m making an API call to a demo link. It is for demonstration purpose only, so make sure to replace it with your own valid URL.
Here, once the login form is submitted, we catch the form submission event and stop it. Then we select the login form element using JavaScript and collect the form data as JSON, and make an API call using Axios to validate the login credentials provided by the user.
If the submitted data is valid, we need to return a token in the JSON response of the API and store it in localStorage of our web browser. Following that, we need to redirect the user to the portal home page. In the upcoming steps, we will learn how to create a portal page, that can be accessed by authorized users only.
If the submitted data is not valid, then we will display an error message on the screen, and stop the page navigation.
Step 7: Create a Protected Route Utility
Now we will create a utility for our application to protect the routes. This utility will help us prevent unauthorized user access. The components or pages being protected by this utility will keep our data safe from users who are not logged in.
Let’s create a folder named util inside src, and create a file named ProtectedRoute.js inside it. The folder structure will look like this.
src
|_util
  |_ProtectedRoute.js
Add the following code snippet to it.
Here, we’re creating a function to check if the current user is logged in or not. The application checks if the user token is available in the local storage, if true, then it marks the user as logged in, else it marks the user as a guest. If the user type is guest, then the utility returns null, else it returns the Route defined by the user. Also, it makes sure that the guest user does not move forward, and gets redirected to the login page.
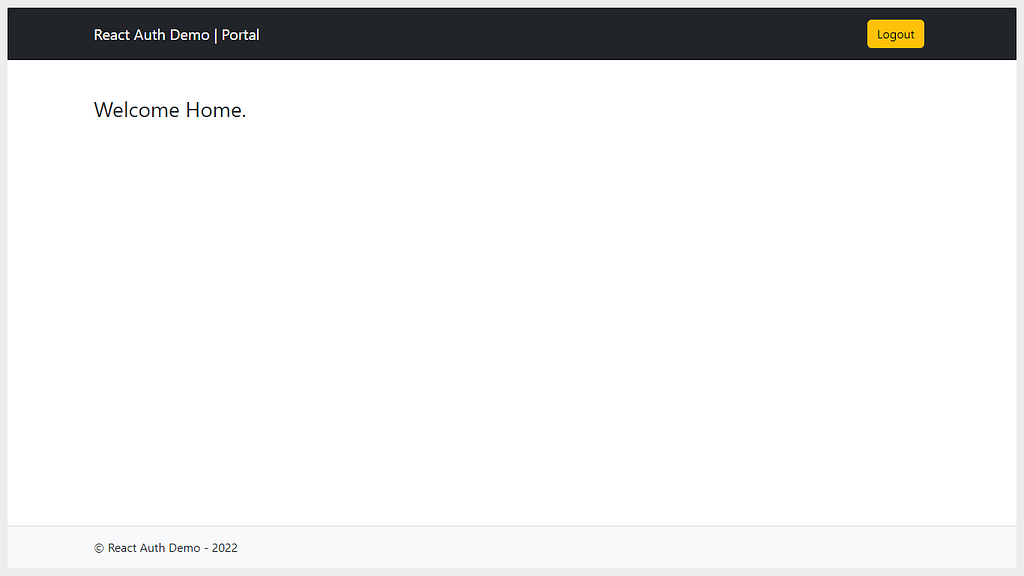
Step 8: Create a Portal Home Page
Let’s create a folder named portal in src. Inside it, create three more folders named navbar, footer, and home. The folder structure will look like this.
src
|_portal
  |_navbar
  |_footer
  |_home
Next, create a file named PortalNavbar.js inside the navbar folder and add the following code snippet.
Next, create a file named PortalFooter.js inside the footer folder and add the following code snippet.
Next, create a file named Home.js inside the home folder and add the following code snippet.
Step 9: Register Routes and Protect Them
We have completed the setup of the login page and portal home page. Now, open the App.js file and remove the existing codes and add the following code snippet.
Here we’re loading the Navbar and Footer of the portal module only if the user is authenticated.
Next, open the index.js file and add the following code snippet to the top of the file. This will import the pages and components being used by the application.
Now, remove the <App /> element present inside the <React.StrictMode></React.StrictMode> element, and add the following code snippet.
Here, we are defining the paths and the elements being rendered for the respective routes. The routes whose path starts with /auth render the <Auth /> module, while the rest of them render the <App /> module. And inside that, we use the <ProtectedRoute /> (protected route) utility to secure the <Home /> route from authorized user access.
Security Tip
To further improve the security of the application, make sure you send the token to the server for validation each time you do a page navigation. You can do this by adding the token to the Authentication Header while sending a request, and then validating the token at the server side. This way, you can add another layer of security to verify the user.
Outcome
GitHub Repository Link
Visit the following GitHub repository to download the files.
GitHub - tararoutray/react-auth-demo
Kudos! You have completed learning how to add authentication to your React application and secure the routes from unauthorized user access.
If you enjoyed reading this post and have found it useful for you, then please give a clap, share it with your friends, and follow me to get updates on my upcoming posts. You can connect with me on LinkedIn.
Useful Links
Learn about React-Bootstrap UI Library.
Getting Started With React-Bootstrap UI Library
Learn about Axios Library.
Getting Started With Axios: A Popular Promise-Based HTTP Client
Implement Authentication and Protect Routes in React was originally published in Level Up Coding on Medium, where people are continuing the conversation by highlighting and responding to this story.
This content originally appeared on Level Up Coding - Medium and was authored by Tara Prasad Routray
Tara Prasad Routray | Sciencx (2022-10-19T11:44:41+00:00) Implement Authentication and Protect Routes in React. Retrieved from https://www.scien.cx/2022/10/19/implement-authentication-and-protect-routes-in-react/
Please log in to upload a file.
There are no updates yet.
Click the Upload button above to add an update.