This content originally appeared on Kilian Valkhof and was authored by Kilian Valkhof
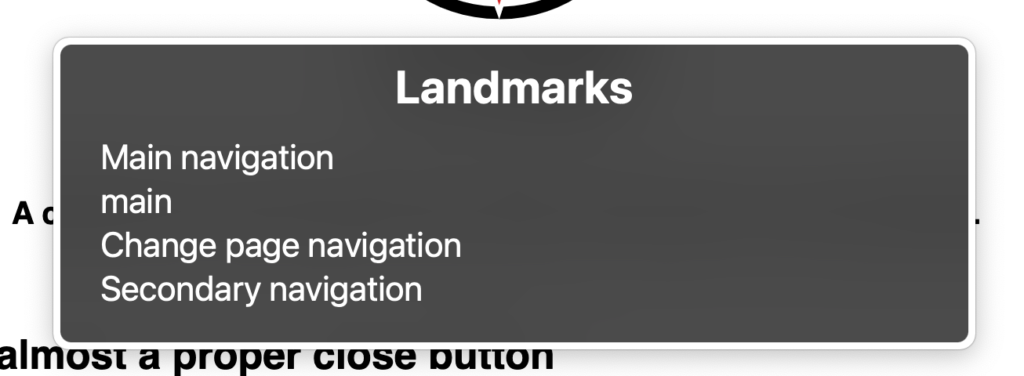
For an article I was writing I wanted to create a quick screenshot of one of the Rotor screens that Voiceover on macOS shows. I couldn't because when you have VoiceOver active the screenshot shortcuts (cmd + shift + 3/4) no longer work because they're captured by VoiceOver instead. If you also have this problem, you can use the screencapture command line tool.

Screencapture
Screencapture is a command-line interface to all the screenshot and screen capturing tools that are built into macOS, and that will let use screenshot VoiceOver because you can create a screenshot with a delay using the following:
$ screencapture -T10 filename.png
-T is the command line flag to set a timeout, and 10 is the number of seconds it should wait. Lastly, filename.png is what it should save the resulting screenshot as. If you don't want to save, you can replace the filename with -c to copy the result to clipboard instead
Steps
- The first time
screencaptureis called, your Mac will show a popup asking you if you want to give your terminal access to screen recording. Make sure to allow it, otherwise it won't be able to make screenshots. - Then, start a screencapture with enough time to configure VoiceOver to look the way you want it to look. I defaulted to 10 seconds, you might be faster.
- Open VoiceOver (cmd + F5) and then open the Rotor (ctrl + alt + u) and use the arrow keys to go to the view you want to show.
- Wait until screencapture is done, find your image in the folder you saved it in.
Unfortunately I haven't found a way yet to capture just the Rotor as an image, because when you configure screencapture to capture a window instead (with -W) the timeout is discarded. So the above will make a screenshot of your entire desktop, and you'll have to crop it yourself.
If you've been photographing your mac screen to get images of VoiceOver in action, I hope this helps! To get an overview of everything screencapture can do, you can execute screencapture -h to show the help page.
Update: capturing just the Rotor
After sharing this in the Fronteers Slack community, Gijs mentioned there was a way to capture the rotor as a standalone image:
- Open VoiceOver (cmd + F5).
- Press shift cmd 4 to start a screenshot capture.
- Press Spacebar to switch to Window mode.
- Open the Rotor (ctrl + alt + u) and navigate to desired dialog with arrow keys
- Hover over the rotor with the mouse so it turns blue (indicating it’s selected for the screenshot).
- Click or press enter to capture screenshot.
This definitely works but it’s also very finnicky. If you do anything out of order you will either not be able to switch to window selection mode or you won’t be able to navigate in the rotor. Making a screenshot with a delay is a little more forgiving, but you won’t end up with an image of just the rotor.
The post Screenshotting VoiceOver on macOS first appeared on Kilian Valkhof.
This content originally appeared on Kilian Valkhof and was authored by Kilian Valkhof
Kilian Valkhof | Sciencx (2022-10-31T13:19:25+00:00) Screenshotting VoiceOver on macOS. Retrieved from https://www.scien.cx/2022/10/31/screenshotting-voiceover-on-macos/
Please log in to upload a file.
There are no updates yet.
Click the Upload button above to add an update.
