This content originally appeared on DEV Community 👩💻👨💻 and was authored by Tracy Chou 👩🏻💻
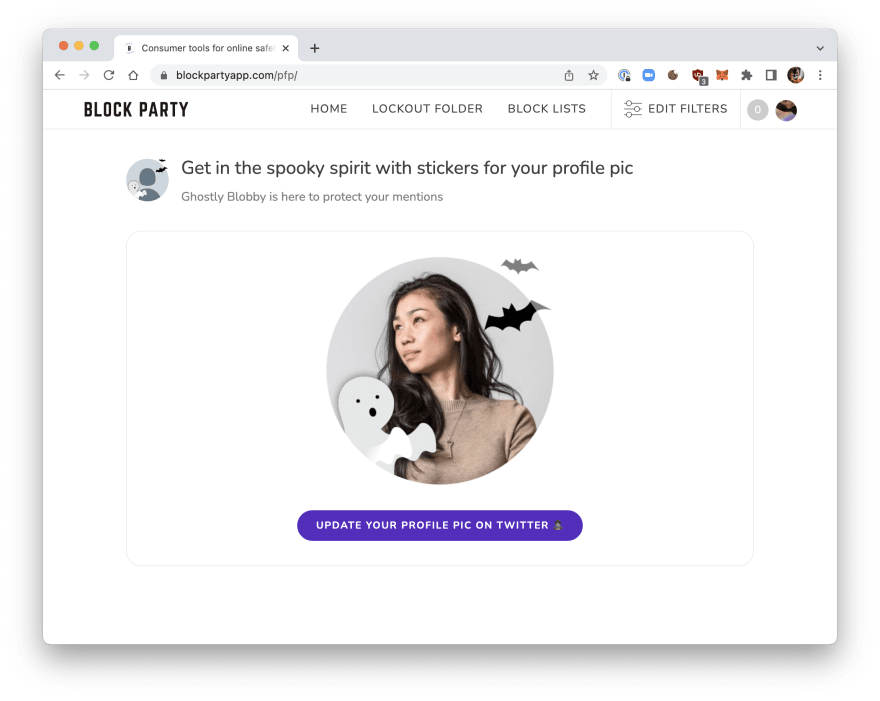
Across most of the Internet, our identities are squashed into a little profile photo and display name, and these are the miniature canvas upon which we can express our personalities or make a statement. Maybe to take part of a social movement, represent an organization or brand; or just to announce that we're "open to work" or feeling the Halloween spirit 👻
Curious about how to build one of those image generators for people to liven up their profile photos? Here is a simple version in Python that uses a partially transparent image overlay for a custom frame and stickers.
This takes a user's profile photo (from Twitter), adds the overlay image on top, and then you can grab the resulting image as a data url to render in HTML or write it as a (temporary) file (which can also be passed back to Twitter to update the user's profile photo).
Inspiration for this post: We recently built this feature as a fun little project for Block Party. Interested in working with us? We're hiring!
First, let's fetch the user's profile photo from Twitter. I've hand-waved the piece about the Twitter client (sorry) but you can use something like Tweepy.
from PIL import Image
import requests

PFP_IMAGE_SIZE = (400, 400)  # max/standard size on Twitter

def get_original_pfp_image(twitter_screen_name):
    # TODO(you) Implement this
    client = create_twitter_client_for_app()

    twitter_user_json = client.get_twitter_user_data_by_screen_name(
        twitter_screen_name)
    pfp_url = twitter_user_json.get("profile_image_url_https", "")
    pfp_original_url = pfp_url.replace("_normal", "")

    pfp_image = Image.open(
        requests.get(pfp_original_url, stream=True).raw)

    # We aren't guaranteed that the user's profile image is
    # the right size, which will cause issues when trying to
    # apply the overlay.
    if pfp_image.size != PFP_IMAGE_SIZE:
        pfp_image = pfp_image.resize(
            PFP_IMAGE_SIZE, Image.ANTIALIAS)

    return pfp_image
If you want to simplify for development and testing, you can pass in a local image path instead.
from PIL import Image

PFP_IMAGE_SIZE = (400, 400)

# Note that this has a slightly different function signature
# than the alternative sample code.
def get_original_pfp_image(pfp_image_path):
    pfp_image = Image.open(pfp_image_path)

    if pfp_image.size != PFP_IMAGE_SIZE:
        pfp_image = pfp_image.resize(
            PFP_IMAGE_SIZE, Image.ANTIALIAS)

    return pfp_image
Next, let's load the overlay image, composite it with the original profile photo, and create the new overlaid image.
The overlay image here should be a 400x400 PNG with transparency.
import PIL
from PIL import Image

def get_overlay_image(overlay_image_path):
    overlay_image = Image.open(overlay_image_path)
    return overlay_image

def generate_overlaid_image(twitter_screen_name):
    pfp_image = get_original_pfp_image(twitter_screen_name)
    if not pfp_image:
        return None

    # We need RGBA mode for transparency in the image
    pfp_image_rgba = pfp_image.convert(mode="RGBA")

    # TODO(you) Replace with your overlay image path
    overlay_image = get_overlay_image("overlay.png")
    overlaid_pfp_image = PIL.Image.alpha_composite(
        pfp_image_rgba, overlay_image)
    return overlaid_pfp_image
Now let's get the image as a data url so we can render it in HTML!
import base64
from io import BytesIO

DATA_IMAGE_PREFIX = "data:image/png;base64,"

def generate_overlaid_pfp_image_data_url(twitter_screen_name):
    overlaid_pfp_image = generate_overlaid_pfp_image(
        twitter_screen_name)
    if not overlaid_pfp_image:
        return None

    image_io = BytesIO()
    overlaid_pfp_image.save(image_io, "png", quality=95)
    data_url = DATA_IMAGE_PREFIX + base64.b64encode(
        image_io.getvalue()).decode("ascii")
    return data_url
To preview in Jinja -- for example, at all the different sizes that Twitter uses -- we just use this image data url as the src of an img element.
{% for dims in [(24, 24), (48, 48), (73, 73), (400, 400)] %}
    <img src="{{ image_data_url }}"
         width="{{ dims[0] }}"
         height="{{ dims[1] }}" />
{% endfor %}
Lastly, if you do want to set the user's profile photo back on Twitter, you can create a temporary file and send it through the API.
import base64
from io import BytesIO

DATA_IMAGE_PREFIX = "data:image/png;base64,"

def update_user_twitter_pfp(twitter_user_id, image_data_url):
    image_data = image_data_url[len(DATA_IMAGE_PREFIX):]

    buffer = BytesIO(base64.b64decode(image_data))
    image_tempfile = tempfile.NamedTemporaryFile(suffix=".png")

    try:
        image_tempfile.write(buffer.read())
        image_tempfile.flush()

        # This client is created with the user's OAuth
        # credentials (vs. app credentials) so we can
        # set their profile photo.
        client = create_twitter_client_for_user(
            twitter_user_id)
        client.update_twitter_user_profile_image(
            image_tempfile.name)
    finally:
        buffer.close()
        image_tempfile.close()
Here's how it looks!
This content originally appeared on DEV Community 👩💻👨💻 and was authored by Tracy Chou 👩🏻💻
Tracy Chou 👩🏻💻 | Sciencx (2022-11-01T21:35:57+00:00) Build your own profile photo sticker/frame tool. Retrieved from https://www.scien.cx/2022/11/01/build-your-own-profile-photo-sticker-frame-tool/
Please log in to upload a file.
There are no updates yet.
Click the Upload button above to add an update.


