This content originally appeared on Bits and Pieces - Medium and was authored by Shanika Wickramasinghe
Getting Started with Bun.js on Windows 10 and Create a React App
Have you used Node.js (Node.js (nodejs.org)) or Deno (Deno — A modern runtime for JavaScript and TypeScript)? Do you know what Bun.js (Bun is a fast all-in-one JavaScript runtime) is?
Well, for those who do not know them, all three of them are JavaScript runtimes. Node.js and Deno were popular runtimes and Bun.js is the newborn runtime in 2022. In this guide, we will get to know about this newcomer and learn how to create a react app with bun. We will discuss,
- Why Bun over Node or Deno?
- About Bun
- How to Install Bun on Windows 10
- Getting started with Bun and
- How to Create a React app with Bun, in this article.
Why Bun over Node or Deno?
According to bun’s statistics, Bun is,
- Three times faster when it comes to server-side rendering React,
- Seven times faster with WebSocket server chat and
- Two times faster when loading a huge SQLite table compared to Node and Deno.
About Bun
Bun comes bundled with transpile, install and run JavaScript and TypeScript. It also has an npm client built-in with a native bundler, transpiler, and task runner. Bun focuses on main three things,
- Start fast
- The new level of performance through extending JavaScriptCore and
- Being a great and complete tool.
You can even use bun on your current JavaScript or TypeScript apps. Bun has natively implemented 90% of Node API functions (as at October 2022). Bun intends to provide performance enhancements, complexity enhancements, and developer productivity through simple and better tools. The goal of Bun is to run JavaScript outside the browser. Ziglang (Home ⚡ Zig Programming Language (ziglang.org)) is the low-level programming language used to write bun. Which provides bun with the features like fastness and simplicity in writing software.
Installing Bun on Windows 10
You can install Bun on Linux or macOS easily by entering, curl https://bun.sh/install | bash on the CLI. However, by today, Bun cannot install directly on Windows operating systems. But we can use it on Windows with the help of ‘Windows Subsystem for Linux’ (WSL). First, we need to enable WSL on our Windows 10 computer.
Enabling WSL on Windows 10
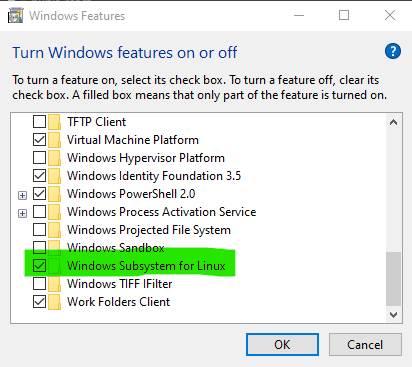
You can easily do that by finding ‘Turn Windows Features on or off’, on settings or just typing it in the Windows search. Then find the WSL, tick it and press ‘ok’. Then you may need to restart your computer. The following figure shows how to turn on WSL.
Installing Ubuntu on windows 10
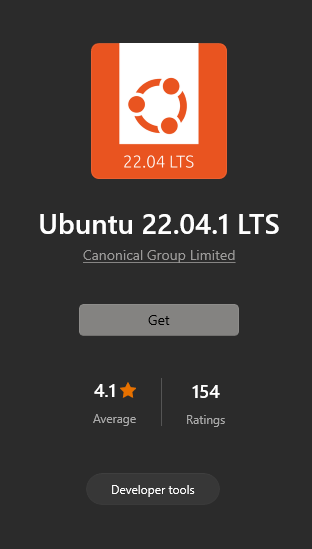
Once WSL is working, we should install Ubuntu on windows. To do that we can go to ‘Microsoft Store’ and install the latest Ubuntu LTS version. Ubuntu 22.04.1 LTS is about 681.5 MB. The below figure shows you the Ubuntu version on Microsoft Store.
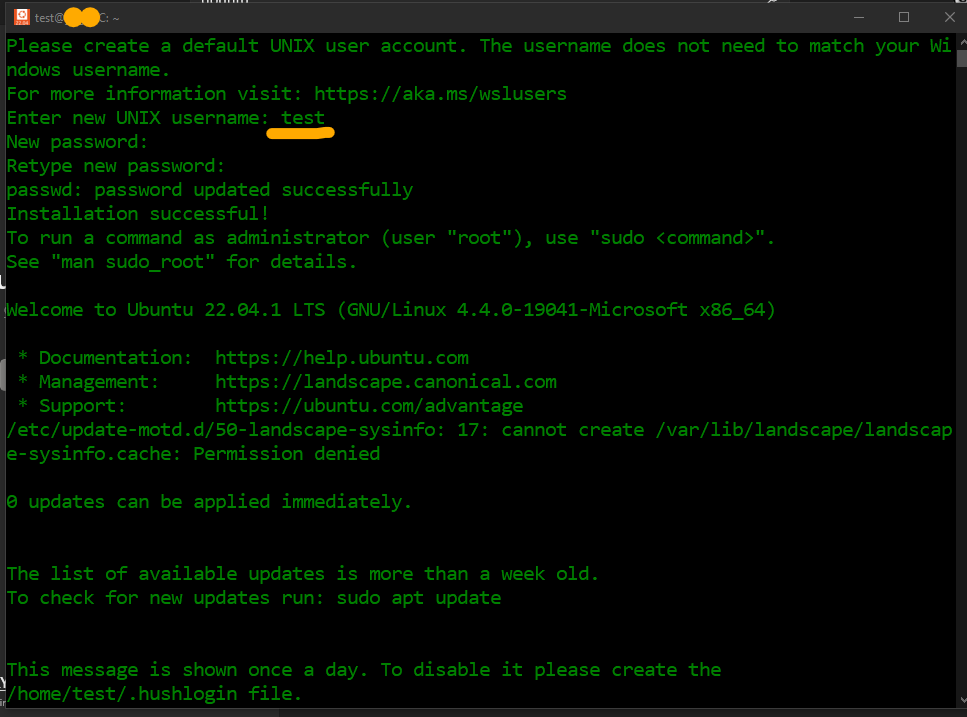
After the installation, click the open button and the Linux terminal will be asking for a new username (test) and password. You may have similar output as the below figure. Then we can start the Bun installation.
Install Bun
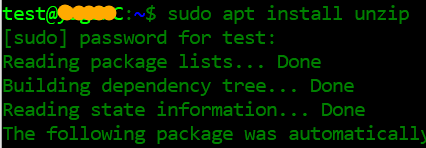
In the Ubuntu terminal, we should install the ’unzip’ tool. We can use the sudo apt install unzip command as you can see in the below figure.
Then we can copy and paste the command for bun installation, curl https://bun.sh/install | bash. Then we should copy and paste the path for Bun on .bashrc file before starting bun. The following figure shows the output.
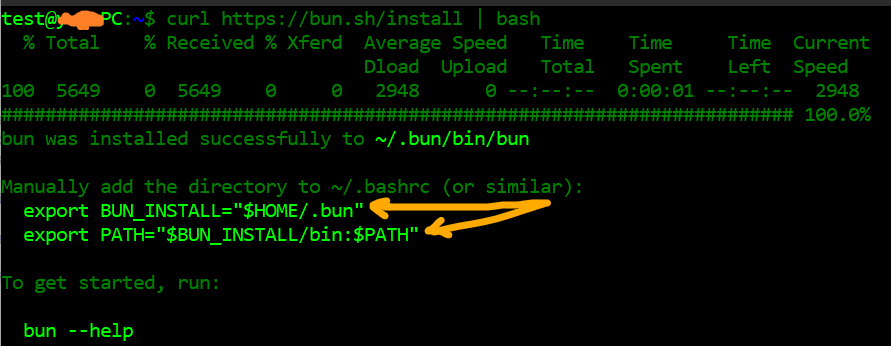
Then we should open .bashrc and edit it. Here we can use Visual Studio Code by typing code ~/.bashrc. If you do not have visual studio code installed in Ubuntu, it will be installed first. Otherwise, you can use ‘nano’ editor by typing nano .bashrc. In the nano editor, you can go to the bottom of the .bashrc file using the drop-down arrow and paste the two lines by right-clicking. Then save it by typing ctrl+x and providing ‘y’ to indicate yes, and press ‘enter’. The below figures indicate how and where to copy and paste the commands.

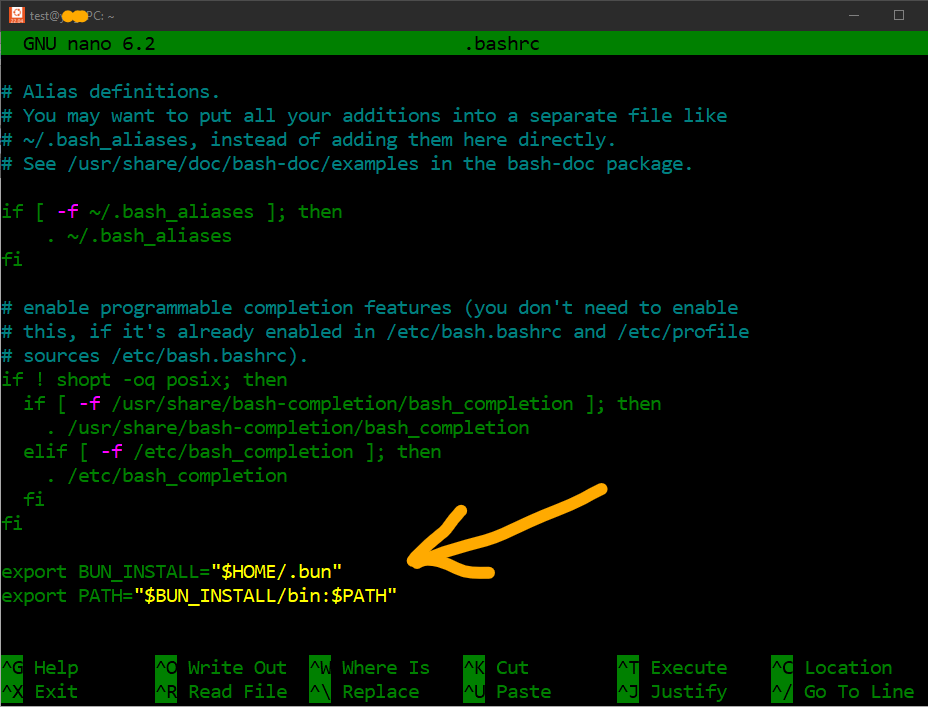
Finally we can check the bun installation by typing, bun –version on the terminal. To do that you need to exit and reopen the Ubuntu terminal. Below figure shows the command in the terminal with output.

Getting started with Bun
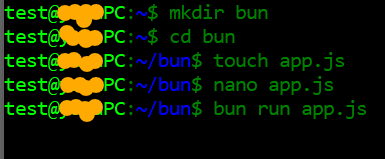
Now we have Bun installed on our computer. We can create a new directory (folder called bun) using the command mkdir bun. Then we can use the command touch app.js to create a JavaScript file inside our directory after changing our directory by typing cd bun. Then open the file using nano app.js and type the below lines to create and see a basic HTTP server request and response from bun.
// app.js
export default {
port: 3000,
fetch(request) {
return new Response(“Welcome to Bun on Windows 10!”);
},
};
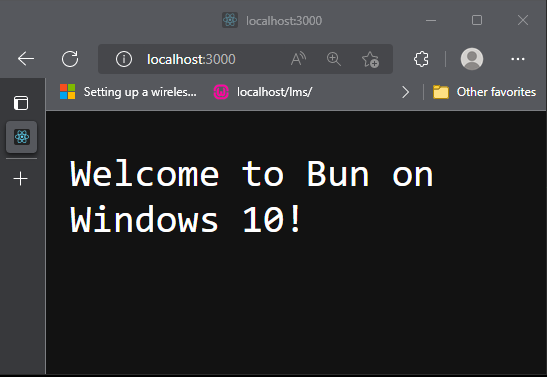
Then we can run the file by typing bun run app.js on the terminal. Then let us check the response on our browser. It may look like the figures below. You can press ctrl+c on the command line to stop running the app.
Create a React app
Now we have tested a simple Bun response on our web browser, let’s start developing our React app with Bun.
Now we are in our home directory inside our Ubuntu. We can create a new directory (folder called react-bun) by using mkdir react-bun. Then navigate to the react-bun folder by typing cd react-bun. Then start a new React project (hello-react) by typing bun create react hello-react. The below figures show outputs respectively.


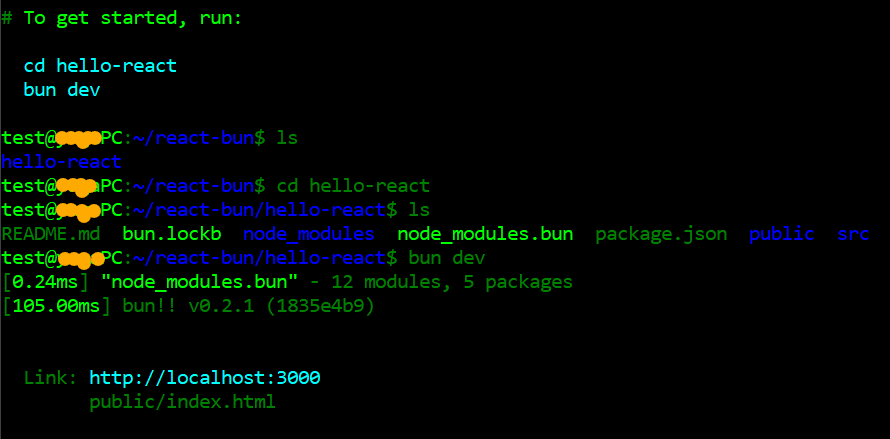
Finally, we can navigate to the hello-react folder and type bun dev to start our React app. As shown in our terminal, we can navigate to http://localhost:3000 and see our React app. The following figure shows the terminal outputs.
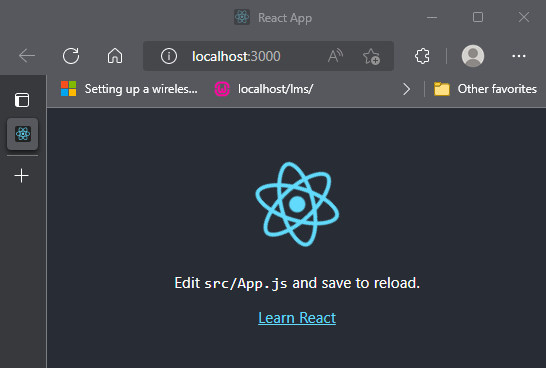
The below figure shows our first impression of the react app on the browser.
Tip: Bun creates a React app with JavaScript in default. But we can change .jsx files to .tsx and run TypeScript apps.
Final thoughts
As we have witnessed, Bun is the fastest JavaScript runtime environment yet. Also, it is an all-in-one native bundler, transpiler, task runner, and npm client built-in environment. Bun is young and promising, though still has some difficulty in using Bun directly on Windows operating systems. But its amazing fast nature will soon make new changes to JavaScript development worldwide.
Build apps with reusable components like Lego

Bit’s open-source tool help 250,000+ devs to build apps with components.
Turn any UI, feature, or page into a reusable component — and share it across your applications. It’s easier to collaborate and build faster.
Split apps into components to make app development easier, and enjoy the best experience for the workflows you want:
→ Micro-Frontends
→ Design System
→ Code-Sharing and reuse
→ Monorepo
Learn more
- How We Build Micro Frontends
- How we Build a Component Design System
- The Bit Blog
- 5 Ways to Build a React Monorepo
- How to Create a Composable React App with Bit
Getting Started with Bun.js and Create a React app was originally published in Bits and Pieces on Medium, where people are continuing the conversation by highlighting and responding to this story.
This content originally appeared on Bits and Pieces - Medium and was authored by Shanika Wickramasinghe
Shanika Wickramasinghe | Sciencx (2022-11-04T07:31:47+00:00) Getting Started with Bun.js and Create a React app. Retrieved from https://www.scien.cx/2022/11/04/getting-started-with-bun-js-and-create-a-react-app/
Please log in to upload a file.
There are no updates yet.
Click the Upload button above to add an update.
