
This content originally appeared on DEV Community 👩💻👨💻 and was authored by NOPR9D ☄️
Hey 👋, I hope you're doing well,
It's been a long time since we've seen each other!

Today I want to talk to you a bit about socket.io
This very nice little library that allows us to easily manage our sockets under nodejs.
Indeed I had to use it in recent days to display a counter of current visitors in real time on my personal site.
It was very simple, so we'll see how it goes!
Let's organize all this a bit with chapters :
Table Of Contents
- Creation
- Code
- Extra
- Repo Github
Creation
So, if you allow me, let's start from the beginning, the creation of the project!

We still have some expectations, in the sense that we are not going to "just" copy/paste code from the documentation.
We are going to make a small server with :
- NodeJs (It's obvious)
- Express
- socket.io
- Typescript (My forever friend)
- RxJS (Because it's great! And it will allow you to simply develop this project)
Come on, let's finally get started!
This part being quite simple, we will quickly go over the first commands.
We create a new folder for our project and enter on it :
mkdir socketio-numberOfOnlineUser-ts
cd socketio-numberOfOnlineUser-ts
We init our new node project :
npm init -y
(with -y cause we don't wanna loose time with the cli, -y approve all by default)
We add our beautiful dependencies ! :
npm i express rxjs socket.io
npm i -D @types/express @types/socket.io nodemon ts-node tslint typescript
Prepare the live reloading with this as script in your package.json
  "scripts": {
    "dev": "nodemon",
    "start": "ts-node src/index.ts",
  }
create a nodemon.json file bellow your package.json with :
touch nodemon.json
Like this ⬇️
And put this on it (it will use this config for nodemon command, your npm run dev):
{
  "ignore": ["**/*.test.ts", "**/*.spec.ts", "node_modules"],
  "watch": ["src"],
  "exec": "npm start",
  "ext": "ts"
}
Init a tsconfig file :
npx tsc --init --rootDir src --outDir dist --module commonjs --lib es2015 --sourceMap true --target es6 --esModuleInterop true
Create our folders :
mkdir src src/models src/services
You will get this ⬇️

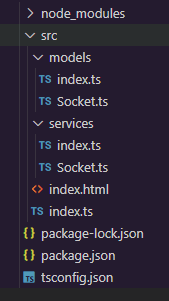
Create our files :
touch src/index.ts src/index.html src/models/index.ts src/models/Socket.ts src/services/index.ts src/services/Socket.ts
Normally at this stage your hierarchy should look like this ⬇️
For the creation stage of the project, we are good !
Next step !
Code
Finally some code ! The fun part !

So, let's open vscode and begin with the index.ts file.
For this part, we will init a basic node server under express, you know that, no seret here so it's what's it's look like :
import express from "express"; // We import express as listener, you know.
import * as http from "http"; // We import http for init the server
// Anyway, if we don't do it, express does it secretly

const app =  express(); // Init express
const server = http.createServer(app); // Init server avec use express as listener
const port =  3000;

app.get("/", (req, res) => {
res.sendFile(__dirname +  "/index.html"); // We Will use the index.html file to see our work
});

server.listen(port, () => {
return console.log(`server is listening on ${port}`); // No need to comment that, no?
});
At this stage we just have a nodejs server running and returning a blank page.
Let's go on.
Let's prepare our index.html file, we just want to see the number of online users in real time.
Let's put this on it :
<div>
    <p>Number of users : <span id="numberOfUsers"></span></p>
</div>
<script src="/socket.io/socket.io.js"></script>
<script>

var socket = io("localhost:3000");
var numberOfUsers = document.getElementById("numberOfUsers");

socket.on("dataChange", function (data) {
  numberOfUsers.textContent = data.numberOfUser;
});
</script>
Ah, finally our first reference to SocketIo, but what's going on?
Here we are initializing a SocketIo instance (with io('backend adress')) on the client side, this instance will try to connect to the socket "normally" available at your address localhost:3000, once connected this instance will wait for the emission of a "dataChange" event from your server (with socket.on('') method) .
However, your server doesn't have anything on this topic yet, so you'll just get an error if you test the page.
But let's continue.
We move on to the creation of the data model, because yes, we will send data from our socket, but to prevent the future complexity of our application we will stay clean and quickly create the data model.
Go on the src/models folder and put this into our file Socket.ts
export interface SocketData {
  numberOfUser?: number;
}
Oh, but next to our Socket.ts file, we have an index.ts file, let's take care of it, in case it's a "barrel", useful to efficiently organize all our future import/export.
So, use it and put this into it :
export * from "./Socket";
Ok, our model is ok, now we know what the data that will pass through our socket looks like.
Now let's take care of our Socket instance ! Finally !
So let's take care of the src/services folder, inside we have our little barrel index.ts (now you know what to do with it right? export blablabla)
Let's move on to the most important file, src/services/Socket.ts
We will finally use RxJS to create a variable that will be "Observable".
That is to say that a function (a callback), to be executed at each change of the data contained in this variable.
So we can make our socket react easily and dynamically!
We will also have a function that increments or decrements the numberOfUser value so that the client can see the changes when a visitor logs in/logs out.
In short here is the state of our famous file ⬇️
import * as socketio from "socket.io";
import * as http from "http"; // Just for typing, we like typing !
import { BehaviorSubject } from "rxjs";

import { SocketData } from "../models/Socket"; // Here our model, cause we like typing things !

export class SocketService {
  private store: BehaviorSubject<SocketData> = new BehaviorSubject<SocketData>({
    numberOfUser: 0,
  }); // Here's our "Observable" data.
  private io!: socketio.Server; // Our Socket instance

  constructor(server: http.Server) {
    this.io = new socketio.Server(server, { cors: { origin: "*" } }); // We init our Socket instance with the server as parameter
  }

  public listenStore() {
    this.store.subscribe((store) => {
      // subscribe is called at each store value change !
      this.io.emit("dataChange", store); // So at each value change, we emit this value to the client with the event name "dataChange"
    });
  }

  public listenUserActivity() {
    this.io.on("connection", (client) => {
      const storeData = this.store.getValue(); // we get the actual value of our "Observable"
      // When a user do a connection at our socket, the "connection" event is called. It's a default event from socket.io.
      this.store.next({ numberOfUser: storeData.numberOfUser + 1 }); // so we change the data of the store with the function "next"
      client.once("disconnect", () => {
        const storeData = this.store.getValue(); // we get the actual value of our "Observable"
        // When a user do a disconnection, the "disconnect" event is called. It's a default event from socket.io.
        if (storeData.numberOfUser !== 0) {
          // A check just by security.
          this.store.next({ numberOfUser: storeData.numberOfUser - 1 }); // You know what next do now.
        }
      });
    });
  }
}
And that it for the socket.ts file !
Now that we have a ready-made Socket service with the logic we want, we need to let our server know it exists.
To do this we will edit the src/index.ts file like this
import express from "express";
import * as http from "http";
import { SocketService } from "./services"; // We import our SocketService, Thanks to the index.ts file, we don't need to specify where exactly the Socket.ts file is located.

const app = express();
const server = http.createServer(app);
const port = 3000;

const socketService = new SocketService(server); // We instantiate our SocketService

app.get("/", (req, res) => {
  res.sendFile(__dirname + "/index.html");
});

socketService.listenStore(); // We ask to our service to listen the change of the "Observable" data and emit the change to our socket by the "dataChange" event.

socketService.listenUserActivity(); // We listen the activity of the socket and change the state of the "Observable" data when a desired event is triggered ("connection" or "disconnect")

server.listen(port, () => {
  return console.log(`server is listening on ${port}`);
});
So if we come back to the client side, we can see all our work !
When we load the page, we wan see the numberOfUser value change, also when we left the page.
It's work !

So you can start from there to make your logic more complex !
Extra
But what are you saying? Your client is not on the node side? You are using a front framework like Vuejs/Angular or Next.
No problem, just use the socket.io-client package on the front side and do like this ⬇️:
import { io, Socket } from "socket.io-client";
import { Observable, BehaviorSubject } from "rxjs";

export interface SocketData {
  numberOfUser?: number;
}

export class SocketService {
  private socket!: Socket;

  private store: BehaviorSubject<SocketData> = new BehaviorSubject<SocketData>({
    numberOfUser: 0,
  });
  private store$: Observable<SocketData> = this.store.asObservable();

  constructor() {
    this.socket = io("YOUR_BACKEND_URL");
    this.socket.on("dataChange", (data) => {
      this.emit(data); // At each "dataChange" event we modify our "Observable" data.
    });
  }

  public emit(store: SocketData): void {
    this.store.next(store);
  }

  public listen(): Observable<SocketData> {
    return this.store$; // You will be able to use this.socketService.listen().subscribe(), it's the same logic as we see above !
  }
}
I think we've seen the main part, so we can stop here!
In the next post, we will see how to deploy this under your own VPS under apache2, you will see it's simple!

Repo Github
 NOPR9D
/
socketio-numberOfOnlineUser-ts
NOPR9D
/
socketio-numberOfOnlineUser-ts
Code of the devto article "SocketIo Show Number of visitor"
Socket.io Show number of visitor
Code of the article Socket.io | Show Number of visitor
How to
Install
npm i
Run
npm start dev
This content originally appeared on DEV Community 👩💻👨💻 and was authored by NOPR9D ☄️
NOPR9D ☄️ | Sciencx (2022-11-10T06:00:56+00:00) Socket.io | Show Number of visitor. Retrieved from https://www.scien.cx/2022/11/10/socket-io-show-number-of-visitor/
Please log in to upload a file.
There are no updates yet.
Click the Upload button above to add an update.