This content originally appeared on DEV Community 👩💻👨💻 and was authored by Maurer Krisztián
You've probably come across an open-source full-stack project that you wanted to try out, but it was hard to start because of UI, API dependencies, database, env config, versions. I tried to make this try-out experience better.
What are the problems when somebody wants to start up a full-stack project?
Let's look at a common setup:
- Clone the UI, clone the API, if it is in a separate repo, find it, install dependencies, find the requirements, set up a database, setup API, environment variables, and don't forget that your tools versions are correct, e.g. Nodejs, etc.
We feel that going through this just to try out an interesting project (which is not yet deployed anywhere) is a long and painful process.
How could this process be simplified?
API and UI can be in one repository, this can be disputed, but if the code is in one place, it makes it easier to have an overview, especially if there are additional microservices. There are already several monorepo solutions that solve this e.g. Nx, Turbo, if we are building a more complicated project.
Let's Dockerize! a docker build solves a few problems: the environment and versions will be OK. However, it's not that simple either.. although we've simplified the process, we still need docker build, create image, container, and start it multiple times e.g. if we have UI and API, then this has to be done twice. This would be difficult for a beginner to do this and it's still complicated.
- Docker-compose: Docker Compose is a tool that was developed to help define and share multi-container applications. This is what we need.
Let's say you need a UI, API, and MongoDB database. For that, we can write something like this: docker-compose.build.yml
version: '2' # specify docker-compose version

# Define the services/containers to be run
services:
  angular: # name of the first service
    build: ui # specify the directory of the Dockerfile
    ports:
      - "4200:4200" # specify port forewarding

  express: #name of the second service
    build: api # specify the directory of the Dockerfile
    ports:
      - "3000:3000" #specify ports forewarding

  database: # name of the third service
    image: mongo # specify image to build container from
    ports:
      - "3333:27017" # specify port forewarding
This will build the Dockerfile in the "ui" and "api" folders, adds a MongoDB database, and everything on the appropriate port.
Start command:
docker-compose --file ./docker-compose.build.yml up
and everything is running.
In the current state, the start process will be something like this
git clone project-name
cd project-name
sudo docker-compose --file ./docker-compose.build.yml up
If we look back at how many difficulties we had to go through to start the project, the experience is already light-years better
Could this experience be any better?
Yes!
You have to clone the project, you have to wait for the build (which can be very slow).
We can create the images ourselves, and then we only need a docker-compose file that points to these images (no need to clone a project and wait for a docker build).
e.g.
version: '2' # specify docker-compose version

# Define the services/containers to be run
services:
  angular: # name of the first service
    image: ghcr.io/maurerkrisztian/dont-break-the-chain-ui:latest
    ports:
      - "4200:4200" # specify port forewarding

  express: #name of the second service
    image: ghcr.io/maurerkrisztian/dont-break-the-chain-api:latest
    ports:
      - "3000:3000" #specify ports forewarding

  database: # name of the third service
    image: mongo # specify image to build container from
    ports:
      - "3333:27017" # specify port forewarding
These images can be built and published manually, but I'm lazy and would probably forget, so I put together a GitHub action. The registry can be DockerHub or even the GitHub docker registry, in this case, it's easier to keep things in one place, and I think you should choose the GitHub registry.
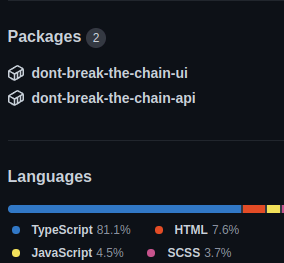
The images appear next to the GitHub repository and you can view them. cool!
name: Create and publish a Docker image

on:
  release:
    types: [created]
  workflow_dispatch:

env:
  REGISTRY: ghcr.io
  IMAGE_NAME: ${{ github.repository }}

jobs:
  build-and-push-image-api:
    runs-on: ubuntu-latest
    permissions:
      contents: read
      packages: write

    steps:
      - name: Checkout repository
        uses: actions/checkout@v3

      - name: Log in to the Container registry
        uses: docker/login-action@f054a8b539a109f9f41c372932f1ae047eff08c9
        with:
          registry: ${{ env.REGISTRY }}
          username: ${{ github.actor }}
          password: ${{ secrets.GITHUB_TOKEN }}

      - name: Extract metadata (tags, labels) for Docker
        id: meta
        uses: docker/metadata-action@98669ae865ea3cffbcbaa878cf57c20bbf1c6c38
        with:
          images: ${{ env.REGISTRY }}/${{ env.IMAGE_NAME }}-api

      - name: Build and push Docker image
        uses: docker/build-push-action@ad44023a93711e3deb337508980b4b5e9bcdc5dc
        with:
          context: ./api
          push: true
          tags: ${{ steps.meta.outputs.tags }}
          labels: ${{ steps.meta.outputs.labels }}
  build-and-push-image-ui:
    runs-on: ubuntu-latest
    permissions:
      contents: read
      packages: write

    steps:
      - name: Checkout repository
        uses: actions/checkout@v3

      - name: Log in to the Container registry
        uses: docker/login-action@f054a8b539a109f9f41c372932f1ae047eff08c9
        with:
          registry: ${{ env.REGISTRY }}
          username: ${{ github.actor }}
          password: ${{ secrets.GITHUB_TOKEN }}

      - name: Extract metadata (tags, labels) for Docker
        id: meta
        uses: docker/metadata-action@98669ae865ea3cffbcbaa878cf57c20bbf1c6c38
        with:
          images: ${{ env.REGISTRY }}/${{ env.IMAGE_NAME }}-ui

      - name: Build and push Docker image
        uses: docker/build-push-action@ad44023a93711e3deb337508980b4b5e9bcdc5dc
        with:
          context: ./ui
          push: true
          tags: ${{ steps.meta.outputs.tags }}
          labels: ${{ steps.meta.outputs.labels }}
another advantage is that you don't have to login because the GITHUB_TOKEN is enough to authenticate yourself in the GitHub registry, which is created automatically (for this action, you don't need to add any GH Action environment variable)
This action will be triggered when new release happens or manually
here is a release action that creates the changelog and version in the root package.json, tag, then triggers the docker builds which is publishes all images at the same time, so images with the same version always work together.
Release action:
name: Releases
on:
  workflow_dispatch:

jobs:
  generate-changelog-and-push-to-main:
    runs-on: ubuntu-latest

    steps:
      - uses: actions/checkout@v2

      - name: conventional Changelog Action
        id: changelog
        uses: TriPSs/conventional-changelog-action@v3.7.1
        with:
          github-token: ${{ secrets.MY_GITHUB_TOKEN }}
          version-file: './package.json'

      - name: create release
        uses: actions/create-release@v1
        if: ${{ steps.changelog.outputs.skipped == 'false' }}
        env:
          GITHUB_TOKEN: ${{ secrets.MY_GITHUB_TOKEN }}
        with:
          tag_name: ${{ steps.changelog.outputs.tag }}
          release_name: ${{ steps.changelog.outputs.tag }}
          body: ${{ steps.changelog.outputs.clean_changelog }}
You will need a MY_GITHUB_TOKEN env.
So now when you start a release, it generates the changelog, and versions. Triggers the docker workflow
which builds images and pushes them to the GitHub registry.
Final experience
for the maintainer:
You can release your project with 1 button press, which updates everything.
User:
Copy docker-build.latest.yml and run it
docker-compose --file ./docker-compose.latest.yml up
it's fast because you don't need to build and everything works together, you don't need to download any dependencies for the project.
I'm not DevOps, just a full-stack developer, if you can improve this, please leave a comment.
Here is a demo repo: https://github.com/MaurerKrisztian/dont-break-the-chain (the project is still at the very beginning, but you can contribute if you want)
Thanks for reading.❤️ I hope this was helpful.
This content originally appeared on DEV Community 👩💻👨💻 and was authored by Maurer Krisztián
Maurer Krisztián | Sciencx (2022-11-29T18:58:26+00:00) Make your full-stack project accessible to others 🚀. Retrieved from https://www.scien.cx/2022/11/29/make-your-full-stack-project-accessible-to-others-%f0%9f%9a%80/
Please log in to upload a file.
There are no updates yet.
Click the Upload button above to add an update.


