This content originally appeared on Level Up Coding - Medium and was authored by Steven Roscoe

Kubernetes, also known as K8s, is an open-source system for automating deployment, scaling, and management of containerized applications. Kubernetes helps you deploy containers across a pool of compute resources, such as servers. K8s allows you to easily manage multiple replicas of your application within the pool of servers. You can send the containers to K8s and have K8s send the replicas to multiple servers at a time. K8s also makes it easy for you to scale your application up or down, allowing you to add more applications or decrease the number to your choosing. K8s provides a framework for managing and controlling your containers’ network communications. It offers a variety of features that give you the ability to build more secure applications. K8s can also help you manage application configuration and pass the configuration data to your containers.
In this project we’ll be using the command line to create a deployment that runs an nginx image, display the details of the deployment, check the event logs of said deployment, then delete the deployment.
Prerequisites:
Docker Desktop
Command Line (I’m using Windows Terminal)
STEP 1: Enable Kubernetes on Docker Desktop
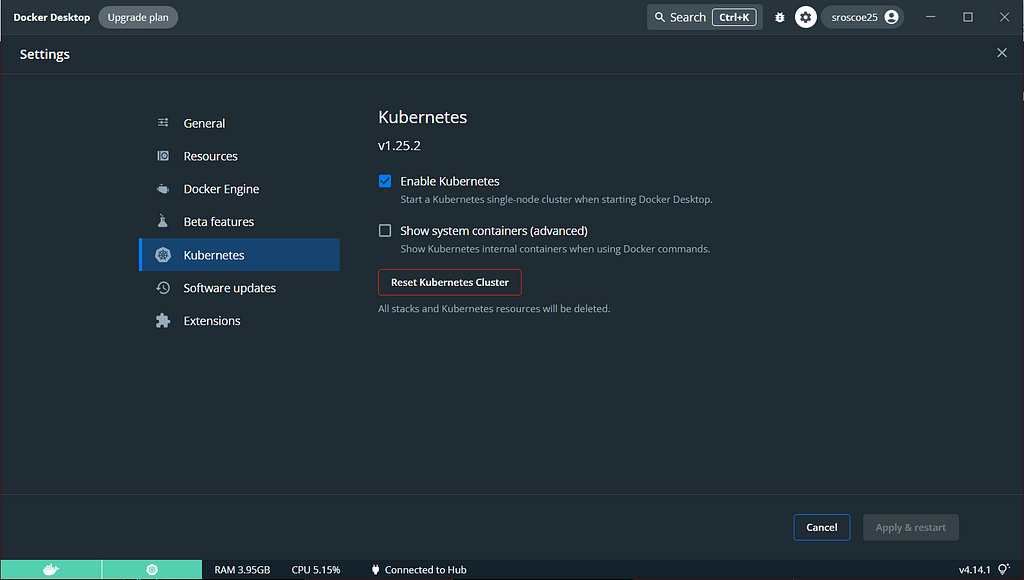
Starting off I will be using Docker Desktop to keep track of my images and containers during deployment. It also works well with your local machine as the Windows Terminal automatically syncs with Docker Desktop. Once you have it installed, go into the Docker Desktop settings and enable Kubernetes. After it has been enabled, you will have to click Apply and restart:
STEP 2: Create your Deployment
Kubernetes provides a command line tool for communicating with a Kubernetes cluster’s control plane, using the Kubernetes API. This tool is known as the kubectl command. We will be using this command to create and inspect our deployment:
kubectl create deployment <name your deployment> --image=nginx
This command creates a container with the nginx image pre-packaged:

Now let’s get some information on our deployment. We can use the command kubectl get deployments <deployment name> -o wide to see a wider range of information:

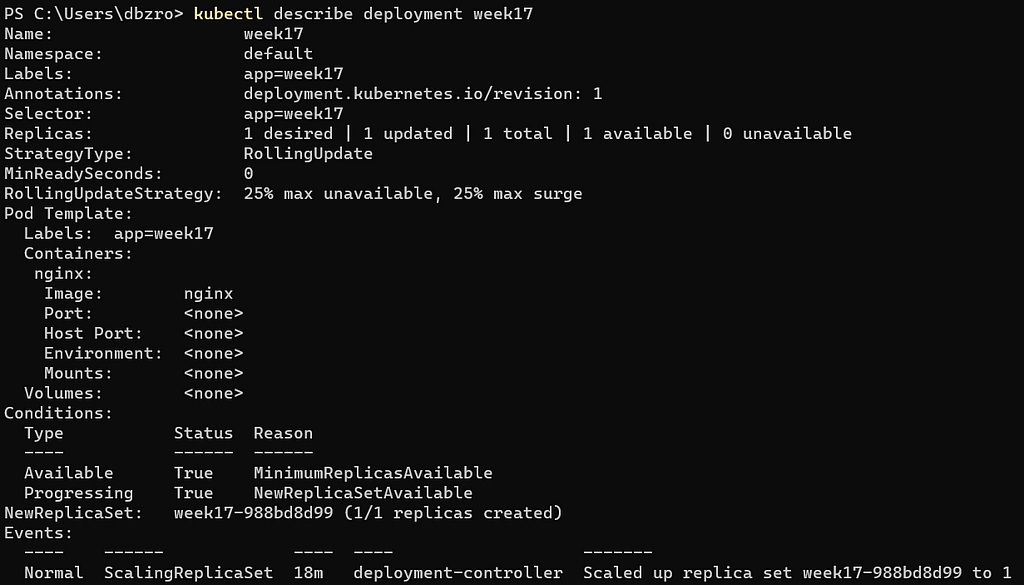
kubectl describe deployment <deployment name> can show you the specifications of your deployment. I panicked at this part as I had no clue why my container wasn’t running at first. After about five minutes my container finally ran. You can tell that it’s running when the status has a value of True:
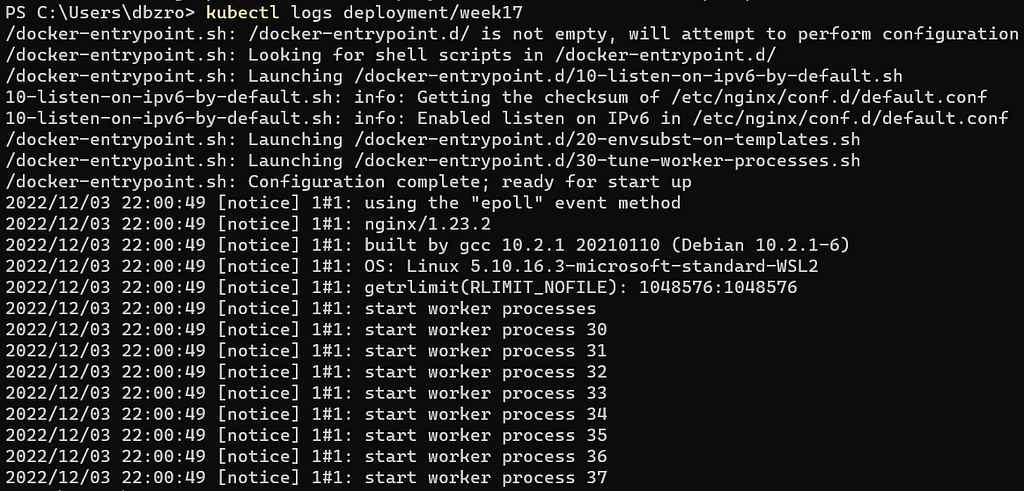
Now we want to check the event logs of your deployment. Use the command kubectl logs deployment/<deployment name> to check the processes and logs:
Now that we are at the end of the project, we want to delete the deployment. Use the kubectl delete deployment <deployment name> command:

ADVANCED
STEP 1: Create the Deployment using a YAML File
For the advanced part of this project, we will be using a YAML manifest file to complete the same task by creating our deployment, getting the logs, then deleting our deployment. The only difference is that now we are using what’s called replicas. Replicas allow you to make multiple copies of your applications. For now, we will be using the manifest file to make a single container. To do this, let’s use the VIM editor:
vim <name the file>.yml

Copy and paste the following YAML deployment into the editor. You can find this YAML file here, and you will have to change some of the data within the file depending on how you want to deploy it:
apiVersion: apps/v1
kind: Deployment
metadata:
  name: week17
  labels:
    app: nginx
spec:
  replicas: 1
  selector:
    matchLabels:
      app: nginx
  template:
    metadata:
      labels:
        app: nginx
    spec:
      containers:
      - name: week17
        image: nginx:stable
        ports:
        - containerPort: 80
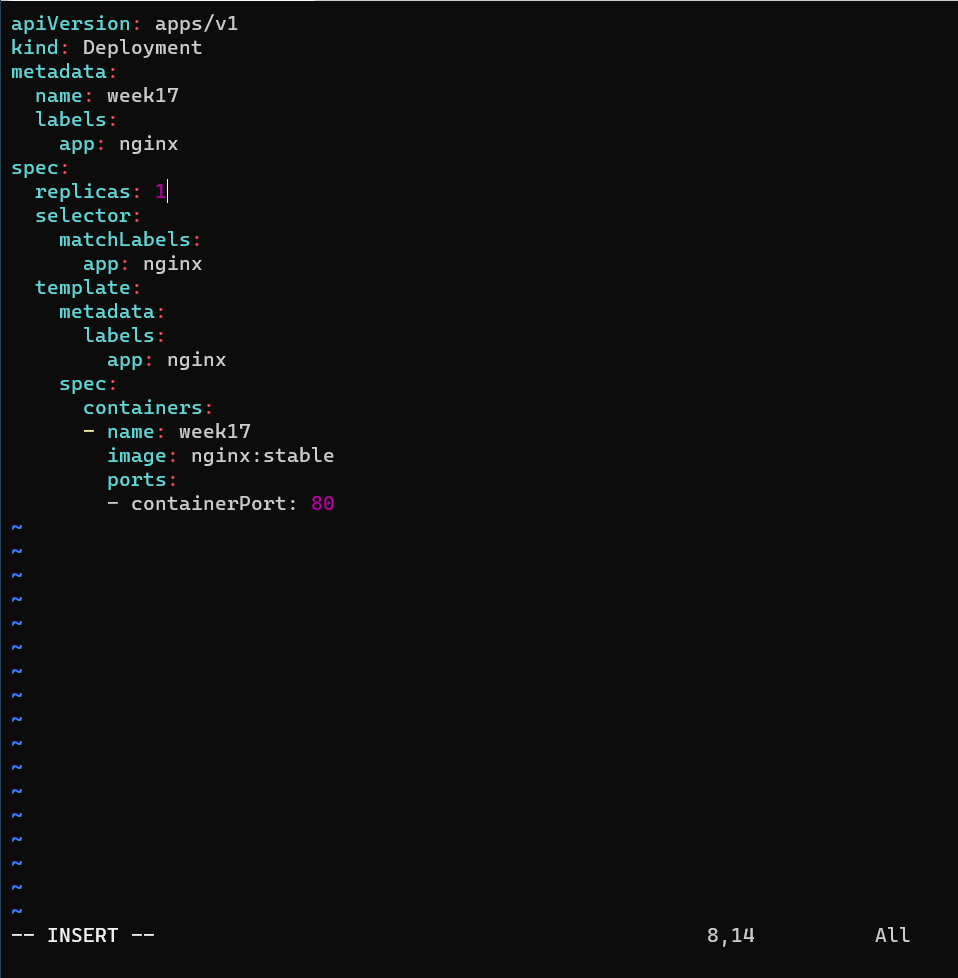
After that, save and exit the file, then apply the manifest file and create your deployment:
kubectl apply -f <file name>.yml

Now, as usual, run the commands needed to get the information on your new deployment:

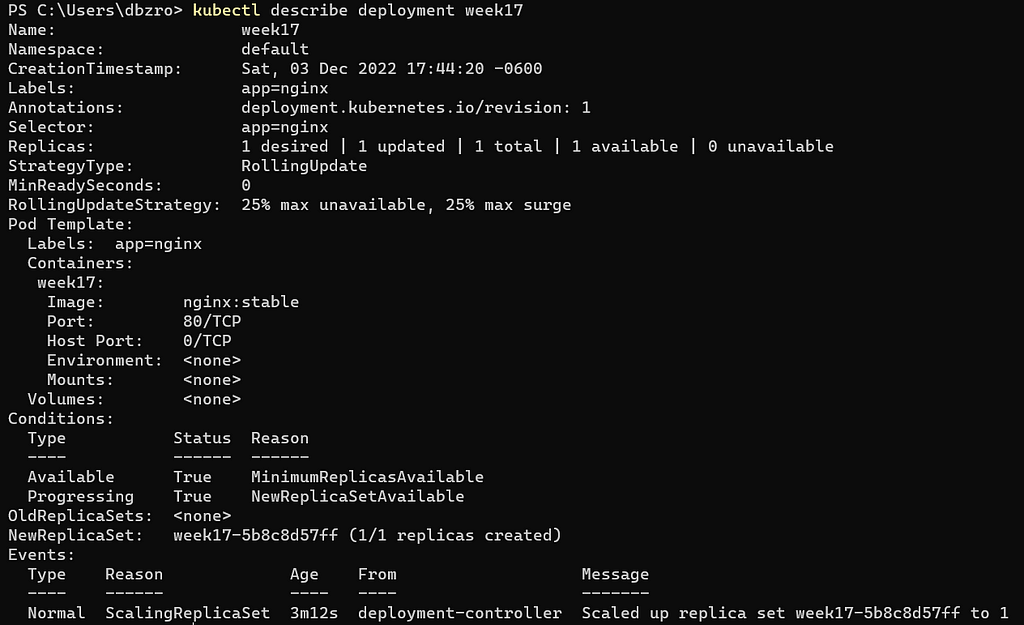
STEP 2: Update YAML File to Scale the Replica Amount to 4
For the next step, all we will do is scale the replica to four deployments. Using the same vim command as before, go into the file and update it to have a replica amount of four:
apiVersion: apps/v1
kind: Deployment
metadata:
  name: week17
  labels:
    app: nginx
spec:
  replicas: 4
  selector:
    matchLabels:
      app: nginx
  template:
    metadata:
      labels:
        app: nginx
    spec:
      containers:
      - name: week17
        image: nginx:stable
        ports:
        - containerPort: 80
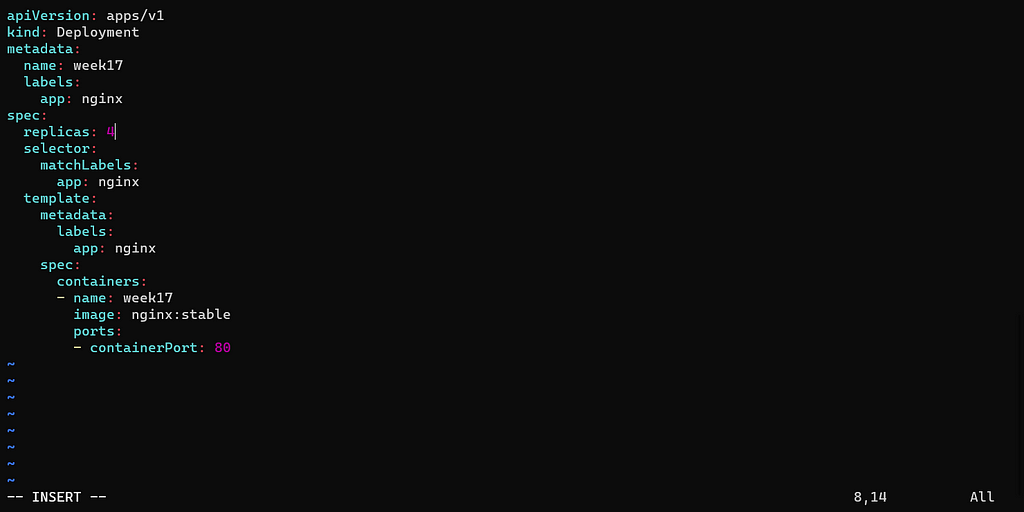
Save and quit out of the file, then run the same commands once more:

The kubectl get pods command allows us to see each pod that was created during deployment. We have currently four running, which means the manifest file was updated correctly:

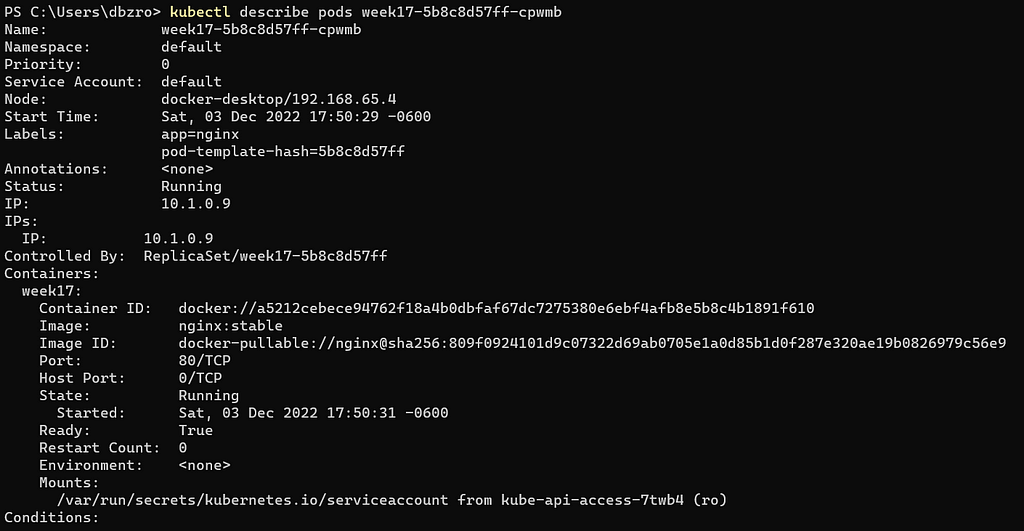
As you can see below, since our Docker Desktop app is synced with our local machine, we can see all of our containers are running after being deployed correctly:
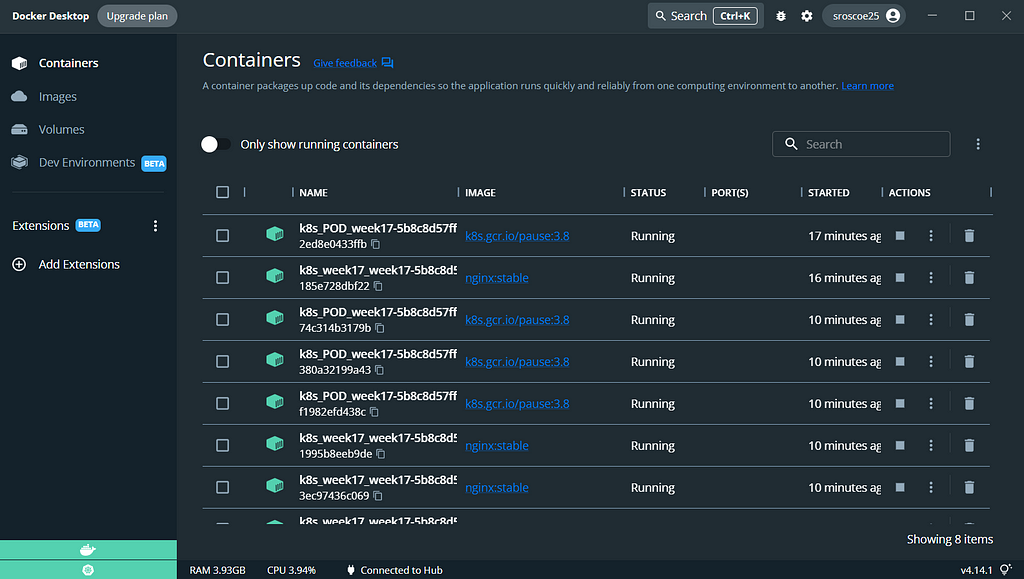
Now that we have deployed our containers correctly, let’s do some cleanup. We don’t want to keep anything running, so let’s delete our deployment:

And this marks the completion of the project! Thanks for stopping by!
Level Up Coding
Thanks for being a part of our community! Before you go:
- 👏 Clap for the story and follow the author 👉
- 📰 View more content in the Level Up Coding publication
- 🔔 Follow us: Twitter | LinkedIn | Newsletter
🚀👉 Join the Level Up talent collective and find an amazing job
Deploying Containers with Kubernetes! was originally published in Level Up Coding on Medium, where people are continuing the conversation by highlighting and responding to this story.
This content originally appeared on Level Up Coding - Medium and was authored by Steven Roscoe
Steven Roscoe | Sciencx (2022-12-04T21:14:39+00:00) Deploying Containers with Kubernetes!. Retrieved from https://www.scien.cx/2022/12/04/deploying-containers-with-kubernetes/
Please log in to upload a file.
There are no updates yet.
Click the Upload button above to add an update.
