
This content originally appeared on Level Up Coding - Medium and was authored by Ali Moezzi
Setup OpenVPN access server on Kubernetes
A modern cloud-native application consists of several layers of building blocks. You need a Continuous integration (CI) system to assess and integrate code changes by developers like Drone CI and Travis CI. A Continuous Integration (CD) to smoothly manage to deploy your services. The whole process requires a monitoring and observability application like Prometheus. Grafana helps to visualize your metrics. However, having many services have security implications. Each of these services can become a target for an adversary to gain full access to your cluster. Upgrading a large number of services immediately as soon as a patch become available seems impractical since the patch must be checked for compatibility with the rest of the stack. But wait, What if there’s a vulnerability that hasn’t yet been publicly discovered?

Thus, keeping all services behind a VPN ensures no adversary can brute-force access your service and test for possible vulnerability. In this article, I’m going to explain a simple setup for a development cluster where you can access your services only through the VPN and also benefit from kube-dns so you don't need to access them by IP. In this development setup, the VPN is running in a POD in your cluster although you can instead host the VPN apart from your cluster but only whitelist the CIDR of the VPN network.

Chart Preparation
I will be using the old stable/openvpn chart which we have to take care of keeping the chart upgrade as it hasn't been updated since Nov 13, 2020. Let's begin by having a look at the application Dockerfile.
# Smallest base image
FROM alpine:3.17 # alpine:3.5
MAINTAINER John Felten<john.felten@gmail.com>
ADD VERSION .
# Install needed packages
RUN echo "<http://dl-4.alpinelinux.org/alpine/edge/community/>" >> /etc/apk/repositories && \\
    echo "<http://dl-4.alpinelinux.org/alpine/edge/testing/>" >> /etc/apk/repositories && \\
    apk update && apk add openssl easy-rsa openvpn iptables bash && \\
    rm -rf /tmp/* /var/tmp/* /var/cache/apk/* /var/cache/distfiles/*
# Configure tun
RUN mkdir -p /dev/net && \\
     mknod /dev/net/tun c 10 200
Here we need to update the base image to use the latest available version of Alpine FROM alpine:3.17 and build image.
docker build --tag <repository>/openvpn:1.0.0 .
Then push it to your container registry like Docker Hub.
docker push <repository>/openvpn
Next, we need to update the chart itself. First, clone the repository. The chart is located at stable/openvpn/
git clone <https://github.com/helm/charts.git>
The first modification we need to make is to fix OpenVPN certificate generation configuration. The configuration is inside templates/config-openvpn.yaml. As the process is being done in a non-interactive environment, we should configure the easy-rsa to skip prompts. Looking over the document the EASYRSA_BATCH environment variable prevents prompts.
export EASYRSA_BATCH=1 # for non-interactive environments
cp -R /usr/share/easy-rsa/* $EASY_RSA_LOC
./easyrsa init-pki
echo "ca\\n" | ./easyrsa build-ca nopass
./easyrsa build-server-full server nopass
./easyrsa gen-dh
Next, as a security precaution, we will add remote-cert-tls to require the certificate to be peer-signed. This is an important mitigation against man-in-the-middle attacks.
First, For client configuration inside templates/config-openvpn.yaml:
newClientCert.sh: |-
    #!/bin/bash
    EASY_RSA_LOC="/etc/openvpn/certs"
    cd $EASY_RSA_LOC
    MY_IP_ADDR="$2"
    ./easyrsa build-client-full $1 nopass
    cat >${EASY_RSA_LOC}/pki/$1.ovpn <<EOF
    client
    nobind
    dev tun
    remote-cert-tls server # mitigate mitm
and then for server configuration:
openvpn.conf: |-
    server {{ .Values.openvpn.OVPN_NETWORK }} {{ .Values.openvpn.OVPN_SUBNET }}
    verb 3
{{ if .Values.openvpn.useCrl }}
    crl-verify /etc/openvpn/certs/crl.pem
{{ end }}
    key /etc/openvpn/certs/pki/private/server.key
    ca /etc/openvpn/certs/pki/ca.crt
    cert /etc/openvpn/certs/pki/issued/server.crt
    dh /etc/openvpn/certs/pki/dh.pem
{{ if .Values.openvpn.taKey }}
    tls-auth /etc/openvpn/certs/pki/ta.key 0
{{ end }}
{{ if .Values.openvpn.cipher }}
    cipher {{ .Values.openvpn.cipher }}
{{ end }}
    key-direction 0
    keepalive 10 60
    persist-key
    persist-tun
    remote-cert-tls client # mitigate mitm
Chart Configuration
After preparing the chart, now it’s time to configure values.yaml. We begin with replacing the chart default image with the image we created earlier.
image:
  repository: <repository>/openvpn # jfelten/openvpn-docker
  tag: 1.0.0
  pullPolicy: IfNotPresent
If you’re using a private registry don’t forget to update imagePullSecretName with your secret. Next, let's update the cipher. To find ciphers OpenVPN supports, we can use the --cipher flag to list supported ciphers.
$ openvpn --show-ciphers
The following ciphers and cipher modes are available for use
with OpenVPN.  Each cipher shown below may be used as a
parameter to the --data-ciphers (or --cipher) option.  The
default key size is shown as well as whether or not it can be
changed with the --keysize directive.  Using a GCM or CBC mode
is recommended.  In static key mode only CBC mode is allowed.

AES-128-CBC  (128 bit key, 128 bit block)
AES-128-GCM  (128 bit key, 128 bit block, TLS client/server mode only)
AES-192-CBC  (192 bit key, 128 bit block)
AES-192-GCM  (192 bit key, 128 bit block, TLS client/server mode only)
AES-256-CBC  (256 bit key, 128 bit block)
AES-256-GCM  (256 bit key, 128 bit block, TLS client/server mode only)
ARIA-128-CBC  (128 bit key, 128 bit block)
ARIA-192-CBC  (192 bit key, 128 bit block)
ARIA-256-CBC  (256 bit key, 128 bit block)
CAMELLIA-128-CBC  (128 bit key, 128 bit block)
CAMELLIA-192-CBC  (192 bit key, 128 bit block)
CAMELLIA-256-CBC  (256 bit key, 128 bit block)
CHACHA20-POLY1305  (256 bit key, stream cipher, TLS client/server mode only)
SEED-CBC  (128 bit key, 128 bit block)
SM4-CBC  (128 bit key, 128 bit block)
The following ciphers have a block size of less than 128 bits,
and are therefore deprecated.  Do not use unless you have to.
BF-CBC  (128 bit key by default, 64 bit block)
CAST5-CBC  (128 bit key by default, 64 bit block)
DES-CBC  (64 bit key, 64 bit block)
DES-EDE-CBC  (128 bit key, 64 bit block)
DES-EDE3-CBC  (192 bit key, 64 bit block)
DESX-CBC  (192 bit key, 64 bit block)
IDEA-CBC  (128 bit key, 64 bit block)
RC2-40-CBC  (40 bit key by default, 64 bit block)
RC2-64-CBC  (64 bit key by default, 64 bit block)
RC2-CBC  (128 bit key by default, 64 bit block)
From these ciphers AES 256 in Galois Counter Mode (AES256-GCM) and CHACHA20-POLY1305 are preferred. Both are good options but pure-software implementation of the latter one is faster. You can read this article from Cloudflare to understand the differences better.
redirectGateway: true
# Use/generate certificate revocation list
useCrl: false
# Use/generate a ta.key (<https://openvpn.net/community-resources/hardening-openvpn-security/>)
taKey: false
# Override default cipher
cipher: AES-256-GCM
Installing the Chart
Now, after enough configuration it’s time to apply the chart to your cluster.
$ helm upgrade --install openvpn . -f values.yaml
NOTES:
OpenVPN is now starting.
Please be aware that certificate generation is variable and may take some time (minutes).
Check pod status with the command:
  POD_NAME=$(kubectl get pods --namespace "default" -l app=openvpn -o jsonpath='{ .items[0].metadata.name }') && kubectl --namespace "default" logs $POD_NAME --follow
LoadBalancer ingress creation can take some time as well. Check service status with the command:
  kubectl --namespace "default" get svc
Once the external IP is available and all the server certificates are generated create client key .ovpn files by pasting the following into a shell:
  POD_NAME=$(kubectl get pods --namespace "default" -l "app=openvpn,release=openvpn" -o jsonpath='{ .items[0].metadata.name }')
  SERVICE_NAME=$(kubectl get svc --namespace "default" -l "app=openvpn,release=openvpn" -o jsonpath='{ .items[0].metadata.name }')
  SERVICE_IP=$(kubectl get svc --namespace "default" "$SERVICE_NAME" -o go-template='{{ range $k, $v := (index .status.loadBalancer.ingress 0)}}{{ $v }}{{end}}')
  KEY_NAME=kubeVPN
  kubectl --namespace "default" exec -it "$POD_NAME" /etc/openvpn/setup/newClientCert.sh "$KEY_NAME" "$SERVICE_IP"
  kubectl --namespace "default" exec -it "$POD_NAME" cat "/etc/openvpn/certs/pki/$KEY_NAME.ovpn" > "$KEY_NAME.ovpn"
Revoking certificates works just as easy:
  KEY_NAME=<name>
  POD_NAME=$(kubectl get pods -n "default" -l "app=openvpn,release=openvpn" -o jsonpath='{.items[0].metadata.name}')
  kubectl -n "default" exec -it "$POD_NAME" /etc/openvpn/setup/revokeClientCert.sh $KEY_NAME
Copy the resulting $KEY_NAME.ovpn file to your open vpn client (ex: in tunnelblick, just double click on the file).  Do this for each user that needs to connect to the VPN.  Change KEY_NAME for each additional user.
Generating client configuration
Finally, we can use the following script to generate a client certificate for us.
#!/bin/bash
# newClientCert.sh
if [ $# -ne 3 ]
then
  echo "Usage: $0 <CLIENT_KEY_NAME> <NAMESPACE> <HELM_RELEASE>"
  exit
fi
KEY_NAME=$1
NAMESPACE=$2
HELM_RELEASE=$3
POD_NAME=$(kubectl get pods -n "$NAMESPACE" -l "app=openvpn,release=$HELM_RELEASE" -o jsonpath='{.items[0].metadata.name}')
SERVICE_NAME=$(kubectl get svc -n "$NAMESPACE" -l "app=openvpn,release=$HELM_RELEASE" -o jsonpath='{.items[0].metadata.name}')
SERVICE_IP=$(kubectl get svc -n "$NAMESPACE" "$SERVICE_NAME" -o go-template='{{range $k, $v := (index .status.loadBalancer.ingress 0)}}{{$v}}{{end}}')
kubectl -n "$NAMESPACE" exec -it "$POD_NAME" -- /etc/openvpn/setup/newClientCert.sh "$KEY_NAME" "$SERVICE_IP"
kubectl -n "$NAMESPACE" exec -it "$POD_NAME" -- cat "/etc/openvpn/certs/pki/$KEY_NAME.ovpn" > "$KEY_NAME.ovpn"
Then execute the script to get your first OpenVPN config file and import it to one of many OpenVPN clients like Tunnelblick.
./newClientCert.sh main default openvpn
The good news is, as your DNS will also be configured; you can access your services by domain names.
DNS Rewrites
If you feel like typing .svc.cluster.local every time is too hard, you're not alone. Fortunately, we can use the rewrite directive to rewrite domain names shorter. The config map we should be changing is the coredns in kube-system namespace.
$ kubectl get cm -n kube-system
coredns 2   395d
We need to patch the config add the rewrite name substring example.com svc.cluster.local directive write after ready directive. For this you can use kubectl edit cm/coredns -n kube-system or patch the data field
$ kubectl get cm/coredns -n kube-system -o yaml
apiVersion: v1
data:
  Corefile: |
    .:53 {
        errors
        health
        ready
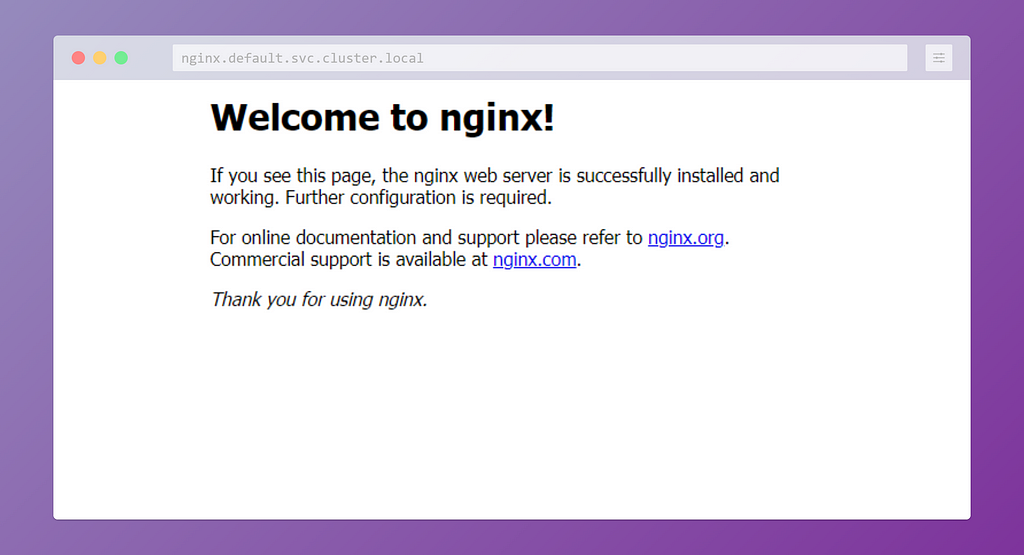
Now we can have a look at the URL in the browser:

Final Thoughts
OpenVPN is not the only option. The same functionality could be achieved by using WireGuard. To better secure this approach you can configure a network policy for your workload. By doing so, you have fine-grained control over other pods that are allowed to communicate on the VPN network. Another line of solution is to use a tunneling approach. Whether you use self-hosted tunneling solutions or managed services like inlets, depends on your specific use case, the number of services, and how large is your team.
I will write more articles in CS. If you’re as passionate about the industry as I am ^^ and find my articles informative, be sure to hit that follow button on Medium and continue the conversation in comments if you have any questions. Don’t hesitate to reach out to me directly on LinkedIn!
Level Up Coding
Thanks for being a part of our community! Before you go:
- 👏 Clap for the story and follow the author 👉
- 📰 View more content in the Level Up Coding publication
- 🔔 Follow us: Twitter | LinkedIn | Newsletter
🚀👉 Join the Level Up talent collective and find an amazing job
Access Kubernetes Cluster: VPN was originally published in Level Up Coding on Medium, where people are continuing the conversation by highlighting and responding to this story.
This content originally appeared on Level Up Coding - Medium and was authored by Ali Moezzi
Ali Moezzi | Sciencx (2023-02-10T14:37:04+00:00) Access Kubernetes Cluster: VPN. Retrieved from https://www.scien.cx/2023/02/10/access-kubernetes-cluster-vpn/
Please log in to upload a file.
There are no updates yet.
Click the Upload button above to add an update.