This content originally appeared on Level Up Coding - Medium and was authored by Phoenix Developer
The art of UI-Testing your SwiftUI apps
I suppose every one of you uses apps daily and many of you might own an app too. But what exactly makes a good app? Fancy graphics? Hugh functionality? Usability? I think any app which is intuitive to use and error-free is a good app. And that is what we are going to concentrate on today. UI-Testing your apps to make them as stable and error-free as possible.
Why should we use UI-Testing?
UI-Testing is one of the most important tools in developing successful and error-free apps. We make errors daily. Therefore we need a way to verify the correctness of our apps.
With UI-Tests we try to ensure our apps behave as wanted when interacting in a certain way with the UI. We can also simulate unwanted behavior with UI-Tests making sure the app doesn’t crash in those scenarios.
How to prepare for UI-Tests?
To write concise and also effective UI-Tests I suggest you follow the FIRST principle. FIRST is primarily intended to be used for unit testing, but can also be applied here. Those rules are:
- Fast: Tests should run quickly.
- Independent/Isolated: Tests shouldn’t share their state.
- Repeatable: You should obtain the same results every time you run a test. External data providers or concurrency issues could cause intermittent failures.
- Self-validating: Tests should be fully automated. The output should be either “pass” or “fail”, rather than relying on a programmer’s interpretation of a log file.
- Timely: Ideally, you should write your tests before writing the production code they test. They are also known as Test-driven-development (TDD).
Following those principles will yield effective tests.
How to test your UI?
Create an app
First, we need to create a new app in Xcode. Open Xcode and create a new project. Select app and then set a checkmark to include tests.
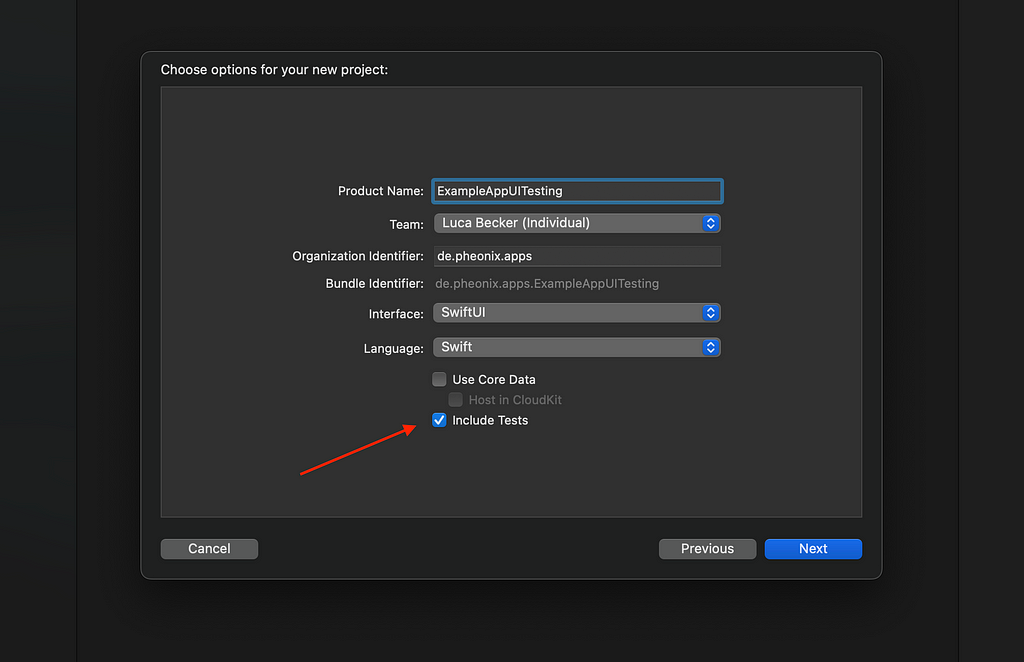
Alternatively, we can add a UI testing target to an existing project by selecting File > New > Target > UI Testing bundle in Xcode’s menu.
Writing the first UI-Test
Let's open the file for the UI-Tests
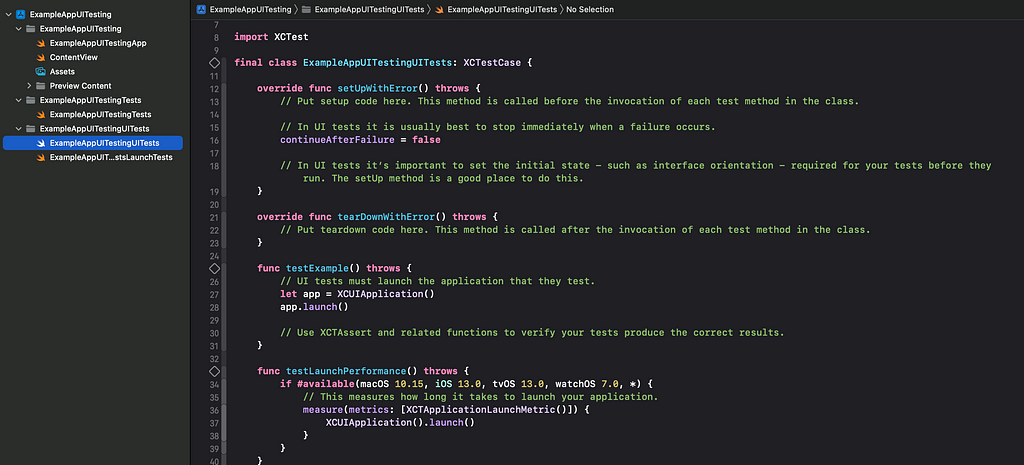
All test files in XCode must extend from XCTestCase. Xcode created this example file for us, containing two test cases. Delete them, we will create our own.
The two functions above setUpWithError and tearDownWithError will run before and after each test case. This helps us create independent test cases.
Before we can test our app we need to create a user interface. For this article, I created a login form.
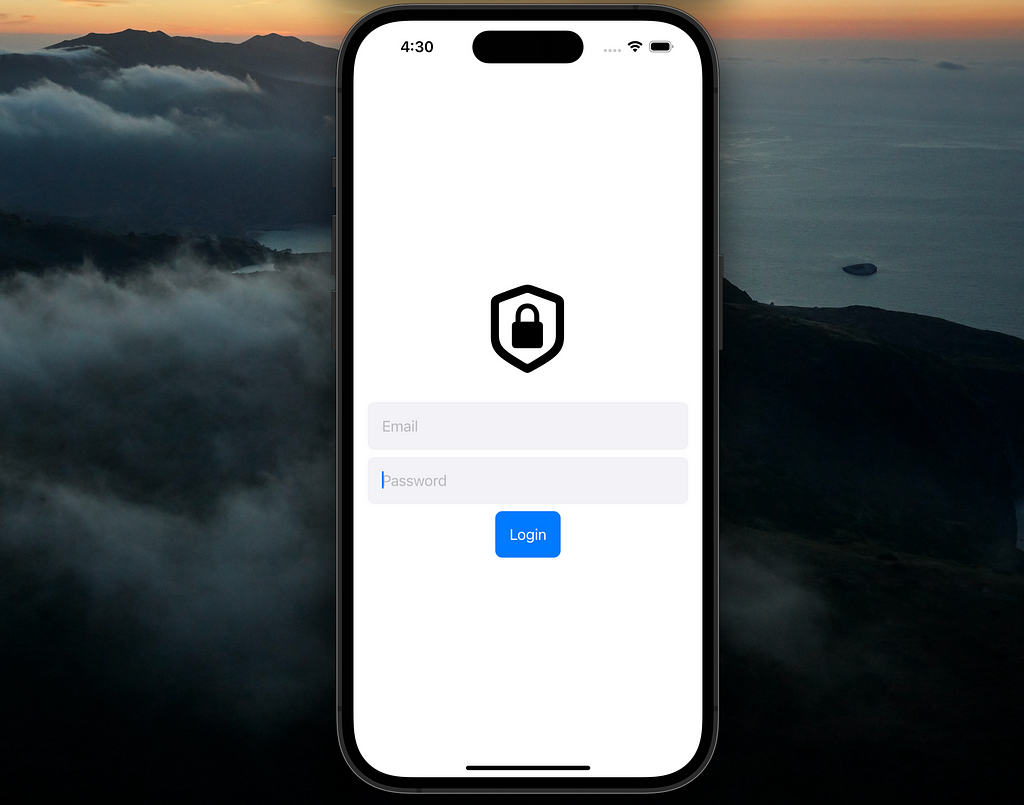
This login form will be used as our base to explore UI-Tests. Let’s get started with testing.
To interact with the app we need to use the class XCUIApplication. This class offers everything we need to interact with our UI.
Valid password?
It would be useful to test the process of logging in. To log in we need to enter an email, and a password and click on the login button.
We can interact with textFields by using the method typeText(_:). First ensure, that the textField is focused.
We will find our views by using their modifieraccessibilityIdentifier. This modifier allows us to find the view.

We can now interact with the views.
final class ExampleAppUITestingUITests: XCTestCase {

    var app: XCUIApplication!

    override func setUpWithError() throws {
        // Put setup code here. This method is called before the invocation of each test method in the class.
        app = XCUIApplication()
        app.launch()
        // In UI tests it is usually best to stop immediately when a failure occurs.
        continueAfterFailure = false

    }

    override func tearDownWithError() throws {
        app = nil
        // Put teardown code here. This method is called after the invocation of each test method in the class.
    }

    func testCanLogin() {
        let emailTextField = app.textFields["emailTextField"]
        XCTAssert(emailTextField.waitForExistence(timeout: 5), "Email text field couldn't be found")
        emailTextField.tap()
        emailTextField.typeText("test@test.test")

        let passwordTextField = app.secureTextFields["passwordTextField"]
        XCTAssert(passwordTextField.waitForExistence(timeout: 3), "Password text field couldn't be found")
        passwordTextField.tap()
        passwordTextField.typeText("password")

        let loginButton = app.buttons["loginButton"]
        XCTAssert(loginButton.waitForExistence(timeout: 3), "Login button couldn't be found")
        XCTAssert(loginButton.isEnabled, "Login button not enabled")
        loginButton.tap()
    }
}
If the test target compiles without errors and the testCanLogin gets a green checkmark, we are good to go.
Recording UI-Tests
With Xcode, you are also able to record your UI-Test which makes it much easier to write UI-Tests fast.
Create a new function testRecordingLogin and tap on the red recording button on the bottom left of the screen.
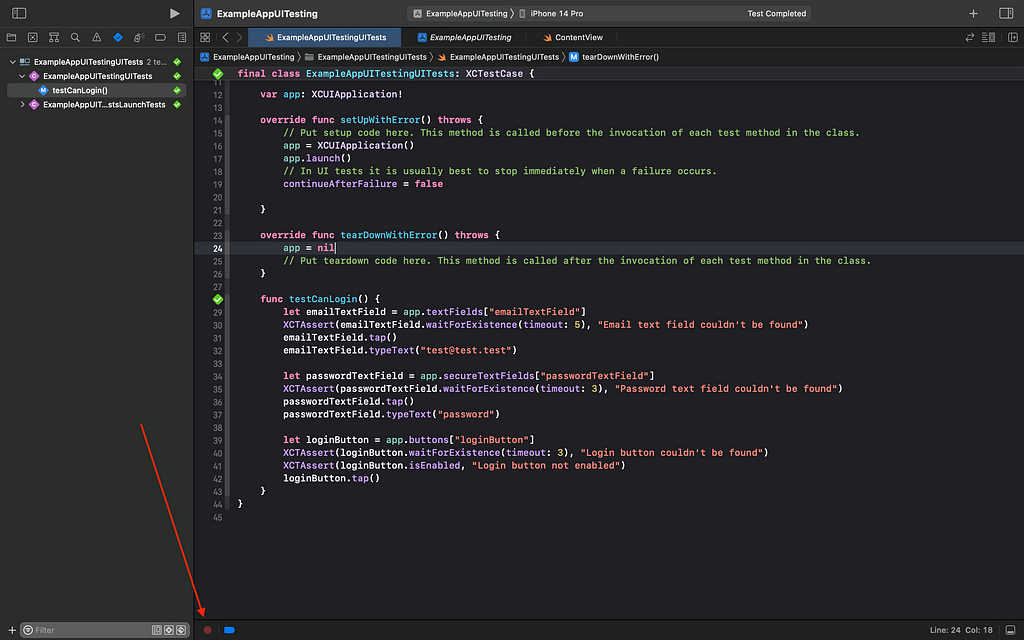
Xcode will now start the Simulator or your real device depending on which device is selected in the toolbar. You can now interact with the app and XCode will try to automatically write the test for what you are doing in the app.
Resources
You can check out the XCode project on my GitHub repository: https://github.com/phoenix-error/ExampleAppUITesting
Also check out Kodeco’s tutorial: https://www.kodeco.com/21020457-ios-unit-testing-and-ui-testing-tutorial
Level Up Coding
Thanks for being a part of our community! Before you go:
- 👏 Clap for the story and follow the author 👉
- 📰 View more content in the Level Up Coding publication
- 💰 Free coding interview course ⇒ View Course
- 🔔 Follow us: Twitter | LinkedIn | Newsletter
🚀👉 Join the Level Up talent collective and find an amazing job
Writing bulletproof apps in SwiftUI was originally published in Level Up Coding on Medium, where people are continuing the conversation by highlighting and responding to this story.
This content originally appeared on Level Up Coding - Medium and was authored by Phoenix Developer
Phoenix Developer | Sciencx (2023-02-21T16:19:53+00:00) Writing bulletproof apps in SwiftUI. Retrieved from https://www.scien.cx/2023/02/21/writing-bulletproof-apps-in-swiftui/
Please log in to upload a file.
There are no updates yet.
Click the Upload button above to add an update.
