This content originally appeared on Telerik Blogs and was authored by Leomaris Reyes
In our fifth .NET MAUI Challenge, we’ll check out the Telerik UI for .NET MAUI Barcode component.
Howdy! ♀️ Welcome to #NetMauiChallenges! Thank you very much for accepting this challenge! These posts will be launched periodically and will be exploring topics that will help you continue to grow in .NET MAUI!
You will see that the challenges focus on simple and very specific but important topics. The goal here is that you can take the time to delve into each one. We want learning to be fun for you, so regardless of the day and the time you are viewing this article, it will only take a few minutes!
How Our Challenges Work
Each challenge has a structure that is easy to understand and that complies with three important points to be of real help for your professional development:
Statement of the challenge: You will always see an image which gives you a description of what the challenge expects from you. After this, you will see three possible answers from which you can only select one.
Solution: In each challenge, you will receive the option that solves the question. It will be hidden so that you first analyze it and then click to see the correct answer with its respective explanation.
Study resources: Once you see the correct answer, each challenge’s solution will have study resources so you can delve deeper into it.
Prefer to Learn via Video?
You can watch a video version of this post here:
Barcode in Telerik UI for .NET MAUI
The Telerik UI for .NET MAUI Barcode enables you to create and show barcodes. You can generate and visualize barcodes in a machine-readable format through the Barcode control by providing numeric or character data.
In this challenge, we will learn to interpret the code and to recognize the types of barcode available!
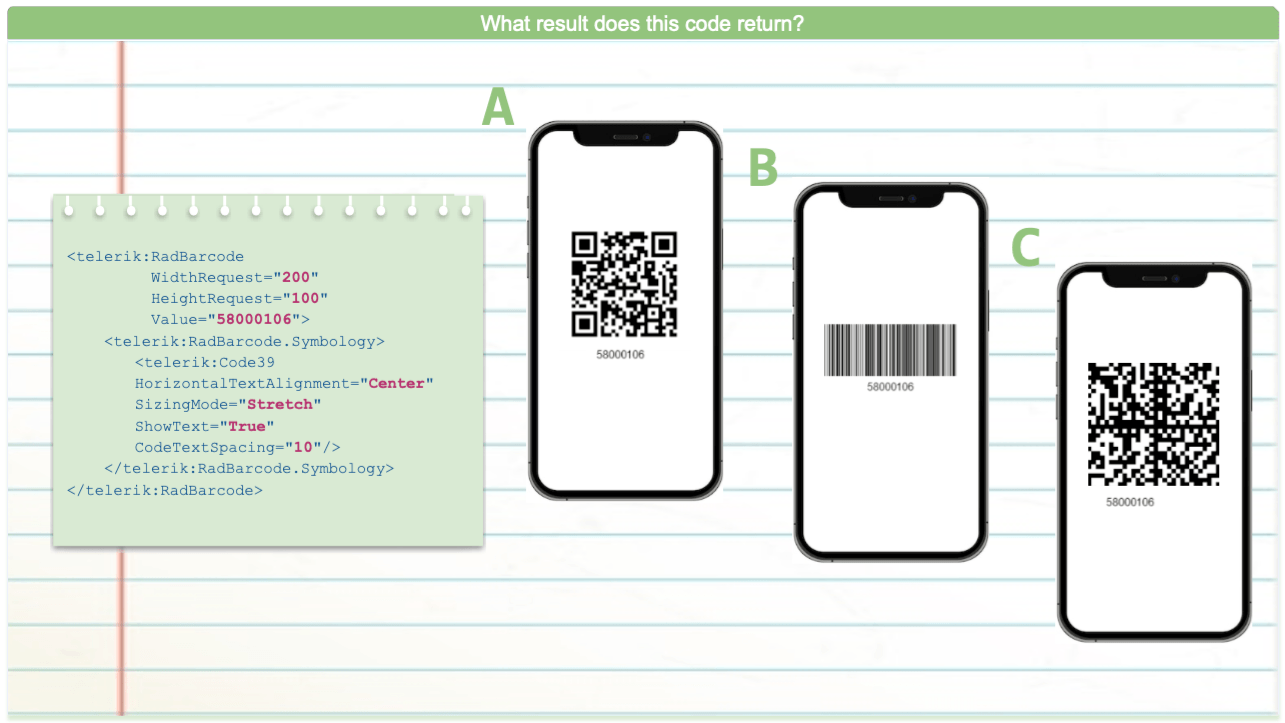
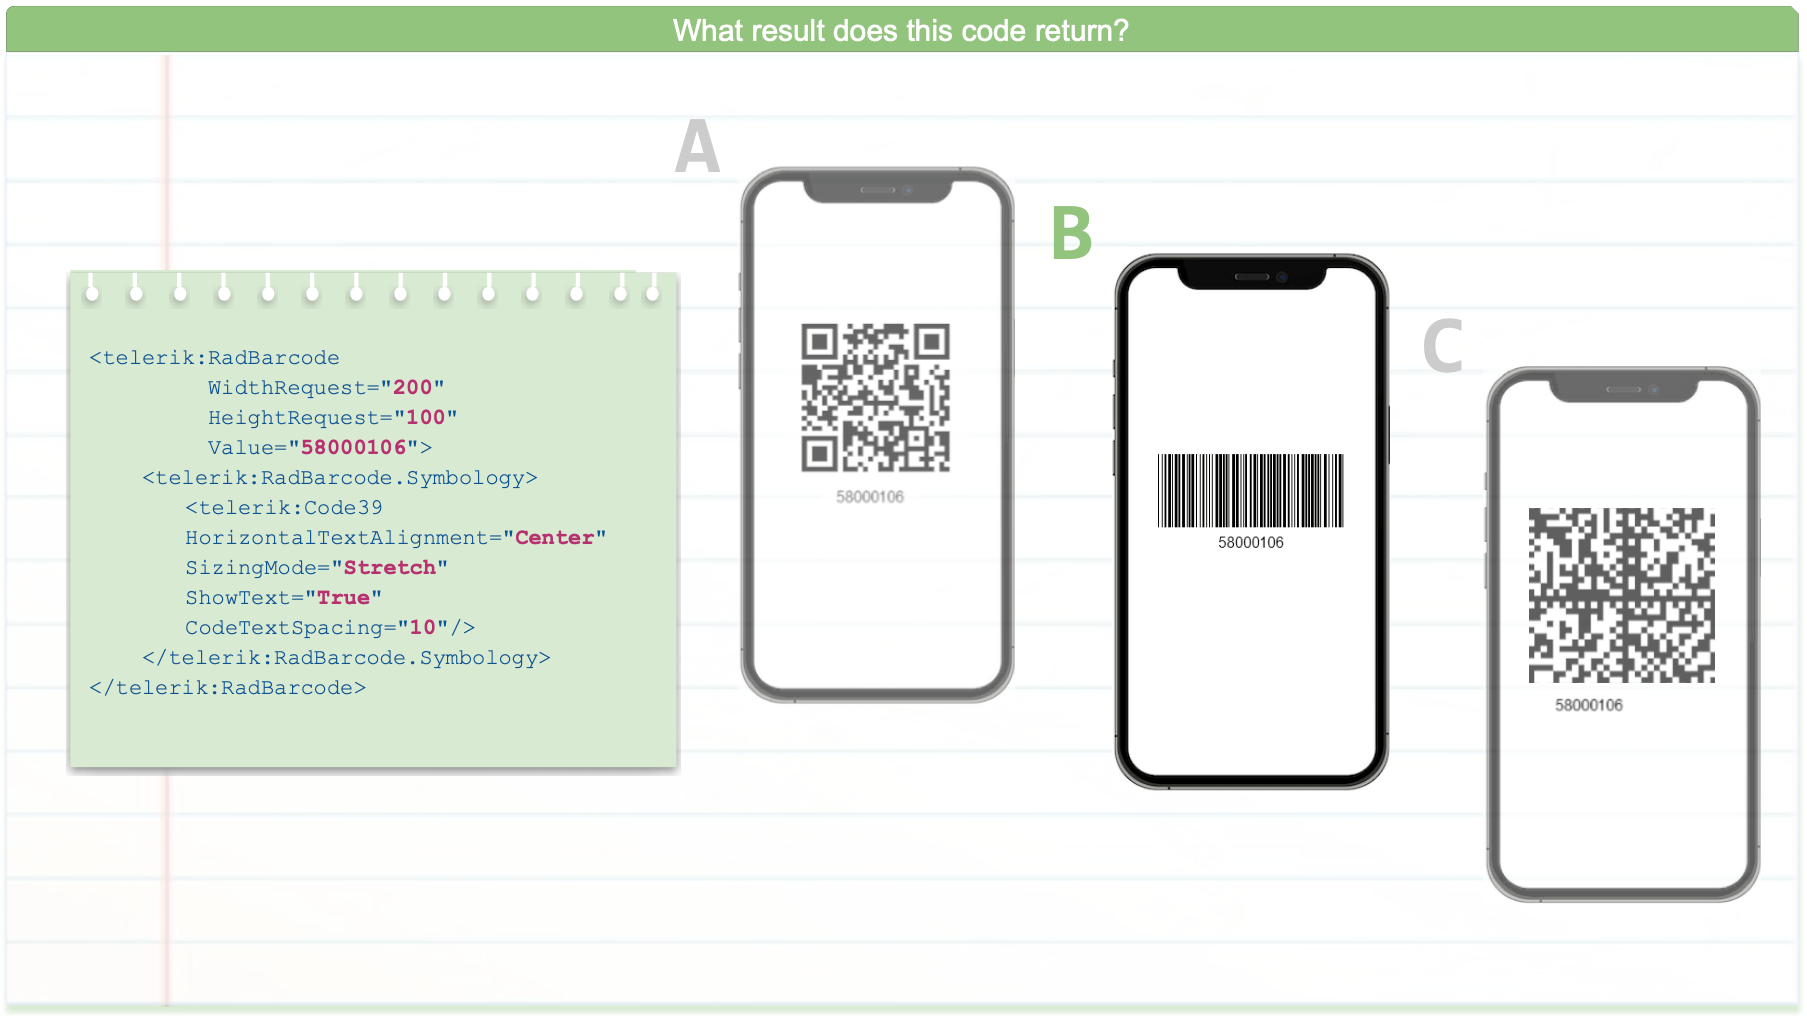
What result does this code return?
<telerik:RadBarcode
         WidthRequest="200"
         HeightRequest="100"
         Value="58000106">
    <telerik:RadBarcode.Symbology>
                <telerik:Code39
                        HorizontalTextAlignment="Center"
                        SizingMode="Stretch"
                        ShowText="True"
                        CodeTextSpacing="10"/>
               </telerik:RadBarcode.Symbology>
</telerik:RadBarcode>
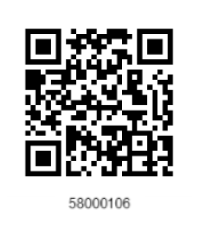
Option A:
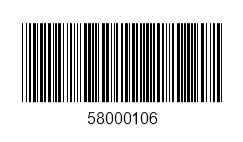
Option B:
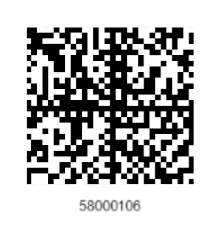
Option C:
Do you already have the answer? Perfect! Please click below to see the solution—here you can see the correct answer and its explanation with supporting materials.
The correct answer is option B!

The correct answer is B due to the following points:
As you can see in the attached portion of code, it refers to a Code39 symbology, which you can identify with the line of code <telerik:Code39>, and you can see that in Option B.
Study Resources
- To know what types of symbology are supported by Telerik Barcode, you can take a look at the article “Value and Symbology for Telerik’s BarCode.”
- Additionally, I leave you the Telerik Barcode Overview where you can find the complete documentation for its implementation.
Wrap-up
We invite you to share this challenge on your networks using the hashtag #NetMauiChallenges.
See you next time! ♀️ I hope you liked it and it was useful!
Thanks for reading!
This content originally appeared on Telerik Blogs and was authored by Leomaris Reyes
Leomaris Reyes | Sciencx (2023-02-23T14:17:00+00:00) .NET MAUI Challenge 5: Telerik Barcode. Retrieved from https://www.scien.cx/2023/02/23/net-maui-challenge-5-telerik-barcode/
Please log in to upload a file.
There are no updates yet.
Click the Upload button above to add an update.

