
This content originally appeared on Level Up Coding - Medium and was authored by Artiom Khalilyaev
Reduce the amount of the boilerplate code in your views!

NSAttributedString is a very powerful element that Apple gives us to develop our apps. With attributed strings, we are able to apply multiple styles to a single string. We can create a bullet lists, apply HTML attributes to the strings, create clickable links and a lot more. This functionality is well known to almost every iOS developer nowadays. In this article, I’m not going to tell you some basic information about attributes or how to apply them to the strings. I want to show you how useful attributed strings can be if they are used to create a UI. This approach will reduce the amount of your code and make it much more simple and readable.
Before we go
Take a look at the following UI:
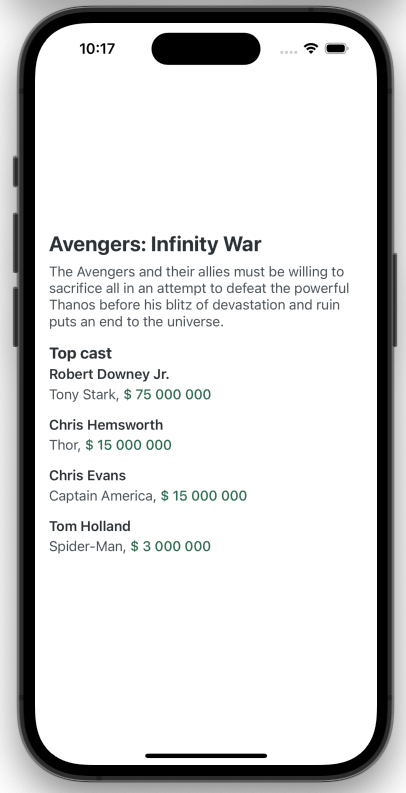
How many labels do you think I used to create this UI? At first, you can think that I used one for a title, another for a description, then added another one for “Top cast” title and so on. I’m sorry to disappoint you, but I used only one label for all this text. In the next chapter of this article, I’m going to show you how to do it with a few lines of code.
Let’s start!
First, we need to create a struct that will keep all data related to the movie. In our case, this is the title, description and info about the actors.
struct MovieInfo {
    let title: String
    let description: String
    let cast: [ActorInfo]
}

struct ActorInfo {
    let character: String
    let name: String
    let revenue: String
}

let movie: MovieInfo = MovieInfo(
    title: "Avengers: Infinity War",
    description: "The Avengers and their allies must be willing to sacrifice all in an attempt to defeat the powerful Thanos before his blitz of devastation and ruin puts an end to the universe.",
    cast: [ActorInfo(character: "Tony Stark", name: "Robert Downey Jr.", revenue: "$ 75 000 000"),
           ActorInfo(character: "Thor", name: "Chris Hemsworth", revenue: "$ 15 000 000"),
           ActorInfo(character: "Captain America", name: "Chris Evans", revenue: "$ 15 000 000"),
           ActorInfo(character: "Spider-Man", name: "Tom Holland", revenue: "$ 3 000 000")]
 )
When data is all set, we can start creating a view code. I’m not a fan of creating views inside UIViewController, so I’m going to create a new UIView subclass with a label inside.
class MainView: UIView {

  let label: UILabel = {
      let label = UILabel()
      label.translatesAutoresizingMaskIntoConstraints = false
      label.numberOfLines = 0
      return label
  }()

  init() {
      super.init(frame: .zero)
      setup()
  }

  required init?(coder: NSCoder) {
      super.init(coder: coder)
      setup()
  }

  func setup() {
      backgroundColor = .white
      addSubview(label)
      NSLayoutConstraint.activate([
        label.topAnchor.constraint(equalTo: safeAreaLayoutGuide.topAnchor, constant: 32),
        label.leadingAnchor.constraint(equalTo: leadingAnchor, constant: 16),
        label.trailingAnchor.constraint(equalTo: trailingAnchor, constant: -16),
        label.bottomAnchor.constraint(equalTo: safeAreaLayoutGuide.bottomAnchor, constant: -32)
      ])
  }

}
In the code above, I created a label and set the value of .numberOfLines property to 0 to remove any maximum limit, and use as many lines as needed. Then in the setup() method I added label as a subview and gave it some constraints. The UI part is done, we needed only one label, and it’s here. Now we can start working with attributed string!
Setting up attributed string
Now we are getting to the main part of this article. We are going to set up attributed string to display all those data in a single label.
First, we need to create a method for setting movie data into a view. I called it set(_ movie: MovieInfo).
func set(_ movie: MovieInfo) {
    let result = NSMutableAttributedString()
}
In this method, I’ve already created a result variable. We are going to use this string as a container in which we will add strings for the title, description and cast. It’s important to create NSMutableAttributedString and not NSAttributedString, so you can add another attributed strings to it.
Now it’s time to start creating strings and adding them to a result. But before that, let’s create resources that we need, i.e. fonts and colors. I will create two structs with static constants inside:
struct Colors {
    static let textPrimary: UIColor = #colorLiteral(red: 0.172, green: 0.193, blue: 0.212, alpha: 1)
    static let textSecondaty: UIColor = #colorLiteral(red: 0.286, green: 0.313, blue: 0.341, alpha: 1)
    static let greenText: UIColor = #colorLiteral(red: 0.176, green: 0.415, blue: 0.309, alpha: 1)
}

struct Fonts {
    static let title: UIFont = .systemFont(ofSize: 24, weight: .bold)
    static let description: UIFont = .systemFont(ofSize: 16, weight: .regular)
    static let subtitle: UIFont = .systemFont(ofSize: 18, weight: .bold)
    static let actorName: UIFont = .systemFont(ofSize: 16, weight: .semibold)
    static let actorCharacter: UIFont = .systemFont(ofSize: 16, weight: .regular)
    static let actorRevenue: UIFont = .systemFont(ofSize: 16, weight: .medium)
}
I suggest that you create such resources every time you work with a UI. It’s a way better than using hardcoded values. But, let’s not get off topic. We need to focus on attributed strings at the moment.
First, need to create a string for the title and add it to the result string. Right after it, add a string for the description and for the “Top cast” subtitle:
func set(_ movie: MovieInfo) {
   let result = NSMutableAttributedString()
   result.append(NSAttributedString(
       string: "\(movie.title)\n",
       attributes: [.font : Fonts.title, .foregroundColor : Colors.textPrimary])
   )
   result.append(NSAttributedString(
       string: "\(movie.description)\n",
       attributes: [.font : Fonts.description, .foregroundColor : Colors.textSecondaty])
   )
   result.append(NSAttributedString(
       string: "Top cast:\n",
       attributes: [.font : Fonts.subtitle, .foregroundColor : Colors.textPrimary])
   )
}
We don’t have spacings at the moment, but don’t worry, I’m going to cover it when we are done with all attributed parts of this string.
We are almost done. We just need to set up text blocks with information about the actors. Since we have an array of actors, it makes sense to create a function that will generate a text block for a given actor. With such a function, we will be able to use it in a for loop to generate text blocks for each actor.
func createTextBlock(for actor: ActorInfo) -> NSAttributedString {
   let result = NSMutableAttributedString()
   result.append(NSAttributedString(
     string: actor.name + "\n",
     attributes: [.font : Fonts.actorName,
                  .foregroundColor : Colors.textPrimary])
   )
   result.append(NSAttributedString(
     string: actor.character + ", ",
     attributes: [.font : Fonts.actorCharacter,
                  .foregroundColor : Colors.textSecondaty])
   )
   result.append(NSAttributedString(
     string: actor.revenue + "\n",
     attributes: [.font : Fonts.actorRevenue,
                  .foregroundColor : Colors.greenText])
   )

   let paragraphStyle = NSMutableParagraphStyle()
   paragraphStyle.lineSpacing = 4

   result.addAttribute(.paragraphStyle, value: paragraphStyle, range: NSRange(location: 0, length: result.length))
   return result
}
We are using NSMutableParagraphStyle to add some spacing between the lines with the name of the actor and the character he played.
Now we need to generate text blocks for all actors, to do so add the following code at the end of the set(_ movie: MovieInfo) function:
movie.cast.forEach { result.append(createTextBlock(for: $0)) }Our attributed string is done! Let’s set it as a label text and see how it looks:
label.attributedText = result
Oh… Looks like we are missing something…
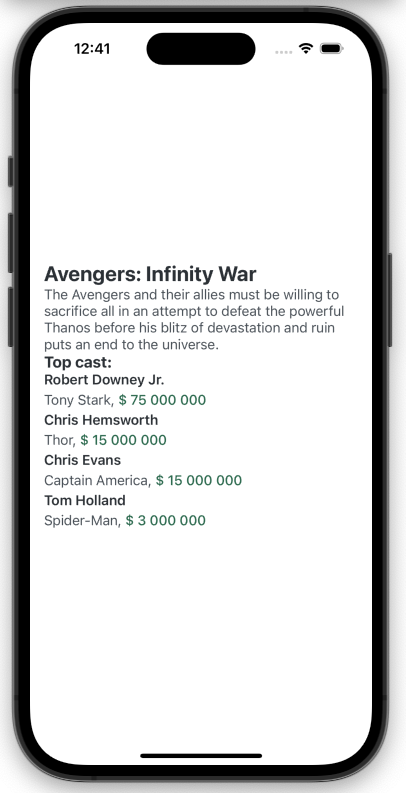
We forgot about spacings. So let’s add them right now!
Spacings
To add a spacing, we just need to insert a string with a line break inside. But what to do if we want to configure spacings height? To do so, we need to use NSMutableParagraphStyle again. With its help, we will be able to set line height that will define our spacing size. I’m going to add spacing as a static method in NSAttributedString extension:
extension NSAttributedString {
    static func spacing(_ size: CGFloat) -> NSAttributedString {
        let paragraphStyle = NSMutableParagraphStyle()
        paragraphStyle.minimumLineHeight = size
        paragraphStyle.maximumLineHeight = size
        let spacing = NSAttributedString(string: "\n", attributes: [.paragraphStyle : paragraphStyle])
        return spacing
    }
}
It’s important to set values for both minimumLineHeight and maximumLineHeight properties.
To use that function, you just have to pass it in .append() method of the NSMutableAttributedString. I’m going to add some spacing after the title, description, subtitle and each text block. You can add the wherever you want, just add it like this:
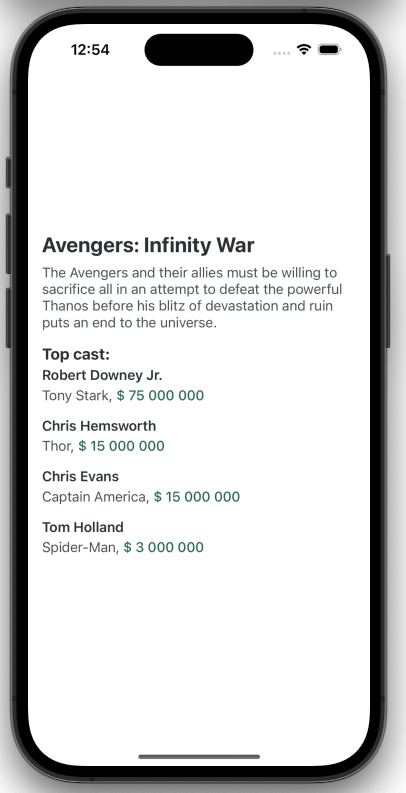
result.append(.spacing(8))
With spacings, our label looks a way better:
Conclusion
As you can see, NSAttributedString is a very powerful component, Apple provides us with. With its help, we managed to put 5 different texts with different attributes in a single label.
Source code with comments can be found here.
Thanks for your time, I hope you found this article useful. See you later!
Level Up Coding
Thanks for being a part of our community! Before you go:
- 👏 Clap for the story and follow the author 👉
- 📰 View more content in the Level Up Coding publication
- 💰 Free coding interview course ⇒ View Course
- 🔔 Follow us: Twitter | LinkedIn | Newsletter
🚀👉 Join the Level Up talent collective and find an amazing job
Power of the NSAttributedString was originally published in Level Up Coding on Medium, where people are continuing the conversation by highlighting and responding to this story.
This content originally appeared on Level Up Coding - Medium and was authored by Artiom Khalilyaev
Artiom Khalilyaev | Sciencx (2023-02-24T20:19:49+00:00) Power of the NSAttributedString. Retrieved from https://www.scien.cx/2023/02/24/power-of-the-nsattributedstring/
Please log in to upload a file.
There are no updates yet.
Click the Upload button above to add an update.