
This content originally appeared on DEV Community and was authored by NJ
step 1 : Create react project

step 2 : run the app

step 3 : create register.jsx

step 4 : In order to use bootstrap add cdn links in public/index.html
Copy-paste the stylesheet into your
before all other stylesheets to load our CSS.<link href="https://cdn.jsdelivr.net/npm/bootstrap@5.0.2/dist/css/bootstrap.min.css" rel="stylesheet"
integrity="sha384-EVSTQN3/azprG1Anm3QDgpJLIm9Nao0Yz1ztcQTwFspd3yD65VohhpuuCOmLASjC" crossorigin="anonymous">
add below script in body
<script src="https://cdn.jsdelivr.net/npm/bootstrap@5.0.2/dist/js/bootstrap.bundle.min.js" integrity="sha384-MrcW6ZMFYlzcLA8Nl+NtUVF0sA7MsXsP1UyJoMp4YLEuNSfAP+JcXn/tWtIaxVXM" crossorigin="anonymous"></script>
index.html look like below
<!DOCTYPE html>
<html lang="en">
<head>
<meta charset="utf-8" />
<link rel="icon" href="%PUBLIC_URL%/favicon.ico" />
<meta name="viewport" content="width=device-width, initial-scale=1" />
<meta name="theme-color" content="#000000" />
<meta name="description" content="Web site created using create-react-app" />
<link href="https://cdn.jsdelivr.net/npm/bootstrap@5.0.2/dist/css/bootstrap.min.css" rel="stylesheet"
    integrity="sha384-EVSTQN3/azprG1Anm3QDgpJLIm9Nao0Yz1ztcQTwFspd3yD65VohhpuuCOmLASjC" crossorigin="anonymous">
<link rel="apple-touch-icon" href="%PUBLIC_URL%/logo192.png" />
<!--
manifest.json provides metadata used when your web app is installed on a
user's mobile device or desktop. See https://developers.google.com/web/fundamentals/web-app-manifest/
-->
<link rel="manifest" href="%PUBLIC_URL%/manifest.json" />
<!--
Notice the use of %PUBLIC_URL% in the tags above.
It will be replaced with the URL of the `public` folder during the build.
Only files inside the `public` folder can be referenced from the HTML.
Unlike "/favicon.ico" or "favicon.ico", "%PUBLIC_URL%/favicon.ico" will
work correctly both with client-side routing and a non-root public URL.
Learn how to configure a non-root public URL by running `npm run build`.
-->
<title>React App</title>
</head>
<body>
<noscript>You need to enable JavaScript to run this app.</noscript>
<div id="root"></div>
<!--
This HTML file is a template.
If you open it directly in the browser, you will see an empty page.
You can add webfonts, meta tags, or analytics to this file.
The build step will place the bundled scripts into the <body> tag.
To begin the development, run `npm start` or `yarn start`.
To create a production bundle, use `npm run build` or `yarn build`.
-->
<script src="https://cdn.jsdelivr.net/npm/bootstrap@5.0.2/dist/js/bootstrap.bundle.min.js"
integrity="sha384-MrcW6ZMFYlzcLA8Nl+NtUVF0sA7MsXsP1UyJoMp4YLEuNSfAP+JcXn/tWtIaxVXM"
crossorigin="anonymous"></script>
</body>
</html>
install axios
![]()
create service folder and create file user.service.js
user.service.js
import axios from "axios";
const API_URL = "http://localhost:8080";

class UserService {
    saveUser(user) {
        return axios.post(API_URL + "/saveUser", user);
    }
}

export default new UserService
RegisterForm.jsx
import React, { useState } from 'react'
import userService from './service/user.service';
function RegisterForm() {
const [user, setUser] = useState({
userName: "",
email: "",
mobile: "",
address: "",
});
const [msg, setMsg] = useState("")
const handleChange = (e) => {
const value = e.target.value;
setUser({ ...user, [e.target.name]: value })
}
const RegisterUser = (e) => {
e.preventDefault();
console.log(user);
userService.saveUser(user)
.then((res) => {
console.log("User Added Successfully");
setMsg("Used Added Sucessfully");
setUser({
userName: "",
email: "",
mobile: "",
address: "",
})
}).catch((error) => {
console.log(error);
});
}
return (
<>
<div className='container mt-3'>
<div className='row'>
<div className='col-md-6 offset-md-3'>
<div className='card'>
<div className='card-header fs-3 text-center'>
Register User
</div>
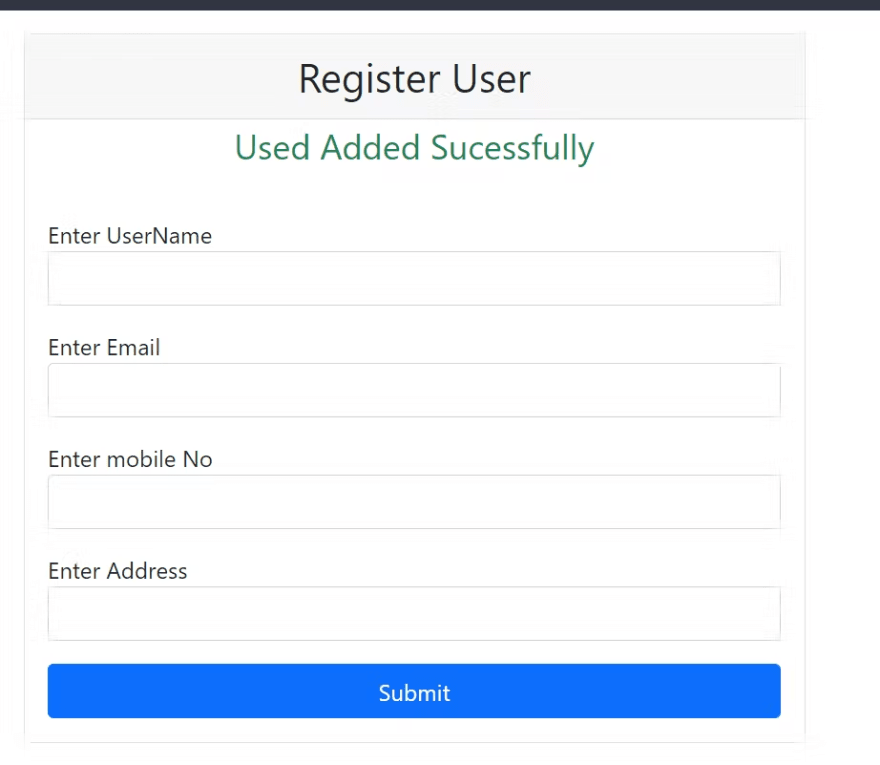
{msg && <p className="fs-4 text-center text-success">{msg}</p>}
<div className='card-body'>
<form onSubmit={(e) => RegisterUser(e)}>
<div className='mb-3'>
<label>Enter UserName</label>
<input type="text" name="userName" className='form-control' onChange={(e) => handleChange(e)}
value={user.userName} />
</div>
<div className='mb-3'>
<label>Enter Email</label>
<input type="text" name="email" className='form-control'
onChange={(e) => handleChange(e)}
value={user.email} />
</div>
<div className='mb-3'>
<label>Enter mobile No</label>
<input type="text" name="mobile" className='form-control'
onChange={(e) => handleChange(e)}
value={user.mobile} />
</div>
<div className='mb-3'>
<label>Enter Address</label>
<input type="text" name="address" className='form-control'
onChange={(e) => handleChange(e)}
value={user.address} />
</div>
<button className="btn btn-primary col-md-12">Submit</button>
</form>
</div>
</div>
</div>
</div>
</div>
</>
)
}
export default RegisterForm

Create Spring boot project with following dependencies

Directory Structure

pom.xml
<?xml version="1.0" encoding="UTF-8"?>
<project xmlns="http://maven.apache.org/POM/4.0.0" xmlns:xsi="http://www.w3.org/2001/XMLSchema-instance"
    xsi:schemaLocation="http://maven.apache.org/POM/4.0.0 https://maven.apache.org/xsd/maven-4.0.0.xsd">
    <modelVersion>4.0.0</modelVersion>
    <parent>
        <groupId>org.springframework.boot</groupId>
        <artifactId>spring-boot-starter-parent</artifactId>
        <version>3.0.5</version>
        <relativePath/> <!-- lookup parent from repository -->
    </parent>
    <groupId>com.example</groupId>
    <artifactId>SpringBootReact</artifactId>
    <version>0.0.1-SNAPSHOT</version>
    <name>SpringBootReact</name>
    <description>Demo project for Spring Boot</description>
    <properties>
        <java.version>17</java.version>
    </properties>
    <dependencies>
        <dependency>
            <groupId>org.springframework.boot</groupId>
            <artifactId>spring-boot-starter-data-jpa</artifactId>
        </dependency>
        <dependency>
            <groupId>org.springframework.boot</groupId>
            <artifactId>spring-boot-starter-web</artifactId>
        </dependency>

        <dependency>
            <groupId>com.mysql</groupId>
            <artifactId>mysql-connector-j</artifactId>
            <scope>runtime</scope>
        </dependency>
        <dependency>
            <groupId>org.projectlombok</groupId>
            <artifactId>lombok</artifactId>
            <optional>true</optional>
        </dependency>
        <dependency>
            <groupId>org.springframework.boot</groupId>
            <artifactId>spring-boot-starter-test</artifactId>
            <scope>test</scope>
        </dependency>
    </dependencies>

    <build>
        <plugins>
            <plugin>
                <groupId>org.springframework.boot</groupId>
                <artifactId>spring-boot-maven-plugin</artifactId>
                <configuration>
                    <excludes>
                        <exclude>
                            <groupId>org.projectlombok</groupId>
                            <artifactId>lombok</artifactId>
                        </exclude>
                    </excludes>
                </configuration>
            </plugin>
        </plugins>
    </build>

</project>
application.properties
spring.datasource.url=jdbc:mysql://localhost:3306/new
spring.datasource.username=root
spring.datasource.password=root


spring.jpa.hibernate.ddl-auto=update
User.java
package com.example.demo.model;

import jakarta.persistence.Entity;
import jakarta.persistence.GeneratedValue;
import jakarta.persistence.GenerationType;
import jakarta.persistence.Id;
import jakarta.persistence.Table;
import lombok.AllArgsConstructor;
import lombok.Data;
import lombok.NoArgsConstructor;

@Data
@AllArgsConstructor
@NoArgsConstructor
@Entity
@Table(name = "user_tab")
public class User {

    @Id
    @GeneratedValue(strategy = GenerationType.IDENTITY)
    private Integer id;

    private String userName;

    private String address;

    private String mobile;

    private String email;
}
UserRepo.java
package com.example.demo.repo;

import org.springframework.data.jpa.repository.JpaRepository;

import com.example.demo.model.User;

public interface UserRepo extends JpaRepository<User, Integer>{

}
UserController.java
package com.example.demo.controller;

import org.springframework.beans.factory.annotation.Autowired;
import org.springframework.http.HttpStatus;
import org.springframework.http.ResponseEntity;
import org.springframework.web.bind.annotation.CrossOrigin;
import org.springframework.web.bind.annotation.PostMapping;
import org.springframework.web.bind.annotation.RequestBody;
import org.springframework.web.bind.annotation.RestController;

import com.example.demo.model.User;
import com.example.demo.repo.UserRepo;

@CrossOrigin(origins = "http://localhost:3000")
@RestController
public class UserController {

    @Autowired
    private UserRepo repo;

    @PostMapping("/saveUser")
    public ResponseEntity<String> saveUser(@RequestBody User user){
        repo.save(user);
        return new ResponseEntity<String>("User Saved",HttpStatus.OK);
    }
}
Now run both react and spring boot apps
enter the form data
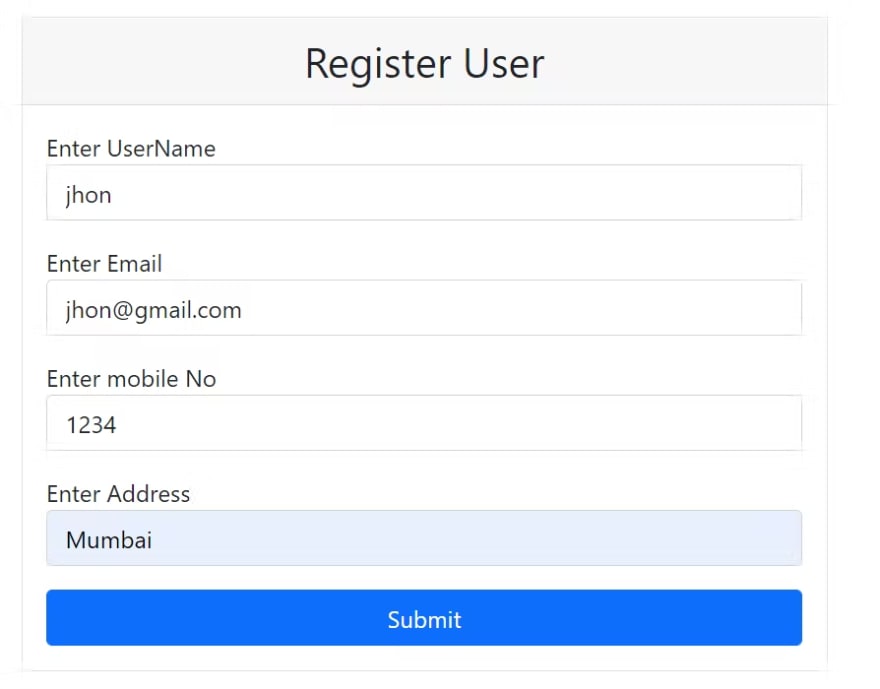
click on submit
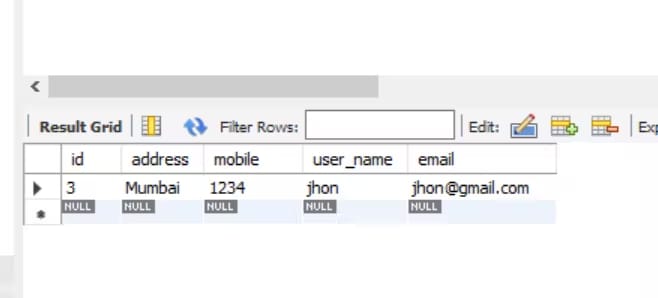
See your database
This content originally appeared on DEV Community and was authored by NJ
NJ | Sciencx (2023-03-27T15:06:09+00:00) how to save react form data into database using Spring boot. Retrieved from https://www.scien.cx/2023/03/27/how-to-save-react-form-data-into-database-using-spring-boot/
Please log in to upload a file.
There are no updates yet.
Click the Upload button above to add an update.