This content originally appeared on Telerik Blogs and was authored by Vyom Srivastava
Learn the process of including a custom CSS file in your Angular application and the various options for downloading and including the file.
If you’re building an application with Angular, you may need to change the styling in your templates. To do that, you’ll need to insert some custom CSS into the template. Angular has many built-in components, but they might not be perfect for every use case. You may want to use your CSS or a different UI library.
In this post, we’ll examine the process of including a custom CSS file in your Angular application and the various options for downloading and including the file.
Why Do You Need To Insert Custom CSS in Your Angular app?
Here are a few reasons why you might want to use custom CSS in your Angular app:
To Match the Styles of an Existing Website
It’s important to match the styles of the website. This way, your app will blend in with the rest of the site. Custom CSS can help you achieve this.
To Create a Consistent Look Across Multiple Angular Apps
If you’re developing multiple Angular apps, you may want to use custom CSS to create a consistent look and feel across all of your apps. This way, users will know they’re using your apps, even if they’re not all identical.
To Add Your Personal Touch to an App
Custom CSS can be a great way to add your personal touch to an Angular app. Maybe you want to use a specific color scheme to add some custom fonts. Whatever you want to do, custom CSS can help you achieve it.
How To Insert Custom CSS Inside Your Angular App
Step 1: Create a Simple Angular Project
First, use the following command in your command prompt to install Angular.
npm install -g @angular/cli
Now let’s create the new project using the following command:
ng new my-app
To run the application using the following command:
cd my-app
ng serve --open
It’s done! Your app should automatically open in the browser.
Step 2: Apply a Custom Font
Now to use a custom font, let’s add some headings and paragraphs in the src/index.html file:
<!doctype html>
<html lang="en">
<head>
  <meta charset="utf-8">
  <title>MyApp</title>
  <base href="/">
  <meta name="viewport" content="width=device-width, initial-scale=1">
  <link rel="icon" type="image/x-icon" href="favicon.ico">
</head>
<body>
  <div class="login-box">
    <h2>Login</h2>
    <form>
      <div class="user-box">
        <input type="text" name="" required="">
        <label>Username</label>
      </div>
      <div class="user-box">
        <input type="password" name="" required="">
        <label>Password</label>
      </div>
      <a href="#">
        <span></span>
        <span></span>
        <span></span>
        <span></span>
        Submit
      </a>
    </form>
  </div>
</body>
</html>
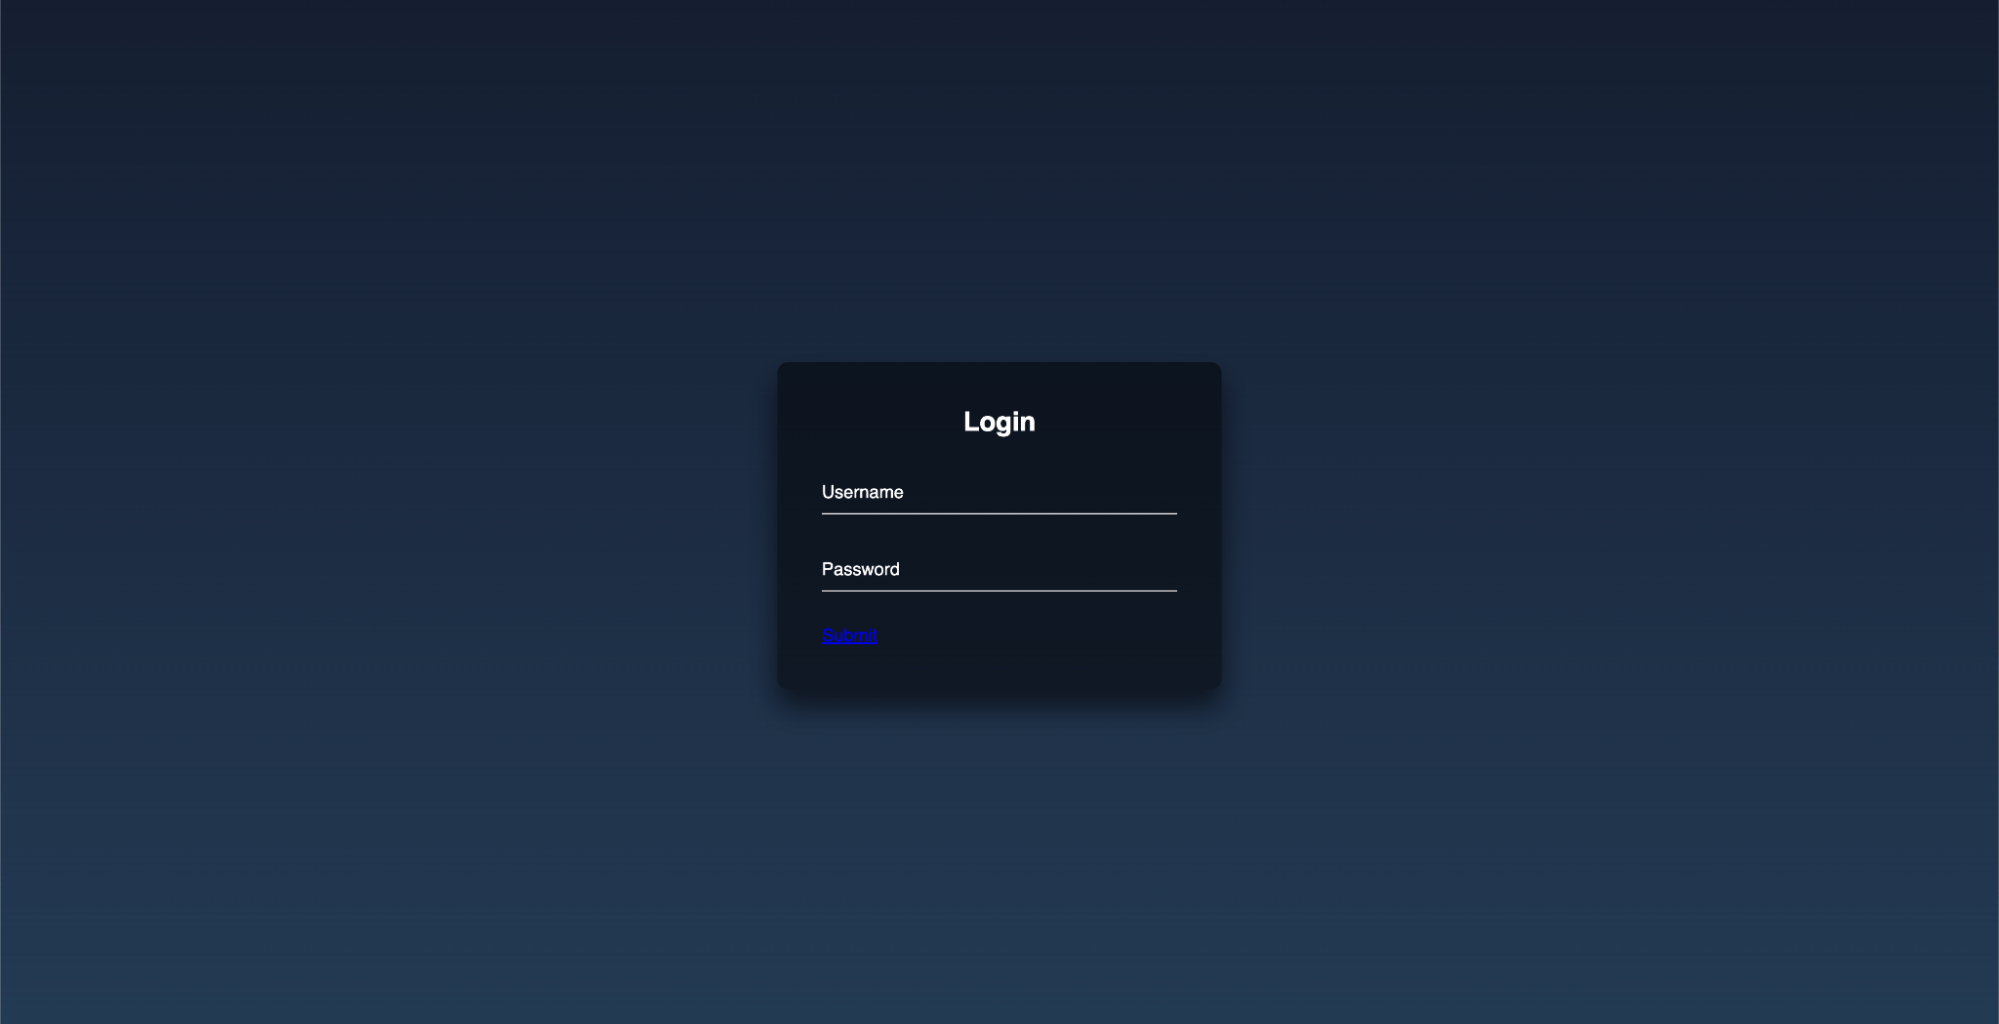
The output:

As you can see, there is no CSS in the file now, so let’s add it back in through a custom CSS file.
Step 3a: Add a CSS File to the Project
One way to add custom CSS is by adding a CSS file to the project.
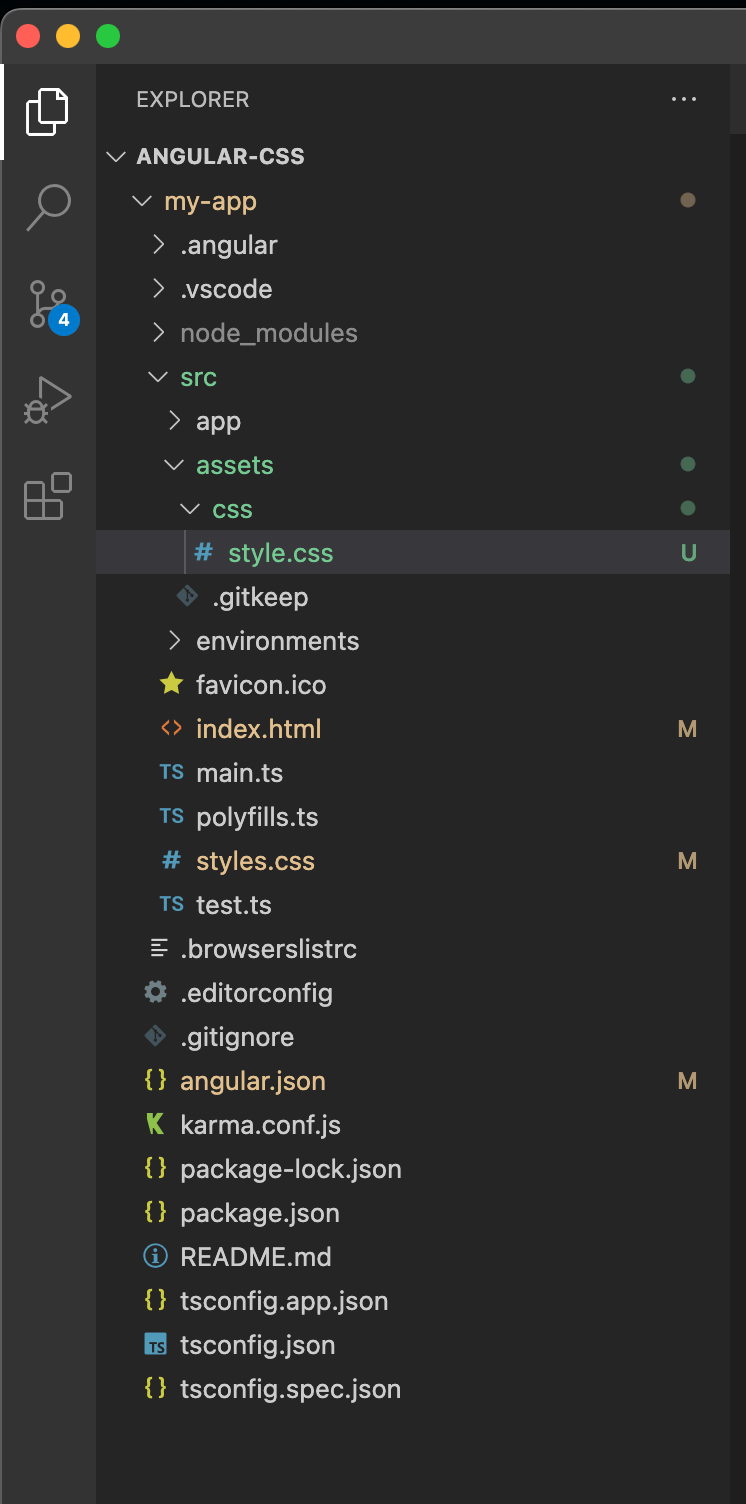
Create a file called style.css in folder src/assets/css and paste the below code:
{
    height: 100%;
  }
  body {

    font-family: sans-serif;
    background: linear-gradient(#141e30, #243b55);
  }

  .login-box {
    position: absolute;
    top: 50%;
    left: 50%;
    width: 400px;
    padding: 40px;
    transform: translate(-50%, -50%);
    background: rgba(0,0,0,.5);
    box-sizing: border-box;
    box-shadow: 0 15px 25px rgba(0,0,0,.6);
    border-radius: 10px;
  }

  .login-box h2 {
    margin: 0 0 30px;
    padding: 0;
    color: #fff;
    text-align: center;
  }

  .login-box .user-box {
    position: relative;
  }

  .login-box .user-box input {
    width: 100%;
    padding: 10px 0;
    font-size: 16px;
    color: #fff;
    margin-bottom: 30px;
    border: none;
    border-bottom: 1px solid #fff;
    outline: none;
    background: transparent;
  }
  .login-box .user-box label {
    position: absolute;
    top:0;
    left: 0;
    padding: 10px 0;
    font-size: 16px;
    color: #fff;
    pointer-events: none;
    transition: .5s;
  }
Step 3b: Insert Custom CSS in Your Angular App by Updating the Global CSS File
In this method, we will add a CSS file to the assets folder and import it into a global style.css file. This will give us the ability to use the custom CSS file in our project. Since we have already added the file in the folder, we just need to update the code.

First, go to the main CSS file called styles.css in the src root folder. This style.css file is a globally declared file. Here you will import all your CSS links like the below CSS code.
@import './assets/css/styles.css';
If you have multiple CSS files, then you have to import all of them one by one.
Now you can check and see if the page is working or not by loading the index page again:

Step 3c: Insert Custom CSS by Updating Angular.json
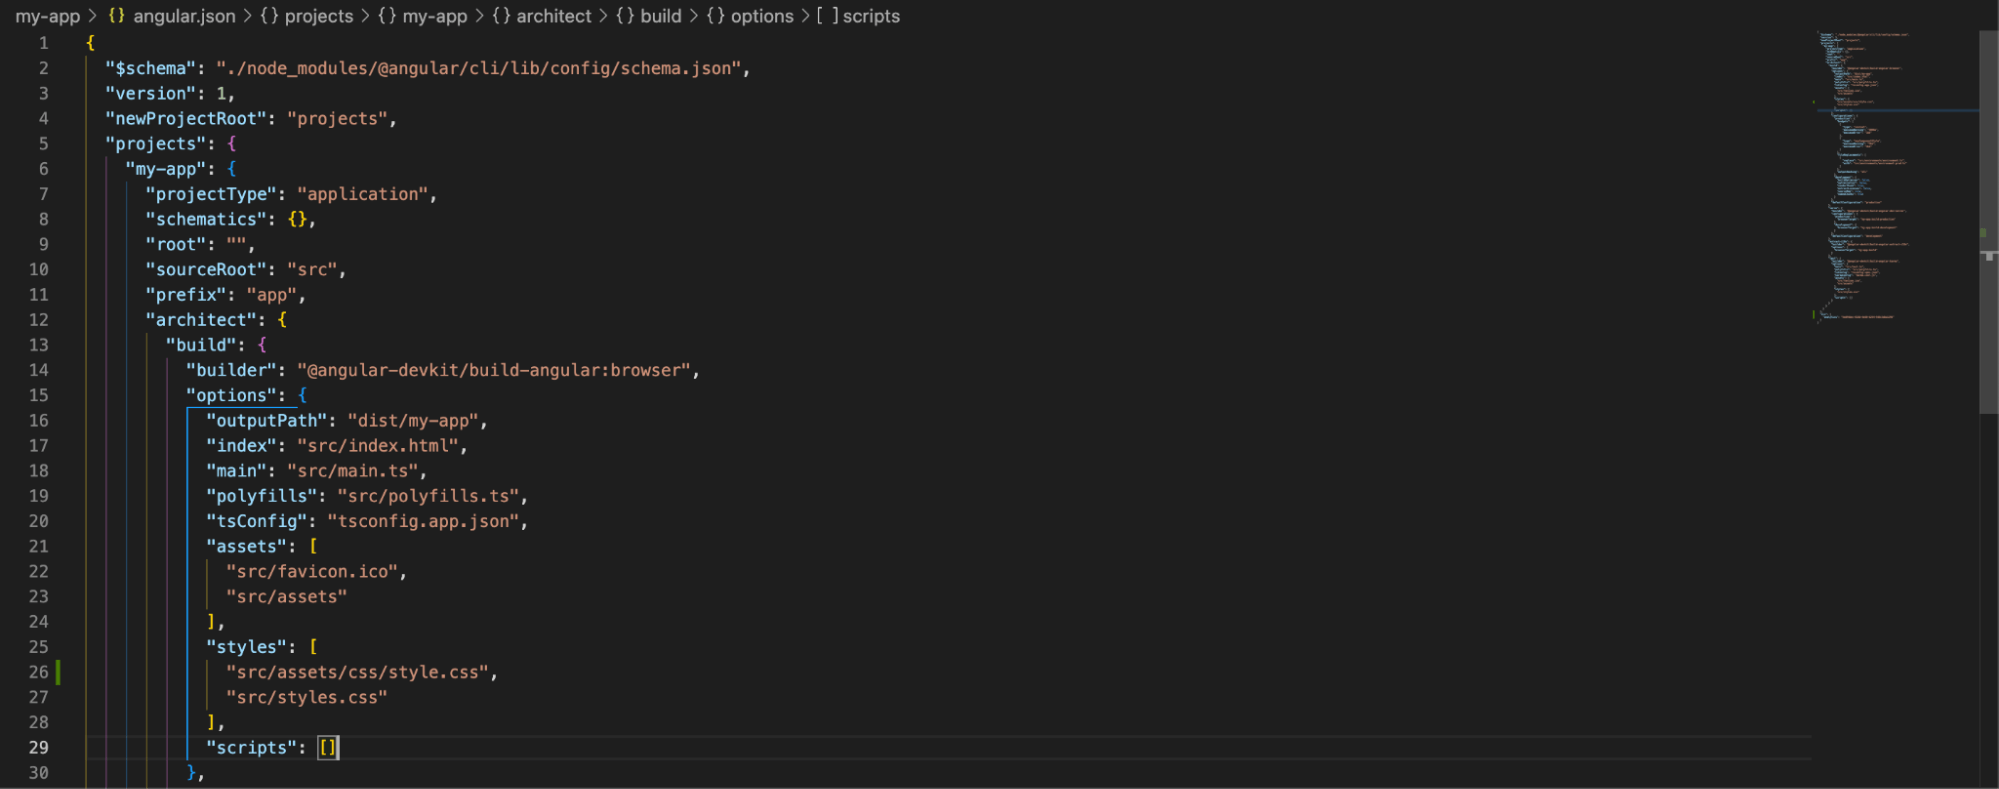
In this method, we will add a path of the CSS file in style tag in angular.json file like this:

 "styles": [
              "src/styles.css",
              "src/assets/css/styles.css"
            ],
Note: If the app isn’t working after adding the path, close the app using Ctrl + C and restart the Angular app using the following command.
ng serve –open
Tips: All of the above mentioned methods also work if you want to add custom JavaScript but remember to add the path of the JavaScript file in the script tag in the angular.json file. This will ensure
that your JavaScript file is loaded and can be used by your Angular application.
An Easier Option
Using a UI component library like Progress Kendo UI for Angular allows elaborate styling and building of a cohesive app (or suite of apps) extremely efficiently. Something like this would be a good thing to consider to take your business to the next level.
Final Words
We hope you liked this article on how to insert custom CSS in your Angular app. If you want to learn more about Angular and how to develop your next Angular app, check out this previous Angular post. Happy coding!
This content originally appeared on Telerik Blogs and was authored by Vyom Srivastava
Vyom Srivastava | Sciencx (2023-05-22T07:36:02+00:00) How to Insert Custom CSS in Your Angular App. Retrieved from https://www.scien.cx/2023/05/22/how-to-insert-custom-css-in-your-angular-app/
Please log in to upload a file.
There are no updates yet.
Click the Upload button above to add an update.
