This content originally appeared on Telerik Blogs and was authored by Leomaris Reyes
In iOS, we are able to ensure our design is not clipped by rounded corners or other design variances. See how to control this in your .NET MAUI app via the safe area guide.
As you may know, there are many devices with varying visual aspects, such as some having rounded edges while others do not. Due to this variety of designs, the safe area layout guide exists to ensure that the design is not clipped. This article will teach you how to manage and adapt the safe area in iOS to meet your specific requirements.
The explanation will be divided into the following points:
- What is the safe area layout guide?
- How can I identify it
- How can I use it in code?
- Customizing the safe area layout guide
What is the Safe Area Layout Guide?
The safe area layout guide is the space on the device’s screen that ensures your app’s content is not clipped due to some design factor or physical limitation of the device. Among the factors that can affect the application’s content are the following:
- Rounded device corners
- Home indicator
- Sensor housing (on some iPhone models)
In .NET MAUI, the content of your application is automatically added to a space defined as safe area for all devices by default.
How Can I Identify the Safe Area?
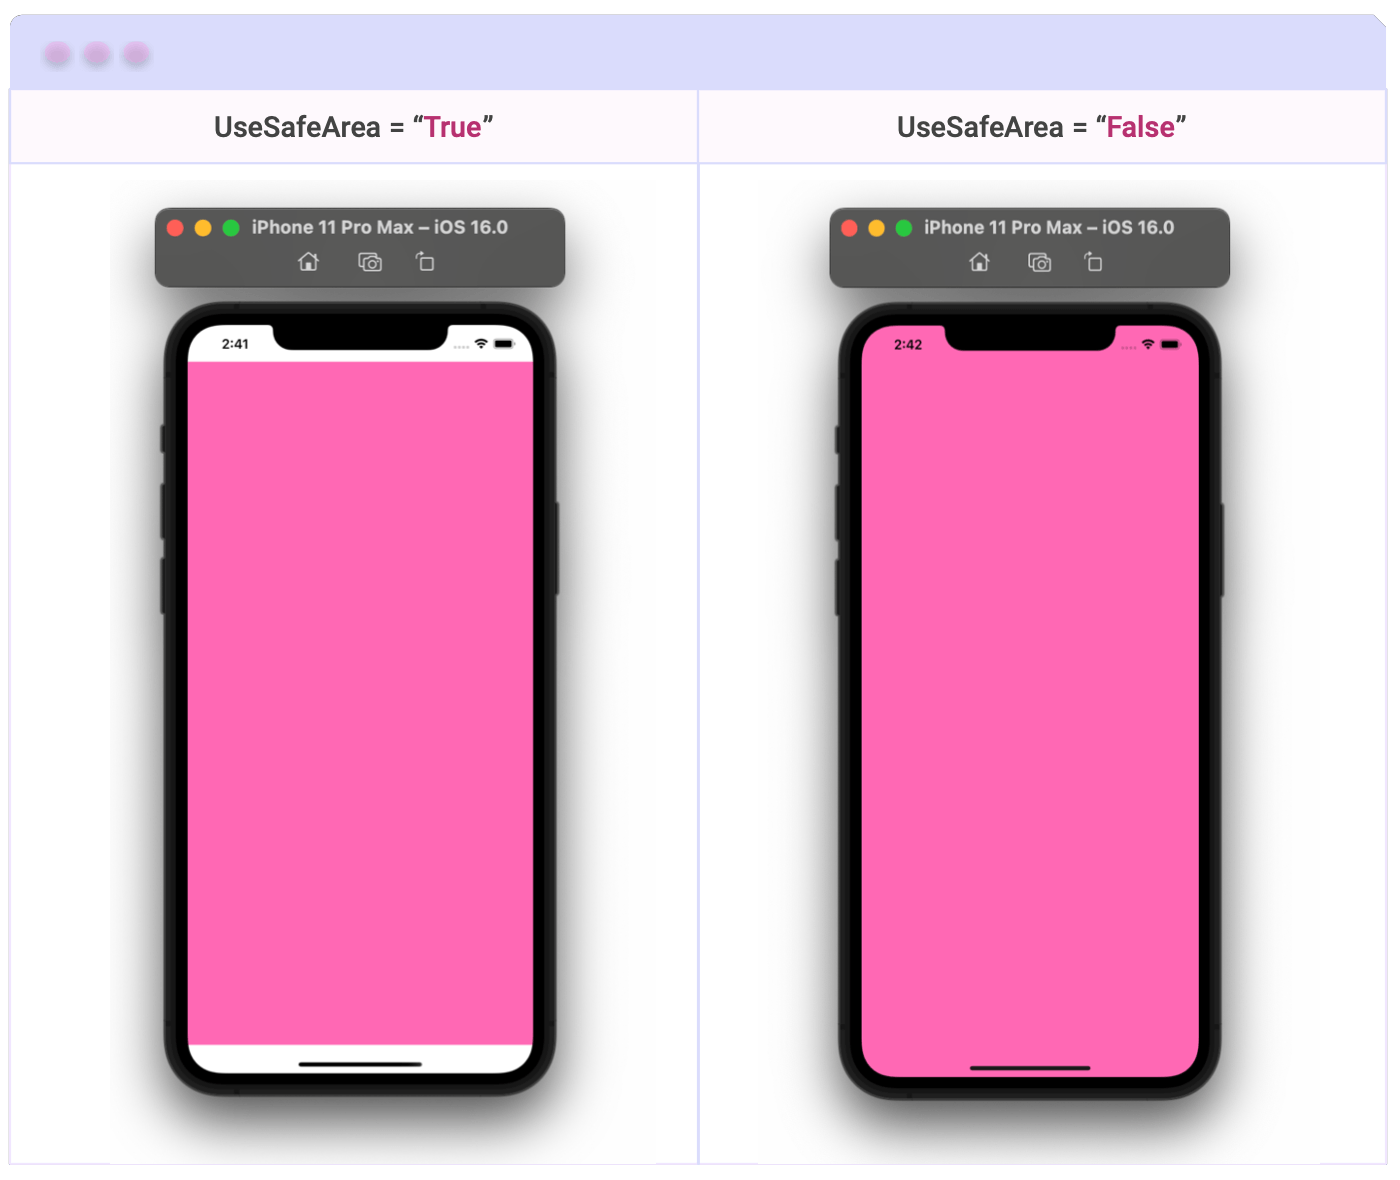
We have a clear understanding of the safe area concept. To help visually identify this area, please refer to the following image:

How Can I Use It in Code?
There is a Page.UseSafeArea attached property that receives a Boolean value. The default value is True, which indicates that the safe area is active. If you want to deactivate it, set the value to False. Let’s explore how to do it in both XAML and C#:
➖ XAML
<ContentPage ...
             xmlns:ios="clr-namespace:Microsoft.Maui.Controls.PlatformConfiguration.iOSSpecific;assembly=Microsoft.Maui.Controls"
             ios:Page.UseSafeArea="False">
                   <!--Your code goes here -->
             </ContentPage>
➖ C#: Another approach is to use the fluent API for consuming it from C#.
using Microsoft.Maui.Controls.PlatformConfiguration;
using Microsoft.Maui.Controls.PlatformConfiguration.iOSSpecific;

On<iOS>().SetUseSafeArea(false);
⚠ By using the Page.On<iOS> method, you can ensure that this platform-specific code will only be executed on iOS.
Customizing the Safe Area Layout Guide
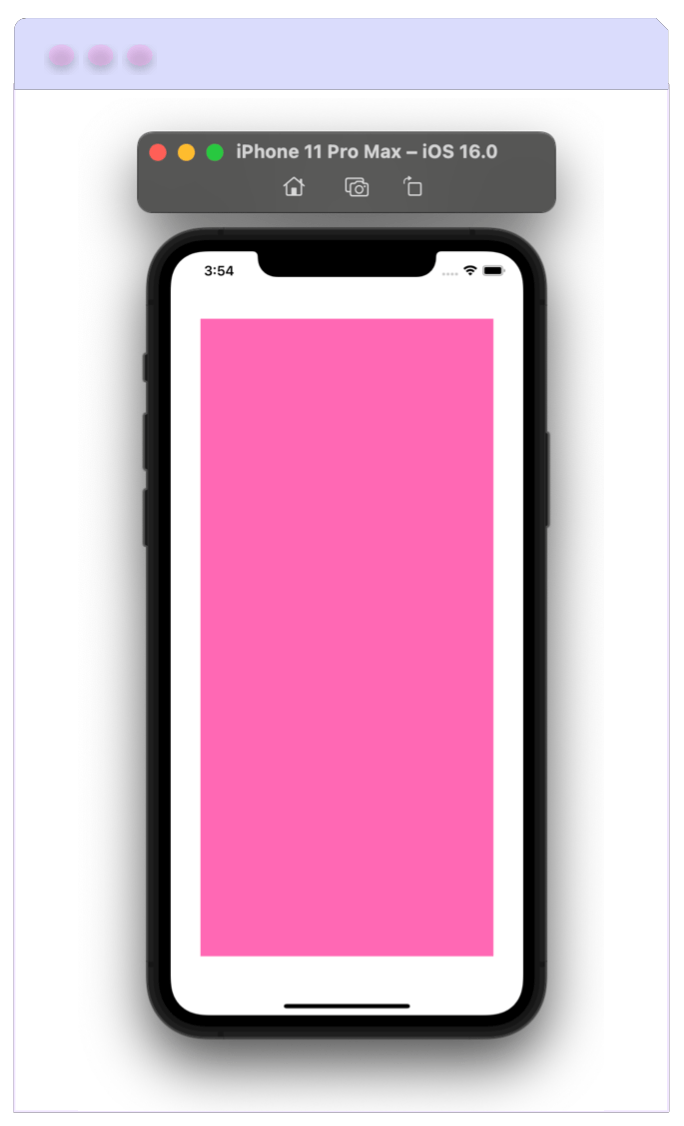
You can customize the safe area by retrieving its Thickness value with the Page.SafeAreaInsets method. This method is in the Microsoft.Maui.Controls.PlatformConfiguration.iOSSpecific namespace.
To accomplish this, override the OnAppearing method and modify the Padding property based on your requirements. In this example, the Padding is set to a
value of 35.

Microsoft.Maui.Controls.PlatformConfiguration.iOSSpecific

protected override void OnAppearing()
{
     base.OnAppearing();
     var customSafe = On<iOS>().SafeAreaInsets();
     Padding = customSafe.Left = 35;
}
Conclusion
I hope that you will now be able to handle the safe area in iOS with much more skill and continue to gain wonderful knowledge in .NET MAUI! I hope you enjoyed this!
See you next time! ♀️
References
This article was based on the official documentation:
This content originally appeared on Telerik Blogs and was authored by Leomaris Reyes
Leomaris Reyes | Sciencx (2023-05-24T14:22:02+00:00) How to Handle the Safe Area Layout for .NET MAUI in iOS. Retrieved from https://www.scien.cx/2023/05/24/how-to-handle-the-safe-area-layout-for-net-maui-in-ios/
Please log in to upload a file.
There are no updates yet.
Click the Upload button above to add an update.
