
This content originally appeared on Bits and Pieces - Medium and was authored by Tyler Marshall
A tutorial on using Partition Keys and Atomic Versioning for organizing and versioning data in Next.js 13, TypeScript and AWS SDK.
I am creating an application where I am collecting applications from people. The business logic states that we can get many applications from one person, typically once per year.
I went down the path of whipping up a DynamoDB table, and then I realised I can really leverage the value of Sort Keys. I figured I would write a blog post about it.
My tech stack is NextJS 13. I am using Typescript for the project, and leveraging the functionality from @aws-sdk.
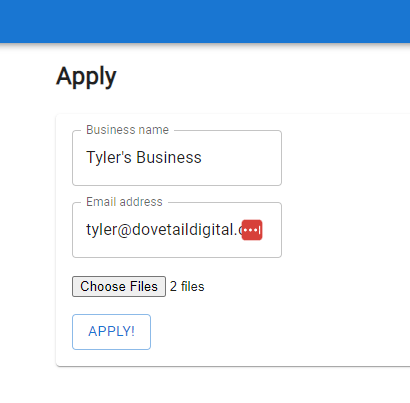
My form for this example is pretty straightforward. I have cut out quite a few of the fields for simplicity. The form collects the business name, and email, as well as one or more files.
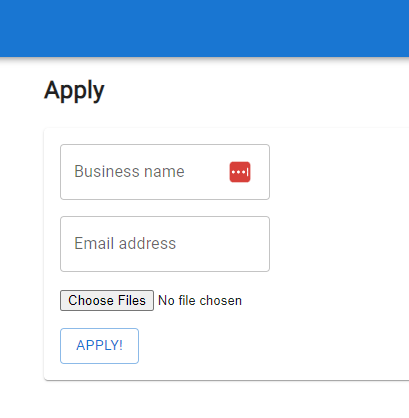
The form code, again very straightforward. I’ve cut it down further for simplicity. Submit button just POSTs to an API route in NextJS with the JSON body:
'use client'

import { Button, Grid, Paper, TextField } from "@mui/material"
import { Stack } from "@mui/system"
import React from "react";
import { useState } from "react"

export default function ApplicationForm() {
    const [businessName, setBusinessName] = useState('');
    const [emailAddress, setEmailAddress] = useState('');
    const [files, setFiles] = useState<FileList | null>();

    function handleSubmit() {
        const data = {
            email: emailAddress,
            businessName: businessName,
        }

        if (!files || files.length === 0) {
            return;
        }
        for (const index in files) {
            const file = files[index];
            if (!(file instanceof File)) {
                continue;
            }
            const fileName = file.name;
            // @todo upload files separately.
            // fetch ('/api/files', method: post)
        }

        fetch('/api/application', {
            method: 'POST',
            body: JSON.stringify(data)
        });
    }

    return (
        <Paper>
            <Stack>
                <Grid container alignItems='center' justifyContent='center' rowSpacing={2} m={2} mt={0}>
                    <Grid item xs={12}>
                        <TextField label="Business name" onChange={(e) => setBusinessName(e.target.value)} />
                    </Grid>
                    <Grid item xs={12}>
                        <TextField label="Email address" onChange={(e) => setEmailAddress(e.target.value)} />
                    </Grid>

                    <Grid item xs={12}>
                        <input type='file' multiple onChange={(e) => setFiles(e.target.files)} />
                    </Grid>
                    <Grid item xs={12}>
                        <Button variant="outlined" onClick={handleSubmit}>Apply!</Button>
                    </Grid>
                </Grid>
            </Stack>
        </Paper>
    )
}
PS: Check my earlier blog post about how to upload files to S3.
The NextJS API endpoint is where most of the magic happens. The basic theory of version control using the SortKey is as follows:
- Update the table, setting the Latest version to be X+1.
- When doing the update, make a new entry for v0 (the version).
- After updating is successful, make a new entry using the Version returned from the first API call that logs the current version.
It looks a little strange at first, as we are creating 2 rows on the first instance. This is because we need to update 0, and create version 1. For all other creations, we will just be updating 0 to be the latest, and creating a new version for the latest one.
First thing is to create our POST handler:
pages/api/application/index.ts
import { randomUUID } from 'crypto';
import { getClient } from "@/utils/DynamoDBClient";
import { AttributeValue, PutItemCommand, PutItemCommandInput, PutItemInput, UpdateItemCommand, UpdateItemCommandInput } from "@aws-sdk/client-dynamodb";
import { NextApiRequest, NextApiResponse } from "next";
export default async function handler(
    req: NextApiRequest,
    res: NextApiResponse,
) {
    if (req.method === 'POST') {
        await handlePost(req, res)
    }
}
The handle post function is as follows:
async function handlePost(req: NextApiRequest, res: NextApiResponse) {
    const body = JSON.parse(req.body)
    const application = JSON.stringify(body);
    const { client, uuid, timestamp } = initClientUuidAndTimestamp();
    const newRecord = buildUpdateItem(body.email, timestamp, application);
    try {
        let response = await client.send(new UpdateItemCommand(newRecord))
        if (response.$metadata.httpStatusCode !== 200 || !response.Attributes) {
            return res.send(500)
        }
        const latestVersion = String(response.Attributes.Latest.N);
        const putItem: Record<string, AttributeValue> | undefined = buildNewItem(
            body.email,
            latestVersion,
            timestamp,
            uuid,
            application
        )
        const putItemCommand: PutItemCommandInput = {
            TableName: process.env.DB_APPLICATIONS_TABLE,
            Item: putItem
        }
        response = await client.send(new PutItemCommand(putItemCommand));
        if (response.$metadata.httpStatusCode !== 200) {
            return res.send(500);
        }
        return res.send(200)
    }
    catch (err) {
        console.error("Error", err)
        return res.send(500)
    }
}
We rip the body out of the request, and build the application from the body’s JSON. I created a helper function that inits the client, uuid, and timestamp variables. That looks like this:
function initClientUuidAndTimestamp() {
    const client = getClient()
    const uuid = randomUUID()
    const timestamp = Date.now().toString()
    return { client, uuid, timestamp }
}
For the UUID generation, I just using the crypto library. I want to use the UUID as a hash for later on. The timestamp is useful so I can sort the applications by date applied (this isn’t super necessary since the versioning will be obvious, but it may be useful either way).
getClient() is a helper function I created in utils/DynamoDBClient.ts which is just the initiator for the DynamoDBClient:
import { DynamoDBClient } from '@aws-sdk/client-dynamodb';
export function getClient() {
    const client = new DynamoDBClient({
        region: String(process.env.AWS_REGION),
        credentials: {
            accessKeyId: String(process.env.AWS_ACCESS_ID),
            secretAccessKey: String(process.env.AWS_SECRET_KEY)
        }
    });
    return client;
}
Next, I build my UpdateItemCommandInput using a helper function:
function buildUpdateItem(email: string, timestamp: string, application: string): UpdateItemCommandInput {
    return {
        TableName: process.env.DB_APPLICATIONS_TABLE,
        Key: {
            email: { S: email },
            sk: { S: "v0" }
        },
        UpdateExpression: 'SET Latest = if_not_exists(Latest, :defaultVal) + :incrval, #time = :time, #application = :application',
        ExpressionAttributeNames: {
            '#time': 'Time',
            '#application': 'Application'
        },
        ExpressionAttributeValues: {
            ":time": { S: timestamp },
            ":application": { S: application },
            ':defaultVal': { N: '0' },
            ':incrval': { N: '1' }
        },
        ReturnValues: 'UPDATED_NEW'
    }
}
This function here is where some of the initial confusion happens. The UpdateItemCommand will create an item if it does not exist. We also get to leverage some of DynamoDB’s functions in the Expression.
- TableName is the name of the table in DynamoDB.
- My Partition Key is the user’s email.
- The Sort Key (which is generic named SK, in case we have others like metadata later on) will be set to v0. This means that we are always keeping v0 item as the latest. This will allow us to just query SK’s for v0 and we have the latest without having to sort on the client/server.
- Our update expression does most of the heavy lifting. We’re setting Latest to be the default value (0) if it does not exist, else Latest will be the value in the DynamoDB row for the v0th element incremented by 1.
- The remaining 3 values are pretty straightforward.
- Finally, ReturnValues is asking to return the values after the item is updated.
If the response is successful, I then store the latestVersion returned from the ReturnValues above. This will be used in the putItem record to store the new value in the database.
buildNewItem is just another helper function to keep the code clean:
function buildNewItem(email: string, latestVersion: string, timestamp: string, uuid: string, application: string) {
    return {
        email: { S: email },
        sk: { S: `v${latestVersion}#${uuid}` },
        Time: { S: timestamp },
        Application: { S: application }
    }
}
💡 If you find yourself using these helper functions over and over for different projects, consider using an open-source toolchain like Bit to extract them into components which you can test, document, and version independently and then share across multiple projects with a simple bit import your.username/yourHelperFuction command.
Learn more here:
Extracting and Reusing Pre-existing Components using bit add
Finally, we execute our putItemCommand to create our new item with the Sort Key being the latest version (1 if net new), and our UUID appended.
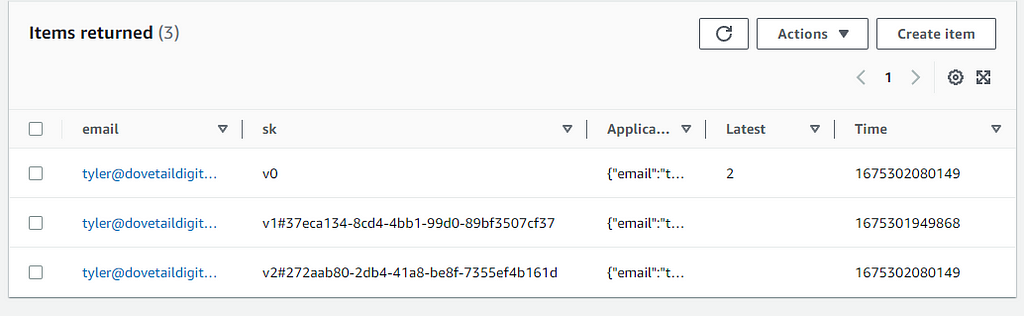
Here’s what the live example would look like:
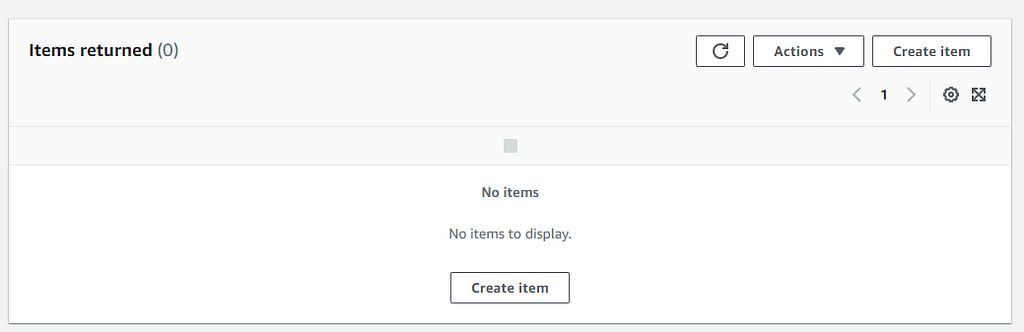
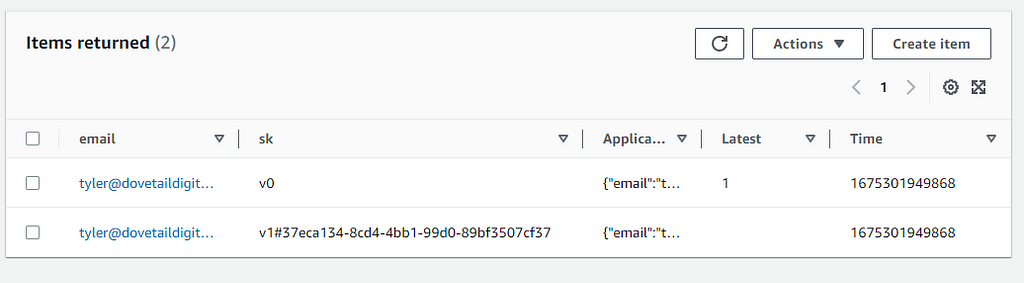
You can see in this screenshot there is 2 records created at first. The first row is the ‘latest’ application. We also have the first version of the application stored in the second row. Because this is the first application, we see the same for both. If I create a new application, a new row will be added (v2 will be the ‘newest version’), and v0 will house the latest one.
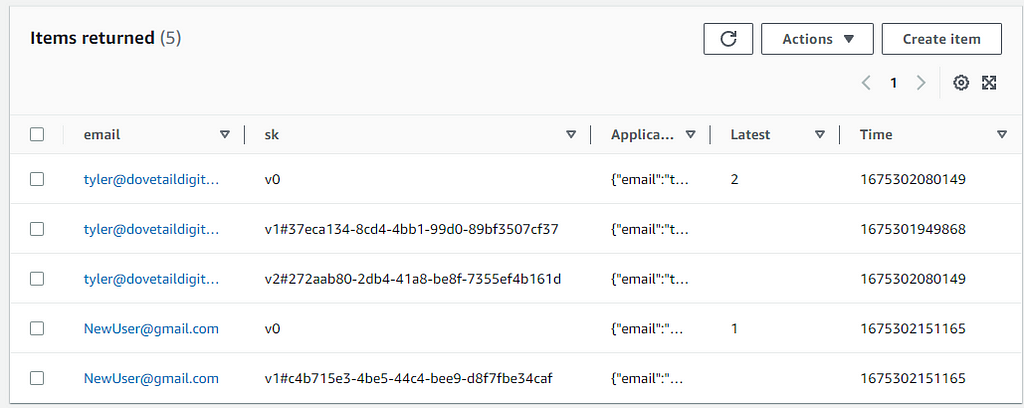
Because the email is the main Partition Key, these are all sub-sets of tyler@dovetaildigital.ca. If a new user is to apply, we will see 2 rows initially created, and then one for new submissions:

I hope this article helps explain the Partition Keys and Sort Keys for organizing and versioning data.
Build Apps with reusable components, just like Lego
Bit’s open-source tool help 250,000+ devs to build apps with components.
Turn any UI, feature, or page into a reusable component — and share it across your applications. It’s easier to collaborate and build faster.
Split apps into components to make app development easier, and enjoy the best experience for the workflows you want:
→ Micro-Frontends
→ Design System
→ Code-Sharing and reuse
→ Monorepo
Learn more:
- Creating a Developer Website with Bit components
- How We Build Micro Frontends
- How we Build a Component Design System
- How to reuse React components across your projects
- 5 Ways to Build a React Monorepo
- How to Create a Composable React App with Bit
- How to Reuse and Share React Components in 2023: A Step-by-Step Guide
- 5 Tools for Building React Component Libraries in 2023
DynamoDB Version Control Using Sort Keys and Atomic Versioning in Next 13, TypeScript and AWS-SDK was originally published in Bits and Pieces on Medium, where people are continuing the conversation by highlighting and responding to this story.
This content originally appeared on Bits and Pieces - Medium and was authored by Tyler Marshall
Tyler Marshall | Sciencx (2023-05-31T11:17:45+00:00) DynamoDB Version Control Using Sort Keys and Atomic Versioning in Next 13, TypeScript and AWS-SDK. Retrieved from https://www.scien.cx/2023/05/31/dynamodb-version-control-using-sort-keys-and-atomic-versioning-in-next-13-typescript-and-aws-sdk/
Please log in to upload a file.
There are no updates yet.
Click the Upload button above to add an update.