
This content originally appeared on Bits and Pieces - Medium and was authored by Ashan Fernando
A Simple Guide to Dockerizing Your Composable Architecture for Smoother and Faster App Deployment

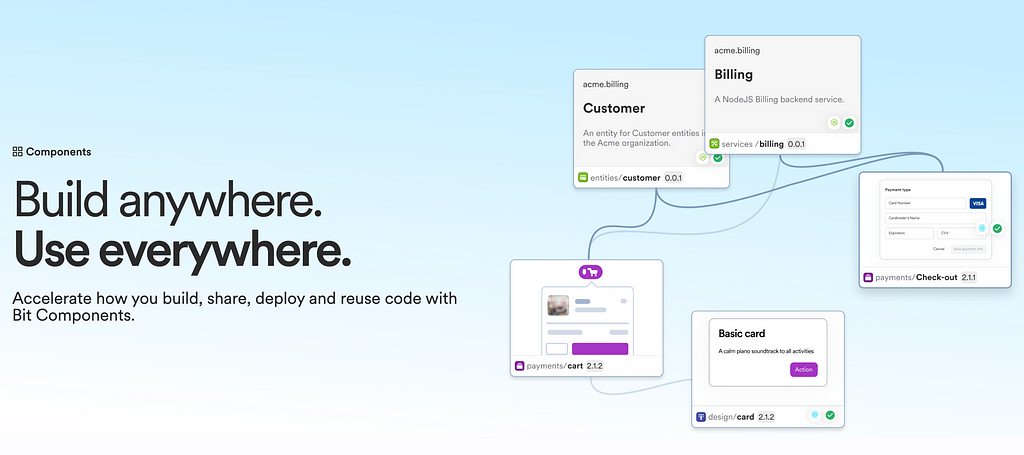
In modern software development, components play a crucial role in developing functionality that can be independently tested, versioned, and released. These feature components can be composed together to build more complex application components.
App components have a unique function compared to feature components. They can be deployed to a server or packaged as a deployable artefact. This is where Docker comes into play, offering a robust solution for packaging and deploying application components.
How Dockerization Comes into the Picture
Docker revolutionizes application deployment by allowing us to encapsulate app components within containers. A Docker container includes everything needed to run a piece of software, including the code, runtime, libraries, and system tools. This ensures that the software runs consistently regardless of the environment in which it runs.
By creating Docker images for app components, we can publish these images to Docker Hub, a cloud-based repository for Docker images. This makes it easy to share and deploy components across different environments.
Steps to Dockerize Your App Component
Let’s walk through the process of Dockerizing an app component step-by-step.
Step 1: Creating an App Component
First, we need to create an app component. For this guide, we’ll use a simple frontend app built with Vite and a NodeJS backend app as examples.
- Frontend App: Vite App Example
- NodeJS App: Node App Example
If you are trying this out, you can fork these two components into your workspace by running the following commands.
bit fork backend.docker/examples/vite-app
bit fork backend.docker/examples/node-app
Step 2: Build and Run the App Locally
Next, you can build the app components locally by running the following command.
bit build
One of the main advantages of app components in Bit is that they can be run locally for development and testing. Run the following commands to run the apps locally.
bit use vite-app # Onetime: Make vite app runnable inside the workspace
bit use node-app # Onetime: Make node app runnable inside the workspace
bit run vite-app # run the vite app
bit run node-app # run the node app
Step 4: Configuring Docker-Deployer Component
Next, you need to set up an organization on Docker Hub. This is where you’ll publish your Docker images.
- Go to Docker Hub and create an account if you don’t already have one.
- Create a new organization or repository where your images will be stored.
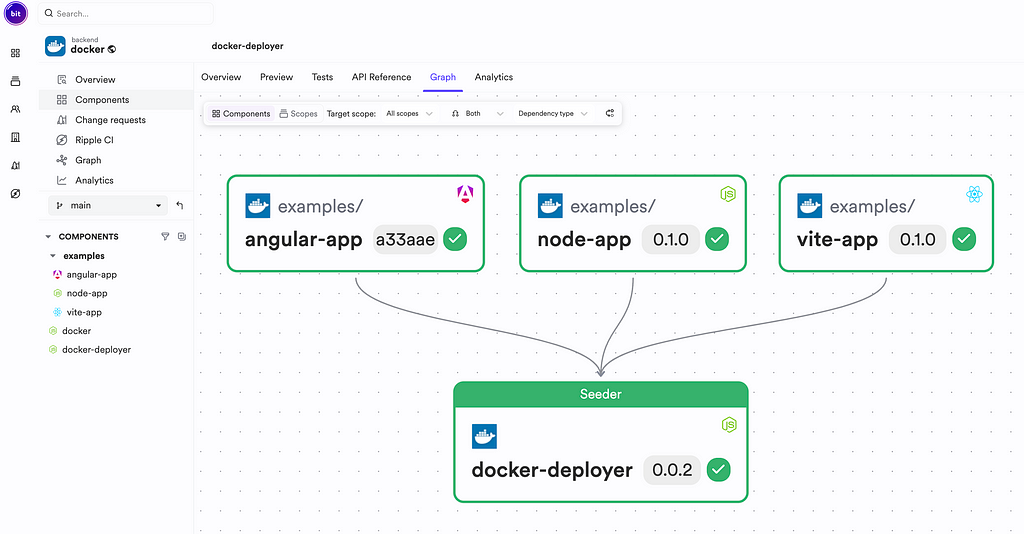
When following composable architecture, every piece of functionality is developed as a component. The same goes for the docker-deployer functionality. It is a component developed by the Bit team that handles the image bundling and publishes it in Docker Hub.
Once you fork the app components, you can see that it depends on the docker-deployer component.
You can update the Docker configuration by editing the <app>.bit-app.tx file.
import { NodeServer } from '@bitdev/node.node-server';
import { DockerDeploy, NodeDockerFile } from '@backend/docker.docker-deployer';

export default NodeServer.from({
  name: 'node-app',
  mainPath: './node-app.app-root.js',
  deploy: DockerDeploy.deploy({
    org: 'bitdevcommunity',
    buildOptions: {
      platform: 'linux/amd64',
    },
    pushOptions: {
      authconfig: {
        username: 'bitdevcommunity',
        password: process.env.DOCKER_PASSWORD || '',
        serveraddress: 'https://index.docker.io/v1',
      },
    },
    dockerfileTemplate: new NodeDockerFile(),
    entryFile: 'node-app.cjs',
  }),
  binary: true,
});
You must also configure the credentials to authenticate Docker Hub to push the container image there.
Note: If you need to customize the docker image, you can include a Dockerfile to the root of the app component.
Following is a list of all the options available in the docker-deployer component.
- org - the Docker organization to push the image to. For example, bitdev, this will push the image to bitdev/<app-name>.
- tag - the tag to use for the image. Overrides the default tag and organization. For example, my-awesome-app:latest.
- latest - whether to tag the image as latest or not. Defaults to false (the tag/snap version will be used).
- push - whether to push the image to the registry or not. Defaults to false.
- buildOptions - options to pass to the docker build command. For example, platform: linux/amd64. See here for more information.
- pushOptions - options to pass to the docker push command. For example, authentication options. See here for more information.
- pushOptions.authConfig.serveraddress - the registry to push the image to. Defaults to https://index.docker.io/v1/.
- pushOptions.authConfig.username - the username to use for authentication.
- pushOptions.authConfig.password - the password to use for authentication.
Step 5: Publishing App Images
After configuring the docker image settings, you can publish new images by tagging and exporting them.
bit tag -m "Releasing new apps" # Build in Ripple
bit export
This will build the image in Ripple CI. And if you plan to build them locally. You can add the flag --build to the bit tag command.
bit tag -m "Relasing new apps" --build # Build locally or in custom CI
bit export
Under the Hood
If we look at what's happening under the hood, we can see that there are two steps involved when building the image.
- Building the Application Component.
- Building the Docker Image and Publishing it to DockerHub.
In the Bit ecosystem, every app component has multiple build tasks.
import type { AppBuildContext, AppBuildResult, AppContext, AppDeployContext, Application, ApplicationInstance } from '@teambit/application';

export class MyApp implements Application {
  name = 'my-app';

  async run(context: AppContext): Promise<ApplicationInstance> {
    // use `process.exec`, `webpack` or other tools to run your app.
    // webpack()
  }

  async build(context: AppBuildContext): Promise<AppBuildResult> {
    // add a build task for your app. usually using build tools like webpack, vite, esbuild or others.
  }

  async deploy(context: AppDeployContext) {
    // return {}
  }
}

export default new MyApp();
In the build task, we usually bundles the artifacts depending on the technology used in the app component. For instance if the app component is a React application, it may use tools like webpack to builde it.
In the deployment step, typically, we publish the artefacts to a web server. In the case of the docker image, the same deploy step is overridden to invoke the deploy method implementation available in docker-deployer to build and publish the docker image to Docker Hub.
export default NodeServer.from({
  name: 'node-app',
  mainPath: './node-app.app-root.js',
  deploy: DockerDeploy.deploy({ // Overriding deploy method
   // Docker options
  }),
  binary: true,
});
Conclusion
Dockerizing your composable architecture offers a consistent and efficient approach to packaging and deploying application components. By encapsulating app components within Docker containers, you ensure they run reliably across various environments, eliminating the “it works on my machine” problem.
The docker-deployer component simplifies the entire process, handling the complexities of building and publishing Docker images.
I hope this guide has provided a clear and practical overview of how to Dockerize your composable architecture.
Thank you for reading. Cheers!
Learn More
- Composable Architecture CI/CD: Releasing to Production on Every Change
- Composable Software Architectures are Trending: Here’s Why
- Build and Run a Node.js application in Docker
How to Dockerize Your Composable Architecture was originally published in Bits and Pieces on Medium, where people are continuing the conversation by highlighting and responding to this story.
This content originally appeared on Bits and Pieces - Medium and was authored by Ashan Fernando
Ashan Fernando | Sciencx (2024-05-28T09:08:09+00:00) How to Dockerize Your Composable Architecture. Retrieved from https://www.scien.cx/2024/05/28/how-to-dockerize-your-composable-architecture/
Please log in to upload a file.
There are no updates yet.
Click the Upload button above to add an update.