This content originally appeared on Level Up Coding - Medium and was authored by Ken Foss
Hosting Static Documents on AWS S3 behind a CloudFront Distribution

Static file storage was one of the first trials I faced in web development. With no professional experience I was actually committing images to my git repositories! I quickly learned this was malpractice, and I still went through phases on the “proper” setup. I began storing images in an S3 bucket, certainly an improvement and often enough with my local following (we’re still growing). Now, if your audience starts to span out and even become multi-national this distribution will become extremely slow the farther clients are from the data center where the S3 bucket lives. My solution to this is CloudFront, a content delivery network (CDN) service provided by AWS. It’s primary function to deliver content, such as web pages, videos, images and other assets to global users with low latency and high data transfer speeds.
Configuring Your AWS Console
I like to imagine many readers are new to development, so we’re going to assume you don’t have AWS CLI configured locally. If you do skip this section.
Play-By-Play
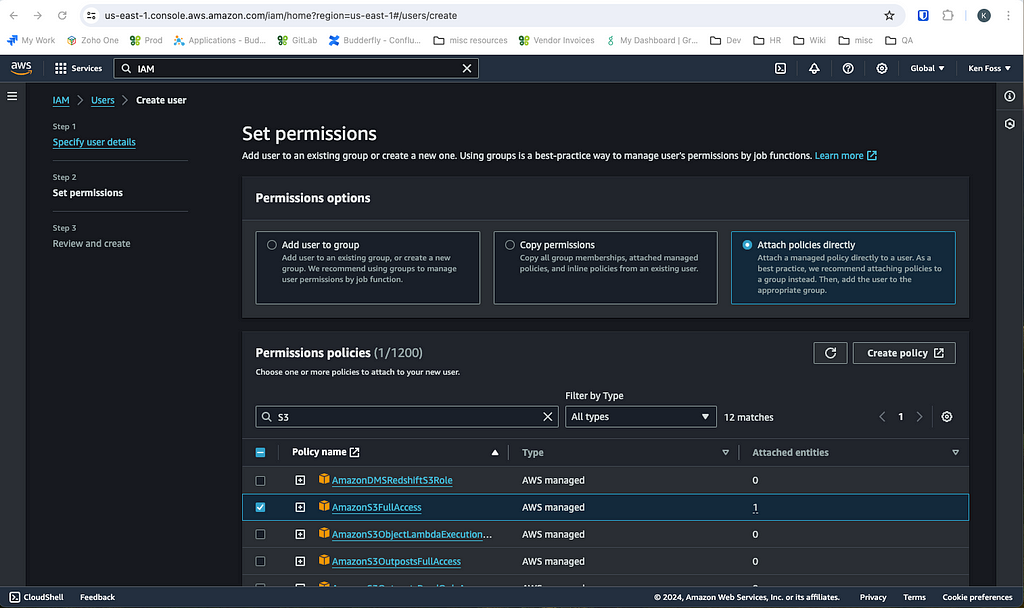
We need to configure the console to associate with an AWS user. Navigate to the Identity and Access Management portal in AWS (IAM) and create a user. You will be prompted to set permissions, ensure this user has at least full S3 access.
You now need an AWS access key, go to your user and select security credentials > Access keys > Create access key. In the following menu give the access key a use case for interacting with AWS via your CLI.
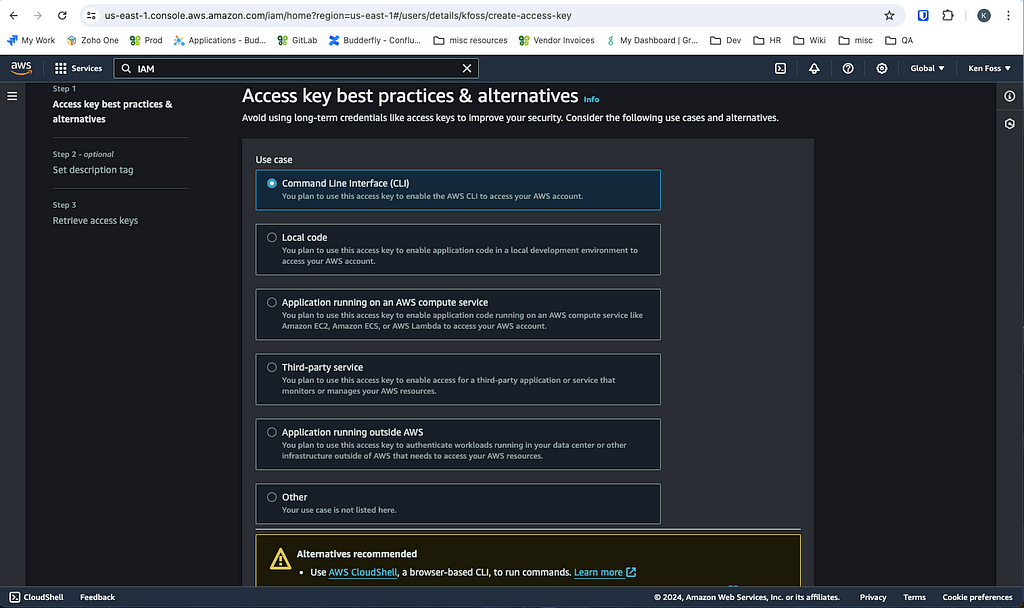
You now have a key and secret to configure the user locally. Make sure to download the .csv or save this information in some other manner before you close this page. Once it is closed this secret access key will never be accessible again. Now we are ready to configure a profile as such:
To create a default profile:
aws configure
To set an additional profile:
aws configure --profile PROFILE_NAME
To set the profile:
export AWS_PROFILE = default
or
export AWS_PROFILE=PROFILE_NAME
At any time you can see all profiles you have configured with the command:
aws configure list-profiles
Our console is configured! Now the fun starts, and a world of AWS CLI opens up to you.
The Image Server
If you want fast access to your images and other static content wherever your users may be, you will want to configure a CloudFront distribution to throw up in front of this S3 instance. We want our data to be cached at edge locations, the less distance between the data and the user, the smoother their reaction.
Creating the S3 Bucket
CloudFront will request a origin domain, any configured S3 buckets will be available here. So this is where we will start. Navigate to S3 in the AWS developer console and select the yellow Create bucket button. For now, we will leave the default settings and name the bucket.
Upload a test image to the bucket by moving it to your directory of choice (the current directory in the following example) with the following command:
aws s3 cp ./demo.jpg s3://demo-bucket-624
Creating the CloudFront Instance
Navigate to the CloudFront page in the AWS console and create a new distribution. We will be given the domain of our S3 bucket as an optional origin domain, select it.

Then, we want to configure origin access control, this is a critical step in securing the content delivery setup. Once this is configured our s3 objects will only be available through our CloudFront Distribution. Configure origin access as follows:

Now, select Create new OAC and configure the basic options for the OAC. On this next screen simply click Create. Later, we will need to configure the S3 bucket policy to allow for this control to take effect. But we will leave this alone for now.
We will also configure the Web Application Firewall (WAF). Leave monitor mode off.
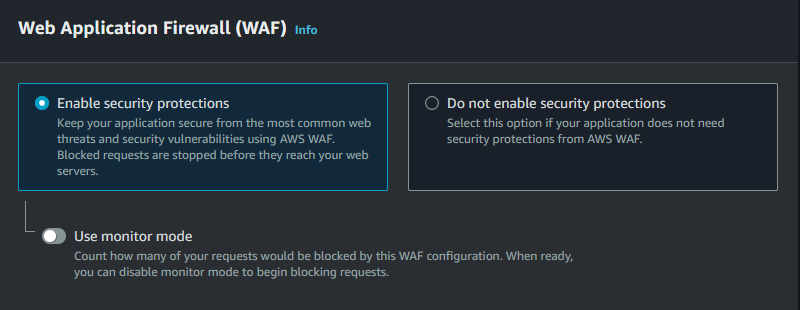
And with that we are done! Scroll to the bottom and select Create distribution and our instance will be configured.
Back to S3
We now need to update the S3 policy to support allow the CloudFront distribution access to our bucket. Navigate to the S3 bucket > permissions and edit the bucket policy. It will resemble this:
However, the “Aws:SourceArn” needs to be configured for the specific CloudFront distribution. The ARN for the distribution can be found back in the CloudFront main view:

Admiring Your Work!
It’s time to sit back and marvel at your work. Navigate to the CloudFront distribution domain name, you will find it next to the ARN. I have called my image demo.jpg, so I navigate to https://<DISTRIBUTION_DOMAIN_NAME>/demo.jpg.
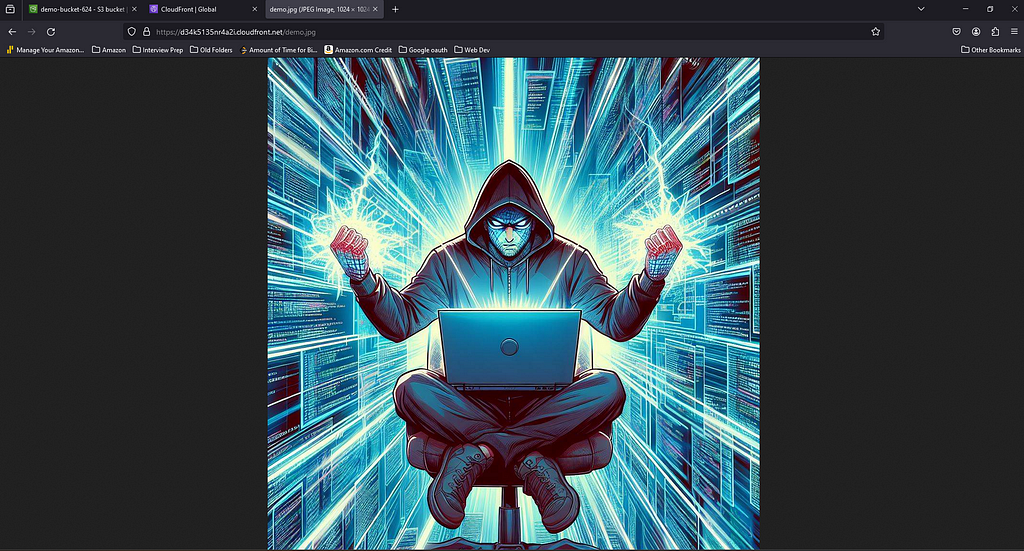
If your like me, just knowing that this configuration will save your images to edge locations world wide is pretty cool.
Now unfortunately the work is not exactly done, unless you want just about anyone to have access to this URL and potentially drive up your expenditures. Try navigating to this link on another device… yep. Assuming you want to restrict access to your public IP for testing, let’s keep this going. This can be set to the IP of your server when in production.
Configuring a Web Application Firewall (WAF)
Navigate to the AWS WAF & Shield service and click the IP sets option in the left-hand menu.

Then create an IP set. This is in CIDR notation which requires a prefix length that specifies how many bits of the 32 bit IP address are used for the network portion. For simplicity sake, just know /32 is what we need here for a single IP address.
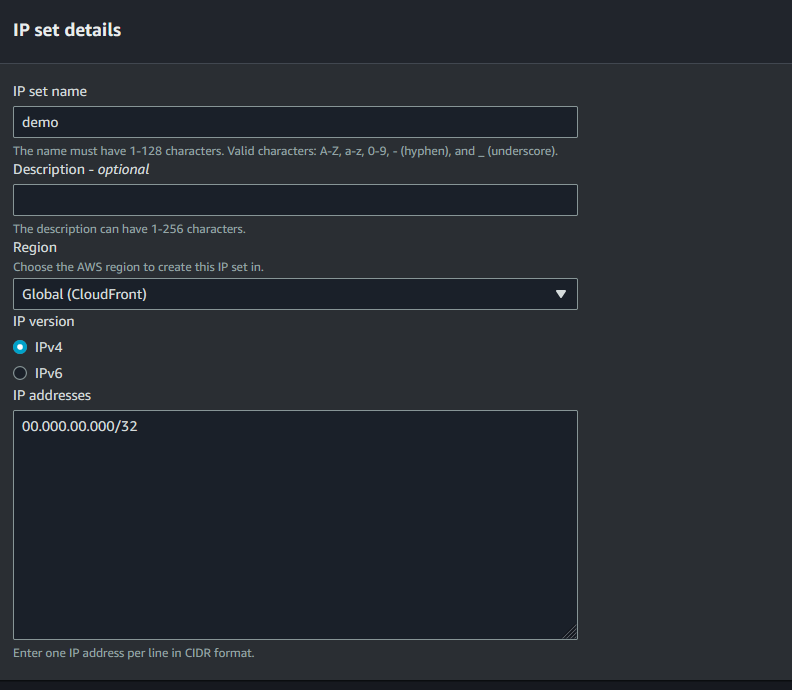
Now, since we elected to configure a WAF in the previous section there is already a Web ACL for this distribution. The name of this ACL will begin with CreatedByCloudFront. Select this to begin. Once here navigate to the Rules tab and elect to Add my own rules and rule groups. We can use the IP set to allow access to this CloudFront instance from only the IPs in this list. Select the IP set you just created. Make sure to select the Allow action.
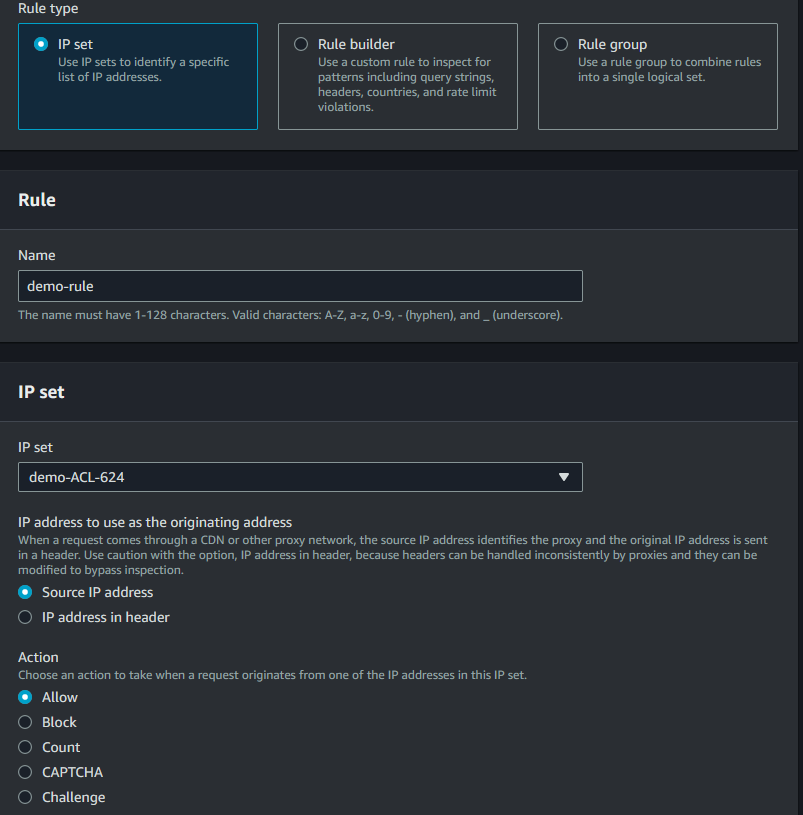
Now if you try to access this image again on your phone, you will notice it is still accessible. This is because the default action for requests that do not match rules is to allow them. We want more control, so we are going to set the default to blocking, navigate to the Rules tab of the Web ACL, and locate this section:

Click edit and change the action to deny. Now you are only allowing access from IP configured in the IP set above. With this, turn off the WiFi on your phone (else your public IP will be no different then this device) and navigate to the test image you added to the S3 bucket. Make sure to clear your cache, otherwise your phone will not need to re-attempt the request. You will now be denied! However, on the given IP you will still be allowed access.
With this in your arsenal you are ready to create some quality simple front-ends. Images take up a lot of space, best to keep them off your web apps server or in version control. Have fun creating!
Stop Committing Your Images to Git! was originally published in Level Up Coding on Medium, where people are continuing the conversation by highlighting and responding to this story.
This content originally appeared on Level Up Coding - Medium and was authored by Ken Foss
Ken Foss | Sciencx (2024-06-13T20:25:52+00:00) Stop Committing Your Images to Git!. Retrieved from https://www.scien.cx/2024/06/13/stop-committing-your-images-to-git/
Please log in to upload a file.
There are no updates yet.
Click the Upload button above to add an update.
