
This content originally appeared on Level Up Coding - Medium and was authored by suhas murthy
Part 1: Building an application using redux and Typescript

Migrating a legacy codebase to React is like trying to teach an old dog new tricks — challenging but rewarding! In one of our applications, we’re using Redux without Redux Toolkit, and finding resources for this older approach is like searching for a needle in a haystack. Most modern apps now use Redux Toolkit, which Redux officially recommends.
This inspired me to write a guide on migrating from Redux to Redux Toolkit. Think of it as giving your app a stylish upgrade! This tutorial will be a three-part series: first, we’ll build an app using traditional Redux; then, we’ll give it a makeover with Redux Toolkit.
Let's build a simple GitHub profile finder application
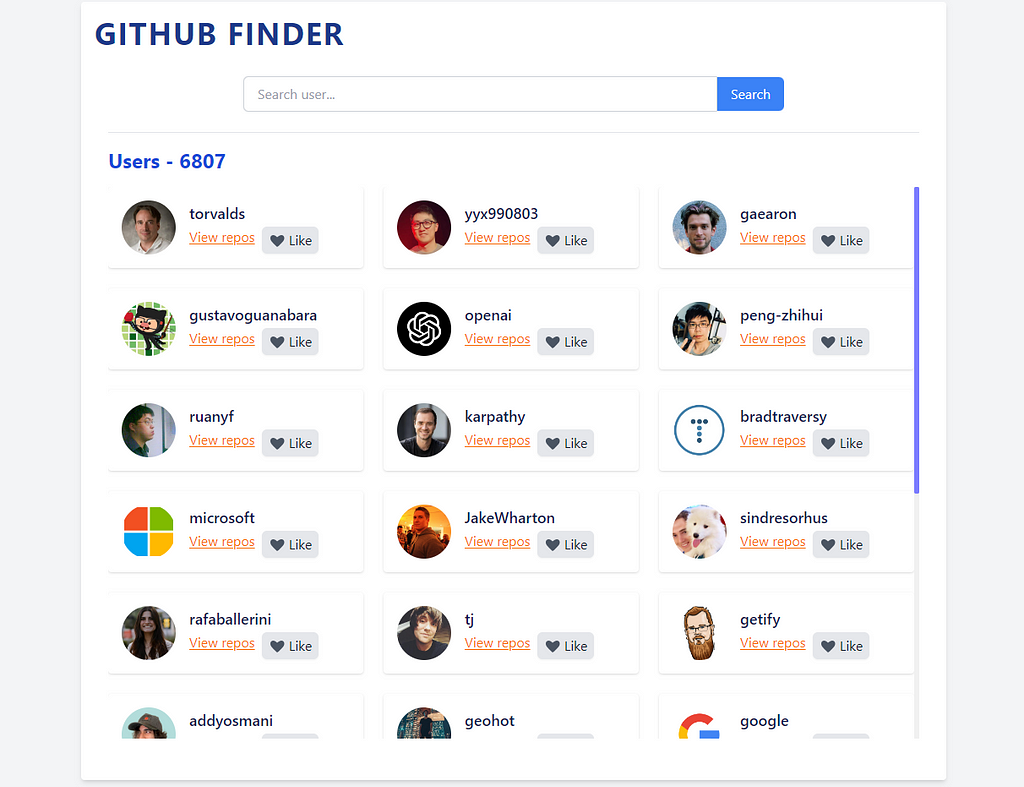
In this application, we’ve curated a list of top users whose followers exceed 1000 — because, in the world of coding, popularity does count! Use our search feature to track down your coding heroes and dive into their public repositories with the ‘View Repos’ option. Additionally, we have a ‘Like’ feature (data presentation excluded) to help you bookmark your favourites
Buckle up for this coding adventure
Prerequisites
You should have a good understanding of React and TypeScript, along with basic knowledge of Redux and Tailwind CSS.
You can find the basic setup of our React app on GitHub
About This Repository:
Within this repository, you’ll discover a basic React application built on the Vite build tool. We’ll be utilizing TypeScript for type safety and Tailwind CSS for styling.
Alright, enough with the appetizers — let’s dig into building our app!
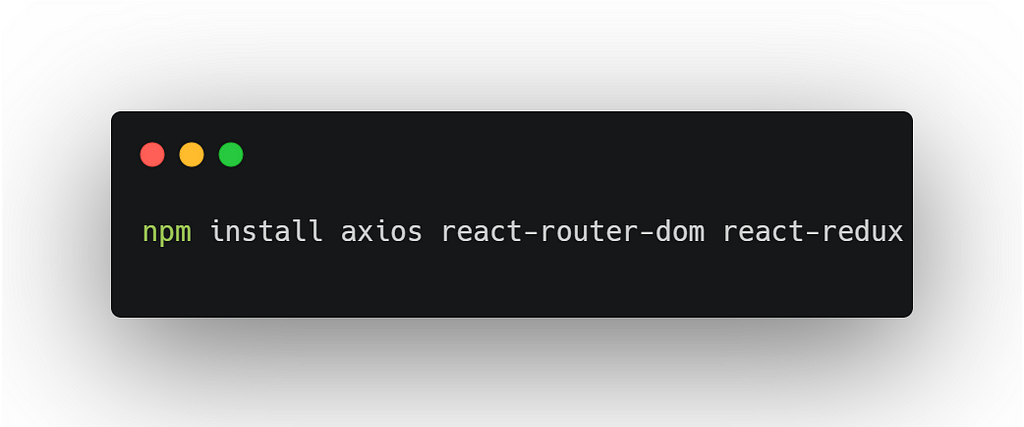
Let's install the libraries required for this application
We’ll be using Axios for reaching out to the interwebs, React Router for navigating through the app, and of course, Redux for keeping our states in check. Let’s get these libraries installed!!
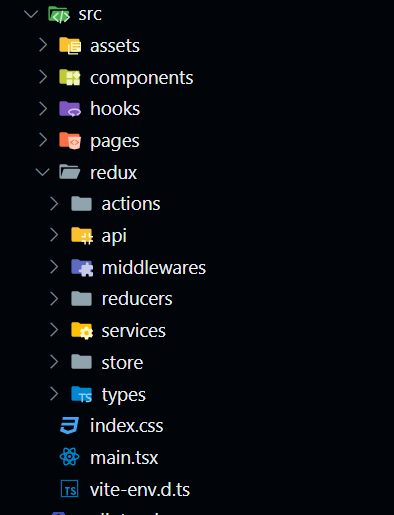
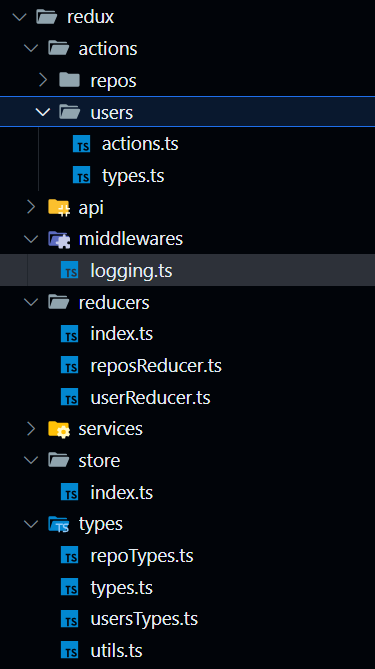
Folder structure
This is the folder structure we’ll be sticking to throughout this application. If you want to follow along, check out the feature/old-redux branch along with this tutorial. Let’s enjoy the journey together!
First things first, let’s kick off with an easy task — setting up our API requests.
Create a folder under ‘redux’ and name it ‘services’. Inside ‘services’, let’s craft a file called ‘index.ts’.
In this file, we’re going to work some magic with four handy methods:
- ‘fetchTopUsersBySize’: Fetches the list of top users.
- ‘fetchUserBySearch’: Search users.
- ‘fetchReposByUserName’: Retrieves repositories for a given username.
- ‘fetchRepoBySearch’: Search repositories by name.
import api from '../api';

export const fetchTopUsersBySize = async (size: number = 30) => {
  const response = await api.get(
    `/search/users?q=followers:>1000&sort=followers&order=desc&per_page=${size}`
  );
  return response.data;
};

export const fetchUserBySearch = async (text: string) => {
  const response = await api.get(`/search/users?q=${text}`);
  return response.data;
};

export const fetchReposByUserName = async (userName: string) => {
  const response = await api.get(
    `/users/${userName}/repos?sort=created&direction=desc`
  );
  return response.data;
};

export const fetchRepoBySearch = async (userName: string, text: string) => {
  const response = await api.get(
    `/search/repositories?q=user:${userName}+${text}`
  );
  return response.data;
};
Time to get our state management game on point!
Key Redux Concepts Overview
- Store: The single source of truth that holds the entire state of your application.
- Actions: Plain JavaScript objects that describe what happened.
- Reducers: Pure functions that take the current state and an action, and return a new state.
Redux folder structure
I won’t be going into details of my folder structure, as different developers have different perspectives on setting up their folder structure. Feel free to refer to my GitHub repository to see how I structure my code and what I might have accidentally missed explaining.
First things first, let’s set up our actions
Let’s set up our action types! We’ve split our action types into different sections to keep things neat and tidy
- Enum for Action Types: We define an enumeration called UsersActionTypes that holds all our action type constants. This makes it easier to manage and avoid typos.
- Action Interfaces: We define interfaces for each action type.
- Union Types for Actions: We define union types to group related actions together.
import { Users } from '../../types/usersTypes';

export enum UsersActionTypes {
  /** Fetch users */
  FETCH_TOP_USERS_REQUEST = 'FETCH_TOP_USERS_REQUEST',
  FETCH_TOP_USERS_SUCCESS = 'FETCH_TOP_USERS_SUCCESS',
  FETCH_TOP_USERS_FAILURE = 'FETCH_TOP_USERS_FAILURE',

  /** Fetch users by search */
  FETCH_USERS_BY_SEARCH_REQUEST = 'FETCH_USERS_BY_SEARCH_REQUEST',
  FETCH_USERS_BY_SEARCH_SUCCESS = 'FETCH_USERS_BY_SEARCH_SUCCESS',
  FETCH_USERS_BY_SEARCH_FAILURE = 'FETCH_USERS_BY_SEARCH_FAILURE',

  /** Toggle user like option */
  TOGGLE_USER_LIKE = 'TOGGLE_USER_LIKE',
}

export interface FetchTopUsersRequestAction {
  type: typeof UsersActionTypes.FETCH_TOP_USERS_REQUEST;
}

export interface FetchTopUsersSuccessAction {
  type: typeof UsersActionTypes.FETCH_TOP_USERS_SUCCESS;
  payload: Users;
}

export interface FetchTopUsersFailureAction {
  type: typeof UsersActionTypes.FETCH_TOP_USERS_FAILURE;
  payload: string;
}

export interface FetchUsersBySearchRequestAction {
  type: typeof UsersActionTypes.FETCH_USERS_BY_SEARCH_REQUEST;
}

export interface FetchUsersBySearchSuccessAction {
  type: typeof UsersActionTypes.FETCH_USERS_BY_SEARCH_SUCCESS;
  payload: Users;
}

export interface FetchUsersBySearchFailureAction {
  type: typeof UsersActionTypes.FETCH_USERS_BY_SEARCH_FAILURE;
  payload: string;
}

export interface ToggleUserLikeAction {
  type: typeof UsersActionTypes.TOGGLE_USER_LIKE;
  payload: number;
}

export type FetchTopUsersActions =
  | FetchTopUsersRequestAction
  | FetchTopUsersSuccessAction
  | FetchTopUsersFailureAction;

export type FetchUsersBySearchActions =
  | FetchUsersBySearchRequestAction
  | FetchUsersBySearchSuccessAction
  | FetchUsersBySearchFailureAction;

export type UserActions =
  | FetchTopUsersActions
  | FetchUsersBySearchActions
| ToggleUserLikeAction;- FetchTopUsersRequestAction, FetchTopUsersSuccessAction, and FetchTopUsersFailureAction: Interfaces for actions related to fetching top users. FETCH_TOP_USERS_SUCCESS includes a payload of type Users containing the fetched user data, while FETCH_TOP_USERS_FAILURE includes a payload of type string for the error message.
- FetchUsersBySearchRequestAction, FetchUsersBySearchSuccessAction, and FetchUsersBySearchFailureAction: Similar interfaces for fetching users by search.
- ToggleUserLikeAction: Interface for the action that toggles the like option, with a payload of type number representing the user ID.
Note: Before moving forward let's install redux-thunk
Redux Thunk is a middleware that allows you to write action creators that return a function instead of an action object. This function can perform asynchronous operations and dispatch regular synchronous actions when those operations are complete.
Now, let’s set up our action creators and thunk functions. These are the parts of our Redux setup that will handle the actual logic for fetching data and dispatching the necessary actions. Below is the code and a breakdown of what each part does.
import { Users } from '../../types/usersTypes';
import { fetchTopUsersBySize, fetchUserBySearch } from '../../services';
import { ThunkAction } from 'redux-thunk';
import { ApplicationState } from '../../store';
import {
  FetchTopUsersRequestAction,
  UsersActionTypes,
  FetchTopUsersSuccessAction,
  FetchTopUsersFailureAction,
  FetchUsersBySearchRequestAction,
  FetchUsersBySearchSuccessAction,
  FetchUsersBySearchFailureAction,
  FetchTopUsersActions,
  FetchUsersBySearchActions,
  ToggleUserLikeAction,
} from './types';

// Action Creators
export const fetchTopUsersRequest = (): FetchTopUsersRequestAction => ({
  type: UsersActionTypes.FETCH_TOP_USERS_REQUEST,
});

export const fetchTopUsersSuccess = (
  users: Users
): FetchTopUsersSuccessAction => ({
  type: UsersActionTypes.FETCH_TOP_USERS_SUCCESS,
  payload: users,
});

export const fetchTopUsersFailure = (
  error: string
): FetchTopUsersFailureAction => ({
  type: UsersActionTypes.FETCH_TOP_USERS_FAILURE,
  payload: error,
});

export const fetchSearchUsersRequest = (): FetchUsersBySearchRequestAction => ({
  type: UsersActionTypes.FETCH_USERS_BY_SEARCH_REQUEST,
});

export const fetchSearchUsersSuccess = (
  users: Users
): FetchUsersBySearchSuccessAction => ({
  type: UsersActionTypes.FETCH_USERS_BY_SEARCH_SUCCESS,
  payload: users,
});

export const fetchSearchUsersFailure = (
  error: string
): FetchUsersBySearchFailureAction => ({
  type: UsersActionTypes.FETCH_USERS_BY_SEARCH_FAILURE,
  payload: error,
});

export const toogleUserLike = (userId: number): ToggleUserLikeAction => ({
  type: UsersActionTypes.TOGGLE_USER_LIKE,
  payload: userId,
});

// Thunk Functions
export const getTopUsersBySize =
  (
    size: number = 30
  ): ThunkAction<void, ApplicationState, unknown, FetchTopUsersActions> =>
  async (dispatch) => {
    dispatch(fetchTopUsersRequest());
    try {
      const users = await fetchTopUsersBySize(size);
      dispatch(fetchTopUsersSuccess(users));
    } catch (error) {
      if (error instanceof Error) {
        dispatch(fetchTopUsersFailure(error.message));
      } else {
        dispatch(fetchTopUsersFailure('Oops something went wrong!!!'));
      }
    }
  };

export const getUsersBySearch =
  (
    userName: string
  ): ThunkAction<void, ApplicationState, unknown, FetchUsersBySearchActions> =>
  async (dispatch) => {
    dispatch(fetchSearchUsersRequest());
    try {
      const users = await fetchUserBySearch(userName);
      dispatch(fetchSearchUsersSuccess(users));
    } catch (error) {
      if (error instanceof Error) {
        dispatch(fetchSearchUsersFailure(error.message));
      } else {
        dispatch(fetchSearchUsersFailure('Oops something went wrong!!!'));
      }
    }
  };
Note: import { ApplicationState } from ‘../../store’; will throw error. But don't worry we will fix this when we set up our code
- Action Creators: These are functions that create actions to be dispatched to the Redux store.
- fetchTopUsersRequest, fetchTopUsersSuccess, and fetchTopUsersFailure: These functions create actions for the different stages of fetching the top users (request, success, and failure).
- fetchSearchUsersRequest, fetchSearchUsersSuccess, and fetchSearchUsersFailure: Similar functions for fetching users by search.
- toggleUserLike: Creates an action to toggle the like status of a user.
2. Thunk Functions: These are functions that handle asynchronous operations and dispatch actions based on the results.
- getTopUsersBySize: This thunk function fetches the top users based on a specified size. It first dispatches fetchTopUsersRequest to indicate that the request has started. Then, it attempts to fetch the users using fetchTopUsersBySize from the services. If successful, it dispatches fetchTopUsersSuccess with the retrieved users. If there's an error, it dispatches fetchTopUsersFailure with the error message.
- getUsersBySearch: Similar to getTopUsersBySize, this thunk function handles fetching users based on a search term. It dispatches fetchSearchUsersRequest to start then attempts to fetch the users using fetchUserBySearch. On success, it dispatches fetchSearchUsersSuccess with the users, and on failure, it dispatches fetchSearchUsersFailure with the error message.
These action creators and thunk functions are crucial for handling the logic of fetching data and managing state transitions in our Redux application. By organizing our actions and action types this way, we create a clear and manageable structure for handling different user-related operations in our Redux setup. With these in place, we can move on to setting up our reducers to handle these actions.
Next up, let’s set up our reducers. This is where our state management gets its game on
This piece of code is crucial as it defines how our application’s state will be updated in response to various actions dispatched to the Redux store. Let’s break down what each part does.
import {
  UserActions,
  UsersActionTypes,
  FetchTopUsersSuccessAction,
  FetchTopUsersFailureAction,
  ToggleUserLikeAction,
} from '../actions/users/types';
import { Users } from '../types/usersTypes';

interface UsersState {
  loading: boolean;
  users: Users | null;
  error: string | null;
}

const initialState: UsersState = {
  loading: false,
  users: null,
  error: null,
};

export const usersReducer = (
  state = initialState,
  action: UserActions
): UsersState => {
  switch (action.type) {
    case UsersActionTypes.FETCH_TOP_USERS_REQUEST:
    case UsersActionTypes.FETCH_USERS_BY_SEARCH_REQUEST:
      return {
        ...state,
        loading: true,
        error: null,
      };
    case UsersActionTypes.FETCH_TOP_USERS_SUCCESS:
    case UsersActionTypes.FETCH_USERS_BY_SEARCH_SUCCESS:
      return {
        ...state,
        loading: false,
        users: (action as FetchTopUsersSuccessAction).payload,
        error: null,
      };
    case UsersActionTypes.FETCH_TOP_USERS_FAILURE:
    case UsersActionTypes.FETCH_USERS_BY_SEARCH_FAILURE:
      return {
        ...state,
        loading: false,
        error: (action as FetchTopUsersFailureAction).payload,
      };

    case UsersActionTypes.TOGGLE_USER_LIKE: {
      const userId = (action as ToggleUserLikeAction).payload;
      if (!state.users) {
        return state; // Return state as is if users data is null
      }
      const updatedUsers = state.users.items.map((user) => {
        if (user.id === userId) {
          return {
            ...user,
            isLiked: !user.isLiked, // Toggle the liked property
          };
        }
        return user;
      });
      return {
        ...state,
        users: {
          ...state.users,
          items: updatedUsers,
        },
      };
    }
    default:
      return state;
  }
};- State Interface and initial :
- UsersState: Defines the shape of our Redux state for users, including loading to indicate if data is being fetched, users to hold user data or null if not fetched yet, and error to store any error messages.
- initialState: Initializes our UsersState with default values.
2. Reducer Function:
- usersReducer: This function handles state updates based on dispatched actions. It takes state and action as parameters.
- switch statement: Evaluates action.type to determine how to update state.
- FETCH_TOP_USERS_REQUEST and FETCH_USERS_BY_SEARCH_REQUEST: Sets loading to true and clears any existing error.
- FETCH_TOP_USERS_SUCCESS and FETCH_USERS_BY_SEARCH_SUCCESS: Updates state with fetched users data from payload and sets loading to false.
- FETCH_TOP_USERS_FAILURE and FETCH_USERS_BY_SEARCH_FAILURE: Updates state with error message from payload and sets loading to false.
- TOGGLE_USER_LIKE: Toggles the isLiked property of a user identified by userId. It maps through state.users.items to find the user, toggles isLiked, and returns a new array updatedUsers. Finally, it updates the state with updatedUsers. Why so much circus, you ask? Remember, state is immutable, so we have to create a new copy.
3. Default case: Returns state as is if the action type doesn't match any case.
This reducer acts as the navigator for our state.
Let’s create a root reducer. We use combineReducers to create a rootReducer. combineReducers simplifies the management of the Redux state by allowing you to split the state management logic into separate, specialized reducers. By combining our reducers into a single rootReducer, we enable our Redux store to manage the state of different parts of our application in an organized and scalable way.
import { combineReducers } from 'redux';
import { usersReducer } from './userReducer';

// Combine Reducers
const rootReducer = combineReducers({
  users: usersReducer,
});

// export type AppState = ReturnType<typeof rootReducer>;
export default rootReducer;
Now that our actions and reducer are working together seamlessly, it’s time to build the foundation of our Redux state — the store!
Next up, let’s dive into setting up the store.
But before that let's export our application action types which we will be using in our application
import { UserActions } from '../actions/users/types';

export type AppActionTypes = UserActions ;
Here’s the code that sets up our Redux store, where all the magic happens:
import {
  applyMiddleware,
  compose,
  legacy_createStore as createStore,
} from 'redux';
import { thunk, ThunkDispatch } from 'redux-thunk';
import rootReducer from '../reducers';
import { AppActionTypes } from '../types/types';
import loggingMiddleware from '../middlewares/logging';

declare global {
  interface Window {
    __REDUX_DEVTOOLS_EXTENSION_COMPOSE__?: typeof compose;
  }
}

// Define middleware array
const middleware = [thunk, loggingMiddleware];

const composeEnhancers =
  (typeof window !== 'undefined' &&
    window.__REDUX_DEVTOOLS_EXTENSION_COMPOSE__) ||
  compose;

export const store = createStore(
  rootReducer,
  undefined,
  composeEnhancers(applyMiddleware(...middleware))
);

export type ApplicationState = ReturnType<typeof rootReducer>;
export type ApplicationDispatch = ThunkDispatch<
  ApplicationState,
  unknown,
  AppActionTypes
>;- Window Declaration: We declare a global interface to make our store compatible with the Redux DevTools Extension, ensuring smooth communication between them.
- Middleware Setup: We assemble our middleware team including thunk and loggingMiddleware, ready to handle tasks like asynchronous actions and logging activities.
- Compose Enhancers: This function creates a composer that combines middleware and enhances our store, making sure everything works together smoothly. It also integrates with the Redux DevTools Extension if available, because even stores like to look good!
- Store Creation: Using createStore, we instantiate our Redux store. It takes rootReducer to manage our state starts with undefined as our initial state, and applies middleware to manage actions and state changes effectively.
- Types Definitions: Finally, we define ApplicationState as the type of our Redux state managed by rootReducer, and ApplicationDispatch as the type of our dispatch function, ensuring type safety throughout our Redux journey.
import { Middleware } from 'redux';
import { ApplicationState } from '../store';

const loggingMiddleware: Middleware<object, ApplicationState> =
  (store) => (next) => (action) => {
    // Log the action
    console.log('Action:', action);

    // Get the current state before the action is dispatched
    const prevState = store.getState();

    // Dispatch the action
    const result = next(action);

    // Get the state after the action is dispatched
    const nextState = store.getState();

    // Log the state changes
    console.log('Prev State:', prevState);
    console.log('Next State:', nextState);

    return result;
  };

export default loggingMiddleware;
With our store set up, our Redux state management is all set to handle the complexities of our application. Now, let’s watch our store and reducers work their magic as we bring our application to life!
Before we start building our pages, let’s wrap our entire application with <Provider store={store}>. This makes the Redux store available to all components in the component tree. The store is passed as a prop, representing your Redux store instance.
Add this code in main.tsx
<Provider store={store}>
      <div className="min-h-screen flex  justify-center bg-gray-100">
        <div className="w-full max-w-screen-lg m-4 p-4 bg-white rounded shadow-md">
          <h1 className="text-4xl font-bold text-blue-900 mb-4 tracking-wider uppercase">
            GitHub Finder
          </h1>
          <RouterProvider router={router} />
        </div>
      </div>
    </Provider>
I know this article is getting a bit hefty, but hey, setting up our Redux state management takes some effort — hence why they invented the Redux Toolkit, which I’ll cover in the next series. Now that I’ve hopefully won back your trust, let’s dive into the application!
useSelector and useDispatch hook
In React Redux, useSelector and useDispatch hooks streamline how components interact with the Redux store.
useSelector: This hook allows components to select specific slices of the Redux state, optimizing data access and minimizing unnecessary renders.
useDispatch: Used for dispatching actions, useDispatch empowers components to trigger state changes and manage asynchronous operations within the application.
In our application, using the useSelector hook looks like this:
const state = useSelector((state:ApplicationState) => state.users);
Importing ApplicationState every time can be a bit tedious. So, instead, I prefer creating a custom hook that I can use across our application. This is how my custom hook will look:
export const useAppSelector: TypedUseSelectorHook<ApplicationState> =
  useSelector;
It’s like creating your own shortcut — because who doesn’t love shortcuts in coding, right?
Similarly, using the useDispatch hook in our application looks like this:
const dispatch = useDispatch<ApplicationDispatch>();
Again, dealing with ApplicationDispatch repeatedly can be a hassle. So, here's how my custom hook simplifies things:
export const useAppDispatch: () => ApplicationDispatch = useDispatch;
Now that we have our custom hooks in place, let’s dive into building our user list page. With useAppSelector for accessing the Redux state and useAppDispatch for dispatching actions, we're all set to create a seamless user experience. Let's get started!
import React, { useEffect } from 'react';
import SearchBox from '../components/SearchBox';
import {
  getTopUsersBySize,
  getUsersBySearch,
  toogleUserLike,
} from '../redux/actions/users/actions';
import Loading from '../components/Loading';
import Error from '../components/Error';
import { NavLink } from 'react-router-dom';
import { useAppDispatch, useAppSelector } from '../hooks/hooks';
import LikeButton from '../components/LikeButton';

const Home: React.FC = () => {
  const { loading, users, error } = useAppSelector((state) => state.users);
  const dispatch = useAppDispatch();
  const handleSearch = (query: string) => {
    if (query) {
      dispatch(getUsersBySearch(query));
    } else {
      dispatch(getTopUsersBySize());
    }
  };
  useEffect(() => {
    dispatch(getTopUsersBySize());
  }, [dispatch]);

  return (
    <div className="container mx-auto p-4 flex flex-col">
      <div className="flex justify-center mb-6">
        <div className="w-2/3">
          <SearchBox placeholder="Search user..." onSearch={handleSearch} />
        </div>
      </div>
      <hr />
      <h2 className="text-2xl text-blue-700 font-bold my-4">
        Users - {users?.total_count}
      </h2>
      {loading ? (
        <Loading />
      ) : error ? (
        <Error message={error} />
      ) : (
        <div
          className="flex-grow  overflow-y-auto"
          style={{ maxHeight: 'calc(100vh - 300px)' }}
        >
          <ul className="grid grid-cols-1 sm:grid-cols-2 md:grid-cols-3 gap-6">
            {users?.items.map((user) => (
              <li
                key={user.login}
                className="flex items-center space-x-4 p-4 bg-white rounded shadow hover:shadow-lg transition-shadow"
              >
                <img
                  src={user.avatar_url}
                  alt={`${user.login} avatar`}
                  className="w-16 h-16 rounded-full"
                />
                <div className="flex flex-col gap-0.5">
                  <span className="text-lg text-blue-950 font-medium">
                    {user.login}
                  </span>
                  <div className="flex gap-2">
                    <NavLink
                      className="underline underline-offset-2 text-orange-500 hover:text-orange-600"
                      to={`/${user.login}/repos`}
                    >
                      View repos
                    </NavLink>
                    <div>
                      <LikeButton
                        liked={!!user.isLiked}
                        toggleLike={() => dispatch(toogleUserLike(user.id))}
                      />
                    </div>
                  </div>
                </div>
              </li>
            ))}
          </ul>
        </div>
      )}
    </div>
  );
};

export default Home;- State Management: The useAppSelector hook is used to access the Redux state, specifically state.users which contains the loading status (loading), user data (users), and error messages (error).
- Dispatch Function: useAppDispatch is used to get the dispatch function dispatch, allowing components to dispatch actions like getTopUsersBySize, getUsersBySearch, and toogleUserLike.
You can find the routing code in my repository
If you run your application now, voila! Behold the User List page in all its glory. Congratulations, we made it! 🎉 Feel free to play around with this code and challenge yourself to implement a Repository page on your own. And remember, if you need a little nudge in the right direction, our repository is there to lend a helping hand. Go ahead, dive in and enjoy exploring your new creation!
I know this article was quite lengthy, but setting up a traditional Redux application can indeed be time-consuming — something even this powerful library has faced criticism for. However, fear not! The Redux team has embraced this feedback with open arms and introduced the Redux Toolkit, a major update that addresses many of these pain points. It’s like Redux just got a makeover and we’re falling in love with it all over again!
Curious about how to migrate your application to Redux Toolkit? Stay tuned for part two. Cheers to simpler, more enjoyable state management!
Happy Coding!!!
Migrating from Redux to Redux Toolkit: A Three-Part Series was originally published in Level Up Coding on Medium, where people are continuing the conversation by highlighting and responding to this story.
This content originally appeared on Level Up Coding - Medium and was authored by suhas murthy
suhas murthy | Sciencx (2024-06-21T14:12:46+00:00) Migrating from Redux to Redux Toolkit: A Three-Part Series. Retrieved from https://www.scien.cx/2024/06/21/migrating-from-redux-to-redux-toolkit-a-three-part-series/
Please log in to upload a file.
There are no updates yet.
Click the Upload button above to add an update.