This content originally appeared on Level Up Coding - Medium and was authored by Andre Lopes
Terraforming your Vercel project
Leverage the power of Terraform to create your Vercel project and deploy your NextJS application
Hey people!
When developing frontend applications with server-side rendering, NextJS is one of the most popular frameworks available. It is a ReactJS framework that allows your web pages to be rendered before being sent to your clients.
During development, you’ll often face the question of where to host your application. For NextJS is not so simple as to host it as a static website in an S3 bucket, for example, because it is not a static application like plain ReactJS. It has a small server dedicated to process and rendering your page before sending it. One of the most popular hosts for NextJS applications is its creator, Vercel.
Vercel is a very popular cloud platform when it comes to web applications hosting. It is to have a very simple deployment and hosting process so you don’t need to worry about the infrastructure and focus on the development of your application. It also supports the most popular front-end frameworks, like React, Angular, and Vue.
We can leverage Infrastructure as Code with Terraform to create and manage our infrastructure in the Vercel cloud. It makes our architecture more resilient and consistent.
Requirements
Ready!
Let’s start by bootstrapping an initial NextJS application.
First, create a folder and then run the following command inside it:
npx create-next-app@latest src \
--ts --tailwind --eslint \
--app --no-src-dir --no-import-alias
For Windows:
npx create-next-app@latest src `
--ts --tailwind --eslint `
--app --no-src-dir --no-import-alias
You should have a folder structure similar too:
.
└── src/
    ├── app/
    │   ├── favicon.ico
    │   ├── globals.css
    │   ├── layout.tsx
    │   └── page.tsx
    ├── node_modules/
    │   └── ...
    ├── public/
    │   ├── next.svg
    │   └── vercel.svg
    ├── next-env.d.ts
    ├── next.config.mjs
    ├── package-lock.json
    ├── package.json
    ├── postcss.config.mjs
    ├── README.md
    ├── tailwind.config.ts
    └── tsconfig.json
Now go to the src folder and run the following command to start the development server:
npm run dev
This will start your app and serve it from the URL http://localhost:3000. You should see the following starting page:
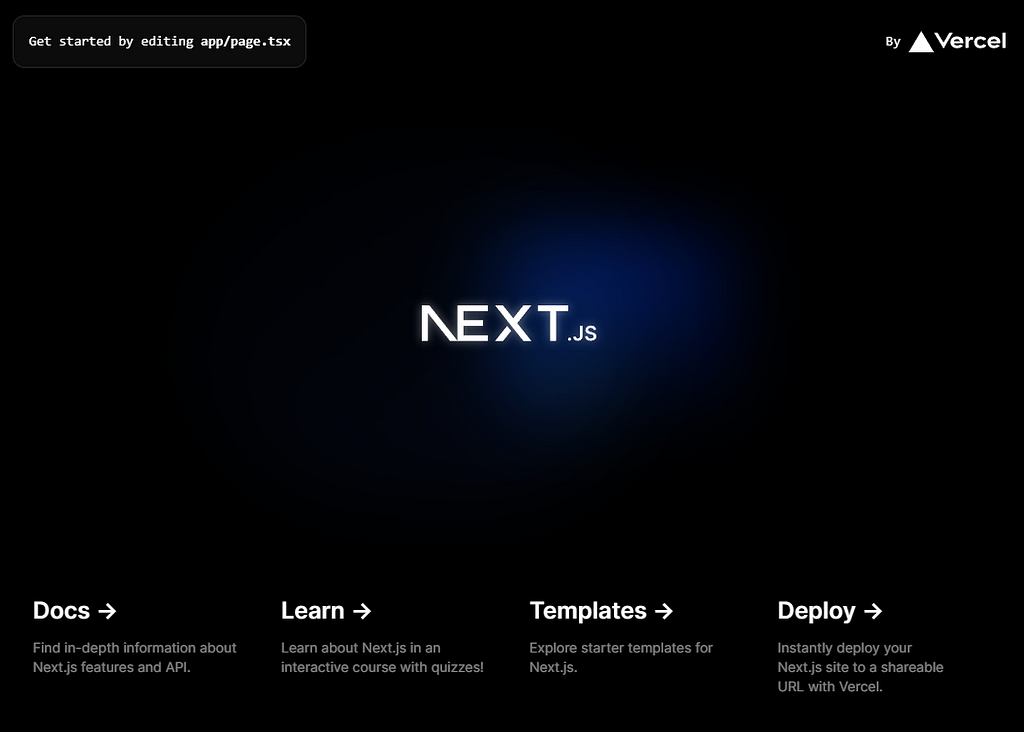
Great! We have our starting application set up. Now let’s move to creating our Vercel infrastructure.
Create Vercel project with Terraform
Let’s start by creating an iac folder in the root folder. Then, create a providers.tf file:
terraform {
  required_providers {
    vercel = {
      source  = "vercel/vercel"
      version = "~> 1.11"
    }
  }

  backend "s3" {
    bucket = "YOUR_S3_BUCKET"
    key    = "state.tfstate"
  }
}

provider "vercel" {}
Here we are setting vercel as our provider and telling Terraform to use at least the version 1.11 or a higher minor version (1.x ≥ 1.11).
Notice also the backend "s3" block, this is only required if you’d like to set up a remote backend for Terraform to keep track of your infrastructure state. In this case, I’m using AWS.
Now, let’s create a main.tf file to create our Vercel infrastructure:
resource "vercel_project" "project" {
  name           = "PROJECT_NAME"
  framework      = "nextjs"
  root_directory = "src"

  git_repository = {
    type = "github"
    repo = "{github_account}/{repository}"
  }
}

resource "vercel_deployment" "init" {
  project_id = vercel_project.website.id
  ref        = "main"
}
Here we are creating a new project in Vercel. In the root_directory property we are telling Vercel that our application code is in the src folder.
You’ll also need to add an initial deployment through the vercel_deployment because Vercel waits until you have pushed changes to the target branch or if you ran the CLI command vercel deploy.
We are also setting up a git hook to our GitHub repository in the git_repository property.
You’ll need to change the following values:
- PROJECT_NAME — Give a name to your project
- {github_account} — Your account handle. For example, mine is alopes2
- {repository} — Your repository name
If you’d like, you can also set up custom domains for your project. If you don’t own any domain, you can use the subdomain *.vercel.app available by Vercel. Just remember that it needs to be unique. So you cannot use app.vercel.app, for example, because someone already configured it.
You can configure a custom domain by adding the following vercel_project_domain resource to your main.tf file:
resource "vercel_project_domain" "andrelopes_vercel" {
  project_id = vercel_project.project.id
  domain     = "totally-unique.vercel.app"
}
Just remember to replace totally-unique for your custom domain.
Now, let’s deploy our infrastructure!
Deploying the infrastructure
To deploy it, let’s use GitHub actions for it.
Create a folder .github and a folder workflows under it. In the workflows folder, create a file deploy-infra.yml and add the following code in it:
name: Deploy Infrastructure
on:
  workflow_dispatch:
  push:
    branches:
      - main
    paths:
      - iac/**/*
      - .github/workflows/deploy-infra.yml

defaults:
  run:
    working-directory: iac/

jobs:
  terraform:
    name: 'Terraform'
    runs-on: ubuntu-latest
    env:
      VERCEL_API_TOKEN: ${{ secrets.VERCEL_API_TOKEN}}
    steps:
      # Checkout the repository to the GitHub Actions runner
      - name: Checkout
        uses: actions/checkout@v3

      - name: Configure AWS Credentials Action For S3 Backend
        uses: aws-actions/configure-aws-credentials@v1
        with:
          aws-access-key-id: ${{ secrets.AWS_ACCESS_KEY }}
          aws-secret-access-key: ${{ secrets.AWS_SECRET_ACCESS_KEY }}
          aws-region: eu-central-1

      # Install the latest version of Terraform CLI and configure the Terraform CLI configuration file with a Terraform Cloud user API token
      - name: Setup Terraform
        uses: hashicorp/setup-terraform@v3

      # Initialize a new or existing Terraform working directory by creating initial files, loading any remote state, downloading modules, etc.
      - name: Terraform Init
        run: terraform init

      # Checks that all Terraform configuration files adhere to a canonical format
      - name: Terraform Format
        run: terraform fmt -check

      # Generates an execution plan for Terraform
      - name: Terraform Plan
        run: |
          terraform plan -out=plan -input=false

        # On push to "main", build or change infrastructure according to Terraform configuration files
        # Note: It is recommended to set up a required "strict" status check in your repository for "Terraform Cloud". See the documentation on "strict" required status checks for more information: https://help.github.com/en/github/administering-a-repository/types-of-required-status-checks
      - name: Terraform Apply
        run: terraform apply -auto-approve -input=false  plan
If you don’t have a backend set up, you can remove the Configure AWS Credentials Action for S3 Backend step.
Now, you need to add a couple of secrets to your GitHub actions repository secrets.
- AWS_ACCESS_KEY — The access key for an account that has permissions ListBucket in your S3 bucket, and GetObject and PutObject for your state file.
- AWS_SECRET_ACCESS_KEY — The access secret for an account that has permissions ListBucket in your S3 bucket, and GetObject and PutObject for your state file.
- VERCEL_API_TOKEN — The API token for your Vercel account
To generate a new Vercel API Token, you can go to the Account Settings page and under Tokens tab.
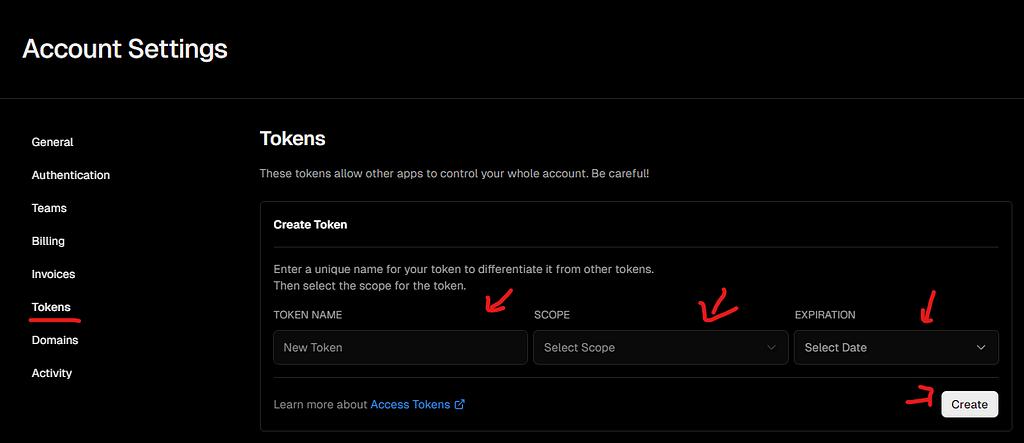
Give it a name, a scope, and an expiration, and then create it.
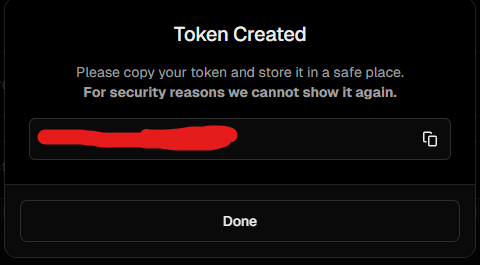
Copy and save it, this is the only time you’ll be able to see the token in the Vercel dashboard.
Now that you have your Vercel token, add it to your GitHub actions repository secrets.
You’ll also need to install the Vercel GitHub App to your Vercel account or you’ll face the following error message when running the apply step:
│ Error: Error creating project
│
│   with vercel_project.example,
│   on main.tf line 1, in resource "vercel_project" "project":
│   1: resource "vercel_project" "project" {
│
│ Could not create project, unexpected error: bad_request - To link a GitHub repository, you need to install the GitHub integration first.
It is basically giving Vercel permissions in your repositories.
After having all the configurations set, you can now push your code to GitHub and see the workflow running.
After it finishes, you can see your project in the list:

In the details, you can see the status of the deployment and the domain to access it:
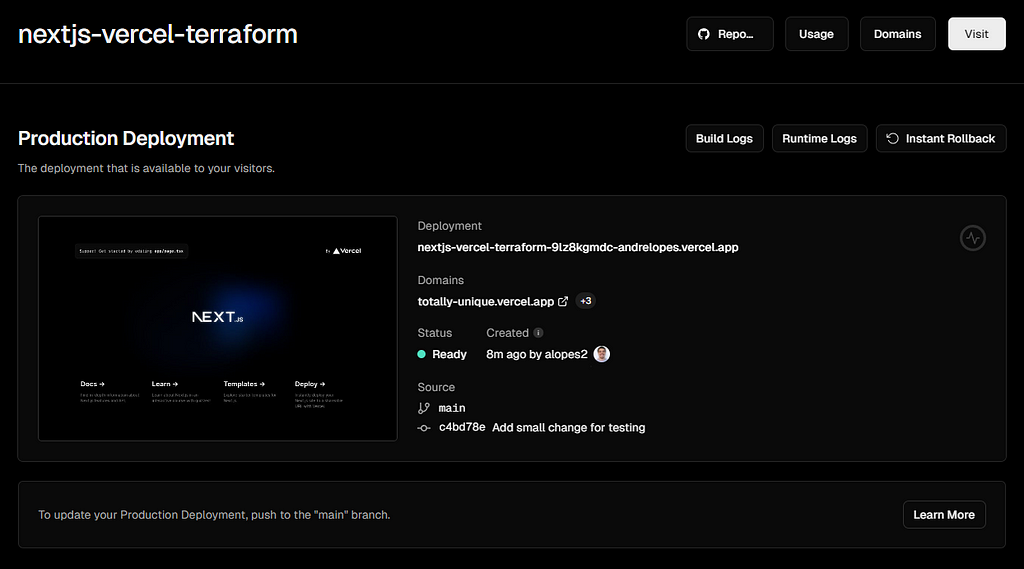
You can now access the URL under Domains and see the same page when we ran the npm run dev command.

Every time you push code to the main branch, Vercel will automatically create a new deployment for you.
Conclusion
Congratulations and thanks for reaching the end of this story.
You could learn how easy it is to bootstrap and deploy a NextJS application to production by hosting it in Vercel. By making use of Vercel, you can have a simple yet powerful cloud platform that lets you focus on your application development and not worry about the infrastructure.
Terraform made the step of creating and configuring our Vercel project and deployments much easier and more consistent, as we are leveraging the power of Infrastructure as Code and its benefits. You could see how to write and deploy your infrastructure from Terraform through GitHub actions.
Thank you for reading.
The code for this story can be found here.
Happy coding! 💻
Deploy Your NextJS App To Vercel With Terraform was originally published in Level Up Coding on Medium, where people are continuing the conversation by highlighting and responding to this story.
This content originally appeared on Level Up Coding - Medium and was authored by Andre Lopes
Andre Lopes | Sciencx (2024-07-12T13:15:05+00:00) Deploy Your NextJS App To Vercel With Terraform. Retrieved from https://www.scien.cx/2024/07/12/deploy-your-nextjs-app-to-vercel-with-terraform/
Please log in to upload a file.
There are no updates yet.
Click the Upload button above to add an update.
