This content originally appeared on Level Up Coding - Medium and was authored by Harish Siva Subramanian

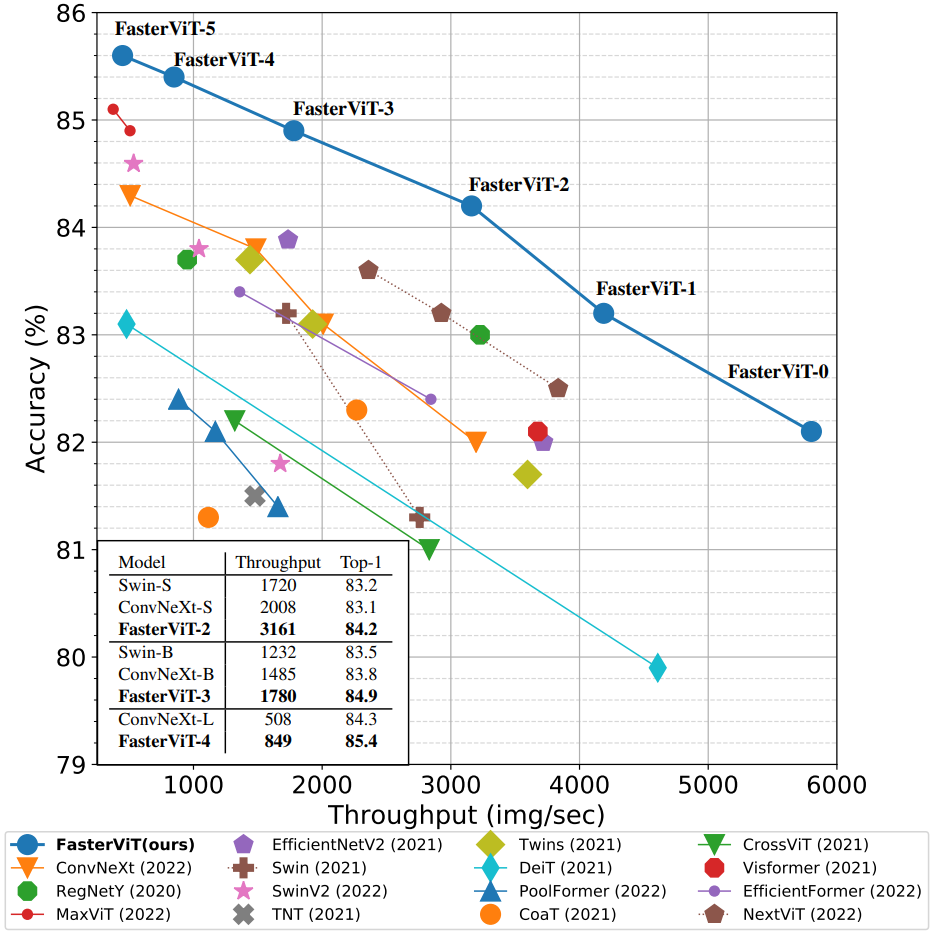
Faster Vision Transformer (FVT) is a variant of the Vision Transformer (ViT) architecture, which is a type of neural network designed for computer vision tasks. FVT is a faster and more efficient version of the original ViT model, which was introduced in the paper “An Image is Worth 16x16 Words: Transformers for Image Recognition at Scale” by Dosovitskiy et al. in 2020.
Key Features of FVT
- Efficient Architecture: FVT is designed to be faster and more efficient than the original ViT model. It achieves this by reducing the number of parameters and computational complexity while maintaining similar performance.
- Multi-Scale Vision Transformers: FVT uses a multi-scale vision transformer architecture, which allows it to process images at multiple scales and resolutions. This is achieved through the use of a hierarchical architecture, where smaller transformers are used to process smaller regions of the image.
- Self-Attention Mechanism: FVT uses the self-attention mechanism, which allows it to model complex relationships between different parts of the image. This is achieved through the use of attention weights, which are learned during training.
- Positional Encoding: FVT uses positional encoding to preserve the spatial information of the image. This is achieved through the use of learned positional embeddings, which are added to the input tokens.

First things first, lets get to the implementation of training a Vision transformer on a custom dataset.
For this purpose we need to pip install fastervit.
pip install fastervit
Let’s import the pytorch libraries along with the faster vision transformer library that we just pip installed.
import torch
from torchvision import datasets, transforms
from torch.utils.data import DataLoader
import os
For this implementation, I have downloaded the damaged road dataset from Kaggle. Check that here.
Then split them into train and val dataset.
After that load the dataset and apply the data transformation.
data_dir = 'sih_road_dataset'

# Define data transformations
data_transforms = {
    'train': transforms.Compose([
        transforms.RandomResizedCrop(224),
        transforms.RandomHorizontalFlip(),
        transforms.ToTensor(),
        transforms.Normalize([0.485, 0.456, 0.406], [0.229, 0.224, 0.225])
    ]),
    'val': transforms.Compose([
        transforms.Resize(256),
        transforms.CenterCrop(224),
        transforms.ToTensor(),
        transforms.Normalize([0.485, 0.456, 0.406], [0.229, 0.224, 0.225])
    ]),
}

# Load datasets
image_datasets = {x: datasets.ImageFolder(os.path.join(data_dir, x), data_transforms[x]) for x in ['train', 'val']}
dataloaders = {x: DataLoader(image_datasets[x], batch_size=32, shuffle=True, num_workers=4) for x in ['train', 'val']}
dataset_sizes = {x: len(image_datasets[x]) for x in ['train', 'val']}
class_names = image_datasets['train'].classes
Next we will load the faster vision transformer model.
# Load the FasterViT model and modify it for your number of classes.

from fastervit import create_model

# Load FasterViT model
model = create_model('faster_vit_0_224',
                     pretrained=True,
                     model_path="faster_vit_0.pth.tar")

# Print the model architecture
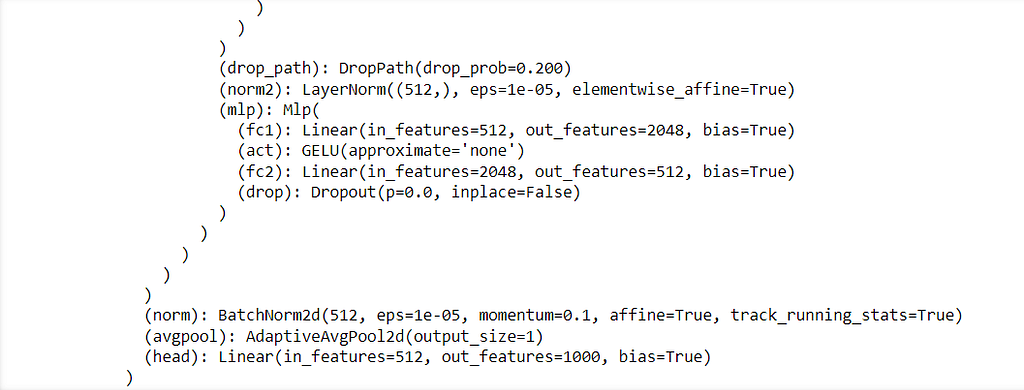
print(model)
When we print the model, we could see the head layer towards the end which is what needs to be modified for fine tuning.

To modify this layer for your custom classification task, you should replace the head layer with a new Linear layer that has the appropriate number of output classes for your dataset.
# Modify the final layer for custom classification
num_ftrs = model.head.in_features
model.head = torch.nn.Linear(num_ftrs, len(class_names))
# Move the model to GPU if available
device = torch.device("cuda:0" if torch.cuda.is_available() else "cpu")
model = model.to(device)
Next specify the optimizers and the learning rates,
import torch.optim as optim
from torch.optim import lr_scheduler

# Define loss function
criterion = torch.nn.CrossEntropyLoss()

# Define optimizer
optimizer = optim.SGD(model.parameters(), lr=0.001, momentum=0.9)

# Learning rate scheduler
exp_lr_scheduler = lr_scheduler.StepLR(optimizer, step_size=7, gamma=0.1)
Alright now everything has been defined, we now specify the training functions that would be used to train our model for our custom dataset.
import time
import copy

def train_model(model, criterion, optimizer, scheduler, num_epochs=5):
    since = time.time()

    best_model_wts = copy.deepcopy(model.state_dict())
    best_acc = 0.0

    for epoch in range(num_epochs):
        print(f'Epoch {epoch}/{num_epochs - 1}')
        print('-' * 10)

        # Each epoch has a training and validation phase
        for phase in ['train', 'val']:
            if phase == 'train':
                model.train()  # Set model to training mode
            else:
                model.eval()   # Set model to evaluate mode

            running_loss = 0.0
            running_corrects = 0

            # Iterate over data.
            for inputs, labels in dataloaders[phase]:
                inputs = inputs.to(device)
                labels = labels.to(device)

                # Zero the parameter gradients
                optimizer.zero_grad()

                # Forward
                with torch.set_grad_enabled(phase == 'train'):
                    outputs = model(inputs)
                    _, preds = torch.max(outputs, 1)
                    loss = criterion(outputs, labels)

                    # Backward + optimize only if in training phase
                    if phase == 'train':
                        loss.backward()
                        optimizer.step()

                # Statistics
                running_loss += loss.item() * inputs.size(0)
                running_corrects += torch.sum(preds == labels.data)

            if phase == 'train':
                scheduler.step()

            epoch_loss = running_loss / dataset_sizes[phase]
            epoch_acc = running_corrects.double() / dataset_sizes[phase]

            print(f'{phase} Loss: {epoch_loss:.4f} Acc: {epoch_acc:.4f}')

            # Deep copy the model
            if phase == 'val' and epoch_acc > best_acc:
                best_acc = epoch_acc
                best_model_wts = copy.deepcopy(model.state_dict())

        print()

    time_elapsed = time.time() - since
    print(f'Training complete in {time_elapsed // 60:.0f}m {time_elapsed % 60:.0f}s')
    print(f'Best val Acc: {best_acc:.4f}')

    # Load best model weights
    model.load_state_dict(best_model_wts)
    return model
Next step is to kick off the training process!
# Train the model
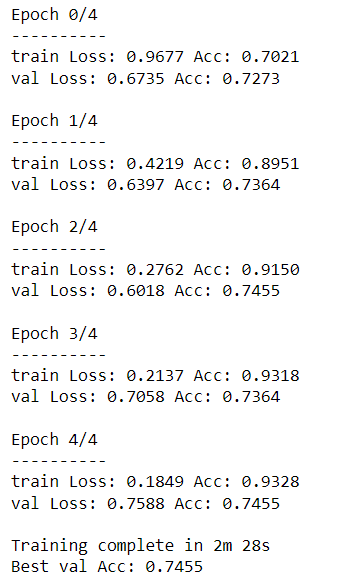
model = train_model(model, criterion, optimizer, exp_lr_scheduler, num_epochs=5)

# Save the model
torch.save(model.state_dict(), 'faster_vit_custom_model.pth')

Note that this is not the best model as we can see the model is overfit on the training dataset. The primary purpose of this article is to demonstrate how to implement a faster vision transformer and train them on the custom dataset. There are other methodologies to tackle overfitting.
Let’s do a quick test of the trained model on the below image,

import torch
from torchvision import transforms
from PIL import Image
from fastervit import create_model

# Define the number of classes in your custom dataset
num_classes = 4  # Replace with your actual number of classes

# Create the model architecture
model = create_model('faster_vit_0_224', pretrained=False)

# Modify the final classification layer to match the number of classes in your custom dataset
model.head = torch.nn.Linear(model.head.in_features, num_classes)

# Move the model to GPU if available
device = torch.device("cuda:0" if torch.cuda.is_available() else "cpu")
model = model.to(device)

# Load the trained model weights
model.load_state_dict(torch.load('faster_vit_custom_model.pth'))
model.eval()  # Set the model to evaluation mode

# Define data transformations for the input image
preprocess = transforms.Compose([
    transforms.Resize(256),
    transforms.CenterCrop(224),
    transforms.ToTensor(),
    transforms.Normalize([0.485, 0.456, 0.406], [0.229, 0.224, 0.225])
])

# Function to load and preprocess the image
def load_image(image_path):
    image = Image.open(image_path).convert('RGB')
    image = preprocess(image)
    image = image.unsqueeze(0)  # Add batch dimension
    return image.to(device)

# Function to make predictions
def predict(image_path, model, class_names):
    image = load_image(image_path)
    with torch.no_grad():
        outputs = model(image)
        _, preds = torch.max(outputs, 1)
        predicted_class = class_names[preds.item()]
    return predicted_class

# List of class names (ensure this matches your custom dataset's classes)
class_names = ['good', 'poor', 'satisfactory', 'very_poor']  # Replace with your actual class names

# Example usage
image_path = 'test_img.jpg'
predicted_class = predict(image_path, model, class_names)
print(predicted_class)
The predicted class is,

The model seems to do good. Performance tuning and model tuning is not the scope of this model anyways! But that is how you fine tune a faster vision transformer on a custom dataset! I hope you liked this article!
Thank you for reading!!
If you like the article and would like to support me, make sure to:
- 👏 Clap for the story (50 claps) to help this article be featured
- Follow me on Medium
- 📰 View more content on my medium profile
- 🔔 Follow Me: LinkedIn | GitHub
Image Classification using Faster Vision Transformer was originally published in Level Up Coding on Medium, where people are continuing the conversation by highlighting and responding to this story.
This content originally appeared on Level Up Coding - Medium and was authored by Harish Siva Subramanian
Harish Siva Subramanian | Sciencx (2024-08-14T11:20:20+00:00) Image Classification using Faster Vision Transformer. Retrieved from https://www.scien.cx/2024/08/14/image-classification-using-faster-vision-transformer/
Please log in to upload a file.
There are no updates yet.
Click the Upload button above to add an update.
