
This content originally appeared on Level Up Coding - Medium and was authored by Itsuki

If you get a chance to read my previous articles, you might notice that I am working on image and video analysis. I have shared with you on how we can create an iOS and macOS App for Human traffic analysis using Vision framework without the need of building a backend.
However, this will limit your application to be Apple-only. If you want a consist behavior across all platforms such as Web, iOS, and Android, the best bet here is to create a backend API service to take in an image or a video as input and returning the result in the response.
Amazon Rekognition is a great place to start!
It is a cloud-based image and video analysis service that makes it easy to add advanced computer vision capabilities to your applications. The service is powered by proven deep learning technology and it requires no machine learning expertise to use.
In this article, let’s check out how we can use Amazon Rekognition with Rust and perform some image analysis such as
- Object Detection
- Text Detection
- Facial Analysis
And many other ones!
I will also be sharing with you on how we can parse the response and overlay some bounding boxes to our image for visualization.
**********************************************************************
Before we get started on coding, if you want to get an overall idea on how Rekognition works, you can try it out from the Amazon Rekognition Console.
Upload your photo and you can visualize the results immediately.

Time to start!
Set Up
First of all, let’s add the following dependencies to Cargo.toml.
[dependencies]
anyhow = "1.0.86"
aws-config = { version = "1.1.7", features = ["behavior-version-latest"] }
aws-sdk-rekognition = "1.42.0"
aws-smithy-types = "1.2.2"
tokio = { version = "1", features = ["full"] }
Also, since we will be using the AWS configuration stored in our environment, make sure you have your credentials set up!
Detect Objects
Let’s start simple by detecting objects in our image.
To detect objects (or labels) we will be using detect_labels. However, since the Rust (crate) documentation is really incomplete, I recommend to check out the DetectLabels API page in AWS Documentation.
We pass the input image either as image bytes or as a reference to an image in an Amazon S3 bucket. I will be using bytes here.
There are some optional parameters we can pass in to control our results.
- settings: a set of filtering criteria with sets of individual labels or with label categories
- max_labels: limits the number of labels returned. The default and upper limit is 1000 labels.
- min_confidence: controls the confidence threshold for the labels returned.
Here is how we can make a DetectLabels request and get the response from it.
async fn detect_labels(client: &aws_sdk_rekognition::Client, file_path: &Path) -> Result<()> {
    let bytes = fs::read(file_path)?;
    let image = Image::builder()
        .bytes(aws_smithy_types::Blob::new(bytes.clone()))
        .build();

    let settings = DetectLabelsSettings::builder()
        .general_labels(
            GeneralLabelsSettings::builder()
                .set_label_inclusion_filters(Some(vec!["Cat".to_string(), "Hat".to_string()]))
                .build())
        .build();

    let response = client
        .detect_labels()
        .image(image)
        .max_labels(3)
        .min_confidence(0.5)
        .settings(settings)
        .send()
        .await?;

    println!("{:#?}", response);

    let labels = response.labels.context("no label exists")?;
    process_labels(&labels, &file_path)?;

    Ok(())
}
(Ignore the process_labels function for now. We will be working on it next!)
I have set LabelInclusionFilters here, but you also have the option to specify LabelCategoryExclusionFilters, LabelCategoryInclusionFilters, and LabelExclusionFilters.
You can find the latest list of labels and object bounding boxes supported by Amazon Rekognition here.
The response should contains the following fields. We will have None for image_properties here since we are not including the ImageProperties feature. (we will be covering this in a short while).
pub labels: Option<Vec<Label>>,
pub orientation_correction: Option<OrientationCorrection>,
pub label_model_version: Option<String>,
pub image_properties: Option<DetectLabelsImageProperties>,
labels are what we are interested in here as it contains details about the detected label, including the name, detected instances (bounding boxes), parent labels, and level of confidence.
Let’s move to processing it and adding some visualization to our original image.
Process Response And Add Visualizations
First of all, let’s add the following crates for image processing to the dependencies in Cargo.toml.
image = "0.25.2"
imageproc = "0.25.0"
ab_glyph = "0.2.28"
To write text, we will also need to provide the data for the font. I will be using this Matemasie font I found on Google Fonts. Feel free to choose one you like and download the ttf file for it!
If you need a more detailed explanation on how to draw Text and Shape on Images, please check out my previous article Rust: Draw Text and Shape on Images, At Any Angle You Like!
Each Label contains the following fields.
pub name: Option<String>,
pub confidence: Option<f32>,
pub instances: Option<Vec<Instance>>,
pub parents: Option<Vec<Parent>>,
pub aliases: Option<Vec<LabelAlias>>,
pub categories: Option<Vec<LabelCategory>>,
What we are mainly interested in are the
- name: The name (label) of the object or scene.
- confidence: Level of confidence.
- instances: If Label represents an object, Instances contains the bounding boxes for each instance of the detected object. Bounding boxes are returned for common object labels such as people, cars, furniture, apparel or pets. That is if the label is something like Urban, Street, or Road, you will have empty instances.
Here is how we can process it and add some bounding box overlays to our original image.
fn process_labels(labels: &Vec<Label>, file_path: &Path) -> Result<()> {
    let filename = file_path.file_name().context("file name not available")?.to_str().context("file name not available")?;
    let mut image = ImageReader::open(file_path)?.decode()?;

    let (dimension_x, dimension_y) = image.dimensions();

    let scale = PxScale::from(36.0);
    let font_vec = Vec::from(include_bytes!("../test_data/Matemasie-Regular.ttf") as &[u8]);
    let font = FontVec::try_from_vec(font_vec)?;

    for label in labels.to_owned().into_iter() {
        let instances = label.instances.context("instances not available")?;
        let name = label.name.context("name not available")?;

        for instance in instances.into_iter() {
            let bounding_box = instance.bounding_box.clone().context("bounding_box not available")?;
            let left = (&bounding_box.left.context("bounding_box not available")? * dimension_x as f32) as i32;
            let top = (&bounding_box.top.context("bounding_box not available")? * dimension_y as f32) as i32;
            let width = (&bounding_box.width.context("bounding_box not available")? * dimension_x as f32) as u32;
            let height = (&bounding_box.height.context("bounding_box not available")? * dimension_y as f32) as u32;

            let confidence = instance.confidence.context("confidence not available")?;

            let rect: Rect = Rect::at(left, top).of_size(width, height);
            draw_text_mut(
                &mut image,
                Rgba([255, 192, 203, 255]),
                left,
                top,
                scale,
                &font,
                &format!("{}: {}", name, confidence)
            );
            draw_hollow_rect_mut(
                &mut image,
                rect,
                Rgba([255, 192, 203, 255]),
            );
        }


    }
    let new_path = format!("test_data/processed_data/new_{}", filename);
    image.save(new_path)?;

    Ok(())
}
I am testing with my Pikachu like always and here is what I got.
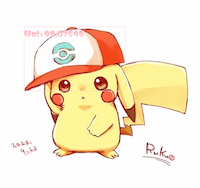
I probably should choose a better font/color but it says Hat: 99.07545!
One note I would like to make here regarding to BoundingBox.
The top, left, width and height are ratios (normalized to the image size), NOT Absolute values!
For example, if the input image is 700x200 pixels, the top-left coordinate of the bounding box is 350x50 pixels, and the bounding box width is 70 pixels, we will have a left value of 0.5 (350/700), a top value of 0.25 (50/200), and a width of 0.1.
I will only be doing the processing for the detect_labels in this article because all the other ones can be processed in the same(almost the same) way!
Get Image properties
I have already mentioned it a little bit about ImageProperties above, but we can use the DetectLabels function (again) to get information regarding to the image. The only difference here is that we will specify the features to be ImageProperties(or both the GeneralLabels and ImageProperties if you want to get the labels as well as the image information).
Pretty much the same as above except for the following points I would like to point out.
- Within the settings, we have image_properties instead.
- max_label we had above is removed since this parameter is only valid when supplying GeneralLabels as a feature type
async fn get_image_properties(client: &aws_sdk_rekognition::Client, file_path: &Path ) -> Result<()> {
    let bytes = fs::read(file_path)?;
    let image = Image::builder()
        .bytes(aws_smithy_types::Blob::new(bytes.clone()))
        .build();

    let settings = DetectLabelsSettings::builder()
        .image_properties(DetectLabelsImagePropertiesSettings::builder().max_dominant_colors(10).build())
        .build();

    let response = client
        .detect_labels()
        .features(aws_sdk_rekognition::types::DetectLabelsFeatureName::ImageProperties)
        .image(image)
        .settings(settings)
        .send()
        .await?;
    println!("{:#?}", response);

    Ok(())
}
The fields within the response will be the same as above except for what we are interested i this time is the image_properties parameter.
pub labels: Option<Vec<Label>>,
pub orientation_correction: Option<OrientationCorrection>,
pub label_model_version: Option<String>,
pub image_properties: Option<DetectLabelsImageProperties>,
It contains a DetectLabelsImageProperties object with information such as
- quality
- dominant_colors
- foreground
- background
Detect Text
First of all, there are multiple AWS services you can use for text detection and Amazon Rekognition is one of them.
It detect text in images and videos and convert the detected text into machine-readable text. With this, we can implement solutions such as
- Visual search for retrieving and displaying images that contain the same text.
- Content insights
- Navigation
- Searching videos for clips with specific text keywords
However, I have to say that you will probably find using ChatGPT or Bedrock a better fit to some of the scenarios above such as Navigation especially if you want to translate the detected text into some other languages, or giving instructions based on the text.
Also if you want to extract text in a document, you probably should check out Amazon Textract, another AWS service for extracting text from documents Using Optical Character Recognition (OCR).
Anyway!
Here is how we can use the DetectText API to convert texts in image into a machine-readable format.
async fn detect_text(client: &aws_sdk_rekognition::Client, file_path: &Path) -> Result<()> {
    let bytes = fs::read(file_path)?;
    let image = Image::builder()
        .bytes(aws_smithy_types::Blob::new(bytes.clone()))
        .build();

    let response = client
        .detect_text()
        .image(image)
        .send()
        .await?;
    println!("{:#?}", response);

    Ok(())
}
We can also add additional filtering based on text region, size and confidence score using the filters parameter.
For example, if we want to filter based on regions_of_interest, let’s say we only care about the upper left corner of the image, here is what we can do.
let bounding_box = BoundingBox::builder()
    .left(0.0)
    .top(0.0)
    .height(0.5)
    .width(0.5)
    .build();

let filter = DetectTextFilters::builder()
    .regions_of_interest(RegionOfInterest::builder().bounding_box(bounding_box).build())
    .build();
And assign the filter to the filters parameter.
let response = client
    .detect_text()
    .image(image)
    .filters(filter)
    .send()
    .await?;
The text_detections:Option<Vec<TextDetection>> parameter within the response is where all the Information about words or lines of text detected by DetectText lies. Each TextDetection contains the following.
pub detected_text: Option<String>,
pub type: Option<TextTypes>,
pub id: Option<i32>,
pub parent_id: Option<i32>,
pub confidence: Option<f32>,
pub geometry: Option<Geometry>,
Personal Protective Equipment (PPE) detection
We can detect Personal Protective Equipment (PPE) worn by persons in an image using the DetectProtectiveEquipment API.
Specifically, Rekognition is able to detect the following types of PPE.
- Face cover
- Hand cover
- Head cover
We can use this information to help determine if workers on a construction site are wearing head covers, or if medical workers are wearing face covers and hand covers.
For example, if we only cares about HandCover and HeadCover, and we want a minimum confidence of 0.8, we can specify those using summarization_attributes like follwoing.
async fn detect_ppe(client: &aws_sdk_rekognition::Client, file_path: &Path) -> Result<()> {
    let bytes = fs::read(file_path)?;
    let image = Image::builder()
        .bytes(aws_smithy_types::Blob::new(bytes.clone()))
        .build();

let attibutes = ProtectiveEquipmentSummarizationAttributes::builder()
        .min_confidence(0.8)
        .set_required_equipment_types(Some(vec![ProtectiveEquipmentType::HandCover, ProtectiveEquipmentType::HeadCover]))
        .build()?;

    let response = client
        .detect_protective_equipment()
        .summarization_attributes(attibutes)
        .image(image)
        .send()
        .await?;

    println!("{:#?}", response);

    Ok(())
}
The response: DetectProtectiveEquipmentOutput will be in the following structure
pub struct DetectProtectiveEquipmentOutput {
    pub protective_equipment_model_version: Option<String>,
    pub persons: Option<Vec<ProtectiveEquipmentPerson>>,
    pub summary: Option<ProtectiveEquipmentSummary>,
}
with persons:Option<Vec<ProtectiveEquipmentPerson>> contains an array of persons detected in the image (including persons not wearing PPE).
Face Detection
The DetectFaces operation provides information not only the bounding box of the faces detected, but also landmarks positions, emotions, and many other facial attributes.
Couple points to keep in mind while using this API.
- It only detects the 100 largest faces in an image.
- Most effective on frontal faces.
Here is how we can use it.
async fn detect_faces(client: &aws_sdk_rekognition::Client, file_path: &Path) -> Result<()> {
    let bytes = fs::read(file_path)?;
    let image = Image::builder()
        .bytes(aws_smithy_types::Blob::new(bytes.clone()))
        .build();

    let response = client
        .detect_faces()
        .set_attributes(Some(vec![Attribute::All]))
        .image(image)

        .send()
        .await?;

    println!("{:#?}", response);

    Ok(())
}
If we are only interested in specific attributes, for example, default ones (that is BoundingBox, Confidence, Pose,Quality, and Landmarks), we can specify that using the attributes parameter.
let response = client
    .detect_faces()
    .set_attributes(Some(vec![Attribute::All]))
    .image(image)
    .set_attributes(Some(vec![Attribute::Default]))
    .send()
    .await?;
In the response, each face detected will have their own corresponding FaceDetail object.
The fields included will be dependent on the attributes we set above. This can be either the default facial attributes or all facial attributes.
Face comparison
Face Comparison is really useful for identity verification. We are basically asking the question “Does the face in one image match a face in another image (for a user in our Database)?”
Here is how we can compare a target image to a reference (source) image.
async fn compare_faces(client: &aws_sdk_rekognition::Client, reference_path: &Path, comparison_path: &Path) -> Result<()> {
    let reference_bytes = fs::read(reference_path)?;
    let reference_image = Image::builder()
        .bytes(aws_smithy_types::Blob::new(reference_bytes.clone()))
        .build();

    let comparison_byte = fs::read(comparison_path)?;
    let comparison_image = Image::builder()
        .bytes(aws_smithy_types::Blob::new(comparison_byte.clone()))
        .build();


    let response = client
        .compare_faces()
        .source_image(reference_image)
        .target_image(comparison_image)
        .send()
        .await?;

    println!("{:#?}", response);

    Ok(())
}
Within the response: CompareFacesOutput, in addition to face_matches:Option<Vec<CompareFacesMatch>>, we will also have access to unmatched_faces: Option<Vec<ComparedFace>> as well.
Each matched faces will contains
- similarity indicating the Level of confidence that the faces match, and
- face: ComparedFace Providing face metadata such as bounding box and confidence
Do Note that if you are using face comparison for verification, you probably should also check out Detecting face liveness because you probably don’t want one person to pretend to be another by simply using a photo…
Celebrity recognition
Last but not least, we have RecognizeCelebrities for recognizing celebrities in the input image, It comes pre-trained with the ability to recognize hundreds of thousands of popular people in fields such as sports, media, politics, and business.
Basically doing the exact same thing as above, except for changing the function called to recognize_celebrities.
async fn recognize_celebrities(client: &aws_sdk_rekognition::Client, file_path: &Path) -> Result<()> {
    let bytes = fs::read(file_path)?;
    let image = Image::builder()
        .bytes(aws_smithy_types::Blob::new(bytes.clone()))
        .build();

    let response = client
        .recognize_celebrities()
        .image(image)
        .send()
        .await?;

    println!("{:#?}", response);

    Ok(())
}
Each celebrity object within the celebrity_faces parameter in our response includes the following attributes: Face, Confidence, Emotions, Landmarks, Pose, Quality, Smile, Id, KnownGender, MatchConfidence, Name, Urls.
In addition to the recognized ones, we will also have access to the unrecognized faces with most of the properties such a the bounding box, confidence, emotions, landmarks and etc.
Every time I tried to use AWS SDK for Rust, I started complaining on how we are lacking of a good documentation…
Anyway!
That’s all I have for this article but definitely NOT all I have for Amazon Rekognition!
In addition to detection in still images, we can also perform analysis on stored video and streaming video events. Also, we have the ability to add custom labels to identify the objects and scenes in images that are specific to our needs, such as logos or engineering machine parts.
I am planning on writing more about those so keep an eye out if you are interested!
Happy recognizing!
Rust: Image Analysis with Amazon Rekognition was originally published in Level Up Coding on Medium, where people are continuing the conversation by highlighting and responding to this story.
This content originally appeared on Level Up Coding - Medium and was authored by Itsuki
Itsuki | Sciencx (2024-09-02T00:40:18+00:00) Rust: Image Analysis with Amazon Rekognition. Retrieved from https://www.scien.cx/2024/09/02/rust-image-analysis-with-amazon-rekognition/
Please log in to upload a file.
There are no updates yet.
Click the Upload button above to add an update.