This content originally appeared on Telerik Blogs and was authored by Leomaris Reyes
Spell check and colored brace pairs can speed up your .NET MAUI development in Visual Studio. Learn more!
Visual Studio is one of the most-used tools in our daily lives as .NET MAUI developers, constantly bringing improvements that make our work easier. Visual Studio 2022 has introduced several enhancements to assist us, including the Spell Checker and Brace Pair Colorization. In this article, you will learn how to quickly and easily configure these features and take advantage of them.
Visual Studio Spell Checker
It’s normal to make some spelling errors when coding. Don’t worry—the important thing is not whether you make mistakes but having the tools to correct them.
You can identify errors immediately with the Visual Studio 2022 Spell Checker, available from version 17.5.
How Do I Set It Up?
It’s super easy. To enable it, you have two options:
- Go to Edit ➡️ Advanced ➡️ Toggle Text Spell Check.
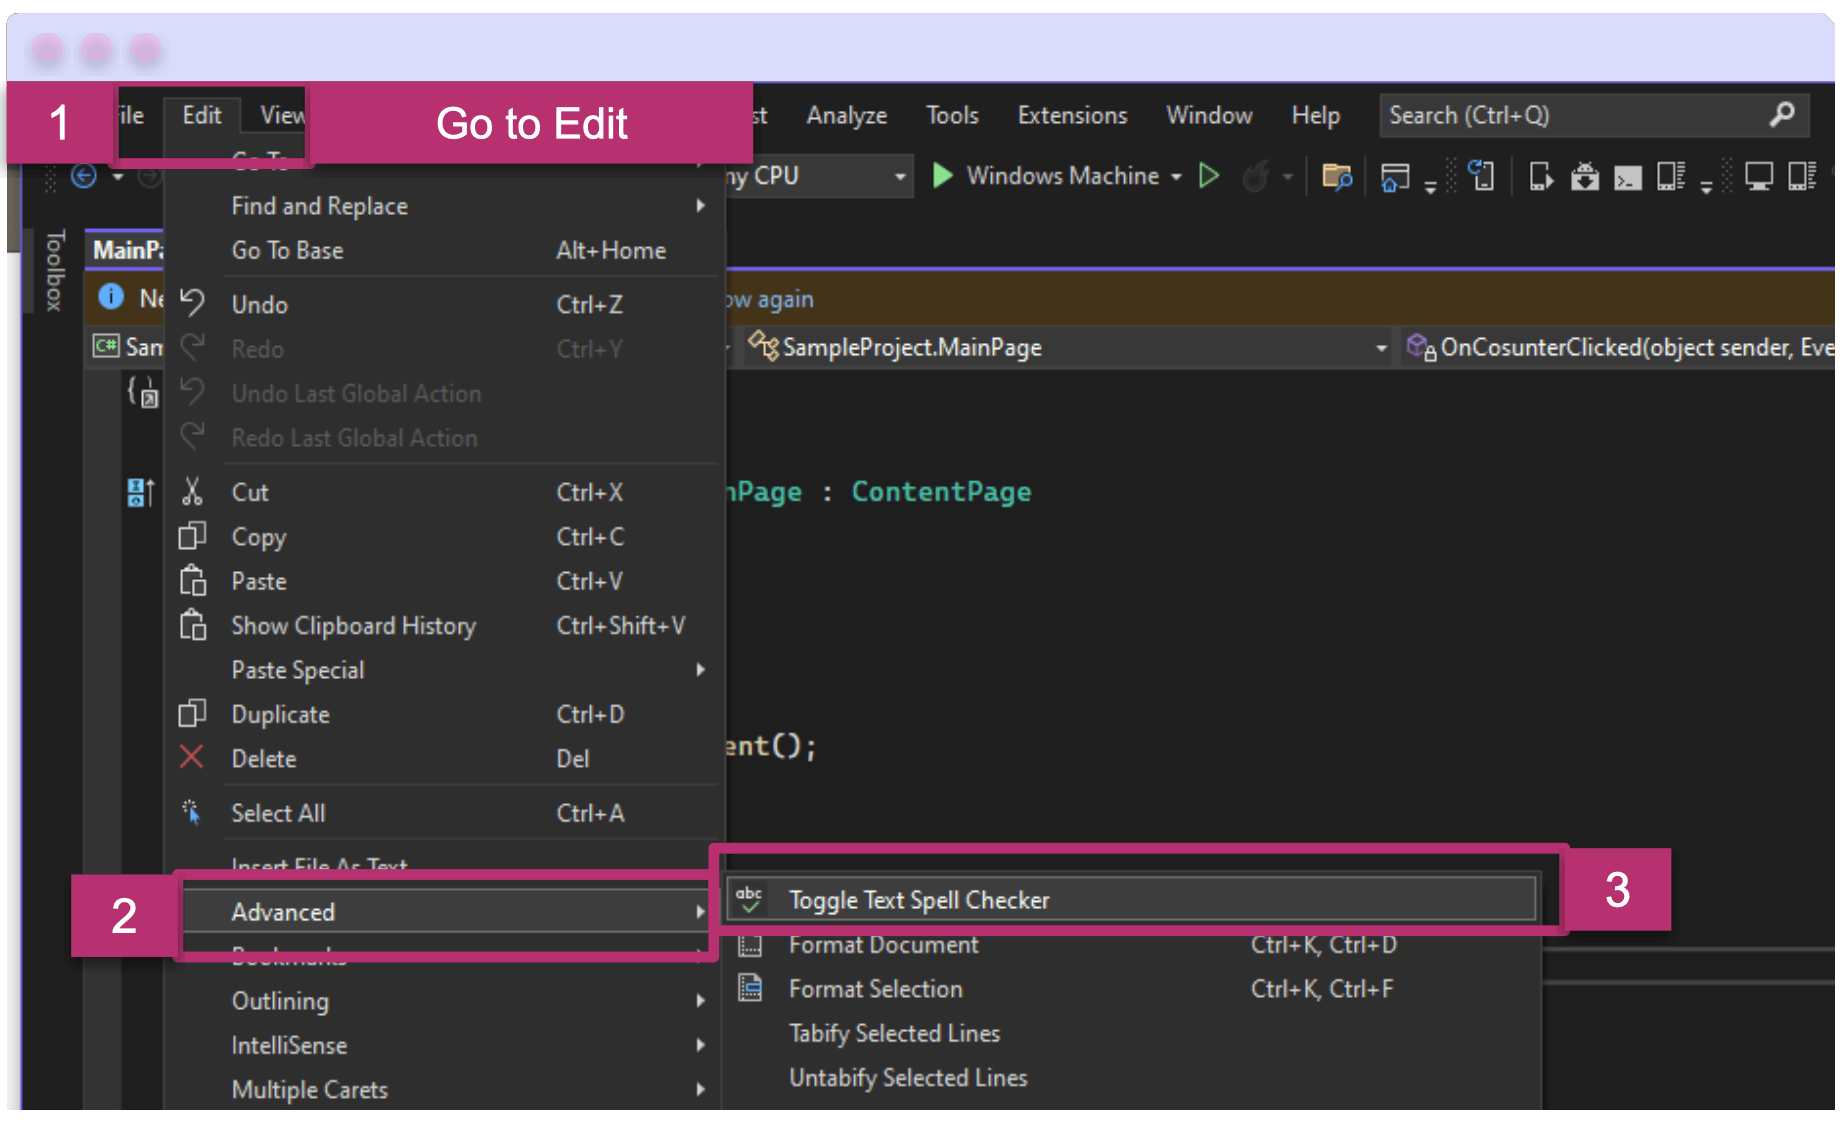
To check that it’s enabled, the “abc” icon should have a slightly lighter background, indicating that it is checked, as shown below.

- A second option, and the faster way to enable Spell Checker, is to simply go to the “abc” icon mentioned earlier and click on it. This is the most direct way to activate it.
How Should Spell Checker Behave in Visual Studio?
Once you have it enabled, any spelling mistakes in your code (including comments) will be highlighted with a line under the entire word. When you hover over it, you will see a description that says: “SPELL: Spelling error - [Your_Word] is not a Word.” When you right-click, you will get a suggestion for the correct spelling.
Let’s see a demo of this in a more detailed example, in simple steps:
Step 1: Let’s make a spelling mistake in the code: We will use the method that comes with a default project called OnCounterClicked. To create the example, we will add some spelling mistakes as follows:
➖ Change the name of OnCounterClick to OnCosunterClicked.
➖ Add a comment that says "I liek this metod."
So far, it should look like the following image:
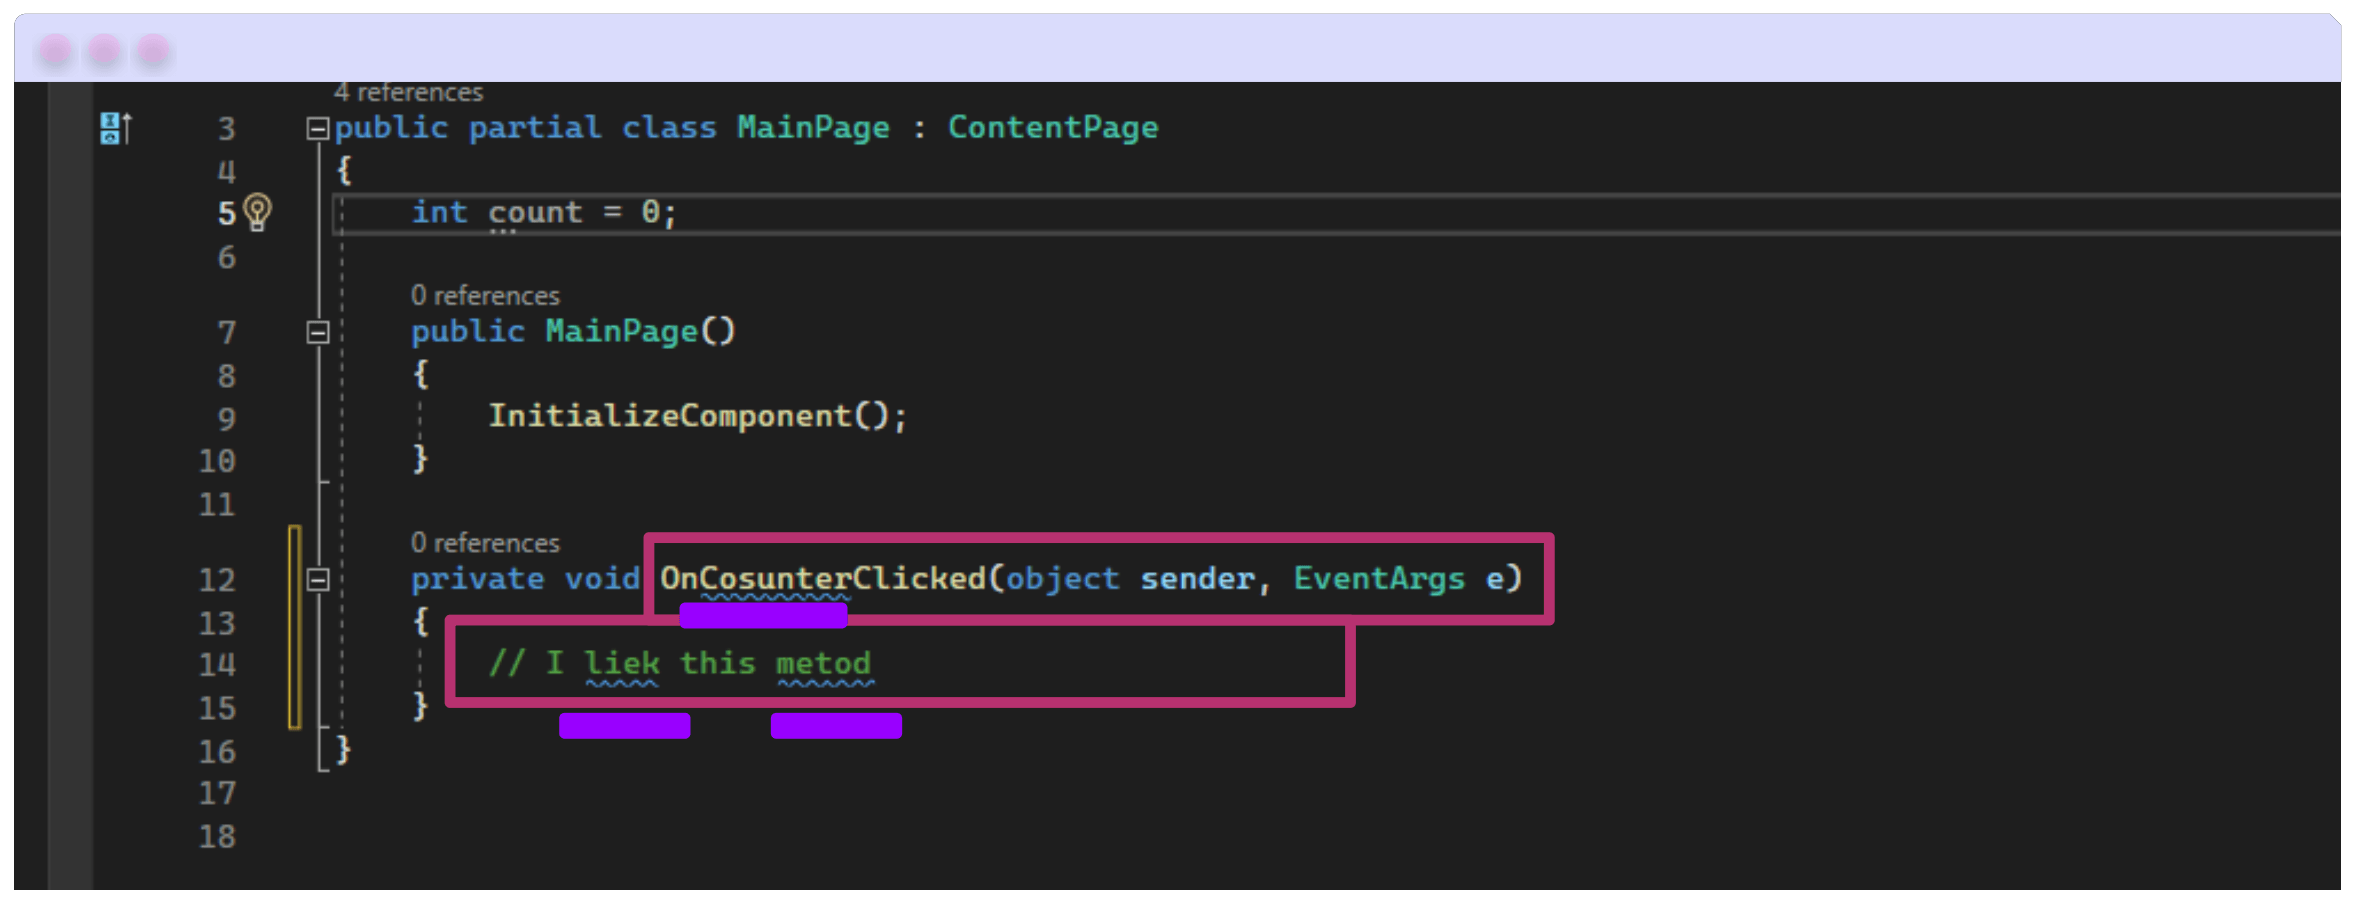
As you can see in the image, a blue line appears under each spelling mistake.
Step 2: How to identify the error? When you hover the mouse over the word, it shows the error and gives you the option to “Show potential fixes.” Click on it.
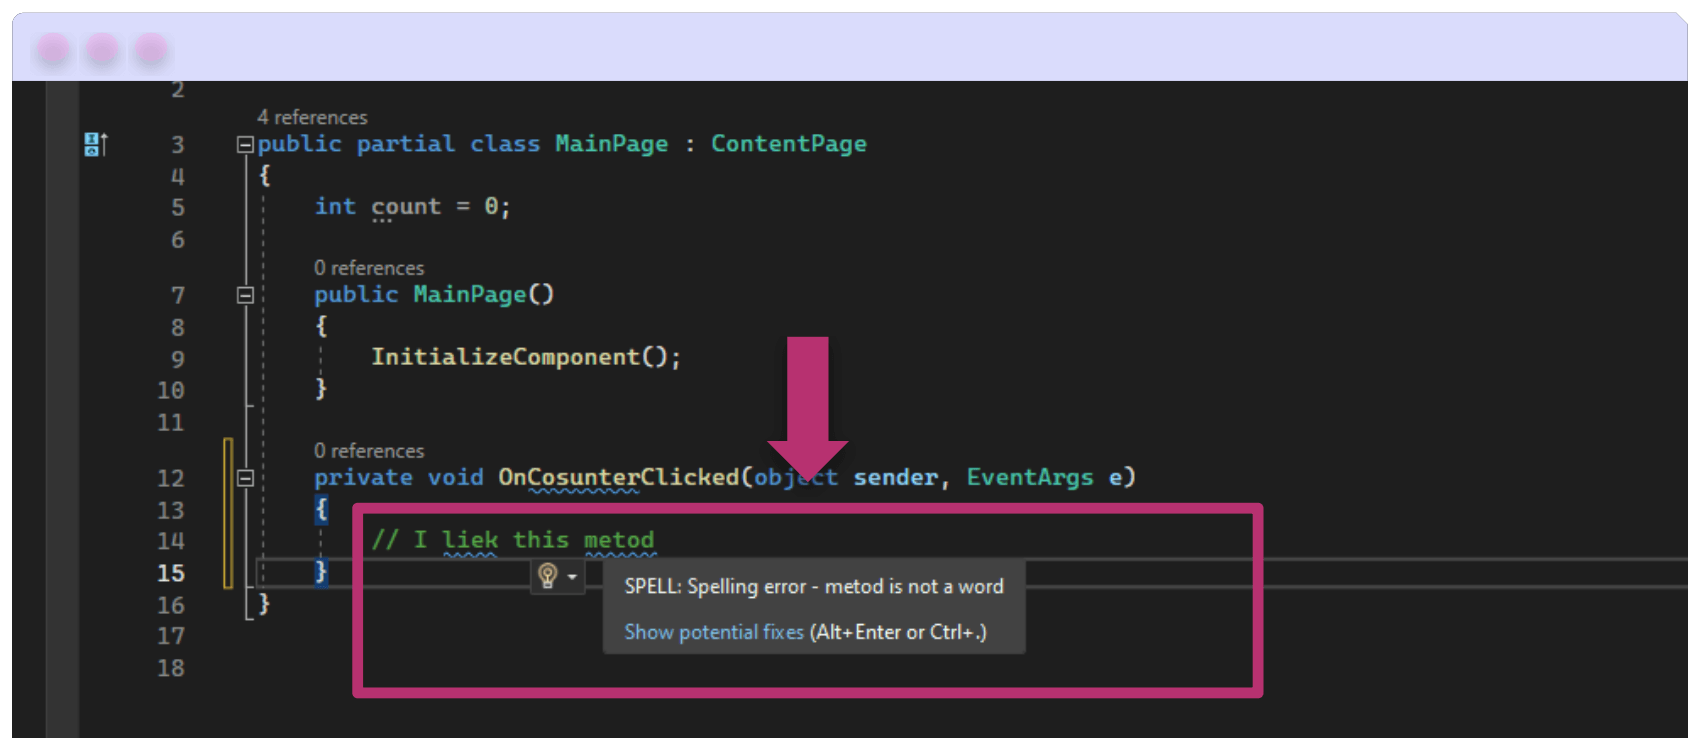
Step 3: And then, what options do I have?
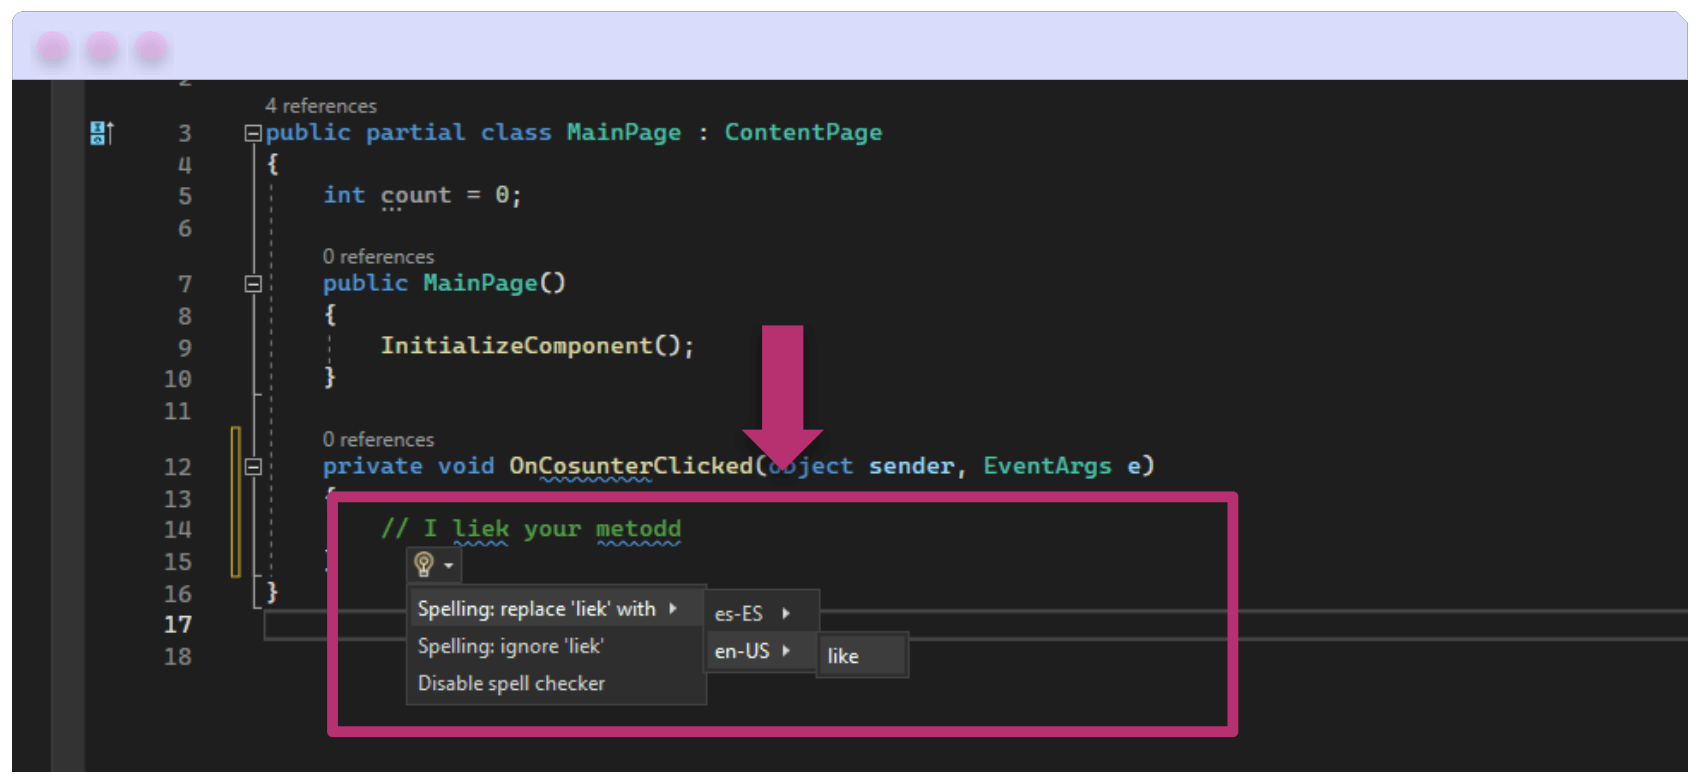
Once you click on the “Show potential fixes” option, you will have three choices:
Spelling: replace [Your_Word] with ➡️: A list of available languages will appear, presenting possible corrections for the spelling mistake. Click on the correct option, and it will be automatically corrected.
Spelling: ignore [Your_Word]: This will indicate ignoring the spelling mistake, and it will stop marking it as incorrect.
Disable spell checker: This will disable the spell checker.
Brace Pair Colorization
The longer your code is, the more key pairs there are, making it harder to identify which keys belong to which block. The good news is that in Visual Studio 2022, starting with version 17.6, there is brace pair colorization.
But what does that mean exactly? Without key coloring, all brace pairs have the same color. To solve a problem, you’ll first want to understand your code in blocks, and part of that involves identifying the pairs of braces that make up a block. With this new feature in Visual Studio 2022, each brace pair is identified with a color, making it faster to read code and spot errors.
To enable it in Visual Studio, follow these steps:
- Go to Tools ➡️ Options.
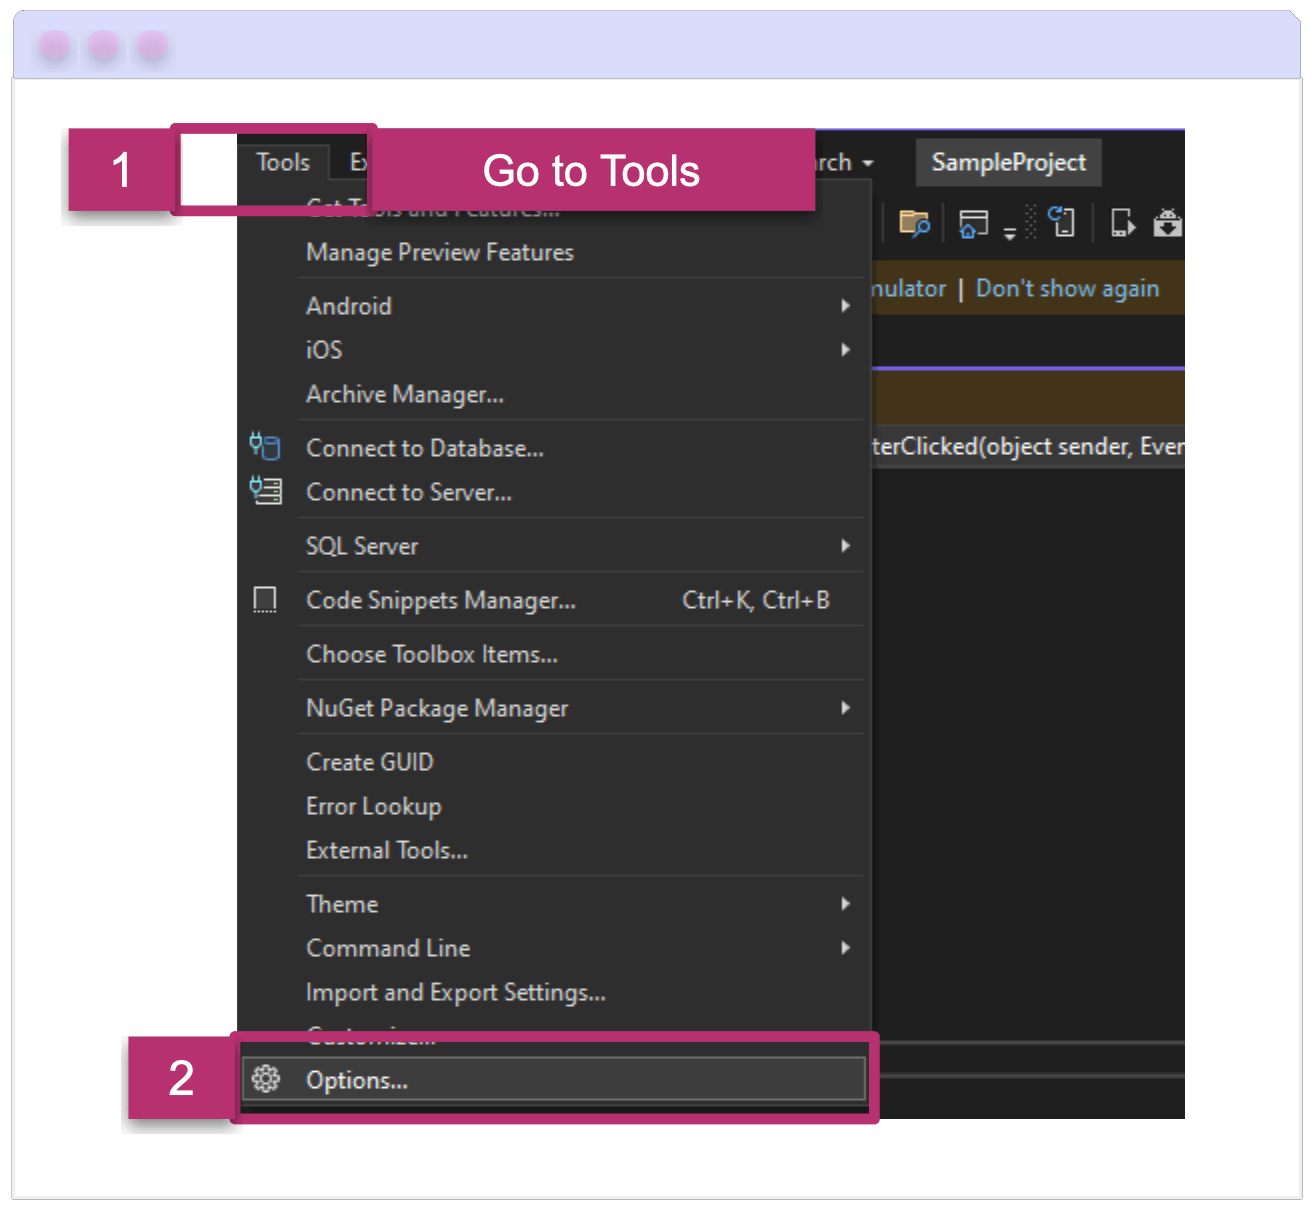
- General options: A dialog box will appear where you can change various settings. Here we will focus on brace pair colorization.
- Go to Text Editor ➡️ General (or type “brace pair” directly in the search bar).
- In the Display category, look for the option that says “Enable brace pair colorization” and check the box.
- Click the OK button.
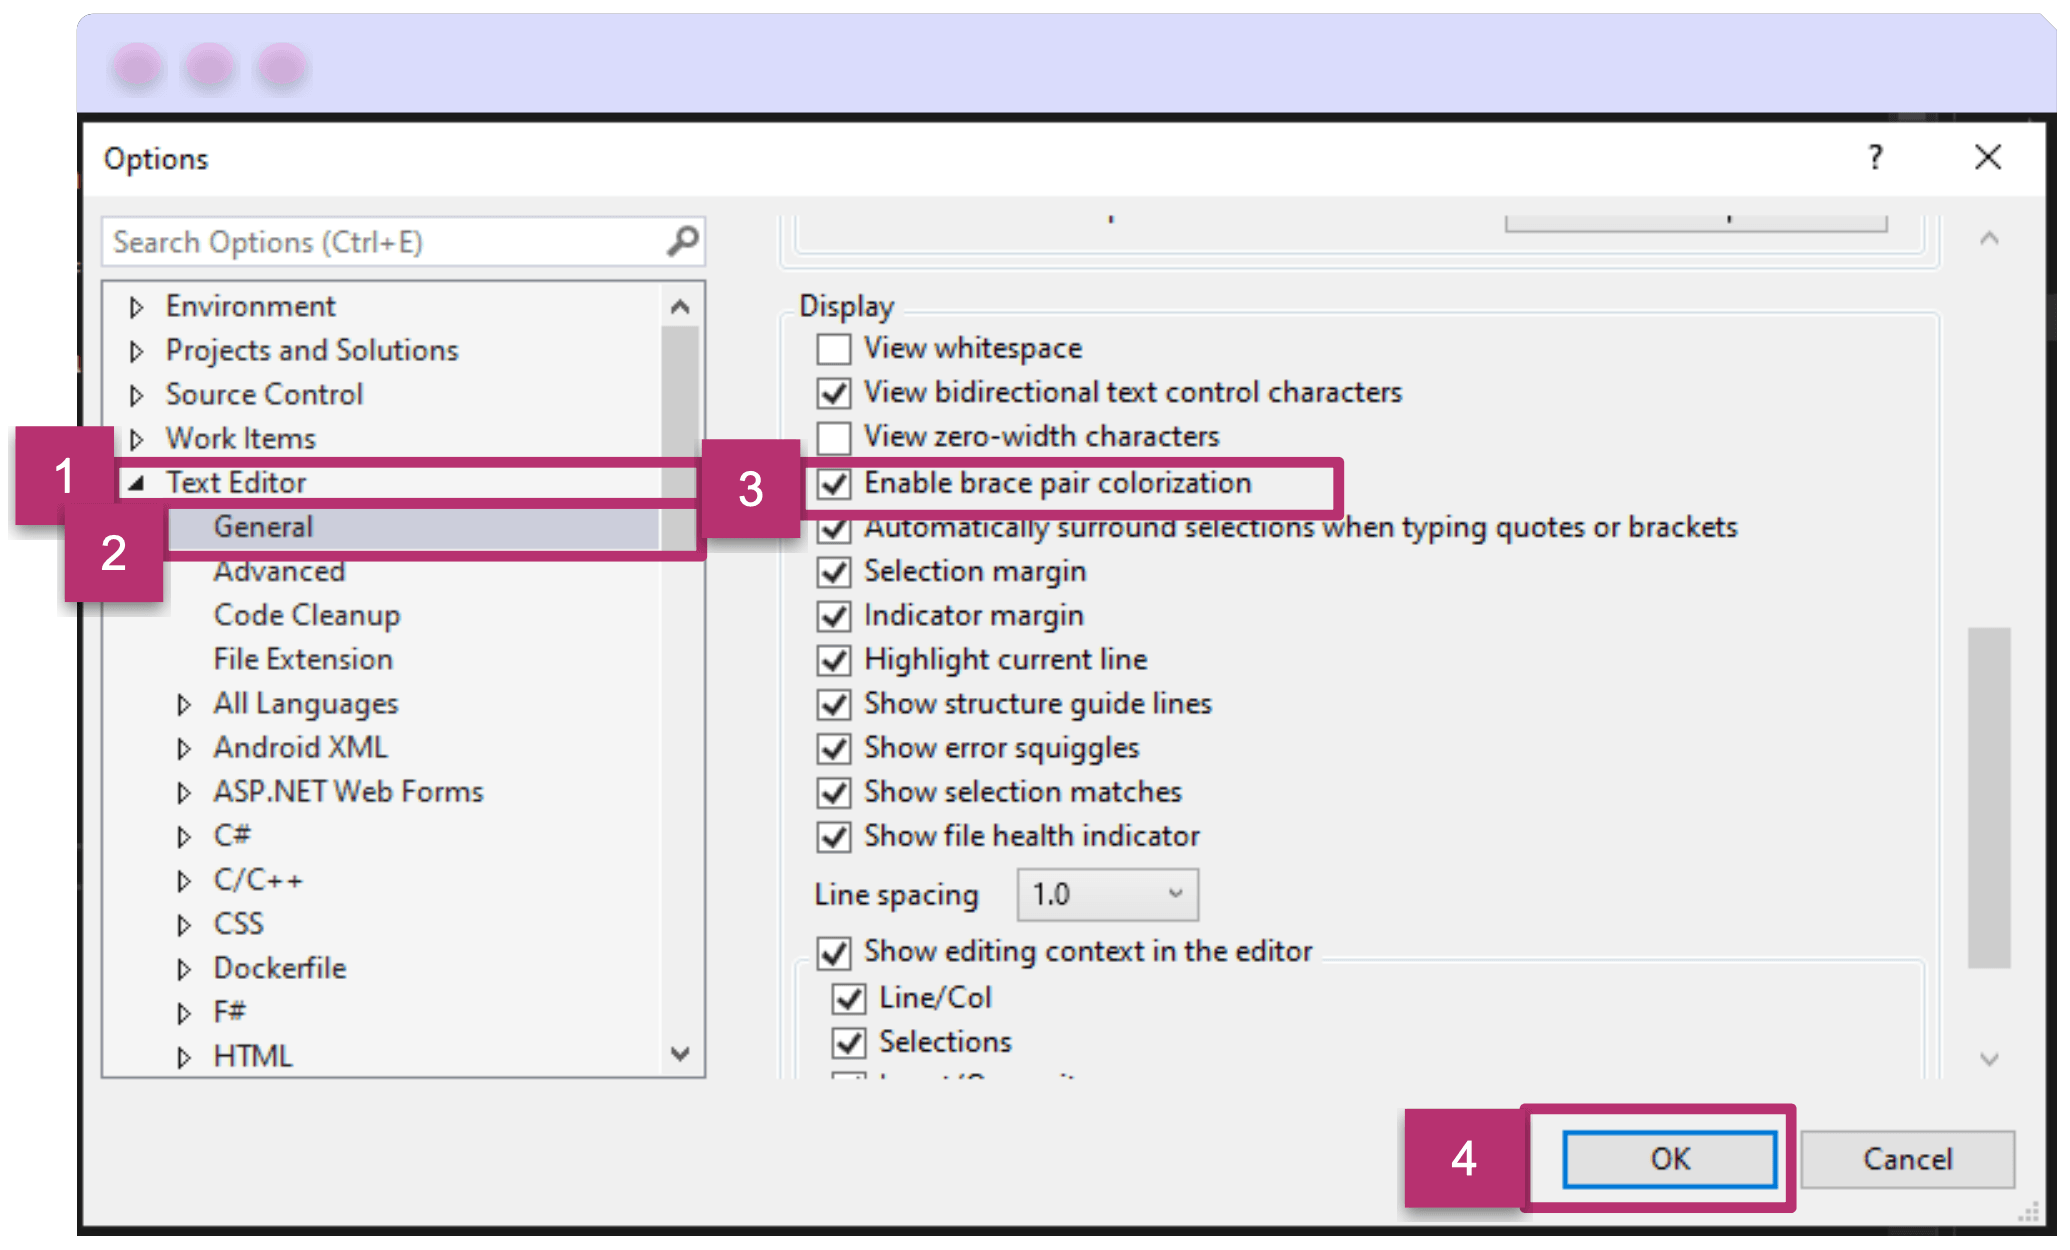
- The result!
Here, I made an example with several if statements so you can notice the color difference for each brace pair. There is one with pink keys, another with yellow keys and others with blue keys. It’s much easier to identify the code blocks this way!
I included an image so you can see the significant difference between having brace pair colorization enabled or not!
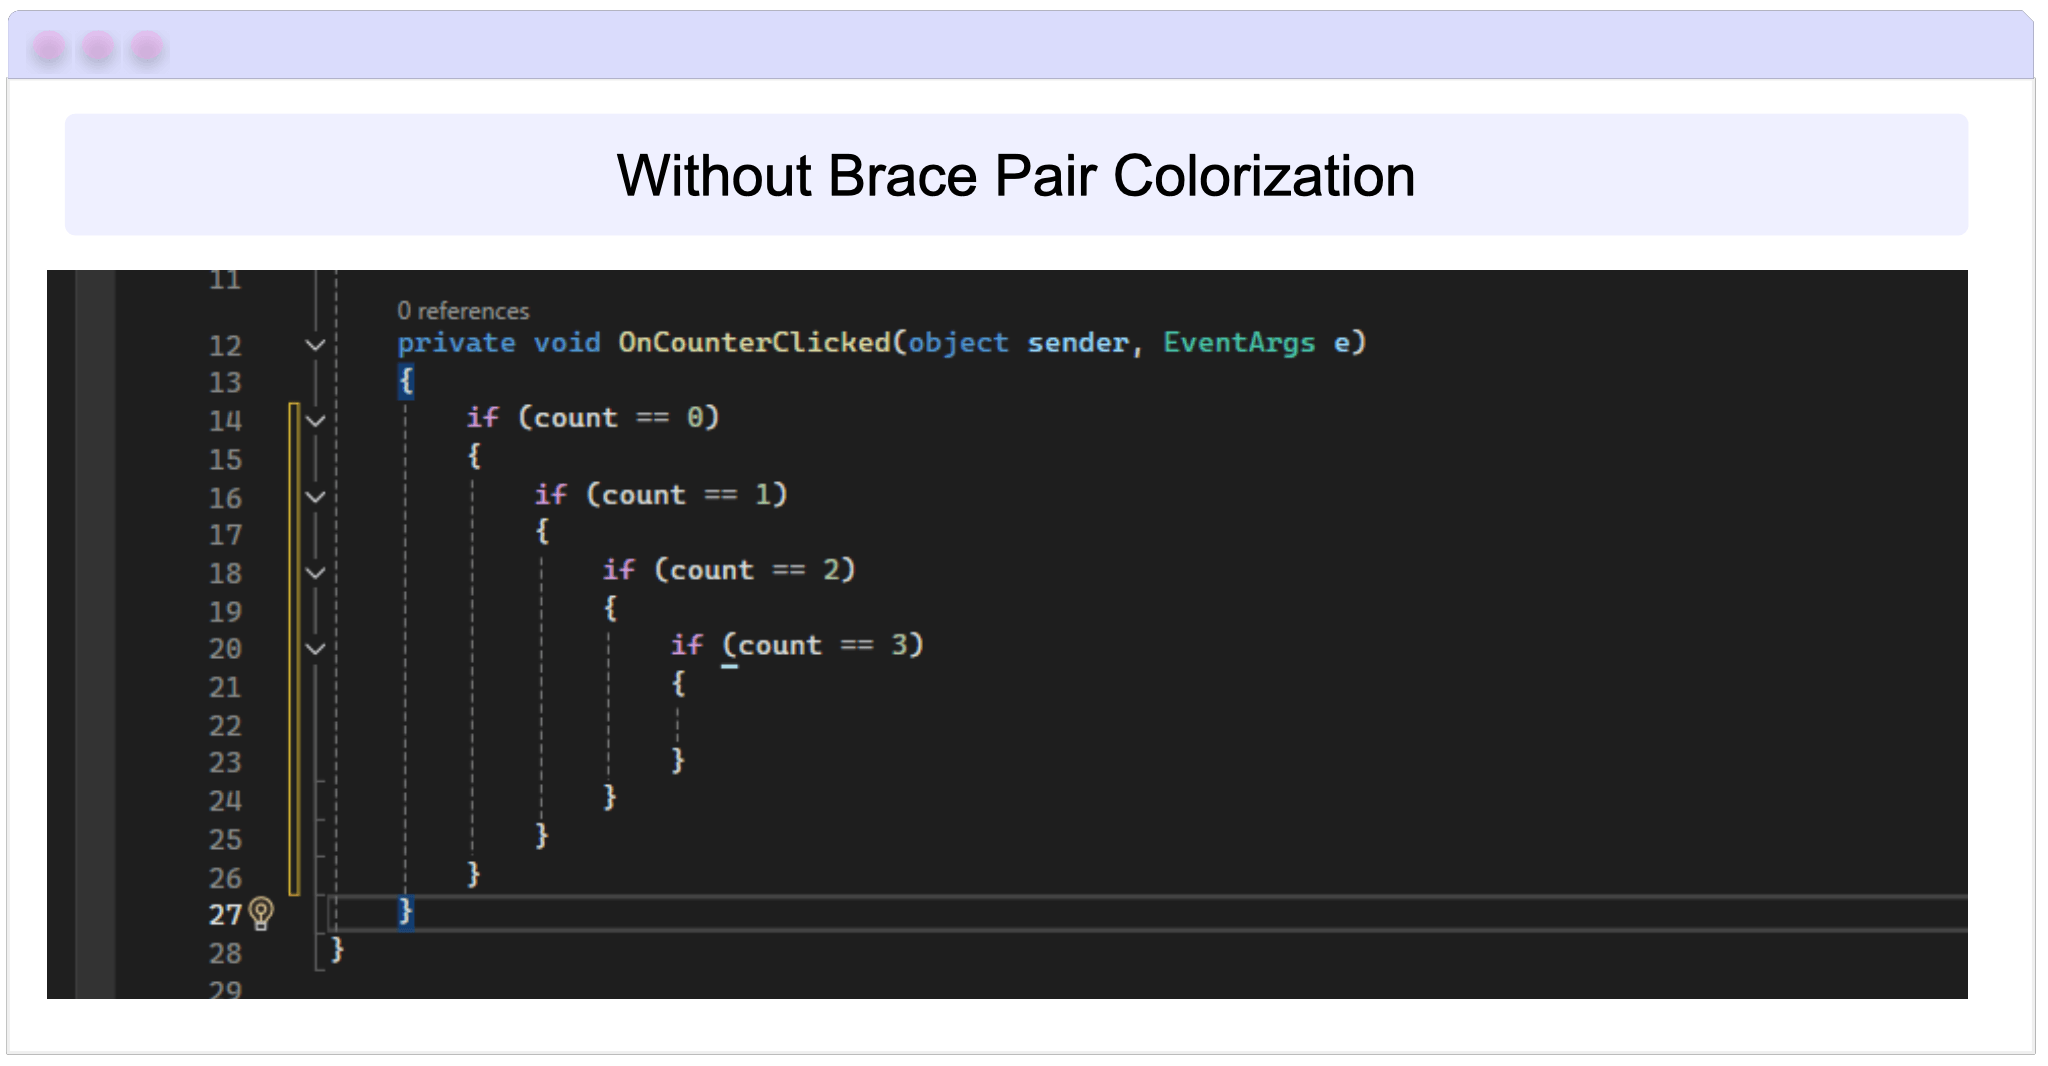
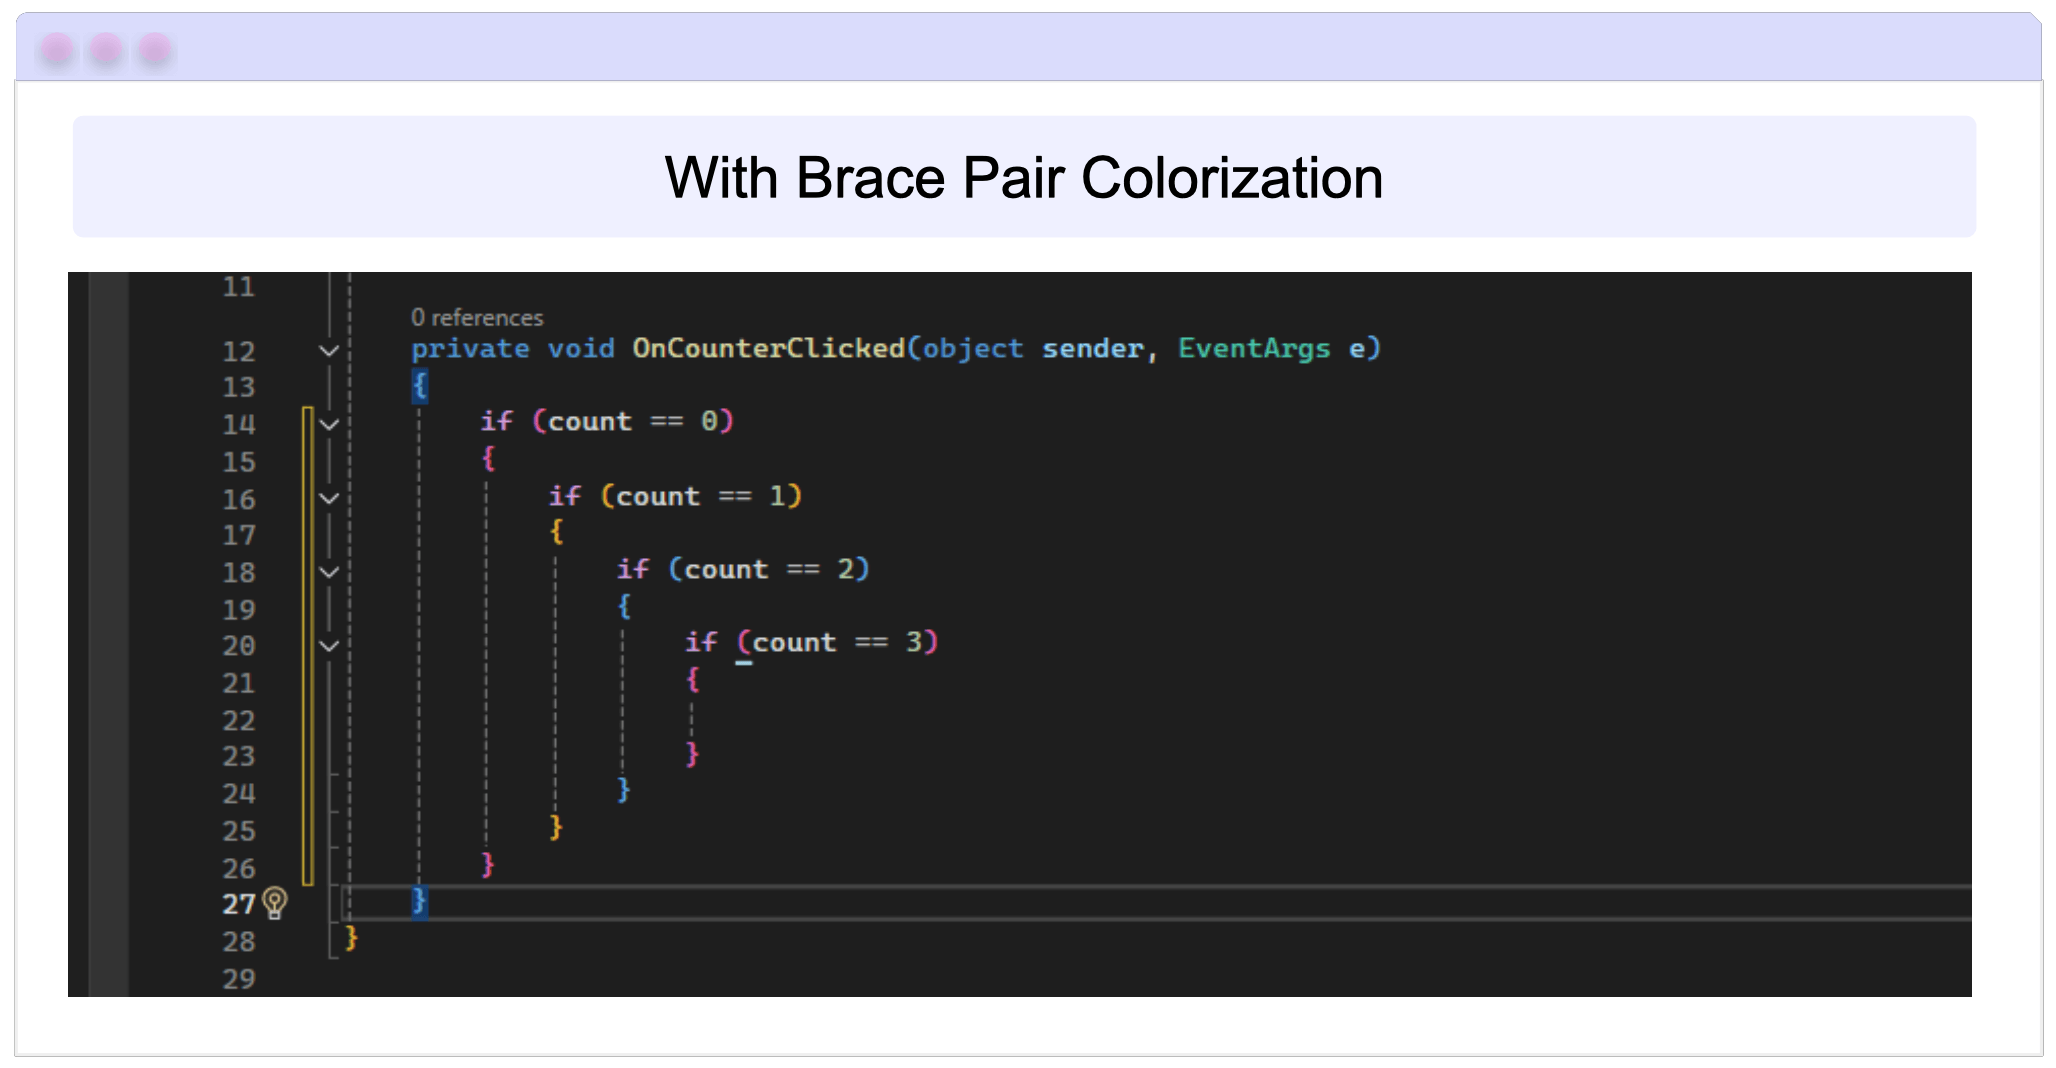
Wrap-up
And that’s all! In a few simple steps, you have learned how to enable spell check and color braces to help identify mistakes in your code. These tools will help you use Visual Studio more effectively and productively.
Thanks for reading my article. See you next time! ♀️
References
Gerald Versluis’s videos were used as references for this article:
This content originally appeared on Telerik Blogs and was authored by Leomaris Reyes
Leomaris Reyes | Sciencx (2024-10-30T16:23:55+00:00) Code Smarter: Spell Checker and Colorization Braces in Visual Studio 2022. Retrieved from https://www.scien.cx/2024/10/30/code-smarter-spell-checker-and-colorization-braces-in-visual-studio-2022/
Please log in to upload a file.
There are no updates yet.
Click the Upload button above to add an update.
