This content originally appeared on Telerik Blogs and was authored by Christian Nwamba
In this article, we will look at the authentication methods WorkOS offers and how to integrate one in a simple two-page Next.js application.
We are well aware that how authentication is done in modern web applications has evolved. Several third parties have been introduced to abstract this process and provide a swift and efficient setup. Gone are the days when we had to manually set up and configure the authentication mechanism of our applications. Today, with just a few lines of code, we are good to go.
WorkOS is one of the frontrunners of modern authentication. It provides enough tooling to integrate enterprise-ready user authentication and management in very little time.
In this article, we will look at WorkOS, its various authentication methods and how to integrate it in a demo Next.js application.
Requirements
To follow along, you’ll need to have:
How WorkOS Approaches Authentication
WorkOS makes it easier to add enterprise-level authentication and identity management features to different kinds of web applications. We can easily integrate options like email and password authentication, social login, multi-factor authentication and more without building complex infrastructure from scratch, allowing developers to focus on building their applications’ core features.
WorkOS offers three authentication methods that can be integrated into web applications:
- AuthKit: This tool provides an authentication user interface that can be customized and supports various authentication methods. This pre-built user interface automatically handles sign-up and sign-in, email verification, security reinforcements, branding and more. Once activated, it redirects to a URL outside the application, where the entire authentication process is done before returning back to the application.
- Custom AuthKit UI: Instead of relying on the pre-built user interface, WorkOS enables an approach where developers have the freedom to build custom user interfaces using their preferred technology stack and seamlessly connect with the authentication and user management API.
- Standalone Single Sign-On (SSO): WorkOS also provides an integration approach that can be used only by applications interested in SSO functionalities.
In this article, we will focus on the first approach, AuthKit, as it is the most recommended method for integrating WorkOS into web applications due to its ease of use and flexibility.
WorkOS Authentication Methods
WorkOS supports different authentication methods, for various application, security and user experience needs. Some of them are:
Email and Password
This is the default authentication method. It is the classic email and password combination we all know. Users can sign in or sign up with a valid email address and password. WorkOS also allows configuring the password strength policy with required criteria that passwords must meet.
Social Login/OAuth
WorkOS integrates well with popular OAuth providers, allowing users to authenticate using their credentials from third-party services such as Google, Facebook, Microsoft, GitHub, Apple and more. It also provides a unified portal to implement these providers in just a single integration.
Magic Auth
WorkOS also provides passwordless authentication, allowing users to sign in or sign up using OTPs or unique tokens sent to their email. This modern method enables users to authenticate without requiring a password.
Single Sign-On
The single sign-on authentication method is designed specifically for enterprise use. It allows user authentication across multiple applications using a single set of credentials typically managed by the user’s organization’s identity provider, such as Okta.
Multi-Factor Auth
WorkOS also allows users to set an additional security layer where they have to provide a time-based one-time password to authenticate the application fully.
Project Setup
Let us create a simple Next.js application that will serve as our demo throughout this guide. Run the command below in your command line to create a Next.js app:
npx create-next-app
Give the application a name of your choice and answer the rest of the resulting prompts as shown below:

Run these commands to change into the created project folder and start your development server:
cd workos-auth-demo
npm run dev
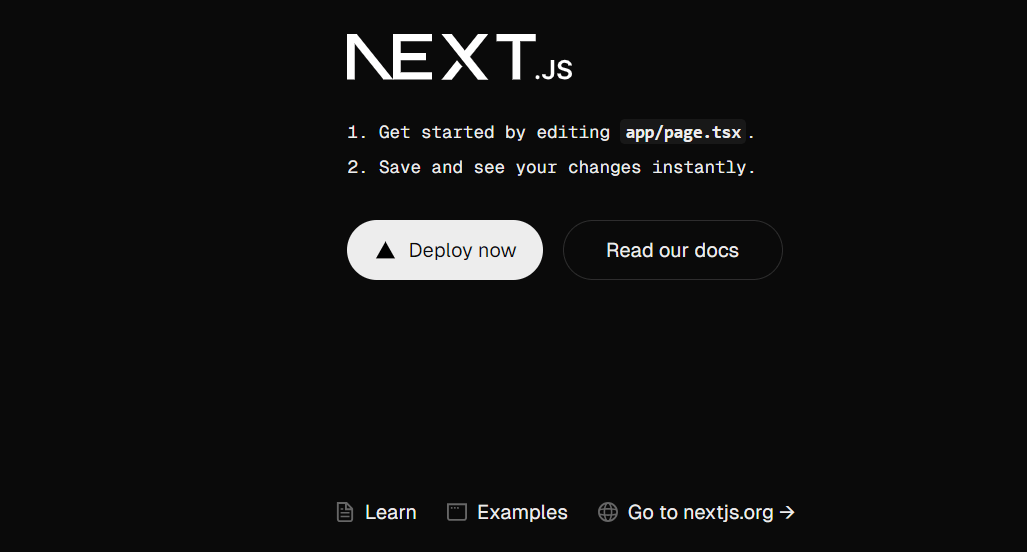
We will create a Home and a Protected page. Later in the article, we will see how we can integrate WorkOS into the project so that the Home page serves as the application entry point and the Protected page can only be accessed when a user is authenticated.
Create a components/Header.tsx file at the root of the application and add the following to it:
import React from "react";
import Link from "next/link";

export default function Header() {
  return (
    <header className="w-full flex my-6 px-8 gap-4 justify-between items-center">
      <Link href="/" className="text-lg font-medium">
        WorkOS Auth Demo
      </Link>
      <div className="flex gap-4">
        <Link href="">Sign In</Link>
        <Link href="">Sign Up</Link>
      </div>
    </header>
  );
}
Here, we created a Header component. We will add the corresponding authentication URLs for the sign-in and sign-up <Link> components once we integrate WorkOS.
Open the app/layout.tsx file and add the Header to the root layout of the application:
import type { Metadata } from "next";
import "./globals.css";
import Header from "@/components/Header";

export const metadata: Metadata = {
  title: "WorkOS Auth Demo",
};

export default function RootLayout({
  children,
}: Readonly<{
  children: React.ReactNode,
}>) {
  return (
    <html lang="en">
      <body className="antialiased">
        <Header />
        {children}
      </body>
    </html>
  );
}
In the code above, we removed the template layout code and added the Header to the root layout.
Next, let us create the Home and Protected pages. Open the app/page.tsx file and replace its content with the following:
import Link from "next/link";

export default function Home() {
  return (
    <main className="w-[25rem] border my-12 mx-auto p-4 text-center">
      <h2 className="text-lg font-medium">WorkOS Auth Demo app</h2>
      <div className="my-4">
        <p>
          A basic Next.js 14 application that demonstrates authentication with
          WorkOS
        </p>
        <Link href="/protected" className="underline my-4 inline-block">
          Protected Page
        </Link>
      </div>
    </main>
  );
}
In the code above, we created an Home component with some basic content.
For the Protected page, create a /components/protected/page.tsx file and add the following to it:
import Link from "next/link";

export default function Protected() {
  return (
    <main className="w-[25rem] border my-12 mx-auto p-4 text-center">
      <h2 className="text-lg font-medium">Protected page</h2>
      <div className="my-4">
        <Link href="/" className="underline my-4 inline-block">
          Home Page
        </Link>
      </div>
    </main>
  );
}
Here, we created a new page with some dummy content as well.
Lastly, remove the template styles in the app/globals.css file as shown below:
// Remove these
@tailwind base;
@tailwind components;
@tailwind utilities;
This is what the demo looks like now:

Notice how we did not create pages for sign-up and sign-in. In this demo, we will be working solely with WorkOS AuthKit, which, as mentioned earlier in the article, abstracts and handles the authentication mechanisms.
In the next section, let’s look at how to set up WorkOS and configure it for our app.
Setting Up and Configuring WorkOS
Open the official WorkOS website in your browser.
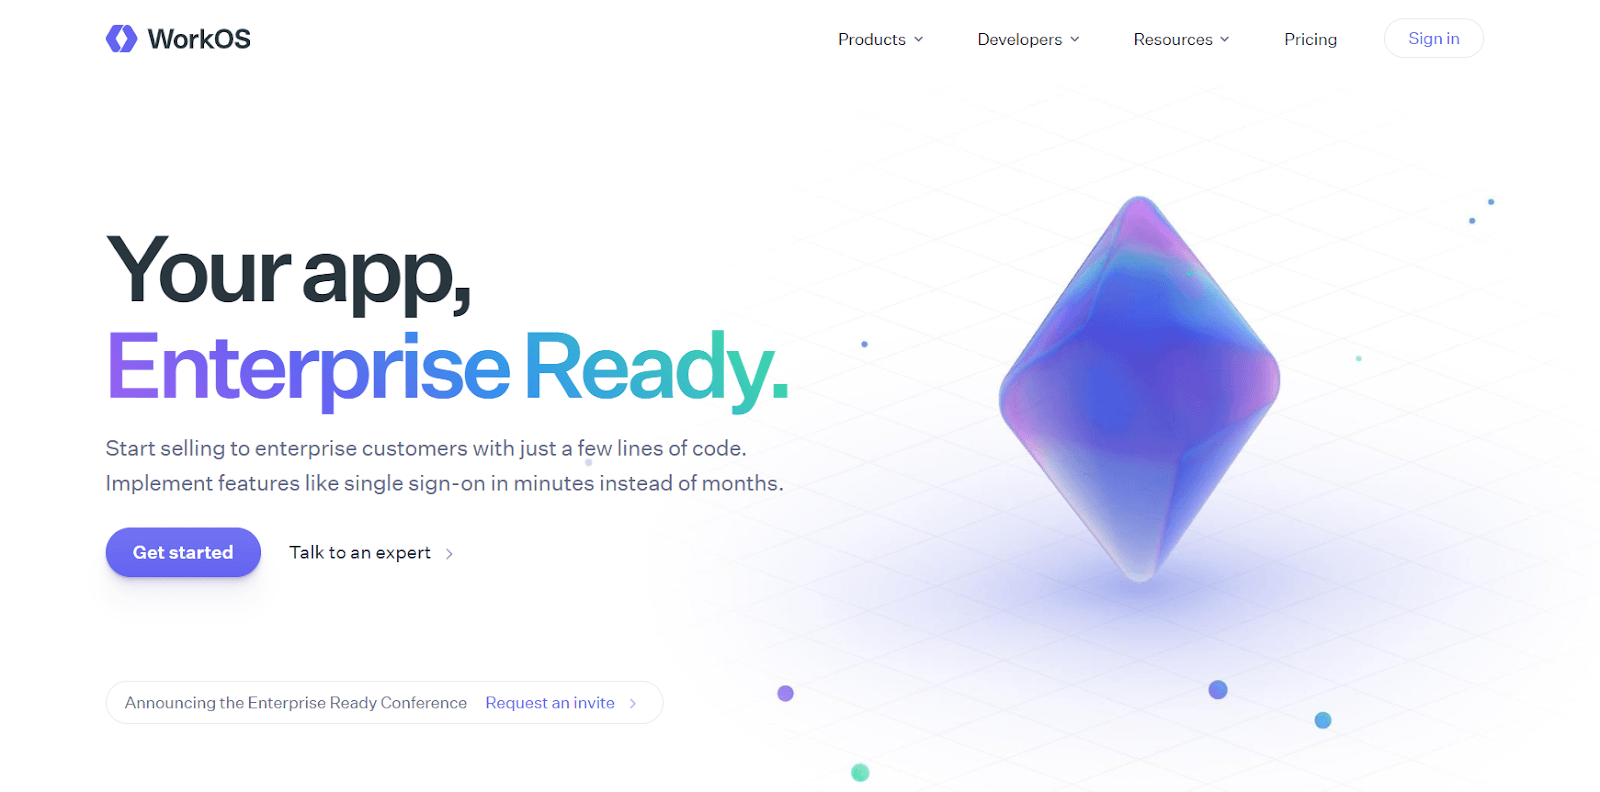
Integrating WorkOS requires having an account. Click on Get Started to create an account or Sign In if you have one already.
After a successful authentication and onboarding process, you should see the WorkOS dashboard, as shown below.
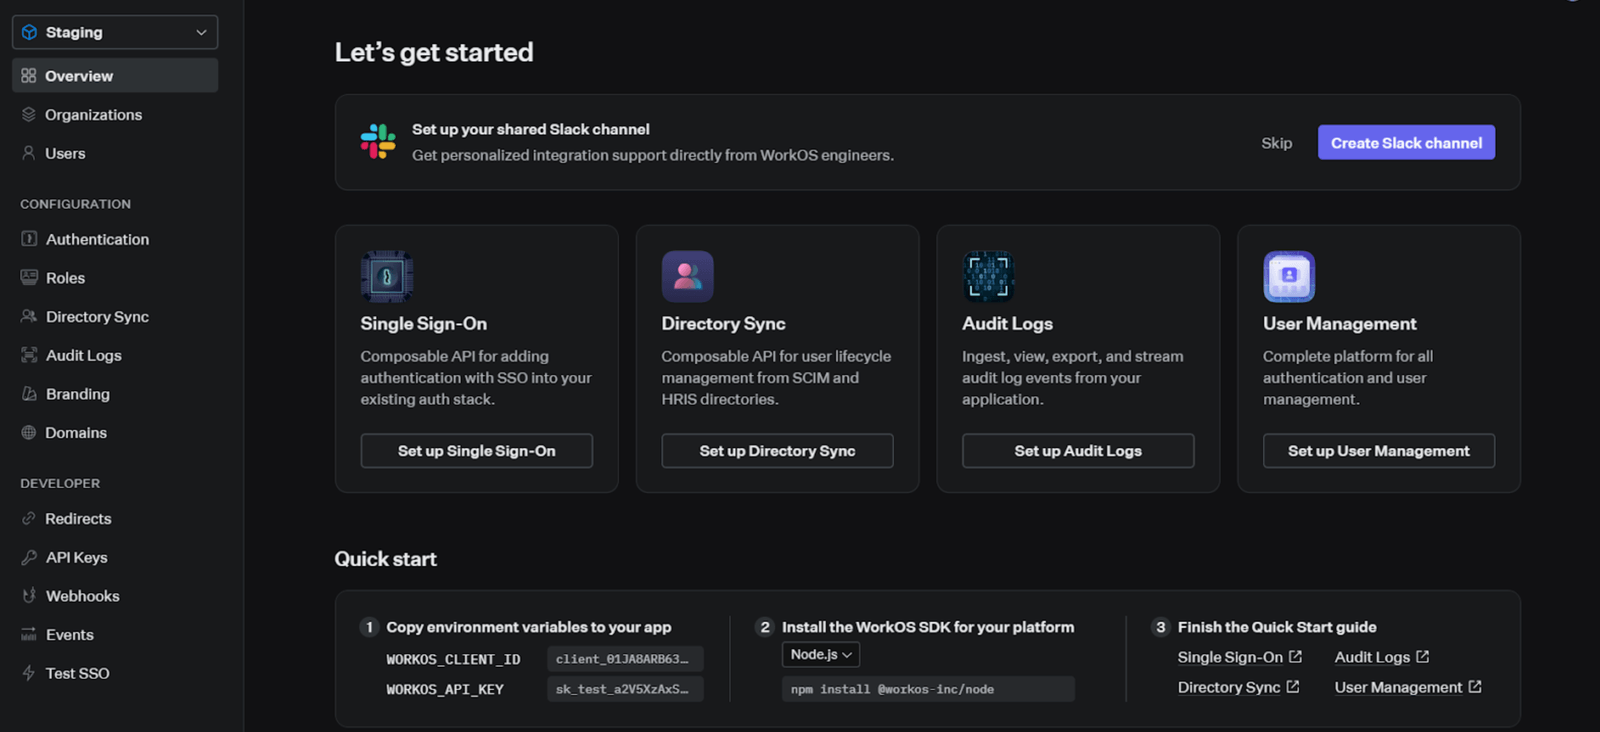
Click on Users on the sidebar and follow the steps accordingly.
Select Email + Password and Google OAuth as the authentication methods and click on Begin setup.
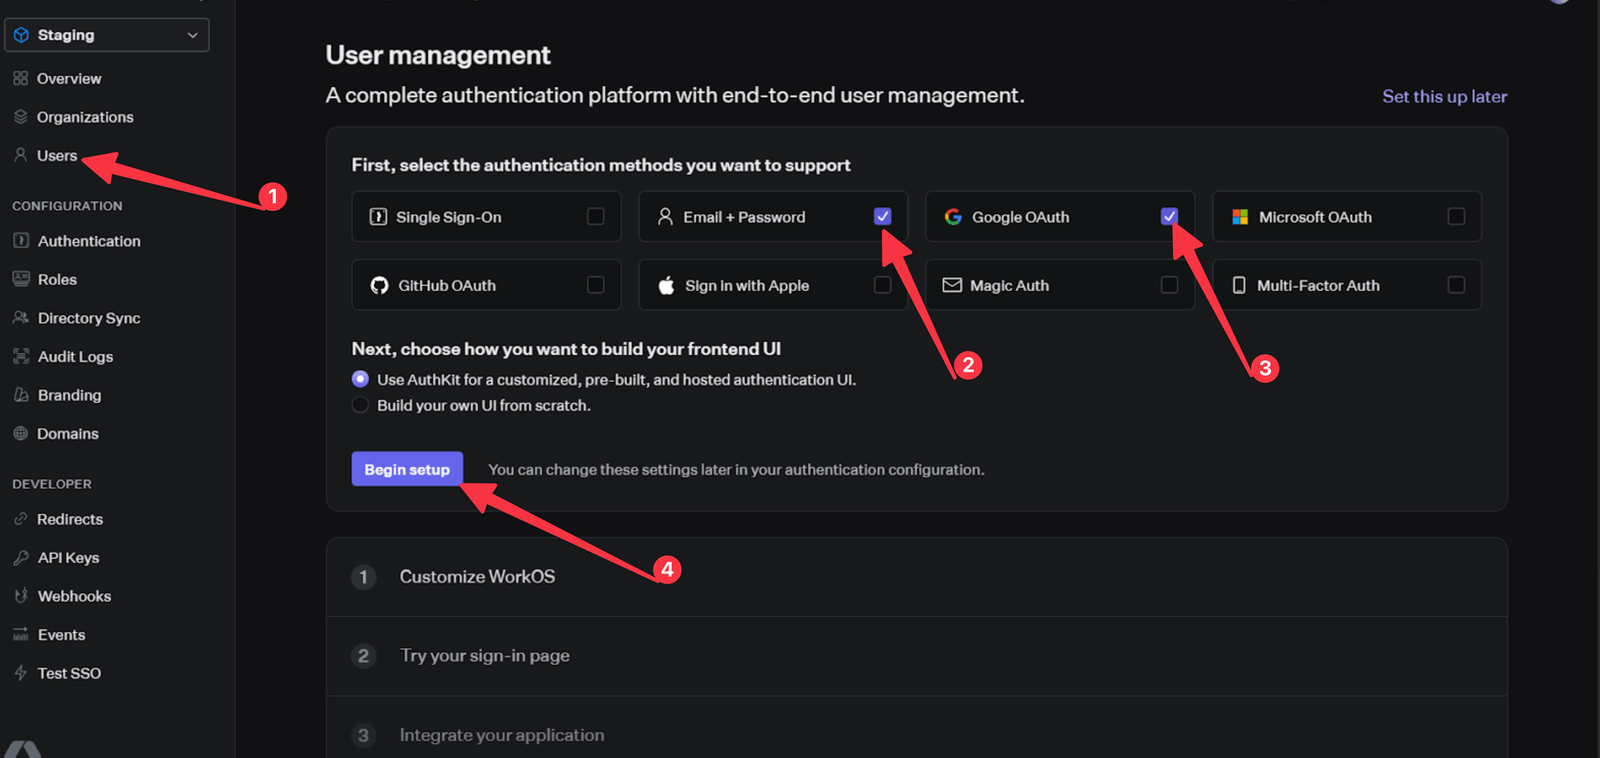
Skip the Customize WorkOS and Try your sign-in page steps.
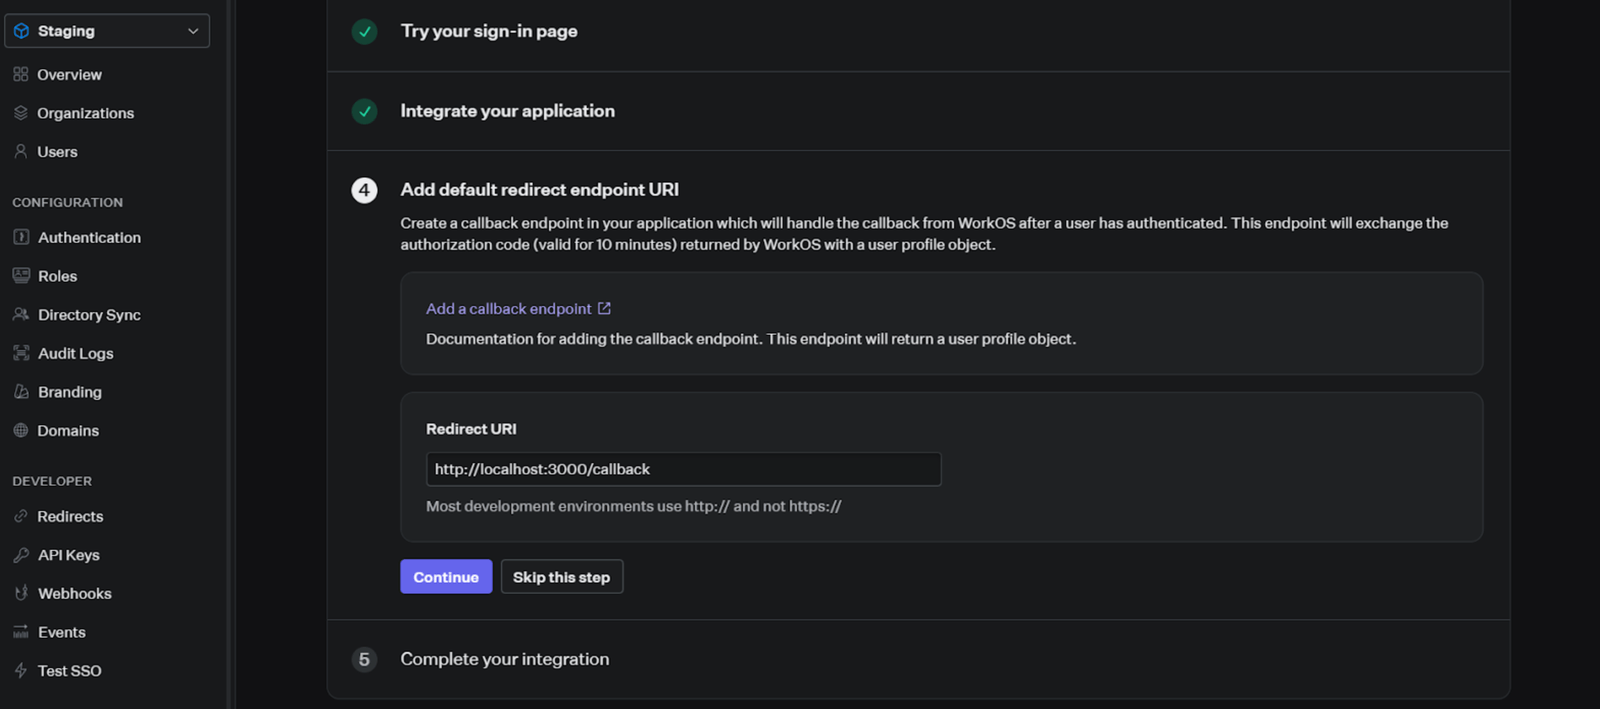
On the Integrate your application step, enter “http://localhost:3000/callback” as the redirect URI and click on Continue.
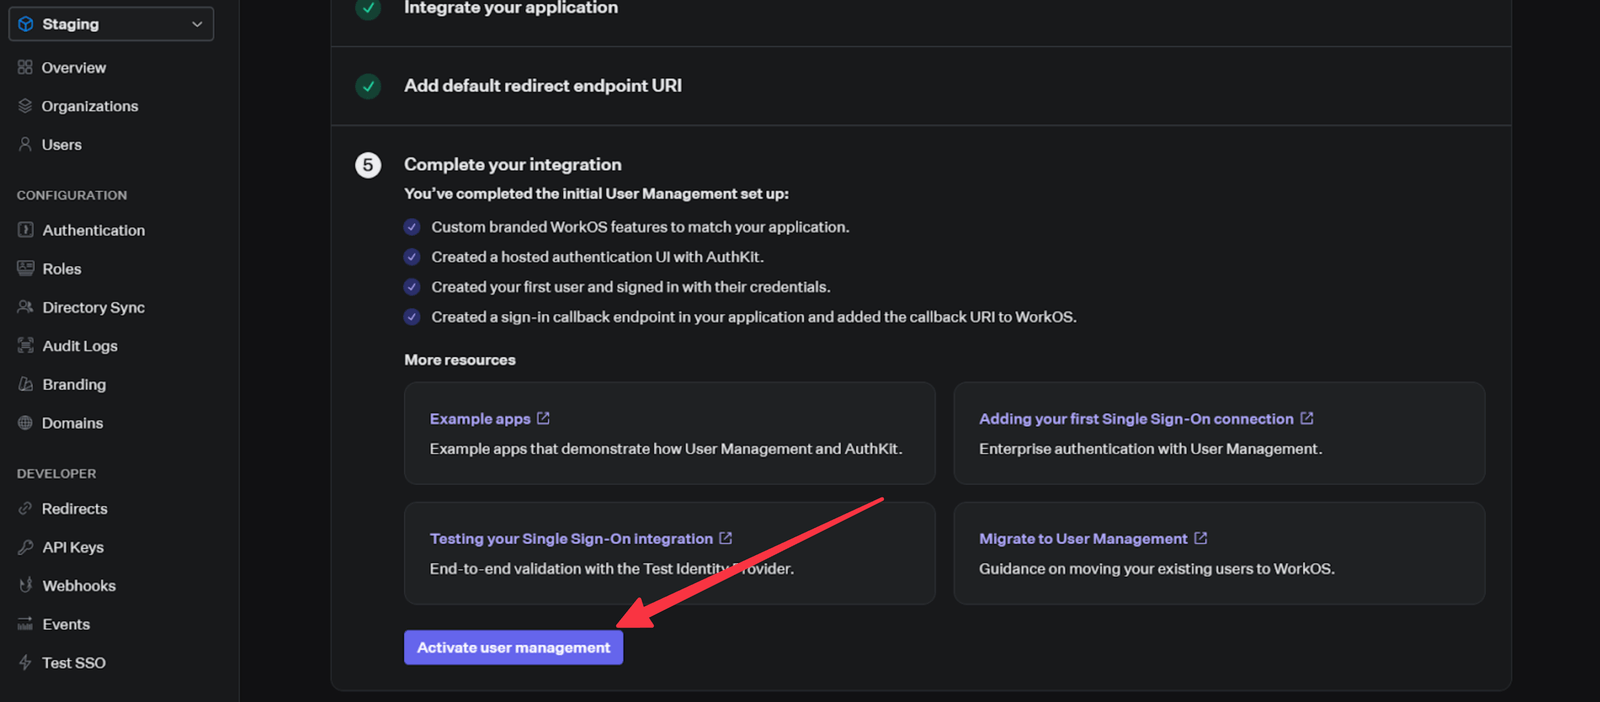
Click on Activate user management to complete the configuration steps.
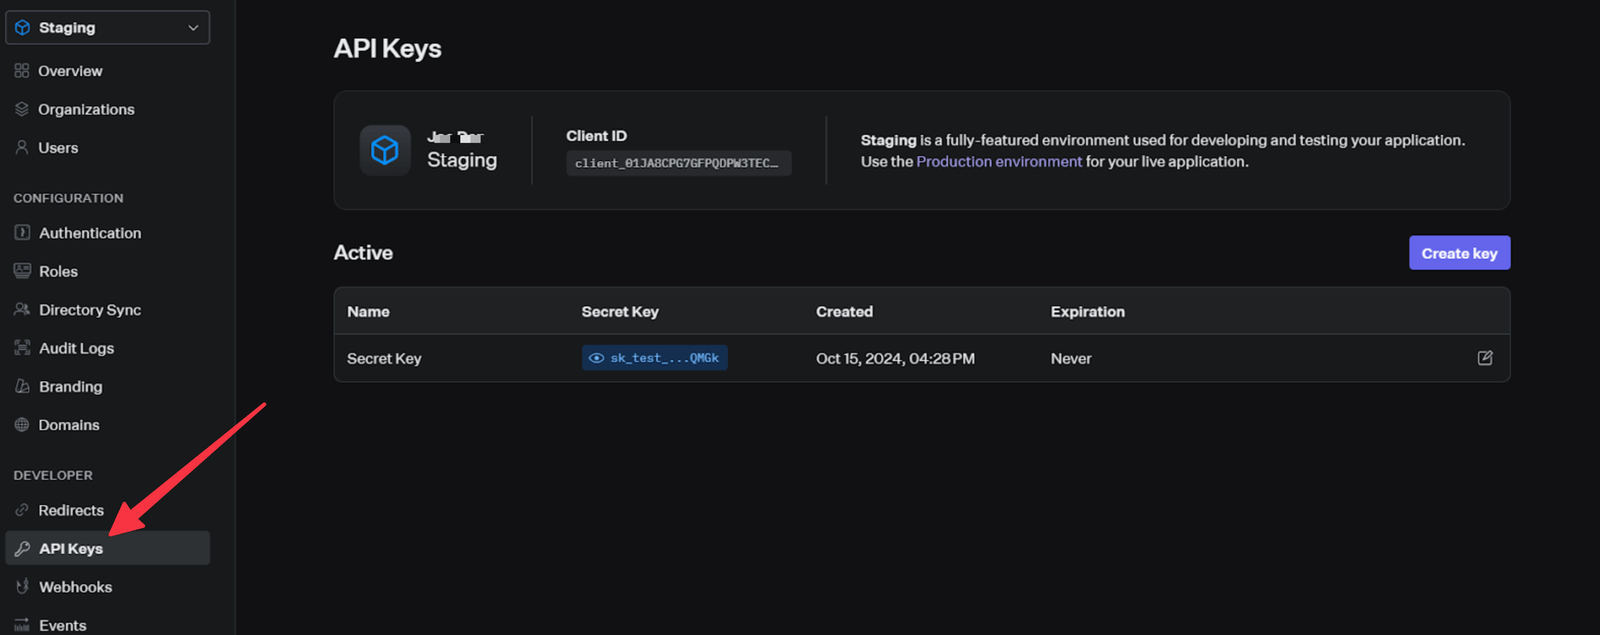
Next, we need to get and define the API keys in our application. These keys will be used later to make WorkOS work in our application.
Create a .env.local file at the root level of the application and add the following to it:
WORKOS_API_KEY = "your-api-key";
WORKOS_CLIENT_ID = "your-client-id";
WORKOS_COOKIE_PASSWORD = "<your-password>";
NEXT_PUBLIC_WORKOS_REDIRECT_URI = "http://localhost:3000/callback";
On the dashboard, click on the Api Keys tab on the sidebar to get your API key and Client ID.
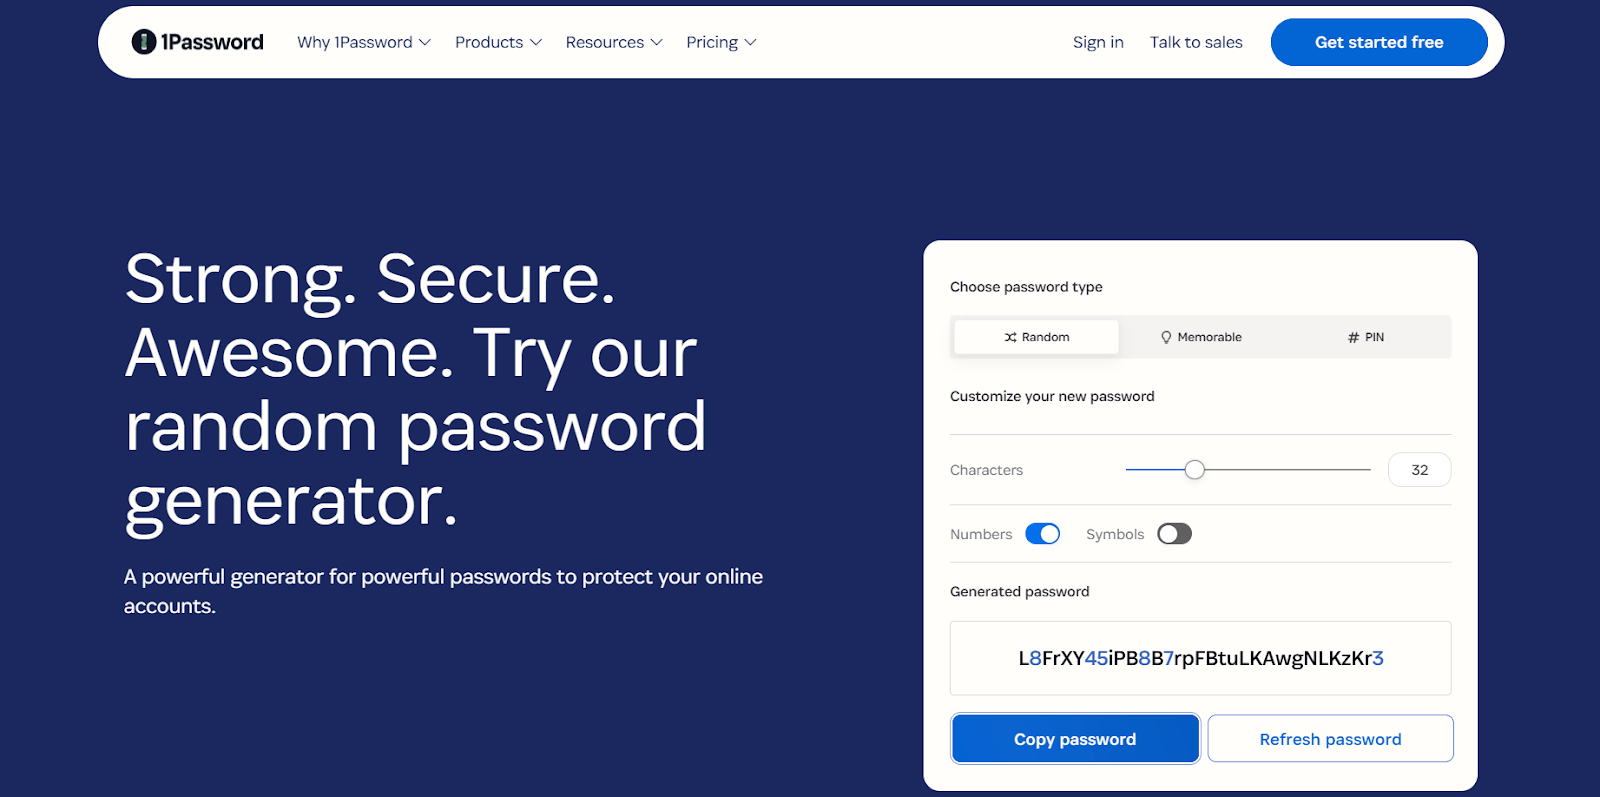
The WORKOS_COOKIE_PASSWORD is used under the hood to encrypt cookies, so it is required to make it strong and at least 32 characters long.
You can generate a secure password by using the 1Password generator.
Integrating WorkOS in a Modern Next.js Project
To integrate the hosted WorkOS configuration into our demo Next.js application, run the command below to install the necessary dependencies:
npm install @workos-inc/authkit-nextjs
This installs the WorkOS AuthKit Next.js SDK. The SDK provides access to helper authentication components, methods and hooks.
The SDK provides an AuthKitProvider component that needs to be wrapped around the application so that the authentication state and configurations are accessible throughout the application.
Open the app/layout.tsx file and wrap the body element in the root layout as shown below:
import type { Metadata } from "next";
import "./globals.css";
import Header from "@/components/Header";
import { AuthKitProvider } from "@workos-inc/authkit-nextjs";

export const metadata: Metadata = {
  title: "WorkOS Auth Demo",
};

export default function RootLayout({
  children,
}: Readonly<{
  children: React.ReactNode,
}>) {
  return (
    <html lang="en">
      <AuthKitProvider>
        <body className="antialiased">
          <Header />
          {children}
        </body>
      </AuthKitProvider>
    </html>
  );
}
To define the routes that require authentication, we need to add an authentication middleware layer.
Create a middleware.ts file at the root level of the application and add the following to it:
import { authkitMiddleware } from "@workos-inc/authkit-nextjs";

export default authkitMiddleware({
  middlewareAuth: {
    enabled: true,
    unauthenticatedPaths: ["/"],
  },
});

export const config = { matcher: ["/protected"] };
In the code above, we use the authkitMiddleware function exported from the SDK to intercept the route flow and add the necessary restriction. We added an authentication layer over the /protected page.
When users authenticate, they get redirected to the application’s callback route. Remember, we defined this on the WorkOS console and in the .env.local file as “http://localhost:3000/callback”. Next, we need to add the callback to our application.
Create an app/callback/route.ts file and add the following to it:
import { handleAuth } from "@workos-inc/authkit-nextjs";

export const GET = handleAuth({ returnPathname: "/protected" });
Here, we defined the callback route and handled the authentication redirection using the handleAuth method. We configured the method to redirect to /protected.
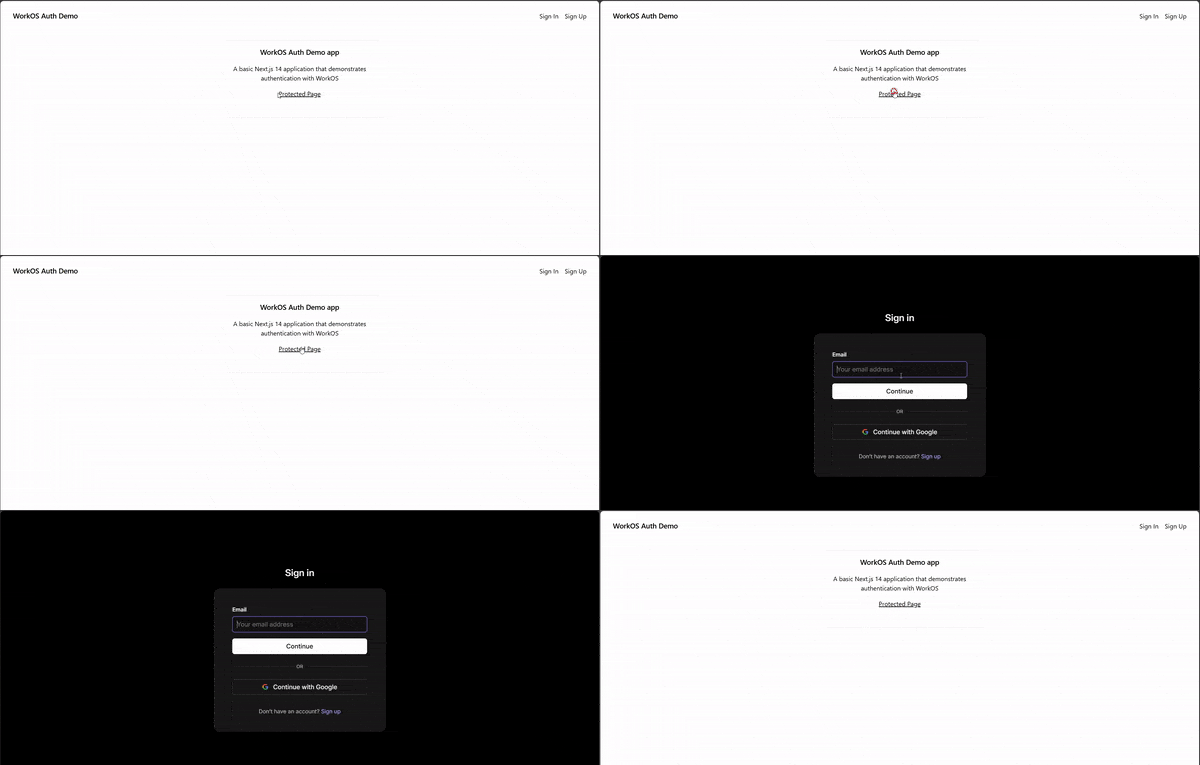
We can already test the whole setup now. When you try to visit the /protected page without authenticating, you will be redirected to the authentication page.
Exploring Built-in Methods in WorkOS
With the setup and configuration done, let’s explore some built-in methods. The WorkOS AuthKit Next.js SDK exposes the getSignInUrl and getSignUpUrl methods that return the URL to redirect users to AuthKit to sign in and sign up, respectively.
Let us see how they work in the demo application. Open the components/Heaser.tsx file and update the code as shown below:
import React from "react";
import Link from "next/link";
import { getSignInUrl, getSignUpUrl } from "@workos-inc/authkit-nextjs";

export default async function Header() {
  const signInUrl = await getSignInUrl();
  const signUpUrl = await getSignUpUrl();

  return (
    <header className="w-full flex my-6 px-8 gap-4 justify-between items-center">
      <Link href="/" className="text-lg font-medium">
        WorkOS Auth Demo
      </Link>
      <div className="flex gap-4">
        <Link href={signInUrl}>Sign In</Link>
        <Link href={signUpUrl}>Sign Up</Link>
      </div>
    </header>
  );
}
Here, we triggered the two helper methods to get the authentication URLs, which are then passed to the Link components accordingly.
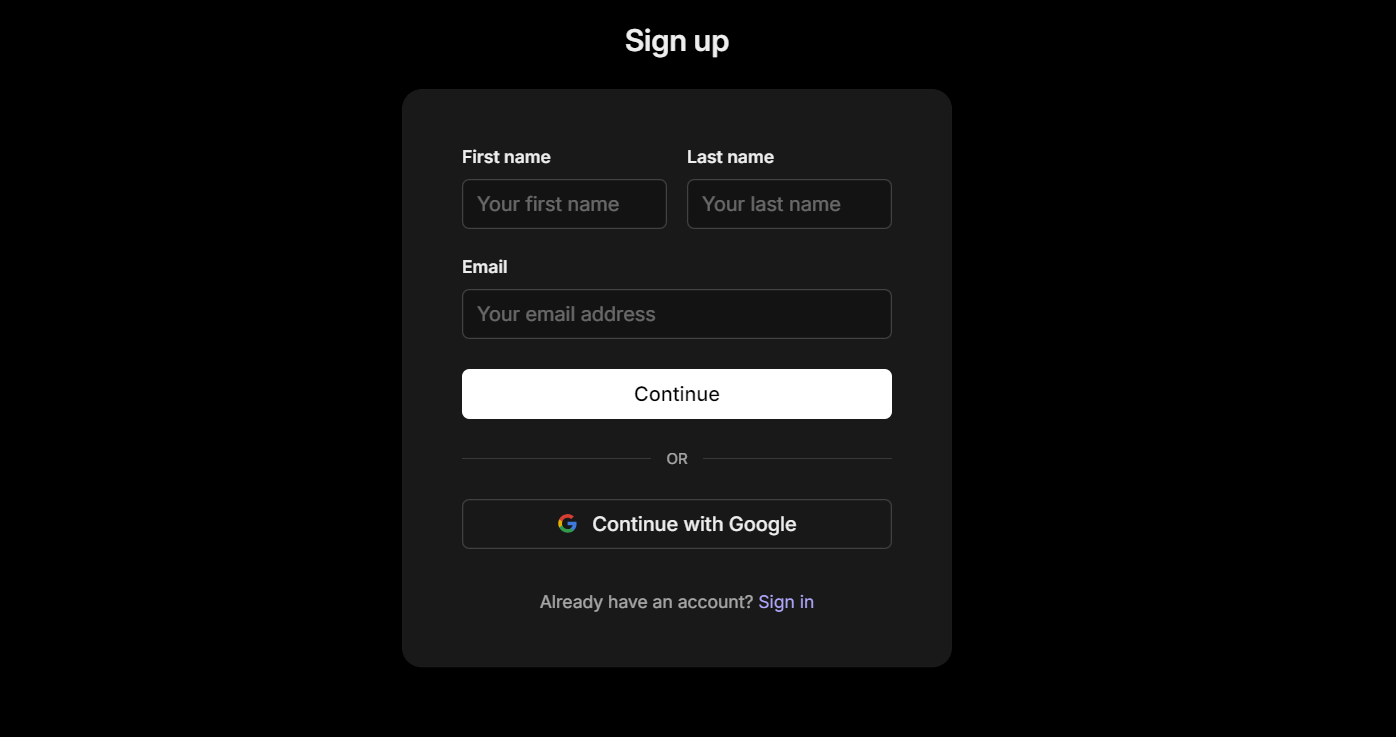
When you click on either of the links, you should be redirected to the authentication page.
User Session Management
Let’s look at how to manage user sessions. The SDK also provides withAuth and signOut helper methods. The withAuth method reflects the user’s data when authenticated, while signOut is a server action that ends the user’s session and handles the user signing out of the application.
WorkOS also provides a section in the console to view and manage authenticated users.
Let’s see this in action. Open the app/protected/page.tsx file and update the code as shown below:
import Link from "next/link";
import { signOut, withAuth } from "@workos-inc/authkit-nextjs";

export default async function Protected() {
  const { user } = await withAuth();

  return (
    <main className="w-[25rem] border my-12 mx-auto p-4 text-center">
      <h2 className="text-lg font-medium">Protected page</h2>
      <div className="my-4">
        <Link href="/" className="underline my-4 inline-block">
          Home Page
        </Link>
      </div>
      <div className="my-4">
        <p>Welcome, {user?.firstName}</p>
        <form
          action={async () => {
            "use server";
            await signOut();
          }}
        >
          <button type="submit">Sign out</button>
        </form>
      </div>
    </main>
  );
}
In the updated code, after authenticating, we defined the code to extract and render the user’s first name and implement a server action that gets triggered when the “Sign out” button is clicked.
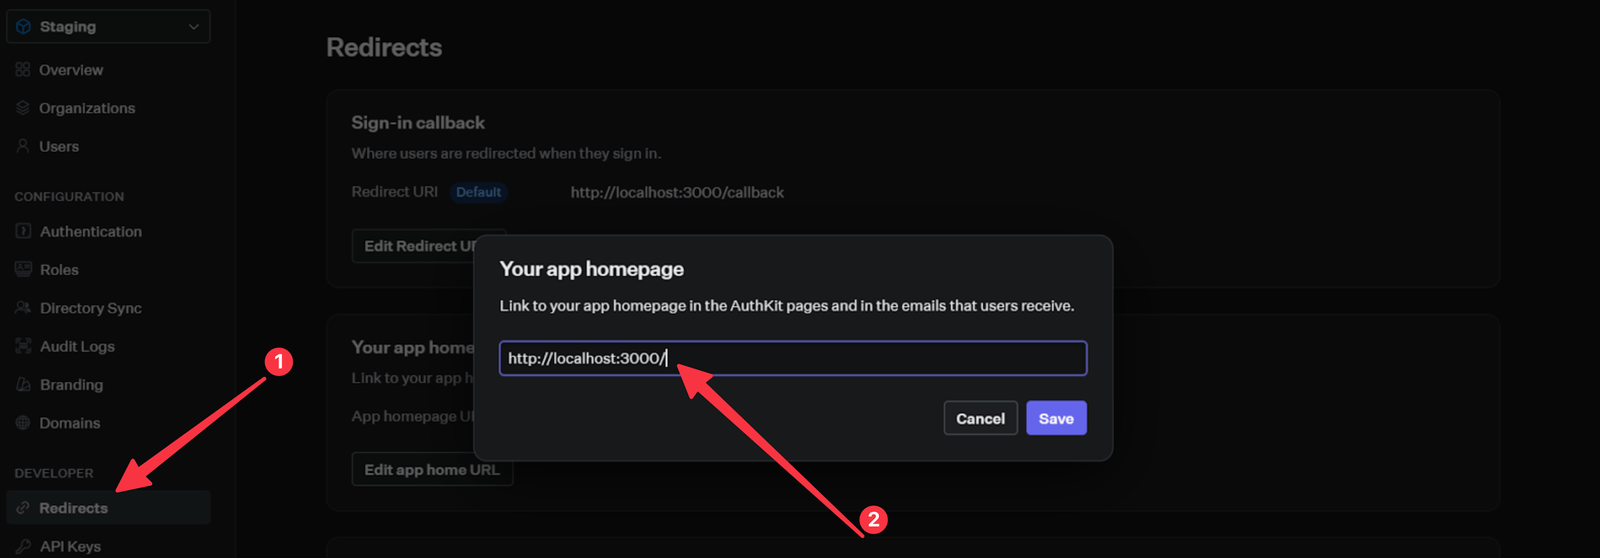
After a successful sign-out process, users get redirected to the application’s Home page. Therefore, we need to ensure our WorkOS configuration knows about this.
Go back to the console and click on the Redirects tab, then enter the Home page route as shown below:
Now, we can test the complete authentication flow.
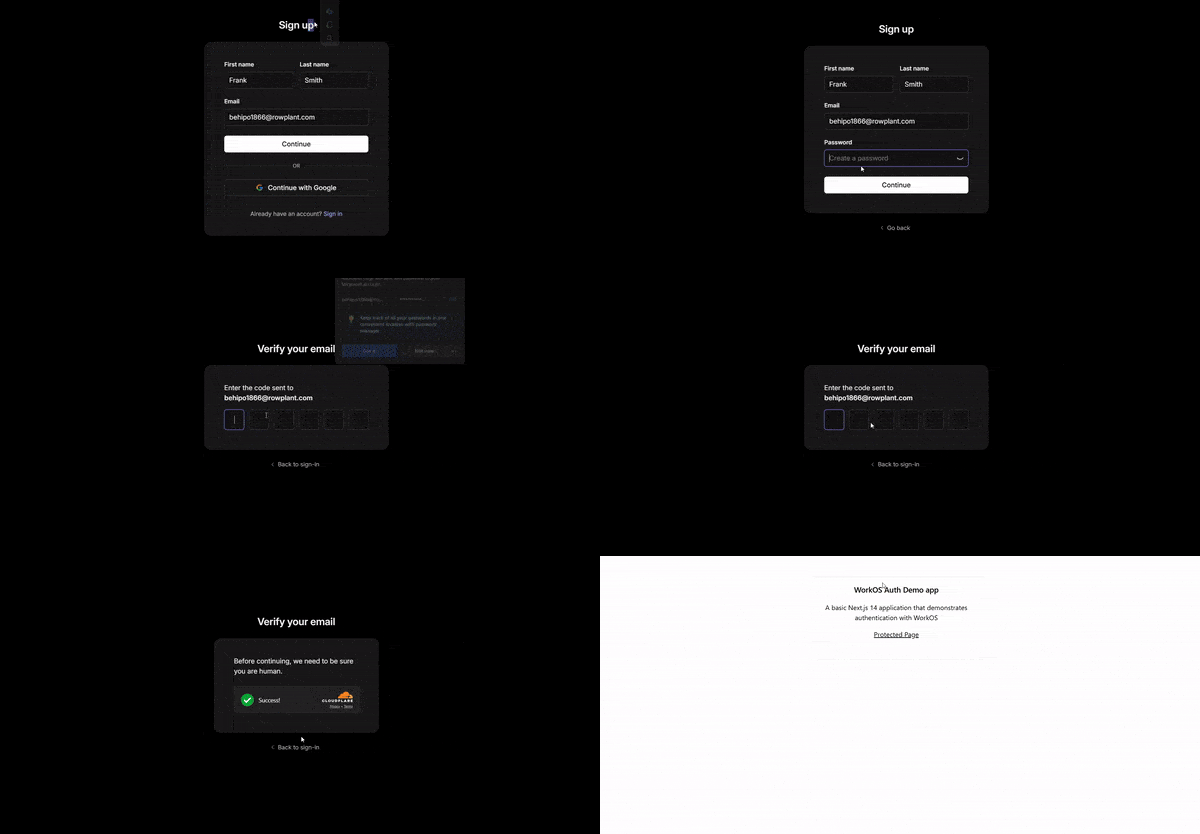
On the console, when you click on the Users tab, you can see the account that was just created.

Customize Authentication Page
Up to this section of the article, we have completed a basic integration of WorkOS in a Next.js application. However, WorkOS offers a lot more features beyond that.
WorkOS also enables branding. We can customize what we want the authentication page to look like. Click on the Branding tab on the console to access this.
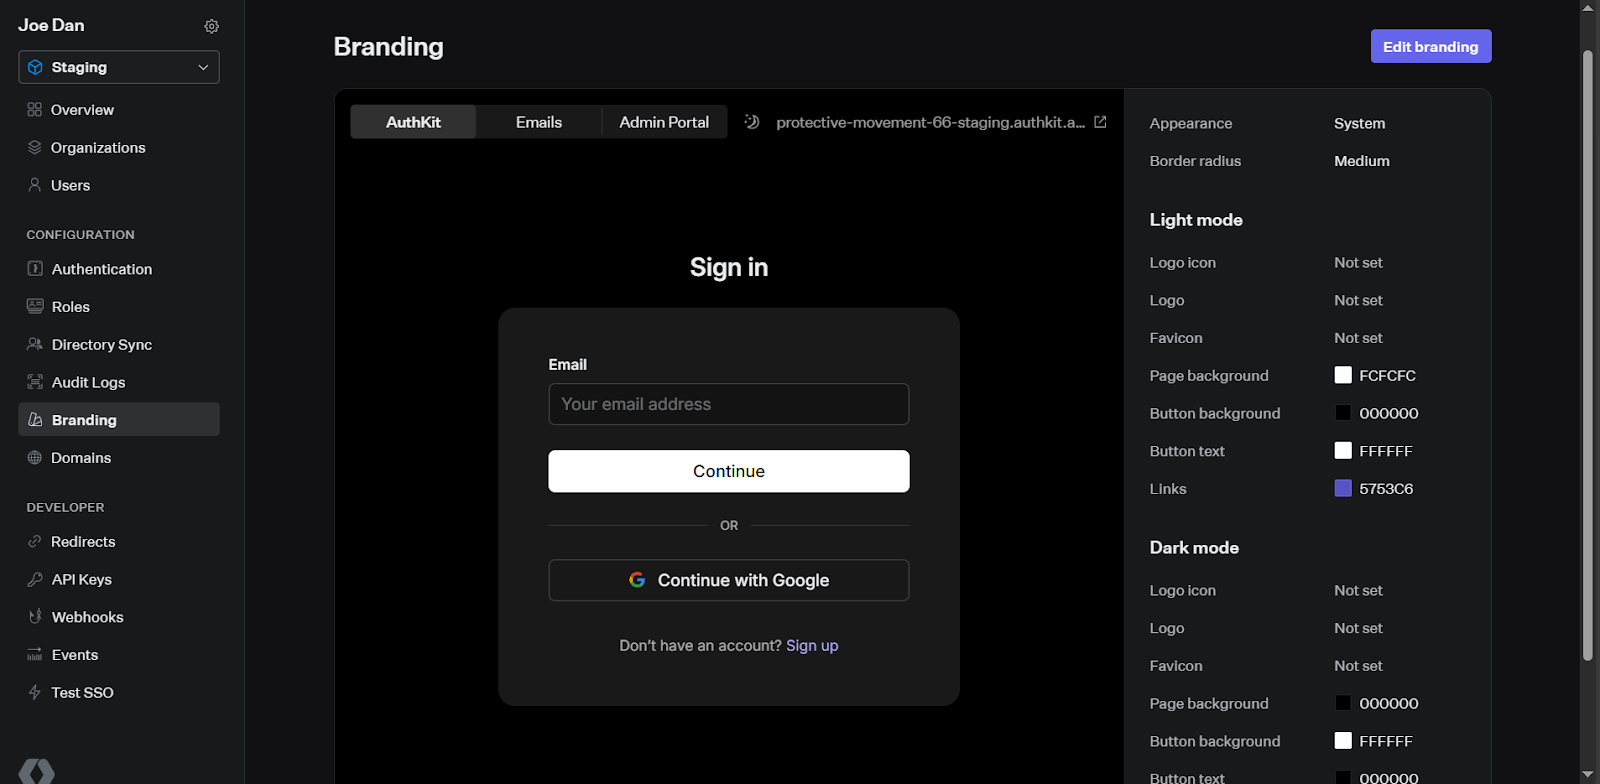
Here, we can define a custom logo, favicon, theme, brand colors, background and more. You can also preview the changes immediately.
Conclusion
WorkOS provides an elegant interface that abstracts different authentication mechanisms. It enables users to set up authentication in modern web applications without pulling many strings.
In the article, we looked at the authentication methods WorkOS offers. We also looked at how to integrate it into a Next.js application, by building a simple two-page application. Learn more about WorkOS here.
This content originally appeared on Telerik Blogs and was authored by Christian Nwamba
Christian Nwamba | Sciencx (2024-12-31T16:07:09+00:00) Authenticating Users with WorkOS. Retrieved from https://www.scien.cx/2024/12/31/authenticating-users-with-workos/
Please log in to upload a file.
There are no updates yet.
Click the Upload button above to add an update.
