
This content originally appeared on Level Up Coding - Medium and was authored by Prithiv Dev Devendran
visionOS introduces spatial computing through the familiar foundation of SwiftUI, while extending these patterns into three-dimensional space. The platform integrates RealityKit for 3D rendering and scene management, alongside tools like Reality Composer Pro for creating and previewing spatial content. While Reality Composer Pro offers a visual approach to building spatial experiences, we’ll focus on programmatic implementation to thoroughly understand the underlying concepts.
In this tutorial, we’ll harness RealityKit and SwiftUI to build an immersive application from the ground up. You’ll learn how to create and manipulate 3D content entirely through code, gaining deep insight into RealityKit’s entity-component system, material handling, and spatial transformations. Our app will demonstrate how to craft rich spatial experiences while maintaining SwiftUI’s declarative programming model.
Throughout the implementation, we’ll explore how to create immersive environments, handle 3D geometry, and manage materials — all through direct interaction with RealityKit’s powerful APIs.
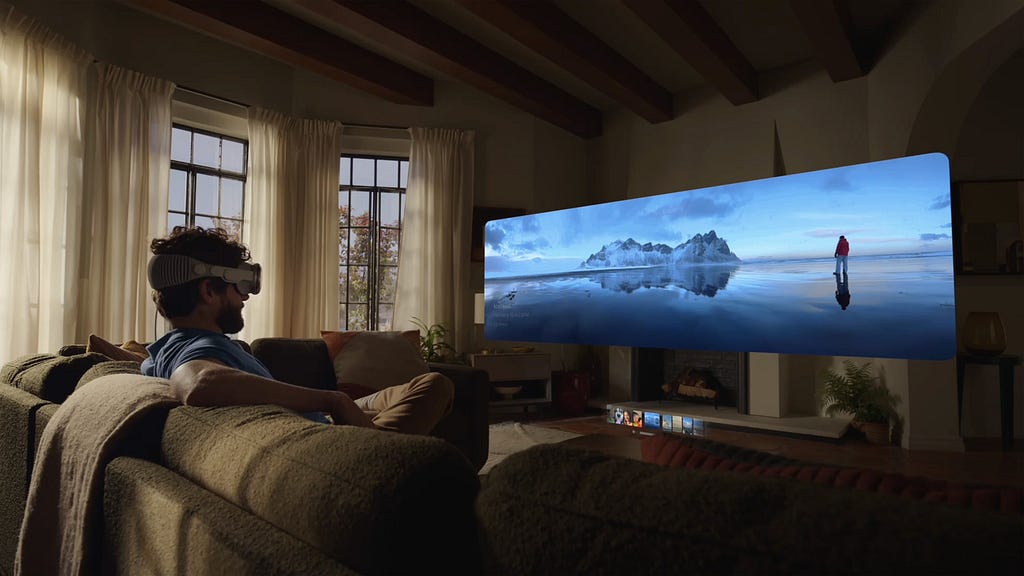
Understanding Windows, Volumes And ImmersiveSpaces

visionOS offers three distinct ways to present content, each serving different interaction models.
Windows in visionOS operate similarly to their iOS counterparts, but float freely in space. These familiar interfaces can be positioned anywhere in the user’s field of view, making them ideal for traditional UI patterns that need to exist in a spatial context.
Volumes extend beyond the flat constraints of windows, creating bounded 3D spaces that users can examine from any angle. Think of volumes as specialized containers for 3D content that still maintain a defined spatial boundary.
ImmersiveSpaces represent the deepest level of spatial integration. They can either merge with or completely replace the user’s surroundings, enabling fully immersive experiences. Our tutorial focuses on building a full immersion experience, where we’ll replace the user’s entire view with our custom environment while maintaining intuitive UI interactions through carefully positioned floating windows.
With these basic concepts in mind, let’s dive in and build our visionOS app.
Initial Project Setup

Our first step is establishing the core structure of our visionOS app. Create a new visionOS project in Xcode (15 or later), selecting “App” with SwiftUI and RealityKit included. Let’s name the project ImmersiveExperience. This generates our initial ImmersiveExperienceApp.swift file, which we’ll modify to manage our app’s primary window and immersive space.
In visionOS, every app requires thoughtful orchestration between its windowed interface and immersive elements. Our app’s main file will handle this coordination through three key components: a WindowGroup for our floating interface, an ImmersiveSpace for our surrounding environment, and state management to control the transition between different views.
Replace the contents of ImmersiveExperienceApp.swift with:
@main
struct ImmersiveExperienceApp: App {
    @StateObject private var appState = AppState()
    @Environment(\.openImmersiveSpace) var openImmersiveSpace

    var body: some Scene {
        WindowGroup {
            ContentView()
                .environmentObject(appState)
                .onAppear {
                    Task {
                        // Automatically open the immersive space (ImmersiveScene) on window launch.
                        await openImmersiveSpace(id: "ImmersiveScene")
                        appState.immersiveSpaceIsShown = true
                    }
                }
        }
        .windowStyle(.automatic)
        .defaultSize(width: 3, height: 2, depth: 2, in: .feet)
        .windowResizability(.contentSize)

        // Our ImmersiveSpace encloses the user with a panoramic sphere.
        ImmersiveSpace(id: "ImmersiveScene") {
            ImmersiveView()
        }
        .immersionStyle(selection: .constant(.full), in: .full)
    }
}
This implementation establishes our app’s foundation. The WindowGroup creates a floating interface that maintains a modest footprint (3x2 feet) to avoid overwhelming the user’s field of view. We’ve configured it with .contentSize resizability, allowing natural scaling while preserving the content’s proportions.
The ImmersiveSpace declaration defines our fully immersive environment. By specifying .full immersion style, we’re indicating that our app will completely transform the user’s surroundings. The .constant(.full) selection ensures this immersive state remains consistent throughout the experience.
The integration of AppState through @StateObject creates a centralized way to manage our app’s presentation state. When the main window appears, we automatically transition into our immersive space using openImmersiveSpace(id:).
This setup provides the foundation for the rest of our implementation, establishing clear boundaries between our floating interface and immersive elements while maintaining a cohesive user experience.
Managing App State
To manage the immersive space and navigation, we’ll define a simple global state that tracks whether the user is viewing the rotating 3D object or the pulsing 3D text, plus a boolean to track if the immersive space is shown:
enum ViewMode {
    case object
    case text
}

class AppState: ObservableObject {
    @Published var currentMode: ViewMode = .object
    @Published var immersiveSpaceIsShown = false
}
When currentMode changes, with the help of the @Published property wrapper we automatically update the UI to show the new content.
Creating An Immersive Environment
Our ImmersiveView is responsible for creating the environment that surrounds the user when in full immersion mode. Using RealityKit, we’ll create a large textured sphere that envelops the user’s view. Create a new SwiftUI file called ImmersiveView.swift:
Tip : SkyBox AI is a great resource for creating AI based panoramic images, for this tutorial, we’ll use an image generated by SkyBox AI.

struct ImmersiveView: View {
    var body: some View {
        RealityView { content in
            // Load the panoramic texture from the app bundle.
            guard let resource = try? await TextureResource(named: "PanoramaImage") else {
                fatalError("Unable to load panoramic texture.")
            }

            // UnlitMaterial ensures lighting doesn’t alter the texture’s appearance.
            var material = UnlitMaterial()
            material.color = .init(texture: .init(resource))

            // Create an entity to hold the sphere’s geometry and material.
            let sphereEntity = Entity()
            sphereEntity.components.set(ModelComponent(
                mesh: .generateSphere(radius: 1000),
                materials: [material]
            ))

            // Flip X so the texture faces inward.
            sphereEntity.scale *= .init(x: -1, y: 1, z: 1)
            content.add(sphereEntity)
        }
    }
}
First, we load our environment texture using TextureResource. This asynchronous operation converts our image asset into a format RealityKit can use for rendering.
We then create an UnlitMaterial, which is ideal for environment textures because it ignores scene lighting calculations. This material type renders the texture exactly as provided, ensuring consistent visibility regardless of the scene’s lighting conditions.
The environment itself is constructed using a large sphere (radius: 1000 units). This size ensures the sphere appears as an infinite environment from the user’s perspective — any smaller and the illusion of being in an environment might break. The sphere is created through ModelComponent, combining the generated spherical mesh with our unlit material.
The critical step is flipping the sphere’s X scale to -1. This inverts the sphere’s normals, causing the texture to render on the interior surface rather than the exterior.
This implementation creates an efficient, single-entity environment that completely surrounds the user when in full immersion mode. While relatively simple, it demonstrates fundamental RealityKit concepts of entity creation, material handling, and spatial transformation.
Displaying The Main Window
The ContentView serves as our app’s primary interface, managing the transition between our two interactive experiences: a 3D sphere and a 3D text. This floating window remains accessible even in full immersion, providing consistent navigation controls.
Replace the contents of ContentView.swift with this:
struct ContentView: View {
    @EnvironmentObject var appState: AppState

    var body: some View {
        VStack {
            switch appState.currentMode {
            case .object:
                ObjectView()
            case .text:
                AnimatedTextView()
            }
        }
        .ornament(attachmentAnchor: .scene(.bottom)) {
            NavigationControls()
                .padding(.top)
        }
        .glassBackgroundEffect()
    }
}
The implementation uses SwiftUI’s state management through @EnvironmentObject to handle view transitions. The switch statement alternates between ObjectView and AnimatedTextView based on the current mode in our AppState.
What makes this window distinctly visionOS is the ornament modifier. Ornaments allow UI elements to float at fixed positions relative to the scene rather than the window. By anchoring our navigation controls to .scene(.bottom), they remain easily accessible regardless of where the user places the main window. The .glassBackgroundEffect() adds the characteristic translucent appearance of visionOS interfaces.
Let’s move on to implementing the navigation controls that will populate this ornament.
Implementing Navigation Controls
Our app needs an intuitive way to switch between the 3D sphere and animated text experiences. We’ll create a simple control panel using SwiftUI that maintains visionOS’s spatial design principles. Create a new SwiftUI file called NavigationControls with this code:
struct NavigationControls: View {
    @EnvironmentObject var appState: AppState

    var body: some View {
        HStack(spacing: 20) {
            Button {
                appState.currentMode = .object
            } label: {
                Label("3D Object", systemImage: "cube.fill")
                    .foregroundStyle(appState.currentMode == .object
                                     ? .white
                                     : .white.opacity(0.4))
            }

            Divider().frame(height: 20)

            Button {
                appState.currentMode = .text
            } label: {
                Label("3D Text", systemImage: "text.bubble.fill")
                    .foregroundStyle(appState.currentMode == .text
                                     ? .white
                                     : .white.opacity(0.4))
            }
        }
        .padding()
        .glassBackgroundEffect()
    }
}
The NavigationControls view uses SwiftUI to arrange two buttons with clear visual feedback. Each button updates the AppState when tapped, triggering our view transitions.
Now that we have our navigation structure in place, let’s implement the first of our 3D experiences — the interactive sphere.
Creating An Interactive 3D Object

Now we’ll implement our first interactive 3D experience — a sphere that animates continuously and responds to material changes. This demonstrates RealityKit’s entity manipulation and real-time material updates. Create a new SwiftUI file called ObjectView.swift:
struct ObjectView: View {
    enum MaterialType {
        case iridescent
        case metallic
    }

    @State private var selectedMaterial: MaterialType = .iridescent

    // The sphere entity we’ll rotate over time.
    @State private var sphereEntity: ModelEntity?
    @State private var rotationAngle: Float = 0.0
    @State private var rotationTimer: Timer?

    var body: some View {
        RealityView { content in
            let sphere = createSphereEntity()
            updateMaterial(sphere, type: selectedMaterial)

            // Add the sphere to the scene so RealityKit can render it.
            content.add(sphere)
            sphereEntity = sphere
        }
        // Show material switches in a top ornament.
        .ornament(attachmentAnchor: .scene(.top)) {
            MaterialControls(selectedMaterial: $selectedMaterial)
        }
        .onChange(of: selectedMaterial) { newValue in
            // Whenever user toggles the material, apply it to the existing sphere.
            guard let sphere = sphereEntity else { return }
            updateMaterial(sphere, type: newValue)
        }
        .onAppear {
            // Kick off a ~30 FPS timer to increment rotationAngle and spin the sphere.
            rotationTimer = Timer.scheduledTimer(withTimeInterval: 1.0 / 30.0, repeats: true) { _ in
                rotationAngle += 0.5
                sphereEntity?.transform.rotation = simd_quatf(
                    angle: rotationAngle,
                    axis: [1, 0.2, 0.1] // tilt the axis so the spin is more visible
                )
            }
        }
        // Stop the timer on disappearance to avoid leaks or double timers
        .onDisappear {
            rotationTimer?.invalidate()
            rotationTimer = nil
        }
    }

    private func createSphereEntity() -> ModelEntity {
        // .generateSphere(...) constructs a standard sphere mesh for RealityKit.
        let sphere = ModelEntity(mesh: .generateSphere(radius: 0.15))
        sphere.position = [0, 0, 0]

        // If we want tapping or collision, we create collision shapes:
        sphere.generateCollisionShapes(recursive: false)
        sphere.components.set(InputTargetComponent())

        return sphere
    }

    private func updateMaterial(_ entity: ModelEntity, type: MaterialType) {
        // A physically based material simulates real-world lighting.
        // “baseColor” sets the diffuse or tinted color.
        // “roughness” controls how matte or shiny the surface is (0.0 = very shiny).
        // “metallic” from 0.0 to 1.0 sets how metallic the surface behaves.
        var material = PhysicallyBasedMaterial()

        switch type {
        case .iridescent:
            material.baseColor = .init(tint: .white.withAlphaComponent(0.8))
            material.roughness = 0.3
            material.metallic = 0.4
        case .metallic:
            material.baseColor = .init(tint: .white.withAlphaComponent(0.8))
            material.roughness = 0.3
            material.metallic = 0.9
        }

        entity.model?.materials = [material]
    }
}
The ObjectView showcases RealityKit’s entity-component architecture. The ModelEntity forms our base 3D object, to which we add components for rendering (ModelComponent) and interaction (InputTargetComponent). The sphere’s collision shapes are generated to enable future interactions, though in our current implementation they primarily serve to define the object’s spatial boundaries.
The rotation implementation uses a timer driving continuous updates to the entity’s transform.rotation property. We use simd_quatf for rotation, which provides efficient rotations. The rotation axis is slightly tilted [1, 0.2, 0.1] to create a more dynamic visual effect while maintaining performance.
Implementing Material Controls
To manage our sphere’s appearance, we’ll create a dedicated view for material selection. Create a new SwiftUI file called MaterialControls.swift:
struct MaterialControls: View {
    @Binding var selectedMaterial: ObjectView.MaterialType

    var body: some View {
        HStack(spacing: 20) {
            Button {
                selectedMaterial = .iridescent
            } label: {
                Text("Iridescent")
                    .padding(.horizontal, 12)
                    .padding(.vertical, 8)
            }
            .buttonStyle(.bordered)
            .tint(selectedMaterial == .iridescent ? .blue : .secondary)

            Button {
                selectedMaterial = .metallic
            } label: {
                Text("Metallic")
                    .padding(.horizontal, 12)
                    .padding(.vertical, 8)
            }
            .buttonStyle(.bordered)
            .tint(selectedMaterial == .metallic ? .blue : .secondary)
        }
        .padding()
        .glassBackgroundEffect()
    }
}
MaterialControls demonstrates visionOS’s spatial UI design patterns. Using a glassBackgroundEffect and proper padding ensures our controls maintain depth and visibility in 3D space. The view communicates with ObjectView through a @Binding property, enabling real-time material updates while maintaining SwiftUI’s state management principles.
When materials change, RealityKit’s PhysicallyBasedMaterial system updates the sphere’s appearance. The iridescent and metallic configurations demonstrate different combinations of roughness and metallic properties, showcasing how RealityKit’s material system simulates real-world surface properties in spatial environments.
Implementing Animating 3D Text
For our second interactive experience, we’ll create a 3D text that animates through scale transformations. This demonstrates RealityKit’s text generation capabilities and real-time entity manipulation. Create a new SwiftUI file called AnimatedTextView.swift:
struct AnimatedTextView: View {
    @State private var textEntity: ModelEntity?
    @State private var pulseAngle: Float = 0.0
    @State private var pulseTimer: Timer?

    var body: some View {
        RealityView { content in
            // .generateText(...) extrudes the string "Hello" into a 3D shape.
            // "extrusionDepth" is how thick the text appears in 3D.
            let textMesh = MeshResource.generateText(
                "Hello",
                extrusionDepth: 0.08,
                font: .systemFont(ofSize: 0.2),
                containerFrame: .zero,
                alignment: .center
            )

            // SimpleMaterial is a quick approach, though PhysicallyBasedMaterial
            // is also valid for more realistic lighting.
            var whiteMaterial = SimpleMaterial(color: .white, isMetallic: true)
            whiteMaterial.metallic = 0.5
            whiteMaterial.roughness = 0.7

            let model = ModelEntity(mesh: textMesh, materials: [whiteMaterial])

            // Offset the text so it scales from the mesh's center.
            let center = textMesh.bounds.center
            model.position = [-center.x, -center.y, 0]

            content.add(model)
            textEntity = model
        }
        .onAppear {
            // A simple 30 FPS timer for pulsing the text's scale
            pulseTimer = Timer.scheduledTimer(withTimeInterval: 1.0 / 30.0, repeats: true) { _ in
                pulseAngle += 0.1
                let scaleFactor = 1.0 + (0.2 * sin(pulseAngle))
                textEntity?.transform.scale = SIMD3<Float>(repeating: scaleFactor)
            }
        }
        .onDisappear {
            pulseTimer?.invalidate()
            pulseTimer = nil
        }
    }
}
AnimatedTextView showcases RealityKit’s ability to generate 3D geometry from text. MeshResource.generateText creates volumetric text with true depth, controlled by the extrusionDepth parameter.
The implementation uses SimpleMaterial instead of PhysicallyBasedMaterial, providing basic metallic and roughness properties for a sleek appearance. The key to proper text positioning lies in the offset calculation using textMesh.bounds.center. By subtracting the center from the entity’s position, we ensure the text scales uniformly from its center point rather than from an arbitrary corner.
The pulsing animation demonstrates real-time entity transformation through scale adjustments. A sine wave drives the scale factor, creating smooth transitions between 1.0 and 1.2 times the original size. While we use Timer for simplicity, RealityKit also offers native animation systems for more complex transformations.

Conclusion
In this tutorial, we’ve built a complete visionOS app that demonstrates key concepts of spatial computing. By implementing both a surrounding immersive environment and an interactive floating window, we’ve explored how RealityKit and SwiftUI work together to create engaging spatial experiences.
Through our implementation, we’ve covered several fundamental aspects of visionOS development: creating immersive spaces using RealityKit’s entity-component system, managing 3D content with materials and transformations, and building spatial user interfaces with SwiftUI. The combination of a floating window containing 3D content with an immersive environment showcases how visionOS apps can provide rich interactions while maintaining familiar UI patterns.
Our app demonstrates how to structure spatial experiences that transition smoothly between different modes of interaction. From the material controls for our 3D sphere to the animated text, we’ve shown how SwiftUI’s declarative syntax integrates naturally with RealityKit’s 3D capabilities.
This foundation opens possibilities for creating more complex spatial computing experiences. Whether you’re building productivity tools, immersive games, or data visualization apps, the patterns we’ve explored — entity manipulation, material systems, and spatial UI design — form the building blocks for sophisticated visionOS applications.
visionOS Deep Dive: Building An Immersive visionOS App was originally published in Level Up Coding on Medium, where people are continuing the conversation by highlighting and responding to this story.
This content originally appeared on Level Up Coding - Medium and was authored by Prithiv Dev Devendran
Prithiv Dev Devendran | Sciencx (2025-02-14T01:58:20+00:00) visionOS Deep Dive: Building An Immersive visionOS App. Retrieved from https://www.scien.cx/2025/02/14/visionos-deep-dive-building-an-immersive-visionos-app/
Please log in to upload a file.
There are no updates yet.
Click the Upload button above to add an update.