
This content originally appeared on DEV Community and was authored by 19Naveen
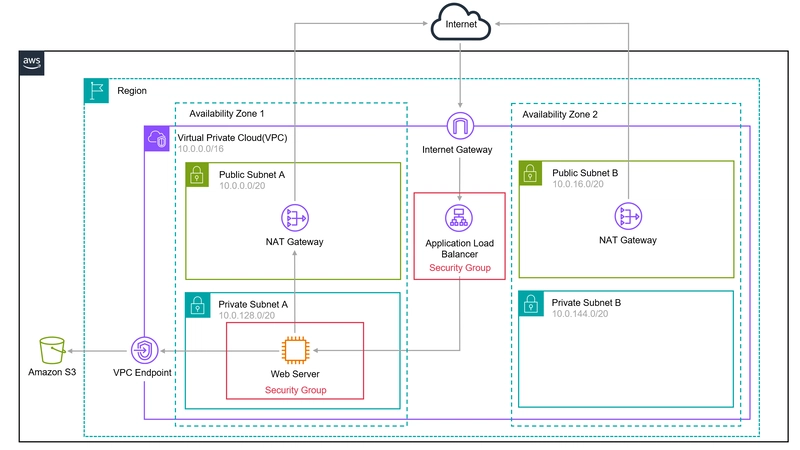
Architecture Diagram
Build Website
- Setup Networking (VPC)
- Resource Security (SGs)
- Access Management (IAM)
- Deploy Compute (EC2)
- Administer Web Server (SSM)
- Load Balancing (ALB)
- Storage (S3)
- Test Web Server
- Scaling (ASG)
- Final Output
1. Setup Networking (VPC)
- Navigate to the AWS Management Console and locate the VPC service.
- Click Create VPC.
- Select VPC and more. This will start the VPC wizard.
- Create a private and public subnet in 2 Availability Zone Each subnet is connected to a route table, which determines how network traffic is routed. The public subnets are routed to an Internet Gateway
- In the NAT gateways section, select 1 per AZ.
- Review the Network
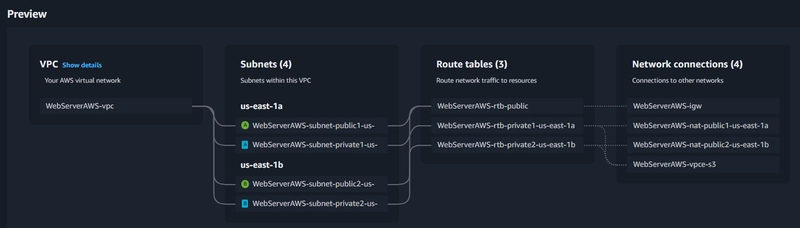
- Click Create VPC
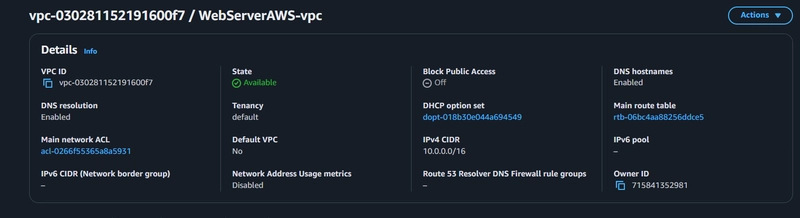
✅ Your VPC with public & private subnets is now ready! 🚀
2. Resource Security (SGs)
- Browse to the Security Groups part of the Amazon EC2 service.
- click Create security group to define a new custom security group for our resource
- In the Inbound rules section click Add rule
- Load Balancer --> HTTP TCP 80 Anywhere-IPv4 Allow HTTP inbound from Internet
- EC2 --> HTTP TCP 80 Load Balancer Security Group Allow HTTP inbound from Load Balancer
- Tags are metadata labels you can apply to AWS resources for organization and cost tracking. Create a new tag for the security group by clicking Add new tag. Enter Name for Key and LoadBalancerSecurityGroup for Value.
- Finalize the creation by clicking Create security group

--
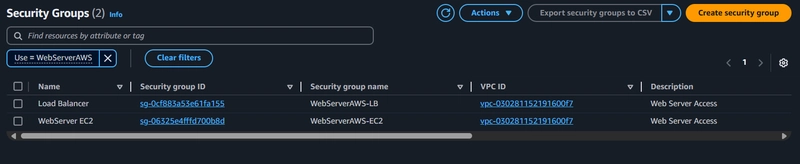
✅ Your Secuirty Group is Created... 🚀
3. Access Management (IAM)
- Browse to the IAM service and click create Role.
- Select AWS Service. Choose EC2 for the service or use case.
- Select EC2 Role for AWS Systems Manager and click Next
- Confirm that the AmazonSSMManagedInstanceCore policy and AmazonS3ReadOnlyAccess Policy has been added to the role and click Next
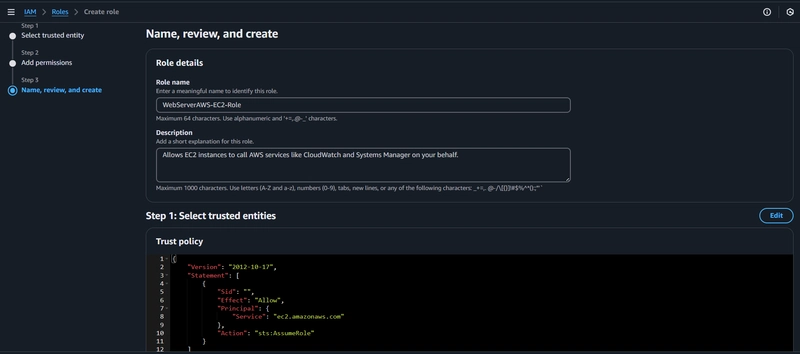
- Name the role. Scroll to the bottom and click Create role

4. Deploy Compute (EC2)
- Browse to the EC2 service.
- Click Launch Instance.
- Name the server and choose the created VPC, SG, add Role and paste the code then click create.
#!/bin/bash
yum update -y
# Install Session Manager agent
yum install -y https://s3.amazonaws.com/ec2-downloads-windows/SSMAgent/latest/linux_amd64/amazon-ssm-agent.rpm
systemctl enable amazon-ssm-agent
# Install and start the php web server
dnf install -y httpd wget php-json php
chkconfig httpd on
systemctl start httpd
systemctl enable httpd

# Install AWS SDK for PHP
wget https://docs.aws.amazon.com/aws-sdk-php/v3/download/aws.zip
unzip aws.zip -d /var/www/html/sdk
rm aws.zip

#Install the web pages for our lab
if [ ! -f /var/www/html/index.html ]; then
rm index.html
fi
cd /var/www/html
wget https://ws-assets-prod-iad-r-iad-ed304a55c2ca1aee.s3.us-east-1.amazonaws.com/2aa53d6e-6814-4705-ba90-04dfa93fc4a3/index.php

# Update existing packages
dnf update -y

5. Administer Web Server (SSM)
- In the Amazon EC2 dashboard, select the web server instance. You'll notice it only has a private IP address, not a public one
- Select the Session Manager tab in ec2 instance and click Connect.
- run the following commands:
echo -n 'Private IPv4 Address: ' && ifconfig enX0 | grep -i mask | awk '{print $2}'| cut -f2 -d: && \
echo -n 'Public IPv4 Address: ' && curl checkip.amazonaws.com

Excellent, there's the private IP address you noted in step 1 This means we successfully connected to the right instance without exposing the SSH protocol. However, you'll also notice there is a Public IP address - this is the Elastic IP allocated for the NAT Gateway. The NAT Gateway allows resources in the private subnet, like our web server, to communicate with the Internet.
6. Load Balancing (ALB)
- Create load balancer.
Click Create under Application Load Balancer.
-
Basic configuration
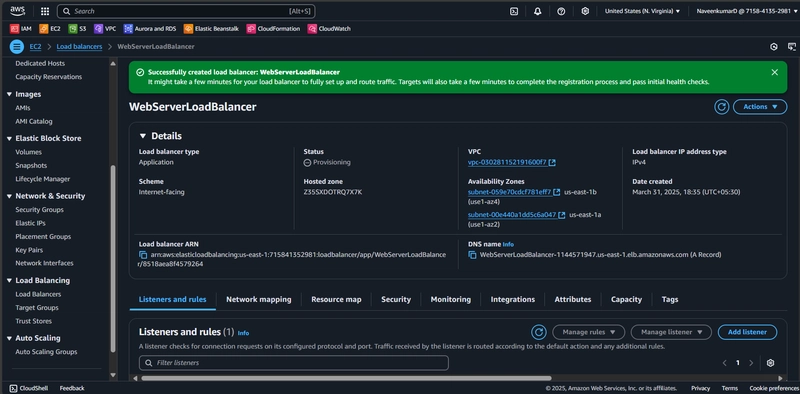
- Load balancer name WebServerLoadBalancer
- Basic configuration Scheme Internet-facing
- Basic configuration Load balancer IP address type IPv4
- Network mapping VPC project-vpc
- Network mapping Availability Zone 1 project-subnet-public1
- Network mapping Availability Zone 2 project-subnet-public2
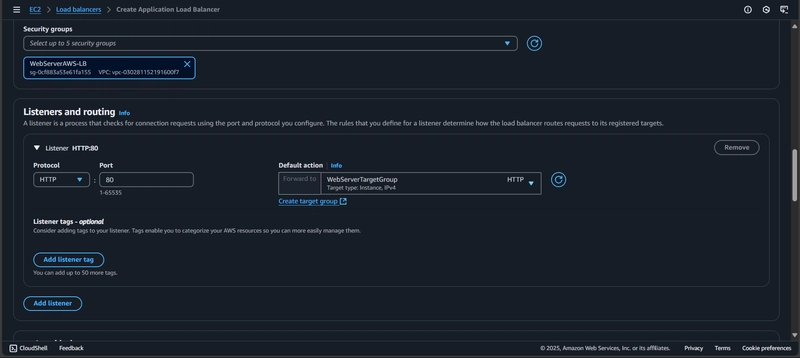
add the Load Balancer Security Group you created earlier.
add ALB security group
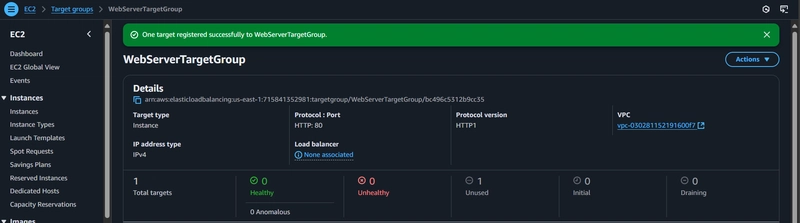
Leave the default settings of HTTP and port 80 in the Listeners and routing section, then click Create target group.
-
Configure the new target group with the following settings:
- Basic configuration Target group name WebServerTargetGroup
- Basic configuration Protocol HTTP
- Basic configuration Port 80
- Basic configuration IP address type IPv4
- Basic configuration VPC project-vpc
- Basic configuration Protocol version HTTP1
- Health checks Health check protocol HTTP
- Health checks Health check path /
- Next to proceed to the register targets settings.
Select mywebserver and click include as pending below. This will configure the load balancer to route web traffic from the Internet to the EC2 web server instance.
Click Create target group to finalize the setup,
- close the browser tab to return to the load balancer configuration.
- In the Listeners and routing section, click the refresh button and select the WebServerTargetGroup we just created
- click Create load balancer
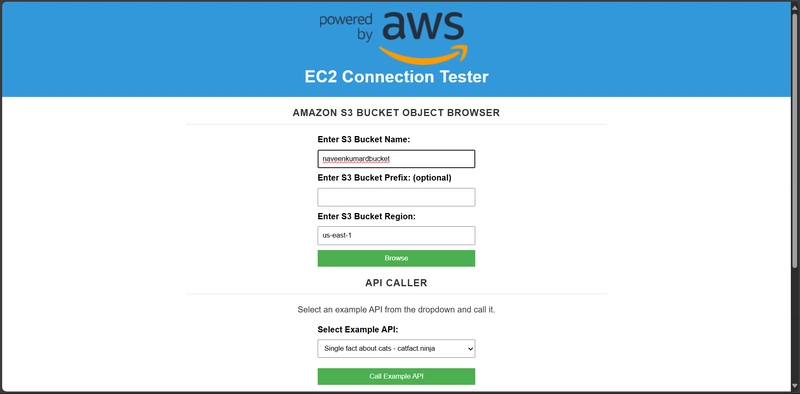
7. Storage (S3)
- Click Create Bucket
- Upload some files to the bucket
- Download Data from this Link
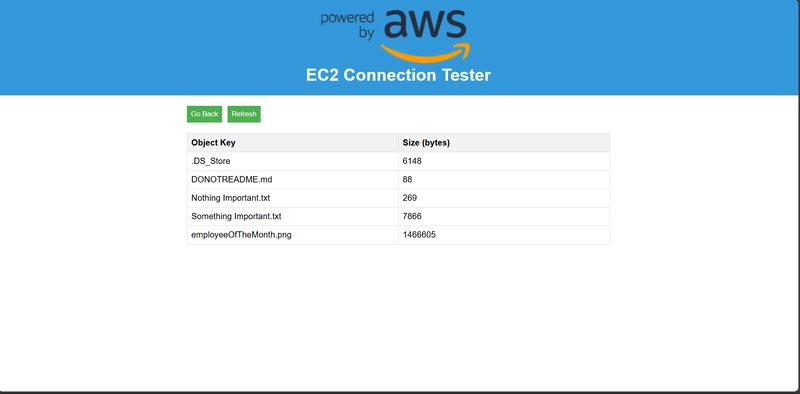
8. Test Web Server
Copy the DNS name from the Load Balancer page and paste it into a new browser tab. Make sure it's http not https...
Final Output:
This content originally appeared on DEV Community and was authored by 19Naveen
19Naveen | Sciencx (2025-03-31T14:05:01+00:00) AWS 101 Practice Workshop. Retrieved from https://www.scien.cx/2025/03/31/aws-101-practice-workshop/
Please log in to upload a file.
There are no updates yet.
Click the Upload button above to add an update.