This content originally appeared on Level Up Coding - Medium and was authored by Andrey Morozov
Short guide to structural directives in Angular

You are probably familiar with Angular built-in structural directives: ngFor, NgIf, NgSwitch. But how do they work, what properties do they have, and what’s going on behind the scenes?
In this article I would like to do a small guide about structural directives, show what’s going on in the template when you use directive, and the case of using decorator property exportAs in structural directives.
Short guide to directives in Angular
Angular directives are used to change the appearance or behavior of a DOM element. There are three types of directives:
- Components (with its own template);
- Structural, changing the structure of the DOM tree;
- Attributes that change the appearance or default behavior of a DOM element.
What is the difference between attribute and structural directives? Structural directives could not only change properties of elements, but also remove or add elements to the DOM. In addition, all of them begin with a * symbol (*ngFor, *ngIf, etc).
Creating our own structural directive
For example, let’s create our own simple structured directive addElement, which will add an element to the page.
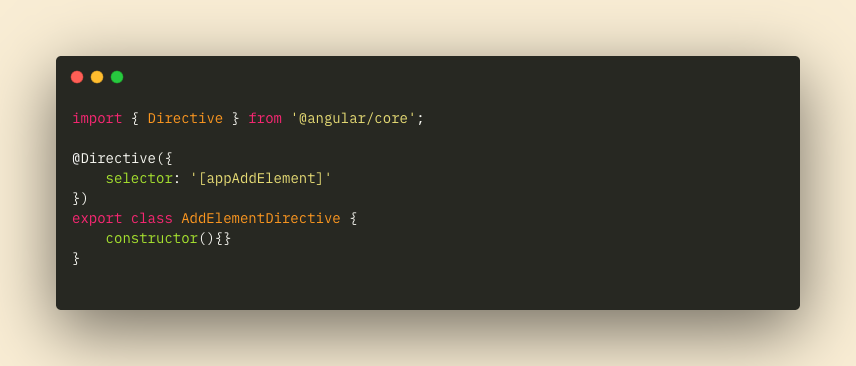
Creating a directive looks like just a class using the @Directive attribute, in which we have a selector that describes how our directive will look when added to any element.
Let’s add our directive to some element. It’s very simple: add our new directive to the declaration object in the component module and hang our directive on the element in the template.

Now back to the directive’s class itself, since it is a structural directive, then we can inject the following services into the constructor:
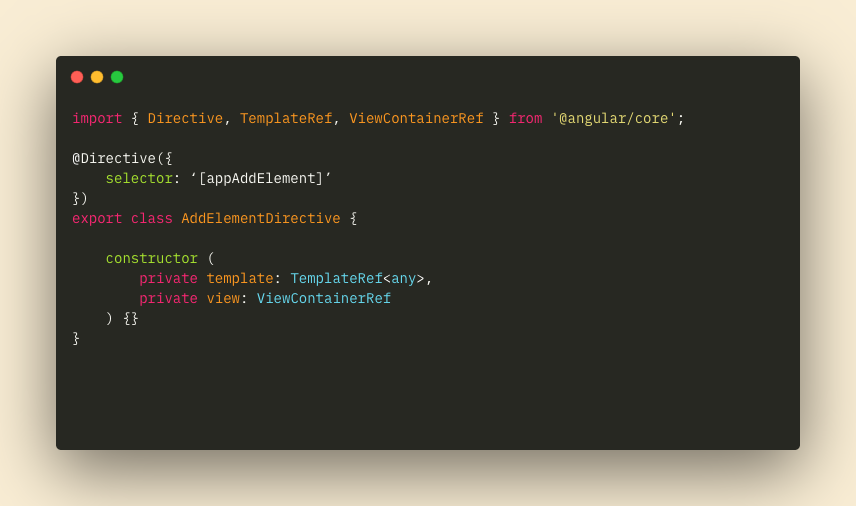
TemplateRef is a view wrapped in special <ng-template /> tags. For us, this is the <div> on which we hung our directive. I’ll explain later how <ng-template /> relates to this.
ViewContainerRef is a wrapper around our directive.
And now if we decide to inspect our element with appAddElement directive in the browser. Then we will see nothing, since we created a structured directive and it immediately throws our element out of the DOM.
To fix this, let’s add our template through our container in the OnInit method.
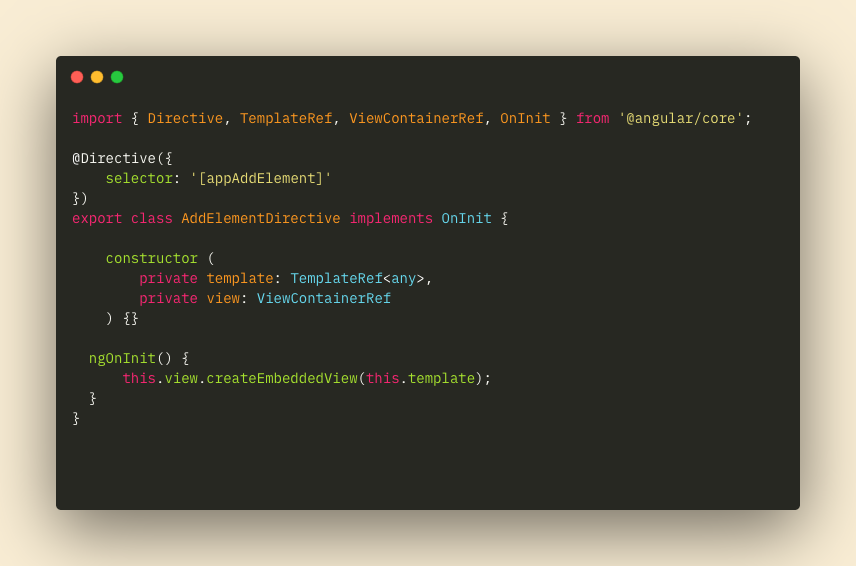
And now we could see our div with content in the browser. But it’s not look pretty interesting so far. Let’s consider some more features that we could do with directives.
Inputs in directives
You can pass input parameters to a directive, just like you do it in components. In addition, for simplicity, you can make the name of the directive as an input. Let’s add logic to our directive and show the element by timeout, and pass the timeout time through the input parameters.
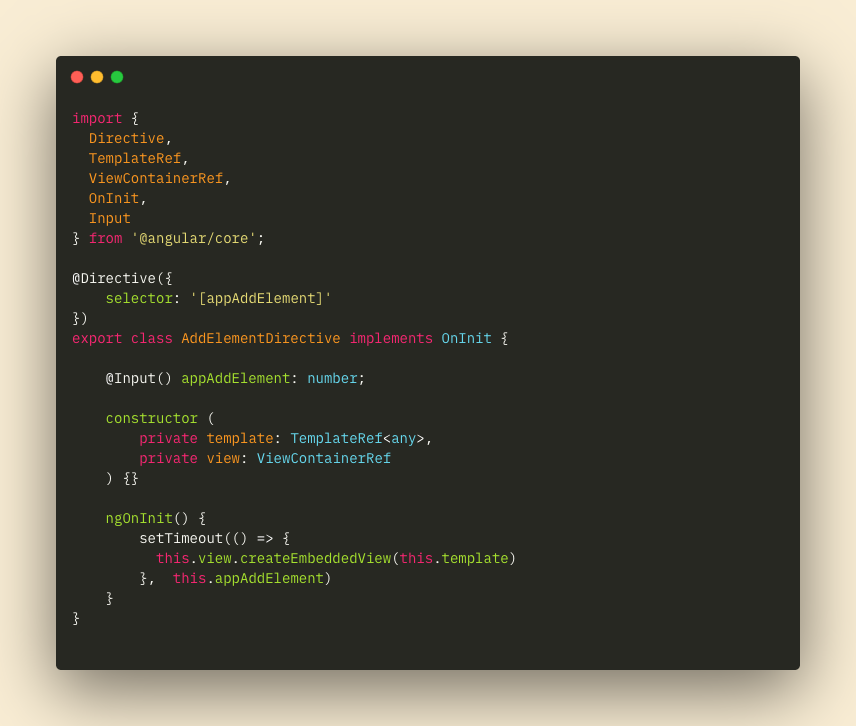
And then, when we call our directive, we pass the delay seconds as an input parameter:

And as expected in the browser we will see that our div appears in 3 seconds.
Quick look at how structural directives work under the hood of Angular
When Angular see the following code:

It wraps everything in <ng-template> tag
And on the <ng-template> itself, Angular puts a simple directive attribute by this name:

This notation above is absolutely identical to the usual notation of the structural directive using *.
But now you could see what exactly the previously declared in the line of the constructor code does:
private template: TemplateRef <any>
It’s a content of the ng-template tag as I wrote earlier.
And the ViewContainerRef declared in the constructor is the <ng-template> tag itself as a wrapper for our directive.
And now i guess it’s clear that using * in a structural directive is just a syntactic sugar, helping us to have a shorter directive notation.
ExportAs decorator property and using it with structural directives
Finally, I would like to point out a very useful property exportAs, which allows us to use the class of a directive outside of the element on which it is attached. In this case we could call methods of the directive directly in the component template, in which this directive is used.
It should be noted that the exportAs property is more often used for the attribute directives, but now we will look at its operation using the example of our structural directive.
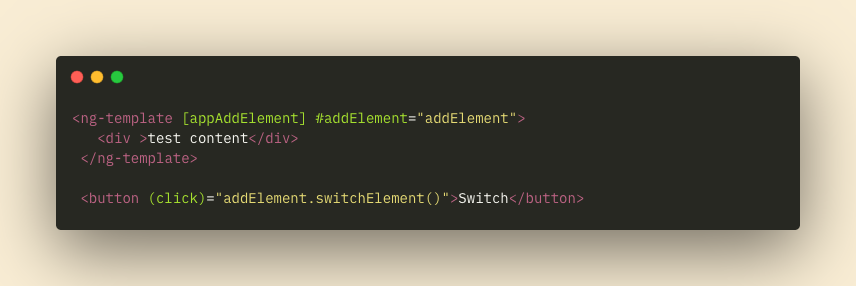
But there are some restrictions. In order to be able to work with the exportAs property with structural directive, we need to use the structural directive in de-sugarized form — without * symbol
Now let’s change the logic of our directive a little — let’s move the logic for showing the content from ngOnInit into a separate method. And also add the exportAs property to the @Directive decorator, that is, we will export a directive class named “addElement” in our case.
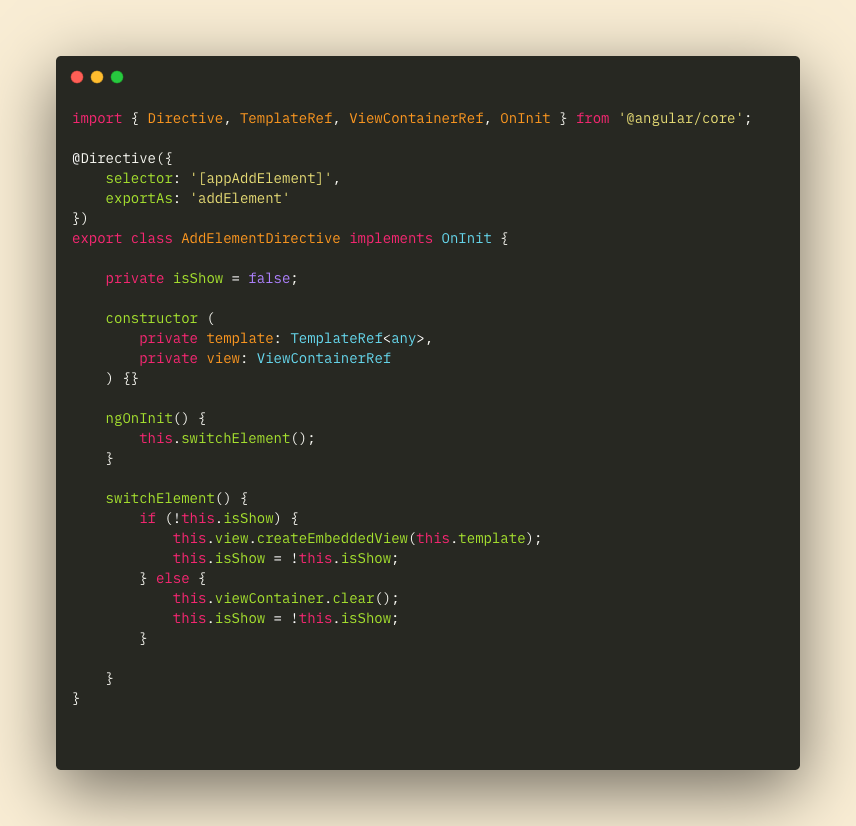
Now let’s move on to calling our directive, as I said earlier, in order to be able to use exportAs, we will have to apply the directive in de-sugarized form — without * symbol. And now, by clicking on button we will directly call switchElement() method from our directive class, that toggle visibility of div content.
Thanks for reading! I hope that this article was useful and opened the mystery of how structural directives work in Angular. See you in my next posts!
Structural Directives in Angular was originally published in Level Up Coding on Medium, where people are continuing the conversation by highlighting and responding to this story.
This content originally appeared on Level Up Coding - Medium and was authored by Andrey Morozov
Andrey Morozov | Sciencx (2021-05-28T13:35:48+00:00) Structural Directives in Angular. Retrieved from https://www.scien.cx/2021/05/28/structural-directives-in-angular/
Please log in to upload a file.
There are no updates yet.
Click the Upload button above to add an update.
