This content originally appeared on DEV Community and was authored by RitzaCo
If you're into creating graphics, 3D worlds, games, sounds, and other more creative things, Replit has a number of tools and environments to help you. One of the benefits of coding with Replit is that you can switch between different programming paradigms and try them out without having to set it all up yourself.
What is creative coding?
For this article, we'll consider a tool to be a creative coding one if its main purpose is to create graphics, visual models, games, or sounds. Plain HTML or JavaScript can be used for this type of thing, but we're looking for tools and languages that are a bit more specialised.
Here's a list of tools we'll be taking a look at for the more creative side of Replit:
- Python
turtle - p5.js
- Kaboom
- Pygame
- Pyxel
- GLSL
Python turtle
Turtle graphics is a classic of the genre. First created way back in the 1960s, the idea is that there is a small turtle robot on the screen, holding some pens. You give the turtle commands to move around and tell it when to put the pen down and what color pen to use. This way you can make line or vector drawings on the screen. The turtle idea comes from a type of actual robot used for education.
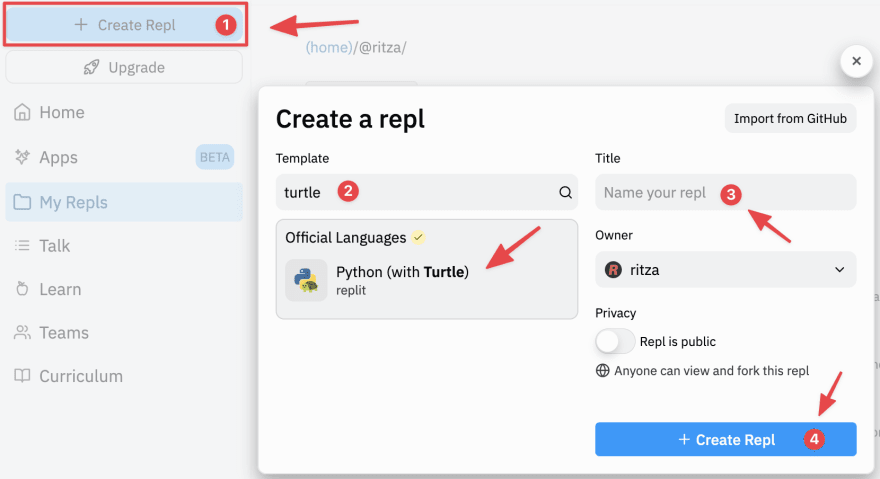
Replit has support for Python turtle, which is the current incarnation of the turtle graphics idea. Choose the "Python (with Turtle)" template when creating a new repl to use it.
Python turtle uses commands like forward(10), back(10), left(50), right(30) pendown() and penup() to control the turtle. The methods forward and back take the distance the turtle should move as their arguments, while left and right take the angle in degrees to turn the turtle on the spot (the turtle is very nimble!). You can use pendown and penup to tell the turtle to draw or not draw while moving.
When you create a new Python (with Turtle) template, you'll notice a small program is included as an example to show you the basics. When you run this program, it will draw a square with each side a different color.
Although turtle has a small set of simple commands, it can be used to make some impressive-looking graphics. This is because you can use loops and calculations and all the other programming constructs available in Python to control the turtle.
Try this turtle program for example:
https://replit.com/@ritza/python-turtle
import turtle

t = turtle.Turtle()
t.speed(0)

sides = 3;
colors = ['red', 'yellow', 'orange']

for x in range(360):
    t.pencolor(colors[x % sides])
    t.forward(x * 3 / sides + x)
    t.left(360 / sides + 1)
    t.width(x * sides / 200)
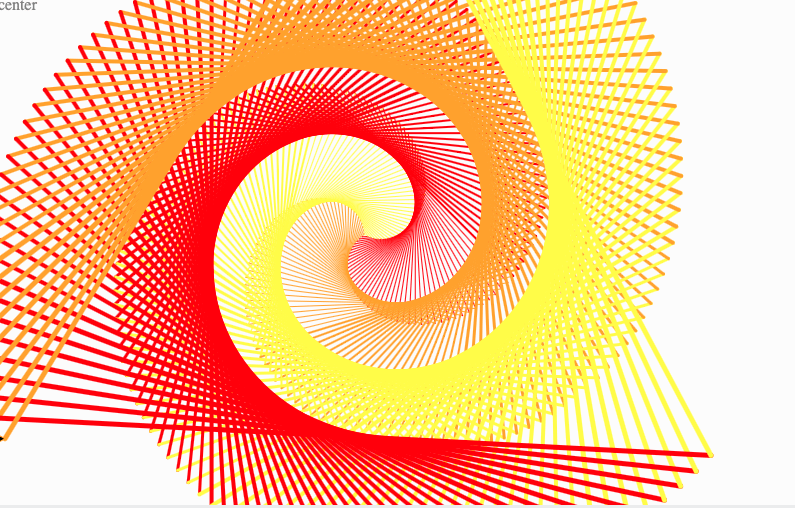
This code generates a spiral by drawing a slightly rotated and increasingly larger triangle for each of the 360 degrees specified in the main loop. This short little script produces a cool-looking output:
Try changing up the sides parameter to draw different shapes, and play with the color combos to come up with new artworks.
p5.js
p5.js is a JavaScript graphics and animation library developed specifically for artists and designers - and generally people who have not been exposed to programming before. It's based on the Processing software project, and brings the Processing concept to web browsers, making it easy to share your "sketches", which is the p5.js name for programs.
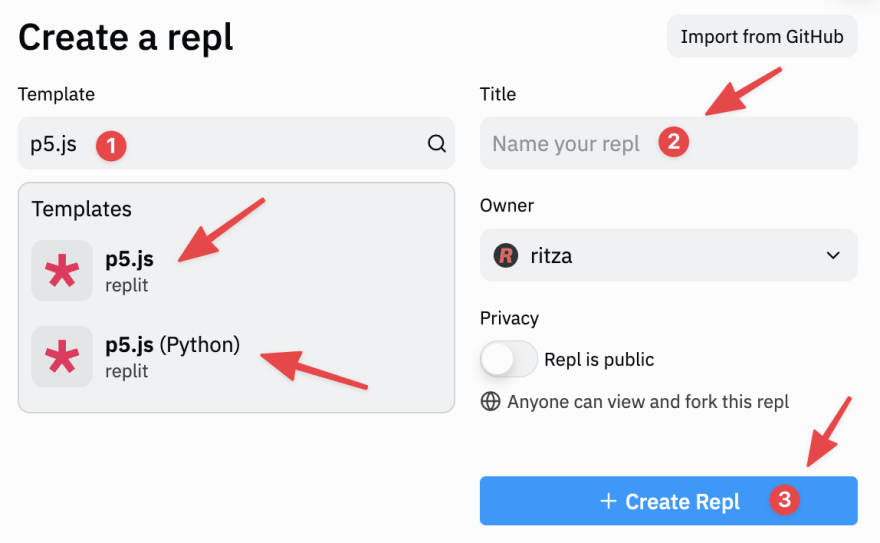
Replit has two templates for p5.js - one for pure JavaScript, and another that interprets Python code, but still uses the underlying p5.js JavaScript library. You can use the Python version if you are more familiar with Python syntax than JavaScript syntax.
If you create a repl using one of the templates, you'll see it includes some sample code. Running it will draw random color circles on the screen wherever the mouse pointer is.
p5.js has two main functions in every sketch: setup(), which is run once when the sketch is executed, and draw(), which is run every frame.
In the setup function, you generally set up the window size and other such parameters. In the draw function, you can use p5.js functions to draw your scene. p5.js has functions for everything from drawing a simple line to rendering 3D models.
Here is another sketch you can try (note that this is in JavaScript, so it will only work in the p5.js JavaScript template):
https://replit.com/@ritza/p5-javascript
function setup() {
  createCanvas(500, 500);
    background('honeydew');
}

function draw() {
  noStroke()
  fill('cyan');
  circle(450, 200, 100);
  fill('pink');
  triangle(250, 75, 300, 300, 200, 275);
  fill('lavender')
  square(250, 300, 200);
}
In this sketch, we draw a few shapes in various colors on the screen, in a kind of 80s geometric art style:
The p5.js website has a guide to getting started, plus a lot of references and examples to experiment with.
Kaboom
Kaboom.js is Replit's own homegrown JavaScript game framework, launched in 2021. It's geared towards making 2D games, particularly platform games, although it has enough flexibility to create games in other formats too. Because it is a JavaScript library, it can be used to develop web games, making it easy to share and distribute your creations with the world.
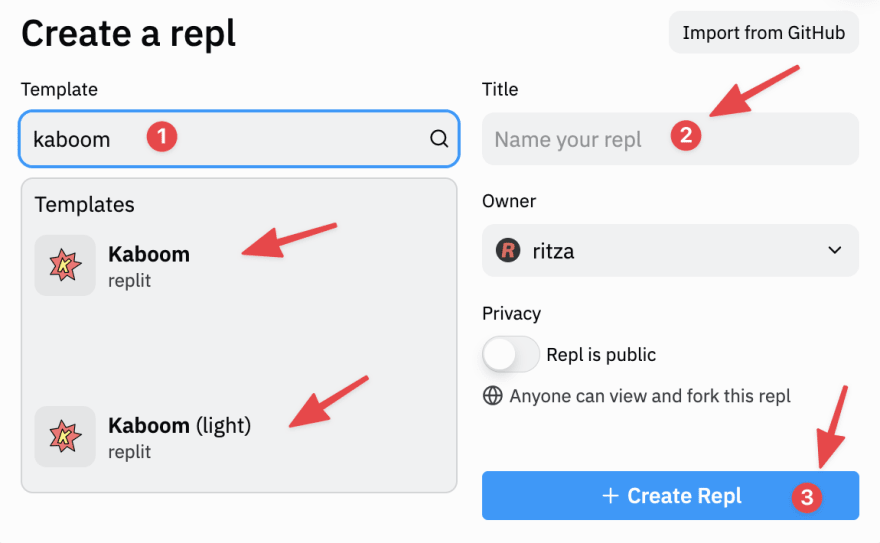
Replit has two official templates for Kaboom:
- A specialized Kaboom template, with an integrated sprite editor and gallery, as well as pre-defined folders for assets. This is perfect for getting started with Kaboom and making games in general, as you don't need to worry about folder structures or sourcing graphics.
- A 'light' template that is a simple web template with just the Kaboom package referenced. This is for coders with a little more experience, as the intent is to give you more control and flexibility
One of the great features of Kaboom is the simple way you can define level maps, drawing them with text characters, and then mapping the text characters to game elements:
const level = [
        "                          $",
        "                          $",
        "                          $",
        "                          $",
        "                          $",
        "           $$         =   $",
        "  %      ====         =   $",
        "                      =   $",
        "                      =    ",
        "       ^^      = >    =   @",
        "===========================",
    ];
Another interesting aspect of Kaboom is that it makes heavy use of composition. This allows you to create characters with complex behaviour by combining multiple simple components:
    "c": () => [
      sprite("coin"),
      area(),
      solid(),
      cleanup(),
      lifespan(0.4, { fade: 0.01 }),
      origin("bot")
    ]
Kaboom has a fast-growing resource and user base. The official Kaboom site documents each feature, and also has some specific examples. There is also a site with complete tutorials for building different types of games at Make JavaScript Games.
Pygame
Pygame is a well-established library (from 2000!) for making games. It has functionality to draw shapes and images to the screen, get user input, play sounds, and more. Because it has been around for so long, there are plenty of examples and tutorials for it on the web.
Replit has a specialised Python template for Pygame. Choose this template for creating Pygame games:
Try out this code in a Pygame repl:
https://replit.com/@ritza/pygame-example
import pygame

pygame.init()
bounds = (300,300)
window = pygame.display.set_mode(bounds)
pygame.display.set_caption("box")

color = (0,255,0)
x = 100
y = 100

while True:
  pygame.time.delay(100)
  for event in pygame.event.get():
    if event.type == pygame.QUIT:
      run = False

  keys = pygame.key.get_pressed()
  if keys[pygame.K_LEFT]:
    x = x - 1
  elif keys[pygame.K_RIGHT]:
    x = x + 1
  elif keys[pygame.K_UP]:
    y = y - 1
  elif keys[pygame.K_DOWN]:
    y = y + 1

  window.fill((0,0,0))
  pygame.draw.rect(window, color, (x, y, 10, 10))
  pygame.display.update()
This code initializes a new pygame instance and creates a window to display the output in. Then it has a main game loop, which listens for keyboard arrow key presses, and moves a small block around the screen based on the keys pressed.
Check out some of our tutorials for Pygame :
Pyxel
Pyxel is specialised for making retro-type games, inspired by console games from the 80s and early 90s. You can only display 16 colors, and no more than 4 sound samples can be played at once, just like on the earlier Nintendo, Sega, and other classic games systems. If you're into pixel art, this is the game engine for you.
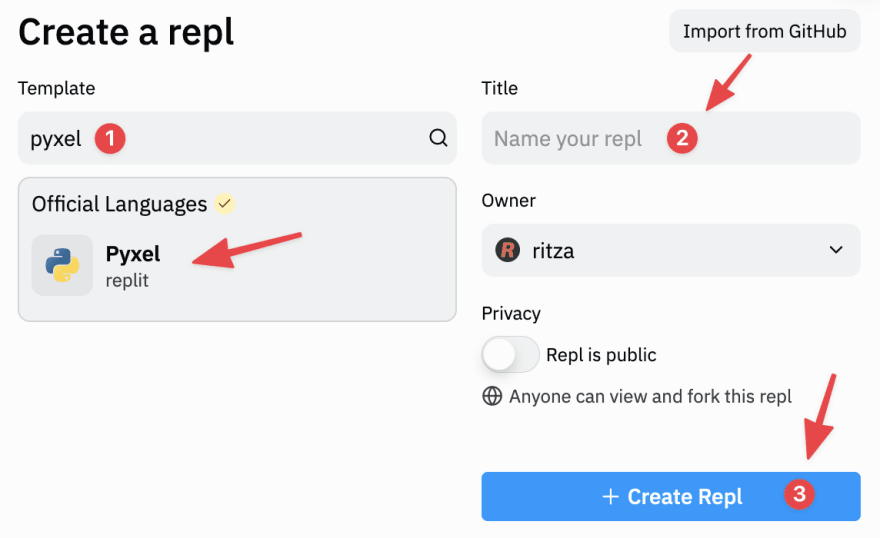
Choose the 'Pyxel' template on Replit to create a new Pyxel environment.
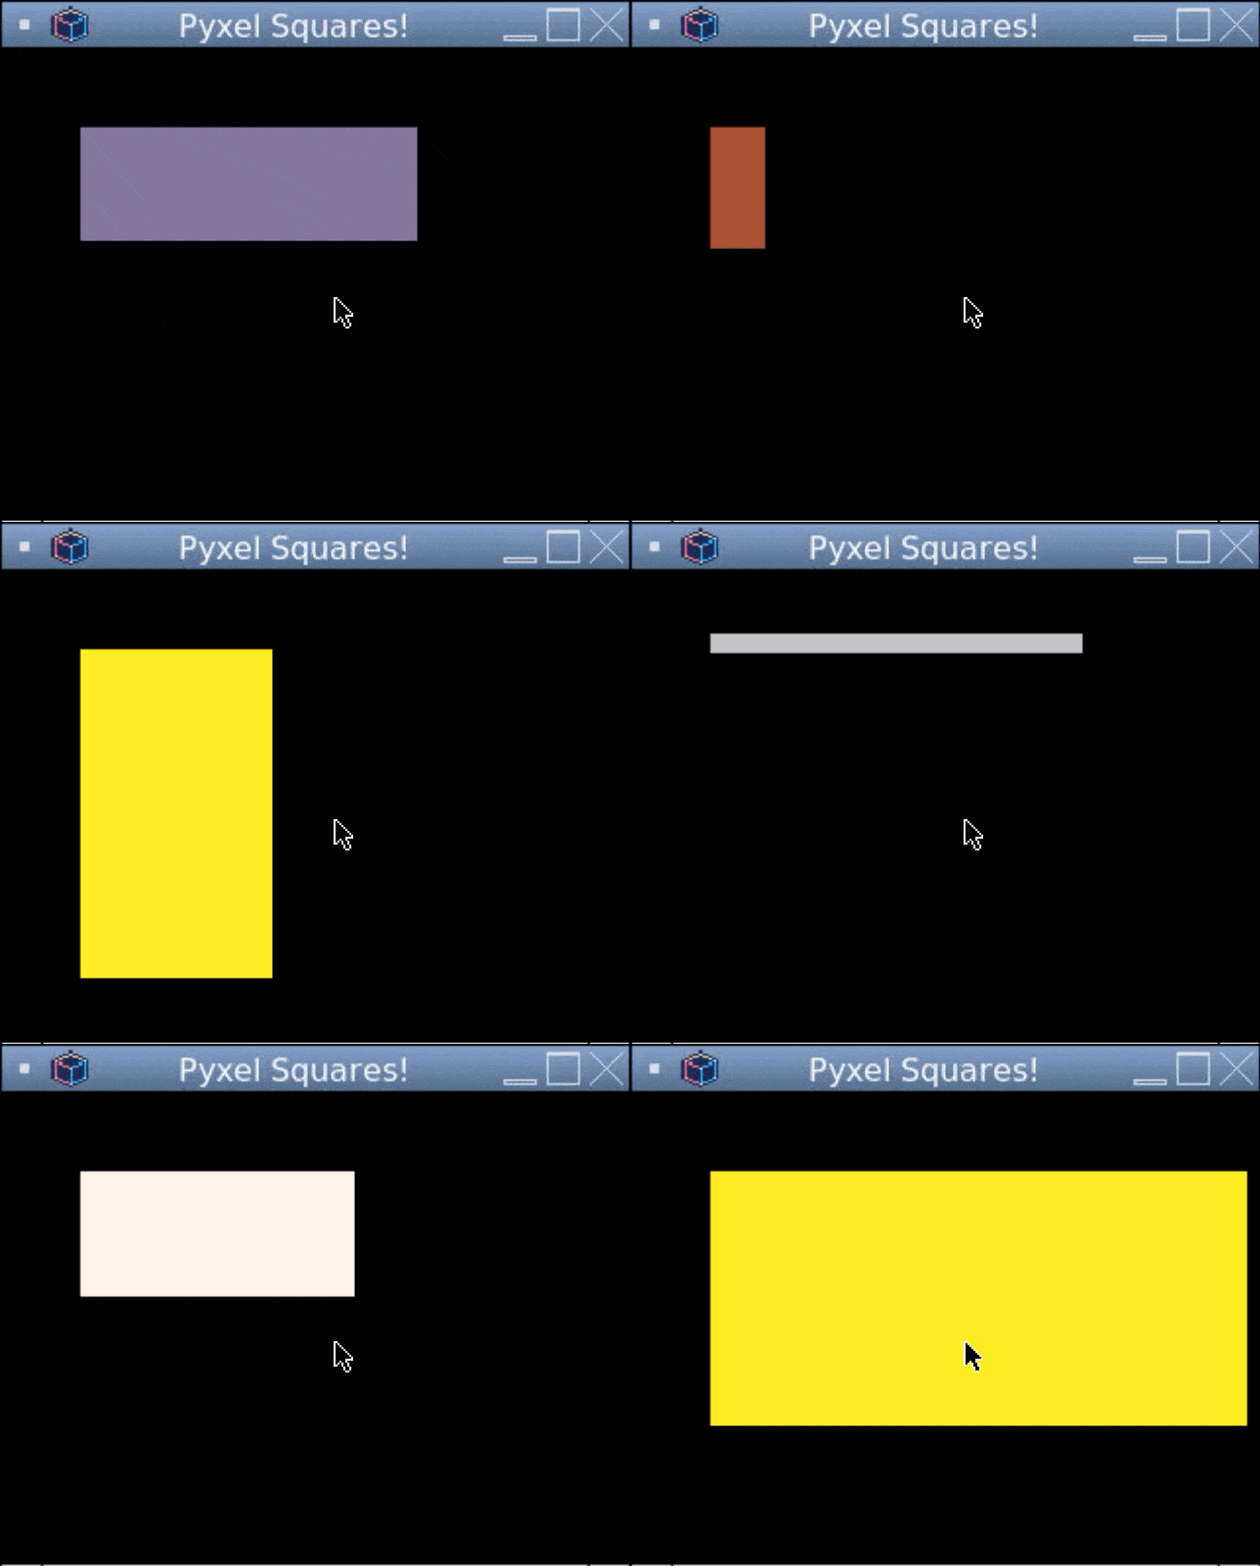
Try this code in a Pyxel repl to draw rectangles of random size and color, changing every two frames:
https://replit.com/@ritza/pyxel-example
import pyxel
import random

class App:

  def __init__(self):
    pyxel.init(160, 120, caption="Pyxel Squares!")
    pyxel.run(self.update, self.draw)

  def update(self):
    if pyxel.btnp(pyxel.KEY_Q):
        pyxel.quit()

  def draw(self):
    if (pyxel.frame_count % 2 == 0):
      pyxel.cls(0)
      pyxel.rect(random.randint(0,160), random.randint(0,120), 20, 20, random.randint(0,15))

App()
Take a look in the examples folder on the Pyxel GitHub project to see more ways to use Pyxel.
GLSL
On the more advanced end of the spectrum, Replit supports GLSL projects. GLSL (OpenGL Shading Language) is a C-style language for creating graphics shaders. Shaders are programs that (usually) run on graphics cards as part of a graphics rendering pipeline. There are many types of shaders - the two most common are vertex shaders and fragment (or pixel) shaders. Vertex shaders compute the position of objects in the graphics world, and pixel shaders compute the color that each pixel should be. This previously required writing code for specific graphics hardware, but GLSL is a high-level language that can run on many different graphics hardware makes.
GLSL gives you control over the graphics rendering pipeline, enabling you to create very advanced graphics. GLSL has many features to handle vector and matrix manipulations, as these are core to graphics processing.
Choose the "GLSL" template to create a new GLSL repl:
The template has a sample fragment shader in the file shader.glsl as well as some web code to setup a WebGL resource to apply the shader to. Running the sample will show some pretty gradients on the screen that vary with time and as you move the mouse over it.
Try this code out in the shader file to make a kind of moving "plaid" effect:
https://replit.com/@ritza/glsl-example
precision mediump float;
varying vec2 a_pos;
uniform float u_time;

void main(void) {

    gl_FragColor = vec4(
      a_pos.x * sin(u_time * a_pos.x),
      a_pos.y * sin(u_time * a_pos.y),
      a_pos.x * a_pos.y * sin(u_time),
      1.0);
}
Here we set gl_FragColor, which is the color for a specific pixel on the screen. A pixel color in GLSL is represented using a vec4 data type, which is a vector of four values, representing red, green, blue, and alpha. In this shader, we vary the pixel color depending on it's co-ordinate a_pos, and the current frame time u_time.
If you'd like to dive deeper into the world of advanced graphics and shaders, you can visit Learn OpenGL's Getting Started: Shaders resource.
Wrap up
That wraps up this list of the official creative coding language templates on Replit. Of course, Replit is flexible enough that you can import and use whatever framework or library you want in your projects, so you are not limited to the tools we've looked at here. Replit is also adding more languages and templates everyday, so be sure to watch out for new additions!
This content originally appeared on DEV Community and was authored by RitzaCo
RitzaCo | Sciencx (2021-11-24T11:36:11+00:00) Creative coding with Replit. Retrieved from https://www.scien.cx/2021/11/24/creative-coding-with-replit/
Please log in to upload a file.
There are no updates yet.
Click the Upload button above to add an update.

