This content originally appeared on DEV Community and was authored by Kimberlee Johnson
If a picture is worth a thousand words, what does that mean for emoji? For decades they’ve been used to add color to all sorts of written communications, from text messages to entire translations of Moby Dick to — most relevant to this blog post — video calls.
We build developer tools at Daily that enable new ways to communicate online. Adding emoji reactions to video chats gives participants a familiar (and fun!) way to express themselves.
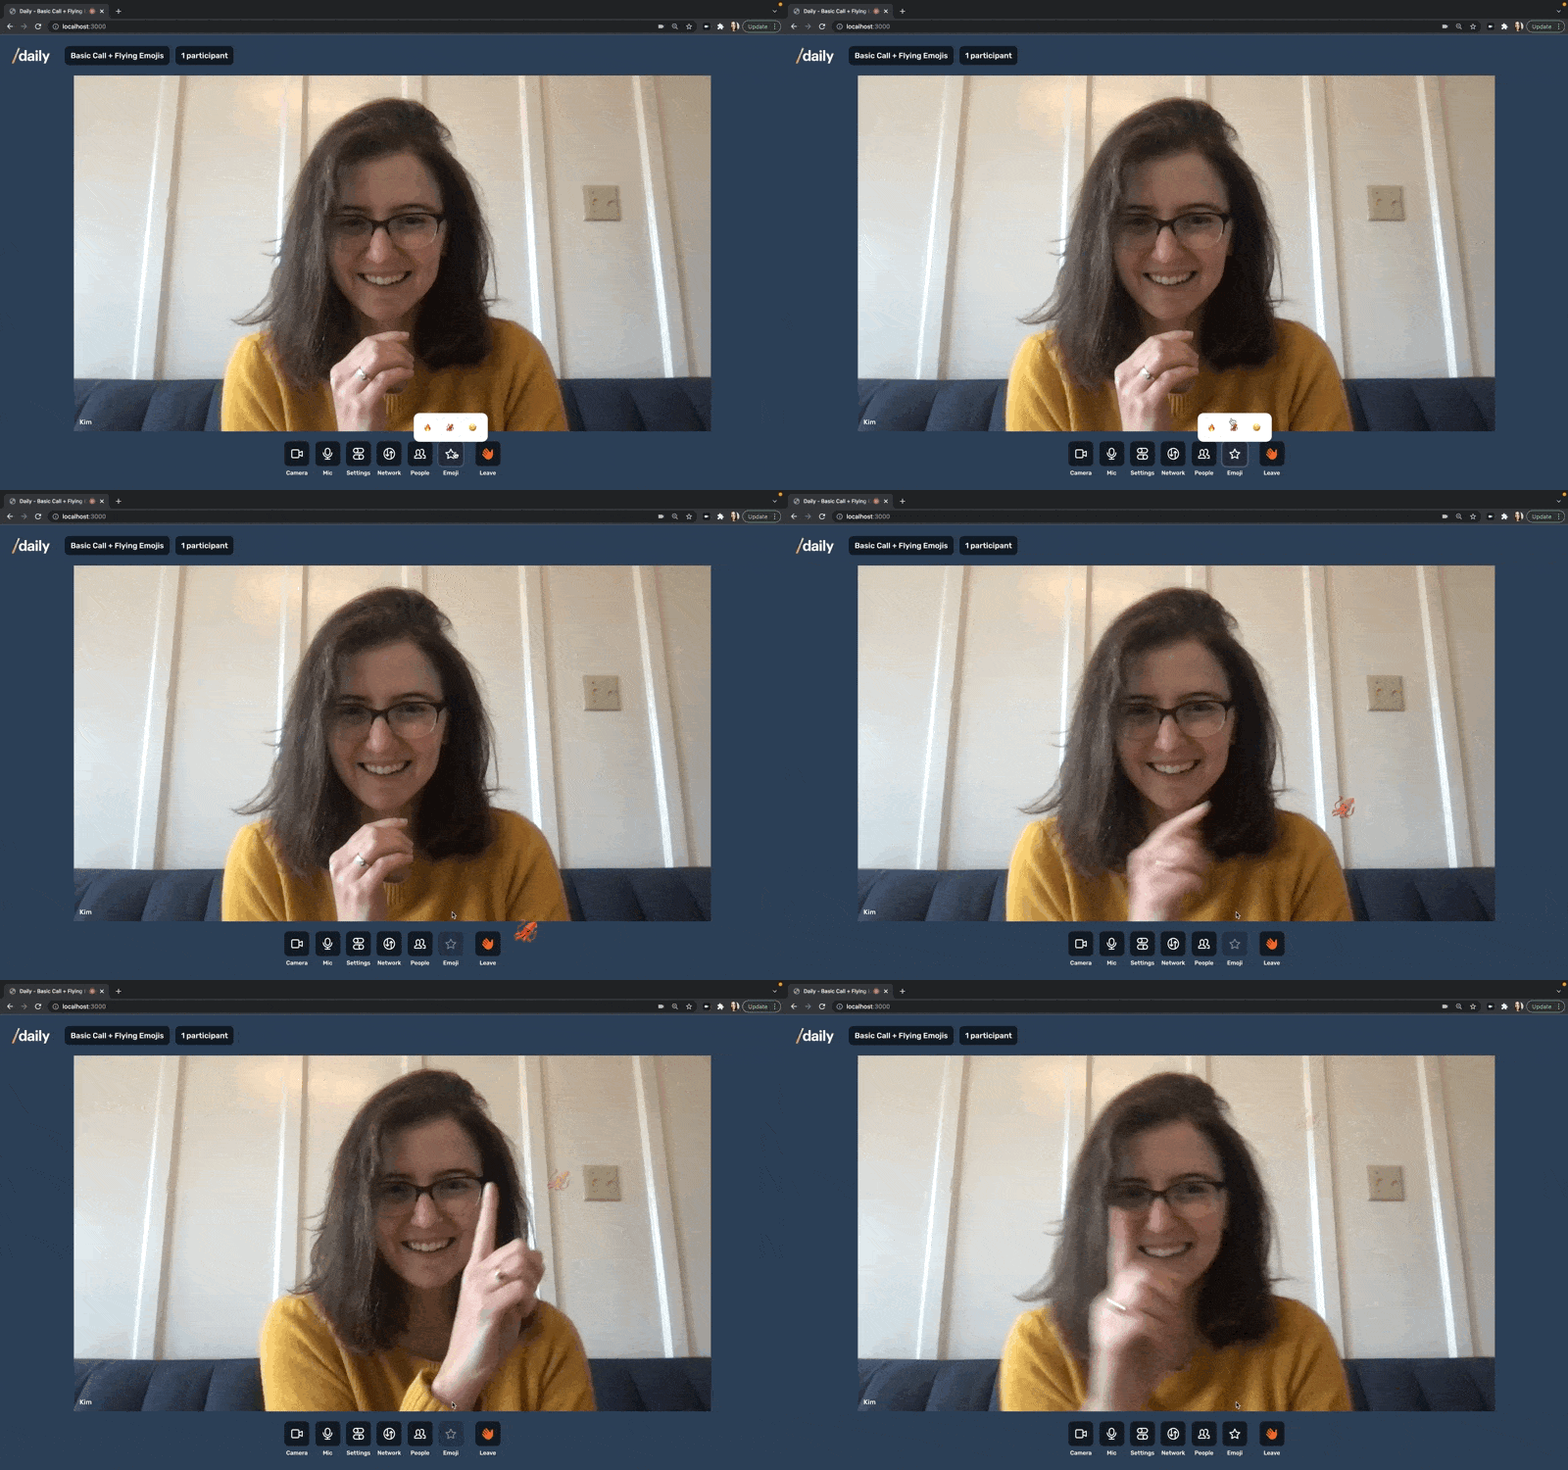
In this tutorial we’ll add a set of flying emoji reactions to a custom video call built on the Daily call object.
To achieve this we will:
- Create a button that sends an emoji of our choice flying on click
- Send our emoji reaction to all other participants using the Daily
sendAppMessage()method - Render the emoji for both the local participant who sent it and the remote participants who receive it
We will do all of these things in a Next.js demo app that we built in a previous post. Reference that tutorial for details on the foundation of the app, like participant, device, and track management. This post just focuses on the emoji 😎
The demo and code snippets are React-based, but you can still apply the essence of the steps outlined in the tutorial to work with other frameworks.
To run the demo locally:
- Fork and clone the
daily-demos/examplesrepository -
cd examples/custom/flying-emojis - Set your
DAILY_API_KEYandDAILY_DOMAINenv variables (seeenv.example) -
yarn -
yarn workspace @custom/flying-emojis dev
With that, our emoji are ready to fly.
Create a button that sends an emoji flying
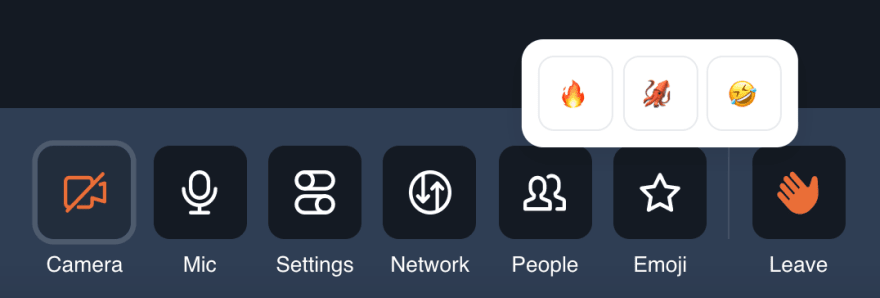
The star icon, labeled "Emoji" in the call tray component, (Tray.js), reveals available emoji reactions, and allows participants to pick one to send.
Here’s that component’s structure, with tangential elements removed:
// Tray.js

<div>
  {showEmojis && (
    <div className="emojis">
      <Button
        onClick={() => sendEmoji('fire')}
      >
        🔥
      </Button>
      <Button
        onClick={() => sendEmoji('squid')}
      >
        🦑
      </Button>
      <Button
        onClick={() => sendEmoji('laugh')}
      >
        🤣
      </Button>
    </div>
  )}
  <TrayButton
    label="Emoji"
    onClick={() => setShowEmojis(!showEmojis)}
  >
    <IconStar />
  </TrayButton>
</div>
When the star icon is clicked, it displays the available emoji. When a participant selects an emoji, the component calls sendEmoji() and passes a string representing the selection. For example, after clicking on "🦑" onClick={() => sendEmoji('squid')} is called.
Let’s look at sendEmoji().
// Tray.js

function sendEmoji(emoji) {
  window.dispatchEvent(
   new CustomEvent('reaction_added', { detail: { emoji } })
 );
 setShowEmojis(false);
}
sendEmoji() triggers a CustomEvent that we named reaction_added. The string representing the emoji is reaction_added’s CustomEvent.detail.
We’ll listen for the reaction_added event in FlyingEmojisOverlay.js, via window.addEventListener('reaction_added', handleSendFlyingEmoji);.
Use sendAppMessage() to broadcast the emoji to other call participants
handleSendFlyingEmoji() gets the string representing the emoji from CustomEvent.detail, and broadcasts it to all other call participants using the Daily sendAppMessage() method:
// FlyingEmojiOverlay.js

function handleSendFlyingEmoji(e) {
   const { emoji } = e.detail;

   if (emoji) {
     callObject.sendAppMessage({ message: `${emoji}` }, '*');
     handleDisplayFlyingEmoji(emoji);
   }
}
sendAppMessage() emits a corresponding app-message event that all remote participants receive. The <FlyingEmojiOverlay /> component listens for the event and calls handleReceiveFlyingEmoji() when a message is received: callObject.on('app-message', handleReceiveFlyingEmoji);.
// FlyingEmojisOverlay.js

const handleReceiveFlyingEmoji = useCallback(
   (e) => {
     if (!overlayRef.current) {
       return;
     }
     handleDisplayFlyingEmoji(e.data.message);
   },
   [handleDisplayFlyingEmoji]
);
handleReceiveFlyingEmoji() passes the message data from e.data.message along to handleDisplayFlyingEmoji().
Render the emoji for both the local sender and the remote recipient
handleDisplayFlyingEmoji() is called both on sending, in handleSendFlyingEmoji() and upon receiving in handleReceiveFlyingEmoji(). That’s because app-message only fires for remote participants, but we want the local participant to see their own emoji reaction as well.
The handleDisplayFlyingEmoji() function takes a string as a parameter. handleSendFlyingEmoji() passes the display handler a string from the CustomEvent.detail from the window event, while handleReceiveFlyingEmoji() passes a string from the app-message event object, e.data.message.
Now that we know how and when handleDisplayFlyingEmoji() is executed, let’s have a look at its definition:
// FlyingEmojisOverlay.js

const handleDisplayFlyingEmoji = useCallback(
  (emoji) => {
    if (!overlayRef.current) {
      return;
    }

    const node = document.createElement('div');
    node.appendChild(document.createTextNode(EMOJI_MAP[emoji]));
    node.className =
      Math.random() * 1 > 0.5 ? 'emoji wiggle-1' : 'emoji wiggle-2';
    node.style.transform = `rotate(${-30 + Math.random() * 60}deg)`;
    node.style.left = `${Math.random() * 100}%`;
    node.src = '';
    overlayRef.current.appendChild(node);

    node.addEventListener('animationend', (e) =>
      handleRemoveFlyingEmoji(e.target)
    );
  },
  [handleRemoveFlyingEmoji]
);
Let’s break it all down.
First, it creates a new <div>, and appends the selected emoji in a text node to that div.
// FlyingEmojiOverlay.js

const node = document.createElement('div');
node.appendChild(document.createTextNode(EMOJI_MAP[emoji]));
It gets the emoji by referencing a CONSTANT EMOJI_MAP object whose keys map to emoji:
// FlyingEmojisOverlay.js

const EMOJI_MAP = {
 fire: '🔥',
 squid: '🦑',
 laugh: '🤣',
};
Once the emoji is added, the function applies styles. Math.random() sets the className to either 'emoji wiggle-1' or 'emoji wiggle-2'.
// FlyingEmojisOverlay.js

@keyframes wiggle-1 {
  from {
    margin-left: -50px;
  }
  to {
    margin-left: 50px;
  }
}

@keyframes wiggle-2 {
  from {
    margin-left: 50px;
  }
  to {
    margin-left: -50px;
  }
}
These classes determine where the emoji starts wiggling on the screen. Math.random() also determines the degree to which the emoji rotates, and its left position.
 // FlyingEmojiOverlay.js

node.className =
       Math.random() * 1 > 0.5 ? 'emoji wiggle-1' : 'emoji wiggle-2';
 node.style.transform = `rotate(${-30 + Math.random() * 60}deg)`;
 node.style.left = `${Math.random() * 100}%`;
With styling set, the emoji is ready to be added to overlayRef:
// FlyingEmojisOverlay.js

overlayRef.current.appendChild(node);
Finally, handleDisplayFlyingEmoji() listens for the emoji animation to end, node.addEventListener('animationend', (e) => handleRemoveFlyingEmoji(e.target)); and then removes the appended child:
const handleRemoveFlyingEmoji = useCallback((node) => {
   if (!overlayRef.current) return;
   overlayRef.current.removeChild(node);
 }, []);
What’s next ❓
We hope this tutorial has helped you add personality to your video calls. To build on this demo, you could customize the animations (maybe make the emoji grow and shrink in size), generate random emoji, or add reactions to a webinar app. The world is your oyster, 🌍🦪.
This content originally appeared on DEV Community and was authored by Kimberlee Johnson
Kimberlee Johnson | Sciencx (2021-12-02T17:26:38+00:00) Add flying emoji reactions to a React video chat app. Retrieved from https://www.scien.cx/2021/12/02/add-flying-emoji-reactions-to-a-react-video-chat-app/
Please log in to upload a file.
There are no updates yet.
Click the Upload button above to add an update.


