This content originally appeared on DEV Community 👩💻👨💻 and was authored by Jessica Wilkins
The best way to practice your JavaScript skills is to build small projects. In this article we will build a small app that takes in a sentence and reverses it.
We will be building out this project in CodePen. CodePen is a popular online code editor used by many developers around the world. It is free to use and you will need to create an account first and then fork the pen to get started. Here is the CodePen starter code you will need to fork that has all of the HTML and CSS.
Prerequisites
All of the HTML and CSS has been provided for you and we will not be covering any of that in this tutorial. This tutorial assumes that you have basic working knowledge of HTML and CSS. If you are interested in learning about HTML and CSS, then I suggest you go through freeCodeCamp's Responsive Web Design Course.
Table of contents
- The basic functionality behind the reverse a sentence project
- Topics covered
- Accessing HTML elements using JavaScript
-
Creating the reverse sentence button functionality
- Adding an event listener to the Reverse Sentence button
- Accessing the value from the input element
- Adding an alert for users that do not provide an input
- Reversing the sentence using the split, reverse, and join methods
- Displaying the reversed sentence and working with template strings
- Resetting the input value after the result is displayed on the page
- Conclusion
The basic functionality behind the reverse a sentence project
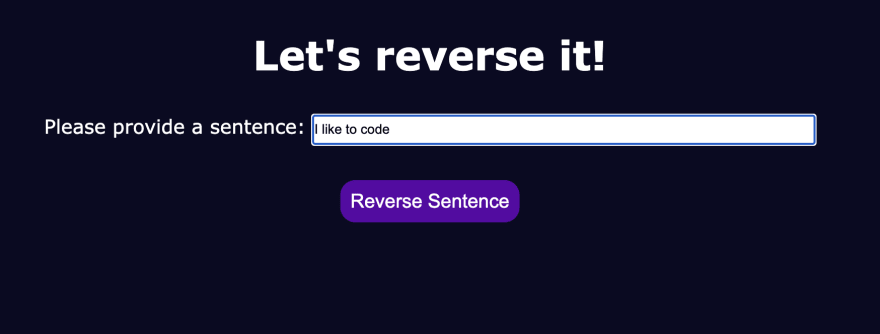
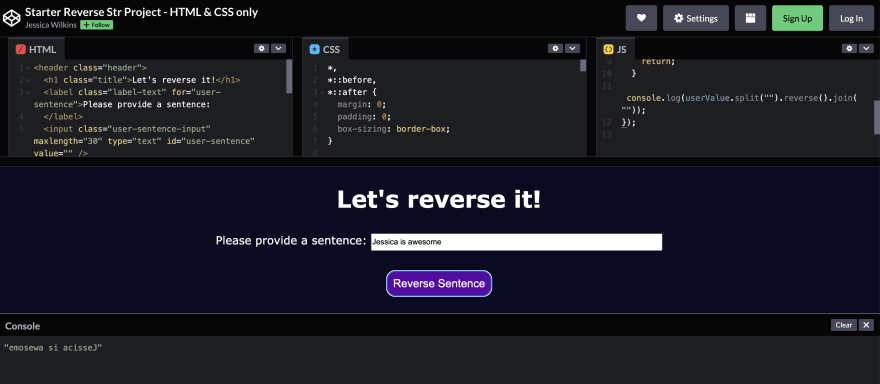
When you open up the CodePen starter code, you should see this result.
We want to build an app where a user inputs a sentence and clicks on the "Reverse Sentence" button, and the reversed sentence is displayed on the screen.
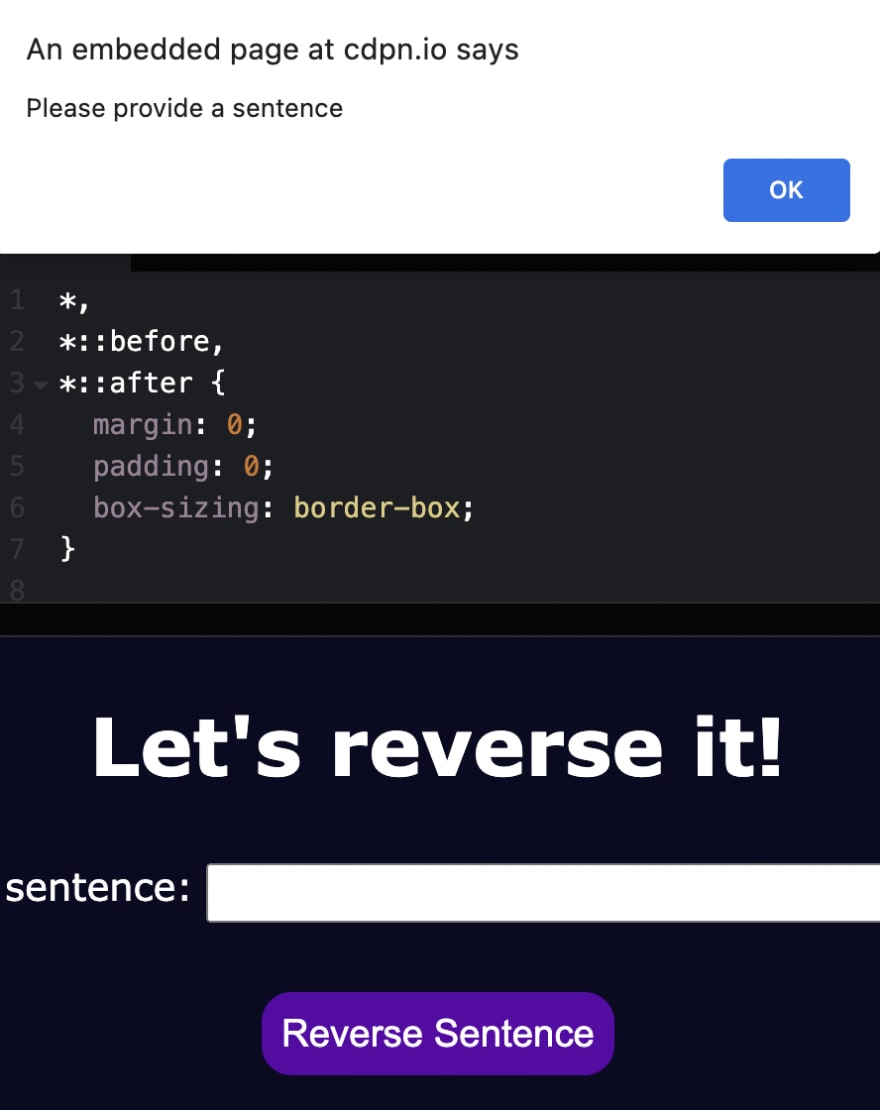
If the user clicks on the "Reverse Sentence" button without providing an input, then an alert with display asking them to provide a sentence.
Topics covered
Here is the complete list of topics covered in this project. You can click on any of the topics and it will take you to an article or MDN link to learn more.
constgetElementByIdaddEventListener- click events
- arrow functions
- return statement
- alert method
- strict equality
=== - innerText
ifstatements- The logical NOT (!) operator
- split method
- reverse method
- join method
- template strings
Accessing HTML elements using JavaScript
Our application has three main HTML elements that we need access to in our JavaScript file. We need access to the input which contains the value for the user's sentence. We need access to the button which will be used to display the result when clicked on. And we also need access to the empty paragraph element which will display the result.
There are a few ways to access elements using JavaScript. In this project we are going to use the getElementById method. This method will access the HTML element that matches the id that we specify. Since id names have to be unique in an HTML document, we can be certain that we are getting back the correct element.
Here is the basic syntax for the getElementById method:
document.getElementById(id);
Let's first start by accessing the input which has an id of user-sentence.
document.getElementById("user-sentence");
We want to be able to assign that to a variable so we can use it later on in our program. We are going to create a const variable called userSentence and assign it the document.getElementById("user-sentence"). We are using the const keyword here because this const variable will not be re assigned.
const userSentence = document.getElementById("user-sentence");
If you are curious on what this document.getElementById("user-sentence") returns, then I would suggest using console.log like this:
const userSentence = document.getElementById("user-sentence");
console.log(userSentence);
Note: To access the console in CodePen, click on the console button in the bottom left hand corner of the screen
You can use console.log to print messages to the console output. This method comes in handy when you need to understand what your code is doing.
Now that we understand how to use console.log, we can remove that line from our program.
The next steps would be to access the paragraph element with the id of reversed-str-result. We can use the getElementById method again and assign it to a variable called reversedStrElement.
const reversedStrElement = document.getElementById("reversed-str-result");
The last element we need access to would be the button with the id of reverse-str-btn. We can use the getElementById method again and assign it to a variable called reversedStrBtn.
const reversedStrBtn = document.getElementById("reverse-str-btn");
Your first three lines of code inside the JavaScript section should look like this:
const userSentence = document.getElementById("user-sentence");
const reversedStrElement = document.getElementById("reversed-str-result");
const reversedStrBtn = document.getElementById("reverse-str-btn");
Creating the reverse sentence button functionality
When the user clicks on the "Reverse Sentence" button, we want to display the reversed sentence on the screen. We need to start by using the addEventListener method.
Adding an event listener to the Reverse Sentence button
The addEventListener is used to detect events in your program and execute a function when that event has occurred. The event that we are listening for is the click event to represent when a user clicks on a button.
Below the const variables, let's add an event listener to our reversedStrBtn.
reversedStrBtn.addEventListener("click", () => {
  // the rest of our functionality will go here
});
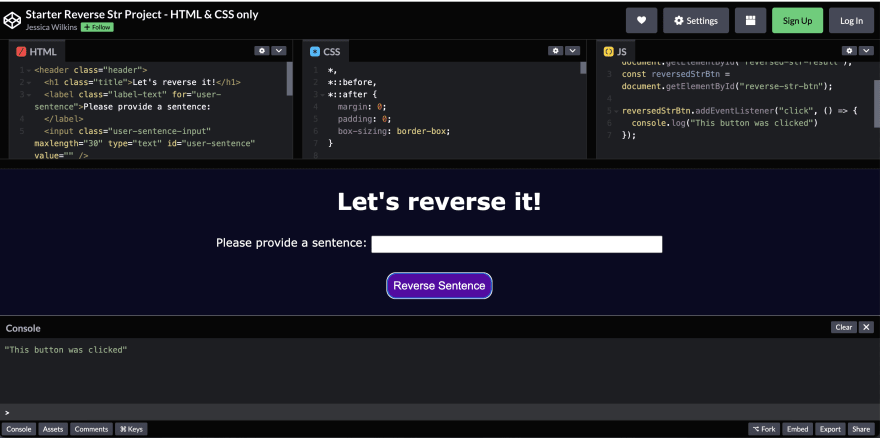
We can test this out by adding a console.log that will print the message "This button was clicked".
reversedStrBtn.addEventListener("click", () => {
  console.log("This button was clicked");
});
Open up your console and click on the button. You should see the following result:
Now that we know our button is working, we can go ahead and remove that console.log.
reversedStrBtn.addEventListener("click", () => {
  // the rest of our functionality will go here
});
Accessing the value from the input element
We need to be able to get the user's input so we can successfully reverse it and display it on the screen. We can accomplish this by adding .value to our userSentence variable.
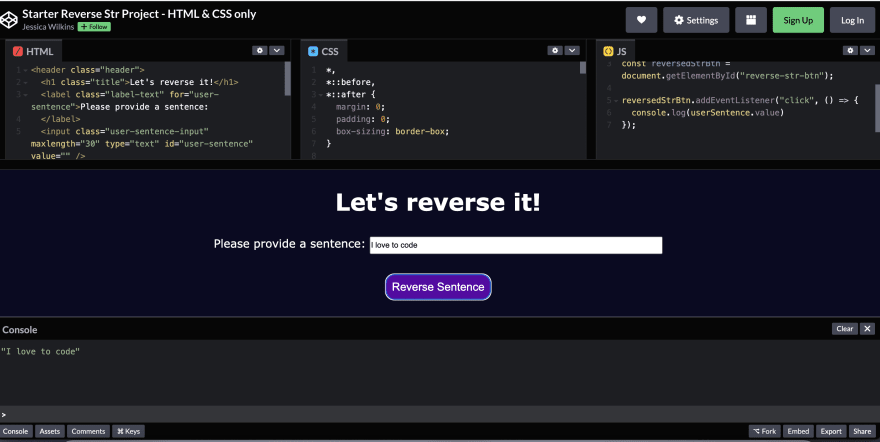
Inside the function for our event listener, let's add a console.log for userSentence.value.
reversedStrBtn.addEventListener("click", () => {
  console.log(userSentence.value);
});
Open up your console, type in a sentence and click on the "Reverse Sentence" button to see the value in the console.
We can remove that console.log and assign that user value to a const variable called userValue.
reversedStrBtn.addEventListener("click", () => {
  const userValue = userSentence.value;
});
Adding an alert for users that do not provide an input
Before we can start reversing a string, we need to check if the user provides a value.
Below the userValue variable, we need to add an if statement. An if statement is a type of conditional statement that will run a block of code if the condition is true.
Here is the basic syntax for an if statement:
if(/*condition is true*/){
    // run this code here
}
For our condition, we want to check if the user value is an empty string. Empty strings in JavaScript are considered falsey values. In if statements, falsey values are coerced to false. We want to use the ! operator which reverses the boolean value (ex. true is now false, and false is now true).
This is what our if will look like:
reversedStrBtn.addEventListener("click", () => {
  const userValue = userSentence.value;

  if (!userValue) {
    // run this code here if condition is true
  }
});
The !userValue is basically saying run this code in the if statement if userValue is not false. If you don't feel comfortable with the ! operator, then you could rewrite your if statement like this:
reversedStrBtn.addEventListener("click", () => {
  const userValue = userSentence.value;
  if (userValue === "") {
    // run this code here if condition is true
  }
});
Inside the if statement, we want to add an alert to let users know that they need to provide a sentence. Below that alert, we need to add the return statement because we want to exit our function if the user does not provide an input.
reversedStrBtn.addEventListener("click", () => {
  const userValue = userSentence.value;
  if (!userValue) {
    alert("Please provide a sentence");
    return;
  }
});
Click on the "Reverse Sentence" button without providing an input to see the alert.
Reversing the sentence using the split, reverse, and join methods
There are many different ways to reverse a string. In this project we are going to use three built in JavaScript methods.
The first step is to take our userValue and split that into individual characters. We can use the split method which takes in a string and creates an array of characters.
Add a console.log below our if statement for the split method.
reversedStrBtn.addEventListener("click", () => {
  const userValue = userSentence.value;
  if (!userValue) {
    alert("Please provide a sentence");
    return;
  }
  console.log(userValue.split(""));
});
Open up the console, provide an input and click on the "Reverse Sentence" button to see the console results.
Next, we want to take that array of characters and reverse it using the reverse method.
Note: I am using a method called chaining here which is used to chain multiple methods together
reversedStrBtn.addEventListener("click", () => {
  const userValue = userSentence.value;
  if (!userValue) {
    alert("Please provide a sentence");
    return;
  }
  console.log(userValue.split("").reverse());
});
Open up the console, provide an input and click on the "Reverse Sentence" button to see the console results.
Lastly, we need to convert that array of characters back into a string. We can use the join method to accomplish this.
reversedStrBtn.addEventListener("click", () => {
  const userValue = userSentence.value;
  if (!userValue) {
    alert("Please provide a sentence");
    return;
  }
  console.log(userValue.split("").reverse().join(""));
});
Open up the console, provide an input and click on the "Reverse Sentence" button to see the console results.
We can remove the console.log and assign the reversed sentence to a const variable called reversedSentence.
reversedStrBtn.addEventListener("click", () => {
  const userValue = userSentence.value;
  if (!userValue) {
    alert("Please provide a sentence");
    return;
  }
  const reversedSentence = userValue.split("").reverse().join("");
});
Displaying the reversed sentence and working with template strings
Now that we have the reversed sentence, we want to be able to display that result on the screen. We can use what are called template strings(or template literals) to inject variables inside strings. Template strings use backticks instead of double("") or single quotes('').
Here is what our template string will look like:
`Reversed sentence: ${reversedSentence}`;
We want that value to display in the reversedStrElement which represents the empty paragraph element in our HTML document. We can use the innerText method to render the reversed sentence on the page.
reversedStrBtn.addEventListener("click", () => {
  const userValue = userSentence.value;
  if (!userValue) {
    alert("Please provide a sentence");
    return;
  }
  const reversedSentence = userValue.split("").reverse().join("");
  reversedStrElement.innerText = `Reversed sentence: ${reversedSentence}`;
});
Resetting the input value after the result is displayed on the page
When the result is displayed on the page, it would be nice if the input value would clear out. We accomplish this by assigning an empty string to the userSentence.value.
reversedStrBtn.addEventListener("click", () => {
  const userValue = userSentence.value;
  if (!userValue) {
    alert("Please provide a sentence");
    return;
  }

  const reversedSentence = userValue.split("").reverse().join("");
  reversedStrElement.innerText = `Reversed sentence: ${reversedSentence}`;
  userSentence.value = "";
});
Now you can test out your project with a variety of sentences and should see the reversed results.
Here is the entire code for our project. Here is the final working result.
Conclusion
I hope you learned a lot with this beginner JavaScript project. For more JavaScript projects like these, please check out the following article:
This content originally appeared on DEV Community 👩💻👨💻 and was authored by Jessica Wilkins
Jessica Wilkins | Sciencx (2022-11-23T20:28:17+00:00) Beginner JavaScript Project: How to reverse a sentence and display it on screen. Retrieved from https://www.scien.cx/2022/11/23/beginner-javascript-project-how-to-reverse-a-sentence-and-display-it-on-screen/
Please log in to upload a file.
There are no updates yet.
Click the Upload button above to add an update.


