This content originally appeared on CodeSource.io and was authored by Deven
This article introduces how Jamstack’s approach to building fast, performant and static/dynamic web apps that can scale easily is revolutionary.
It also introduces how Gridsome; a static site generator and GraphCMS; a headless CMS can enable the developers to be flexible with presentational layer of their sites.
Live Demo
The methods of developing and deploying web applications has kept on improving over the years with more emphasis on simplifying the process. In this article, we will be exploring the Jamstack architecture for building web applications with these technologies:
Headless software or APIs are those which do not have a graphical user interface. It means they are shipped with logic, and computational benefits and users are free to create their UI. They provide the flexibility to create designs according to our structures and principles.
Let’s assume you have some experience building Javascript applications with Vuejs (preferably). However, Jamstack is framework agnostic, so this would still be useful to any Javascript developer.
What’s the Jamstack about?
Jamstack is an approach. It’s an approach, a way of planning, a set of basic principles, and best practices. It is not related to any specific technologies instead it’s about going back to very basics of web development: Pre-rendering the HTML files and Hosting it with minimal server costs.
Pre-rendering enables your sites to be served by a Content Delivery Network (CDN). A CDN is a distributed network optimized for serving assets to users. By being geographically distributed, a CDN can provide redundancy and also improve delivery performance as a result of servicing requests from the infrastructure closest to the user making the request.
Here is the basic example of a Jamstack website:
<html>
  <head>
    <title>Hello from Smashing</title>
  </head>
  <body>
    JAMstack is Fast
  </body>
</html>
Go ahead and save the above HTML file and then open it in the browser of your choice. you have just created a Jamstack website! This is the most basic example of a Jamstack application, although here we are just using Markup (HTML) not JavaScript and APIs.
JAMstack apps are made of bundles of HTML, JavaScript, and CSS files. Basically Jamstack is the Acronym of the following:
- JavaScript
- (Reusable) APIs
- (Pre-rendered) Markup
In the JAMstack, apps are written in JavaScript and run within a web browser, and the most exciting part of Jamstack is API. The most commonly used APIs are RESTful endpoints that are accessed via HTTP(S). But More recently, developers have started to leverage GraphQL too as an alternative format, which we will using in this article.
Gridsome
Gridsome is a Vue js framework. It was invented to improve overall vue app performance and to do that Gridsome adopted a different architecture compared to Normal Vuejs app.
Gridsome is static site generator for Vue what this means is that when we build a project with Gridsome, it takes our Vue app, and when someone visits our site, it renders it as first static HTML and immediately after a split second that HTML is hydrated.
Gridsome then first gives the CSS styles and then the JavaScript, and once that process takes place, the user can interact with our Vue app. This entire process is known as pre-rendering.
On top of making or Vue apps very fast, rendering our apps with HTML solves some inherent problems to single-page applications. It makes us possible to improve SEO( search engine optimization) & we also have flexibility with how we want our data for our site.
A very convenient thing about Gridsome is that we are not tied to traditional architecture. Where we have a client or server instead we get our data from a local JSON file or markdown file, however, we can still use an API or content management system.
Headless CMS
A Headless CMS is a content management system that makes content accessible via REST APIs, GraphQL APIs or Git workflow. As the name implies, there’s no frontend (head). Since the content is delivered via an API, it can be consumed by multiple front-end applications & provides greater flexibility in how the content is shown.
A headless CMS is a perfect option for a Jamstack application because of its decoupled, API-first approach. We can develop an entire site all around the API, utilizing it as a data source for our web content.
One potential disadvantage of a headless CMS is that sometimes we can’t see a preview of how the content will look on the live site in real-time.
We can categorize headless CMSes into two:
- Git based CMS: The content is stored in a git repository with your code. This enables you to handle content editing directly in Git! Some popular Git workflow based CMSes are: Netlify CMS, Forestry, Jekyll admin
- API based CMS: You manage your content on the CMS platform (such as GraphCMS, Strapi, contentful) and deliver the content to your frontend with an API endpoint.
GraphCMS
Although there are plenty Of Headless CMS available, including Ghost, strapi, Netlify CMS, etc., IN this article, we will use GraphCMS. The main reason for choosing GraphCMS is that it is GraphQL native. GraphCMS uses GraphQL API exceptionally well-thought-out, which is not a surprise given that it’s the native communication format on which such CMS work.
Further, GraphCMS has (in my opinion) the most straightforward UI/UX flow in the headless CMS space and great user onboarding too. It has a free forever developer plan which can be used for unlimited personal or commercial projects on a small scale, and include features like webhooks, localization, and integrations to services like Netlify, Gatsby, and Vercel.
You are free to use any other Headless CMS of your choice since we can apply the same concepts to other Headless CMSes.
Setting up a GraphCMS API endpoint
To follow along with this tutorial, you need to create a free account on GraphCMS website.
Let’s set up our endpoint and add some data to our CMS. we will start by creating a GraphCMS project.
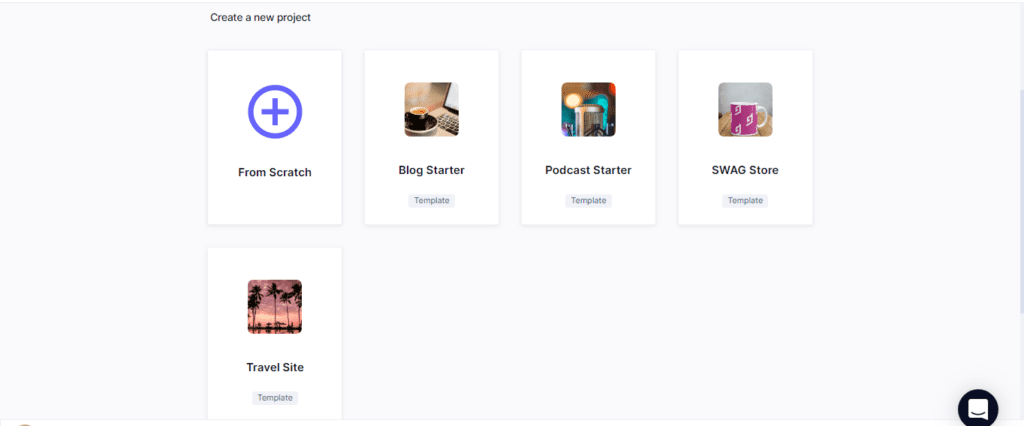
For the purpose of this tutorial, we are using the SWAG Store template., which is an open source starter for a dropshipping eCommerce shop, using GraphCMS, Gatsby, Netlify, Stripe, and Printful. You can check the GitHub repo on https://github.com/graphcms/gatsby-graphcms-ecommerce-starter.
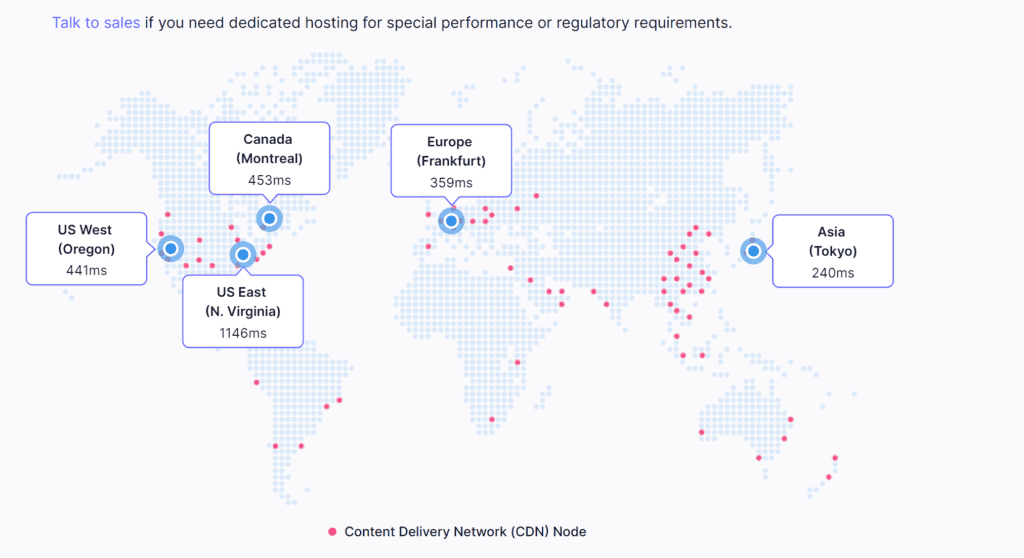
Here, you name the project and give it a description (optional), as well as choose from 5 shared data centers across the world for where to host your content. The content and queries are always cached across 190+ edge CDN nodes globally then click on continue below.
You will be presented with a pricing page, for the purpose of this tutorial, we will use the Personal plan. On the right sidebar, On the right sidebar, you’ll find “content models” which is where we’ll define our schema for this project. Each model can have as many fields as you prefer.
Here, you can create your model, fields, types and add content from the GUI.
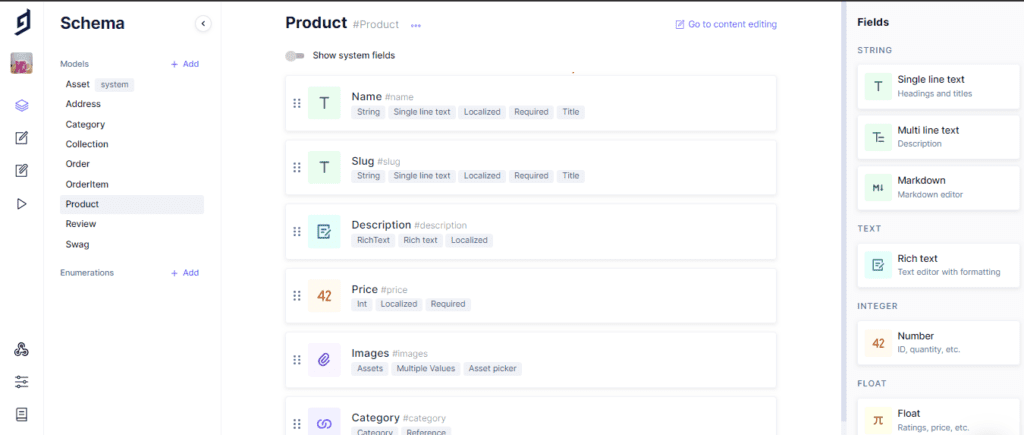
We are using the Product model for this tutorial. You can find fields for name, description, slug, price, images, category and collections but if you toggle the “Show system fields” you’ll find out that graphcms gives us fields for ID, Created At, Updated At and Published At out of the box.
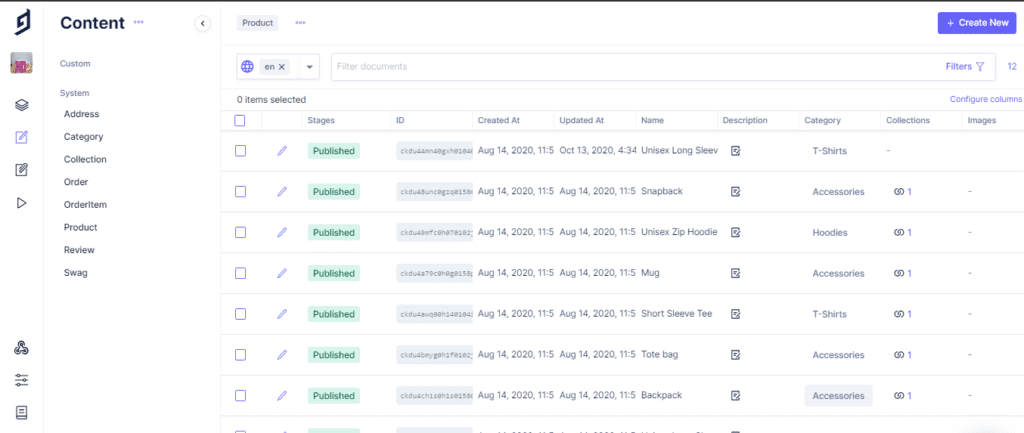
Let’s try editing one of the products, click on the edit button for Snapback. You’ll be presented with a WYSIWYG editor.
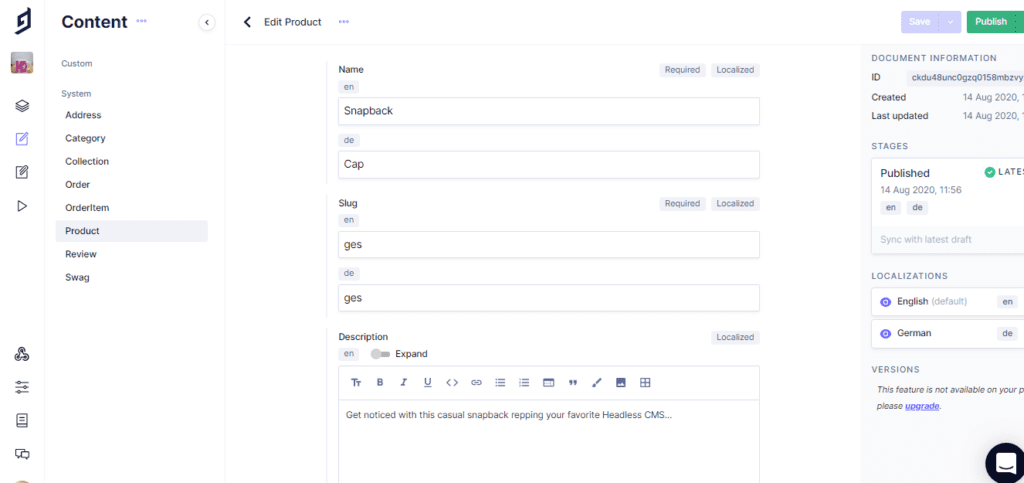
Let’s add an image here, When you’re done with adding the image, Save and Publish and make sure you select the image when you’re publishing.
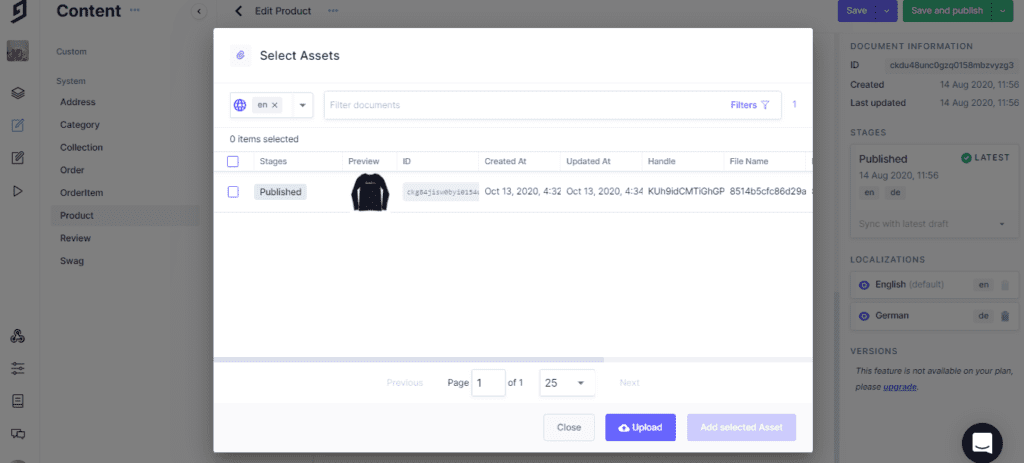
Here is a github gist with the links of all images we will need in this tutorial. You could go ahead and add more images from the github gist.
Let’s get the API endpoint, so we can test what we’ve done so far. On the far left sidebar, launch the settings page.
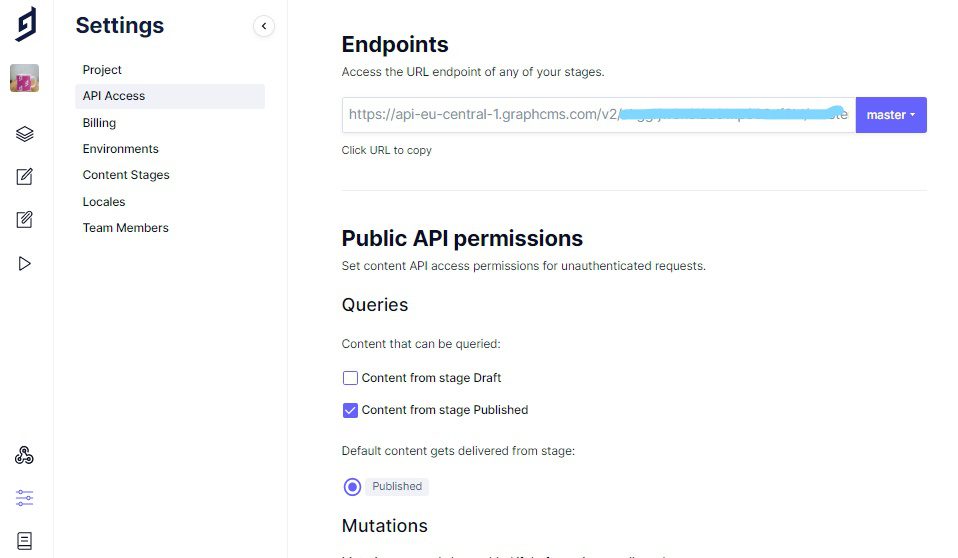
Go to API Access and ensure content can be queried from the Published stage.
GraphCMS also embeds graphiql playground in the dashboard, launch and run this query.
query{
  products {
        id
        name
        description{
          markdown
        }
        category{
          name
        }
        price
        images {
          url
        }
        slug
      }
}
The result:
{
  "data": {
    "products": [
      {
        "id": "ckdu44mn40gxh010405uwgbtw",
        "name": "Unisex Long Sleeve Tee",
        "description": {
          "markdown": "Awesome GraphCMS Tshirt, available in a variety of colours, and super comfortable. Rep your favorite Headless CMS in style.\n"
        },
        "category": {
          "name": "T-Shirts"
        },
        "price": 400,
        "images": [
          {
            "url": "https://media.graphcms.com/HX33kVMwT7ePfWPOycoW"
          }
        ],
        "slug": "unisex-long-sleeve-tee"
      },
      {
        "id": "ckdu48unc0gzq0158mbzvyzg3",
        "name": "Snapback",
        "description": {
          "markdown": "Get noticed with this casual snapback repping your favorite Headless CMS...\n"
        },
        "category": {
          "name": "Accessories"
        },
        "price": 100,
        "images": [
          {
            "url": "https://media.graphcms.com/8tUVUaUYSi2wKVtYfEHP"
          }
        ],
        "slug": "ges"
      },
Let’s now query a single product. Open a new tab and run this query on the API playground.
query GetProduct($id: ID) {
    product(where: {id: $id}) {
        id
        name
        description{
            markdown
        }
        price
        images{
            url
        }
    }
}
For querying a single product, id is the unique identifier. We have to pass an id as query variable. Launch the Query Variables tab below and pass the id of any product, i used Snapback here.
// Query Variables
{
  "id":"ckdu48unc0gzq0158mbzvyzg3"
}
The result:
{
  "data": {
    "product": {
      "id": "ckdu48unc0gzq0158mbzvyzg3",
      "name": "Snapback",
      "description": {
        "markdown": "Get noticed with this casual snapback repping your favorite Headless CMS...\n"
      },
      "price": 100
    }
  }
}
Awesome! We have a perfectly functioning API endpoint. Let’s now work on the frontend.
Configuring the Gridsome project
Install the Gridsome CLI globally by executing the following command:
npm install --global @gridsome/cliThis will enable you to use the gridsome CLI in your machine. Then run this command to create a new gridsome project.
gridsome create my-gridsome-appThis might take some time but when it’s done, go to the project directory by running this command:
cd my-gridsome-appFinally, run gridsome develop to start your local development server.
Working with The API
We will be using the GraphCMS API endpoint as a data source we created earlier for the Gridsome app. One of the coolest features of Gridsome is the vast array of plugins that you have at your disposal. There is a plugin for fetching remote graphql schema gridsome/source-graphql.
Execute the following command in the terminal to add it to your project.
npm install @gridsome/source-graphqlNow you have the plugin, this is how to set it up in Gridsome config file.
// gridsome.config.js

module.exports = {
  siteName: 'Dev Case',
  plugins: [
    {
      use: '@gridsome/source-graphql',
      options: {
        url:
        'your-api-url',
        fieldName: 'customField',
        typeName: 'customFieldTypes'
      }
    }
  ]
}
Here, we set the API url, a custom fieldName and typeName. The fieldName is required so they won’t be conflicts between remote and local data. typeName is the prefix used for imported schema field types.
Gridsome Server API allows you to manipulate with the server side features of the framework. In your project tree, you should have a gridsome.server.js.
//gridsome.server.js
module.exports = function(api) {
  api.createPages(async ({ graphql, createPage }) => {
    const { data } = await graphql(`
      {
        gcms {
          products {
            id
          }
        }
      }
    `);
    data.gcms.products.forEach(node => {
      createPage({
        path: `/product/${node.id}`,
        component: './src/templates/Product.vue',
        context: {
          id: node.id,
        },
      });
    });
  });
};
In the code snippet above, we export a function that receives an API that will let you perform actions such as:
- Create a custom schema
- Create custom pages programmatically from external APIs
- Programmatically perform CRUD actions
- Modify webpack settings
We’ve already exposed our API to gridsome. Now we will make use of createPages() from Pages API to create custom pages from the GraphQL schema.
At this point, you might be wondering what the templates directory is for.
Gridsome templates are used to create single pages for nodes in a collections.
Let’s add some structure and style to our Layout.
//src\layouts\Default.vue
<template>
  <div class="layout">
    <header class="header">
      <strong>
        <g-link to="/" class="headerText">{{ $static.metadata.siteName }}</g-link>
      </strong>
    </header>
    <slot/>
  </div>
</template>
<static-query>
query {
  metadata {
    siteName
  }
}
</static-query>
<style>
@import url('https://fonts.googleapis.com/css2?family=Karla&family=Rubik&display=swap');
body {
  font-family: 'Rubik', karla, -apple-system,system-ui,BlinkMacSystemFont,"Segoe UI",Roboto,"Helvetica Neue",Arial,sans-serif;
  margin:0;
  padding:0;
  line-height: 1.5;
}
.layout {
  max-width: 1100px;
  margin-right: auto;
  margin-left: auto;
  padding-top: 4rem;
  padding-bottom: 4rem
}
.header {

  margin-bottom: .75rem;
  font-weight: 700;
}
.headerText{
  text-decoration: none;
   font-size: 4rem;
  color: #5828e8;
}
.nav__link {
  margin-left: 20px;
}
@media (max-width: 760px){
  body{
    margin-right: 8px;
    margin-left: 8px;
  }
  .layout{
    padding-top: 2rem;
    padding-bottom: 2rem;
  }
}
</style>
Querying graphql data is very easy in Gridsome. We use <page-query> for making queries in pages while <static-query> for queries in page components. Learn more here
Now let’s create a page to display all products. Delete everything in src\pages\Index.vue and paste this.
//src\pages\Index.vue
<template>
<Layout>
<div class="divide__between">
<h1>Showcase</h1>
<g-link class="button" href="https://app.graphcms.com/ca8fb3ba8d4f4a43813027734f669cda/master/content/771b4175eaa447a59fa0d7194dbf3d2a/view/0af105749d234960b22b83a691a449dc"> Add Products </g-link>
</div>
<div>
<div v-if="$page.gcms.products" class="product-grid">
<div
v-for="(product) in products"
:key="product.id"
class="flex-col"
>
<g-link :to="'product/' + product.id" class="link" >
<div class="product-wrapper">
<g-image v-for="(images, slug) in product.images" class="img" :key="slug" :src="images.url" />
<div class="product-content">
<p class="product-name"> {{ product.name }}</p>
<p class="product-price"> ₦{{ product.price * 10 }}</p>
</div>
</div>
</g-link>
</div>
</div>
</div>
</Layout>
</template>
<script>
export default {
data() {
return {
products: [{
name: '',
description: {
markdown: ''
},
category: {
name: ''
},
price: '',
images: [{
url: ''
}]
}],
}
},
created(){
this.products = this.$page.gcms.products
},
}
</script>
<page-query>
{
gcms{
products {
id
name
description{
markdown
}
category{
name
}
price
images {
url
}
slug
}
}
}
</page-query>Let’s go through some of the moving parts here. Here, we use <page-query> to query the products field but we enclosed it in the custom field type we set in the gridsome.config.js. The results from page queries are stored in $page. In data() we return the products property as an array of objects. I decided to structure the products property based on the API response.
Now create a file in the templates folder, call it Product.vue and then paste this
// src\templates\Product.vue
<template>
    <Layout>
        <div v-if="this.$page.gcms.product" class="product_layout" >
            <div>
              <g-image :src="product.images[0].url" class="img" alt="new image" />
            </div>
            <div>
                <h1> {{ product.name }} </h1>
                <p > {{ product.description.markdown }} </p>
                <p>
                    ${{ product.price}}
                </p>
            </div>

        </div>
    </Layout>
</template>
<script>
export default {
    data() {
        return {
            product: {
                name: '',
                description: {
                    markdown: ''
                },
                images: [{
                    url: ''
                }]
            }

        }
    },
    created(){
        this.product = this.$page.gcms.product
        console.log('Product here', this.product)
    }
}
</script>
<page-query>
query GetProduct($id: ID) {
    gcms {
        product(where: {id: $id}) {
                id
            name
            description{
                markdown
            }
            price
            images{
                url
            }
        }
    }
}
</page-query>
<style scoped>
    .img{
        width: 300px;
    }
    .product_layout{
        display: flex;
        flex-wrap: wrap;

        justify-content: space-between;
        margin-top: 2rem;
    }
</style>
This snippet is similar to all products page. The major difference here is the query, I just copied the query we wrote earlier for a single product.
Querying graphql data is very easy in Gridsome. We use <page-query> for making queries in pages while <static-query> for queries in page components.
<page-query>
  {
    gcms{
      products {
        id
        name
        description{
          markdown
        }
        category{
          name
        }
        price
        images {
          url
        }
        slug
      }
    }
  }
</page-query>
Here, we use <page-query> to query the products field but we enclosed it in the custom field type gcms that we set earlier in gridsome.config.js.
At this point, you would have been able to create a page that gets all the items from the query above. To create a page for single items you can use this page query to get single items from the endpoint.
<page-query>
  query GetProduct($id: ID) {
      product(where: {id: $id}) {
          id
          name
          description{
              markdown
          }
          price
          images{
              url
          }
      }
  }
</page-query>
Now, you could go ahead to GraphCMS , add more fields and build awesome websites with Gridsome.
These are some of the ideas i got from working with GraphCMS and Gridsome:
- Using Gridsome, you can set up site plugged into GraphCMS in a matter of minutes.
- GraphCMS is a headless CMS enabling the developer to be flexible with presentational layer of their sites.
- Gridsome suggest focus on GraphQL as the query language, improving user experience by reducing under/over fetching.
- With GraphCMS, managing and transforming media assets is really easy.
I built a demo here and the source code is on github.
Summary
In this tutorial, we built a simple eCommerce storefront using Gridsome and GraphCMS and a Headless CMS and learned how Gridsome offers; optimized performance, less susceptible to security issues, and massive cut in resources (plugins) other traditional sites builder. We also learned how headless CMS is shipped with logic, and computational benefits and users are free to create their UI which provides flexibility to create designs according to our structures and principles. In our case, we used GraphCMS to write our logic & used Gridsome to Create Our UI.
The post Building an eCommerce storefront using Gridsome and GraphCMS appeared first on CodeSource.io.
This content originally appeared on CodeSource.io and was authored by Deven
Deven | Sciencx (2021-03-11T16:37:29+00:00) Building an eCommerce storefront using Gridsome and GraphCMS. Retrieved from https://www.scien.cx/2021/03/11/building-an-ecommerce-storefront-using-gridsome-and-graphcms/
Please log in to upload a file.
There are no updates yet.
Click the Upload button above to add an update.
