This content originally appeared on Bits and Pieces - Medium and was authored by Ashan Fernando
How to implement authentication for React microfrontends

In modern web development, microfrontends have become a powerful architectural style, allowing teams to develop frontends at scale. However, this also introduces new challenges when addressing other cross-cutting concerns, such as authentication, authorization, performance, etc. The main problem occurs when adapting existing patterns to work with microfrontends.
In this blog post, we'll explore how to implement authentication in a React-based microfrontend architecture using Auth0 configured to use OAuth2 Code Grant Flow.
Microfrontend Architecture
Microfrontends allow different teams to work independently on separate parts of a larger frontend. There are various patterns for implementing microfrontends. For this example, we will use a composable microfrontend that composes its components using a shell app.
If you plan to create a microfrontend from the ground up, refer to the following blog post. It explains how to create the microfrontend with module federation.
Micro Frontends: A Practical Step-by-Step Guide
Now let’s look at the key components responsible for microfrontend authentication.
- Shell app component: This has an unauthenticated landing page, protected routes and the logic to manage the user session.
- NPM library @auth0/auth0-react: This library handles the authentication in the frontend.
- Auth0: Identity provider service that handles user login and signup.
- Auth Provider: Initialize authentication for the React app.
- Auth Guard: Protect private routes.
Step 1: Configure Auth0 for SPA and OAuth2
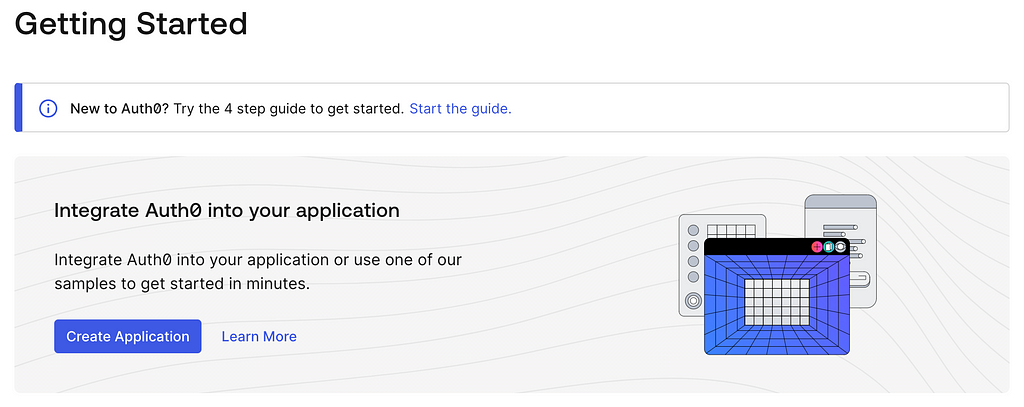
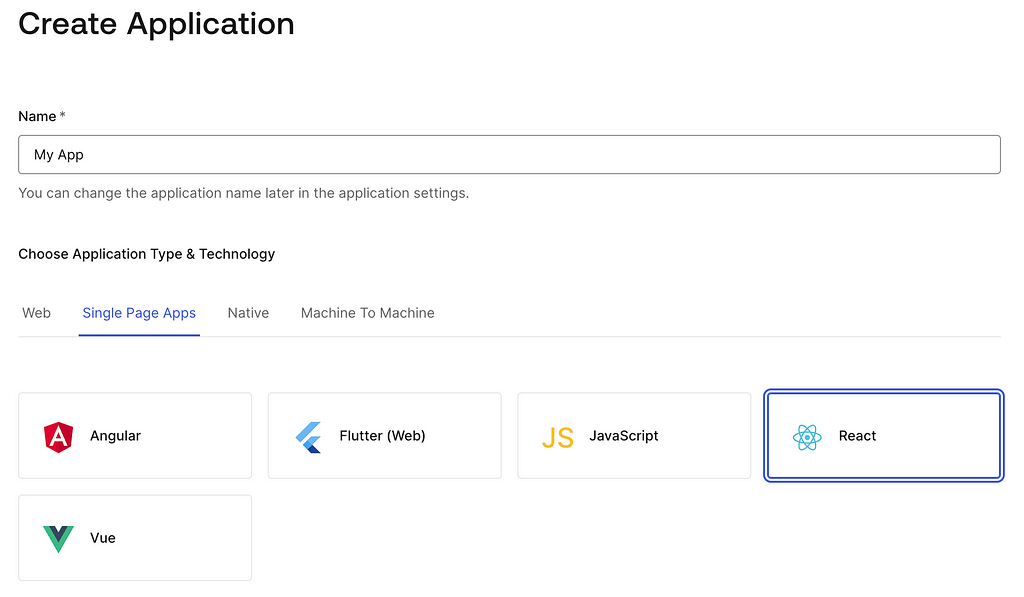
This step is straightforward. Once you login to Auth0, it provides a wizard where you can select that you need authentication for a React Single Page App (SPA) and proceed.


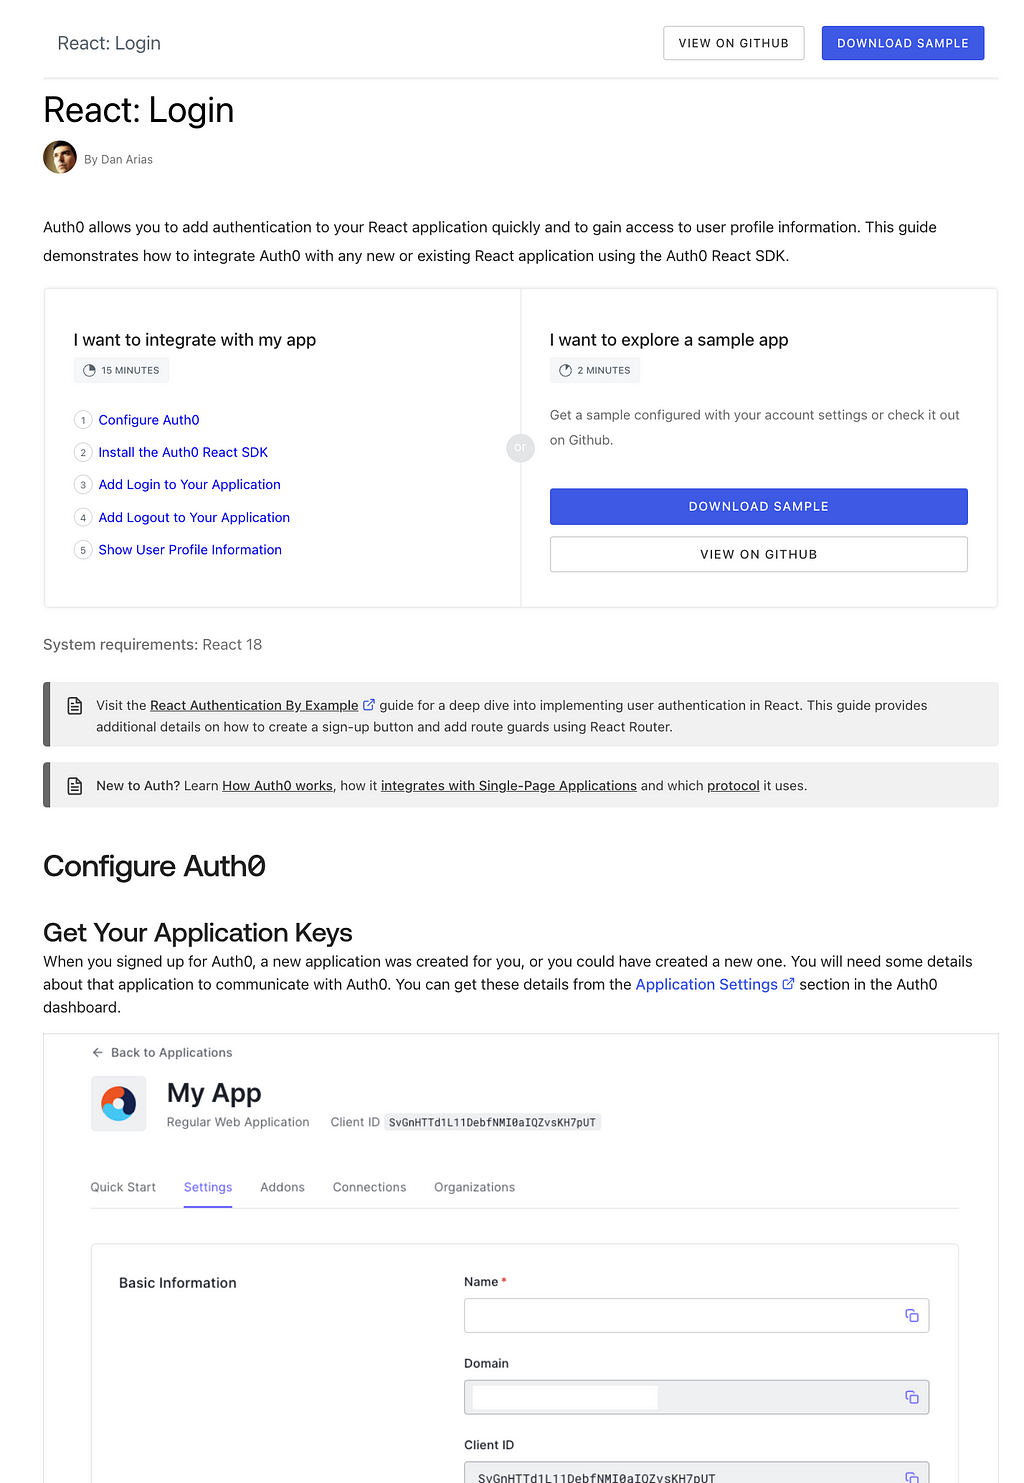
While you continue, it provides all the guidance to set up your application's configuration. You can follow it step by step.

The main difference is that instead of using the sample they provide, you can follow the below steps. The sample provided by Auth0 uses an Express.js Server with Cookie support. Though the approach is solid regarding security, not all can use an Express.js server, especially if you host your frontend in platforms like Netlify, Vercel, etc.
Instead, you can follow the steps below, which don’t depend on the server side.
Step 2: Create a React App
There are many ways to create a React App. For this example, I will use the Bit create React app since we wanted to share all the composable authentication components you can reuse.
First, with Bit, you need to create a workspace for your development and a scope in Bit Cloud to track all your components, including your React app. Follow these steps to set up the foundation.
- Go to https://bit.cloud and create a SCOPE
- Install Bit CLI locally https://bit.dev/docs/intro/
- Create a workspace locally to start creating components by running the following command.
# Initalize a workspace
bit init --default-scope my-org.my-project

# Create react app component
bit create react-app apps/my-app --aspect bitdev.react/react-env

# Run the app
bit use react-app
bit run react-app

# Export to Bit cloud
bit tag -m "tagging the app component"
bit export
Now, you have a Bit React app component tagged and exported to bit.cloud. You can use this as the shell app in your microfrontend.
Note: Alternatively, if you need a fully working example, you can fork the app component from the example scope instead of creating a new one.
Step 3: Adding Authentication Components
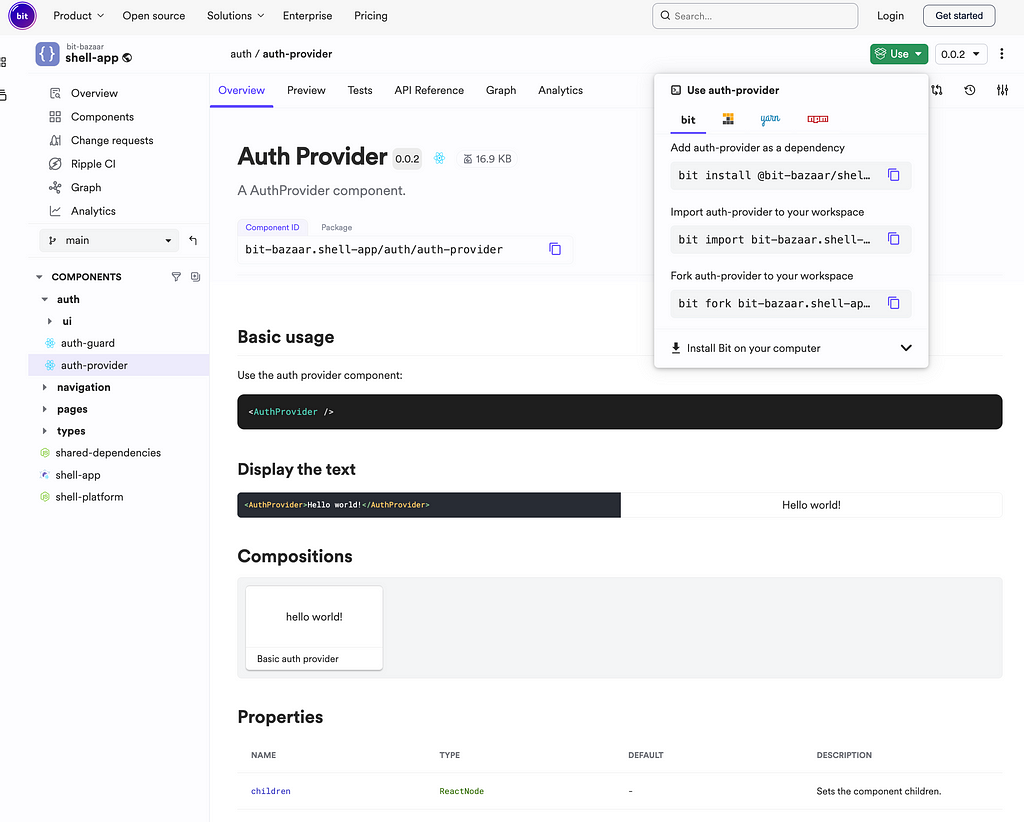
Since you are using Bit, you don’t need to write any authentication code. You can directly reuse all the components we have already created under our scope. You can decide to either import the components or fork them or even install them as npm dependencies into your application. All these options are provided by Bit. For example, if you visit the page for AuthProvider component in bit.cloud, you can do the following;

Now, let’s fork (take a copy) of the component into your workspace by running the following command.
bit fork bit-bazaar.shell-app/auth/auth-provider

// Follow the same for other components
bit fork bit-bazaar.shell-app/auth/auth-guard
We forked it because, for demonstration purposes, we have configured the domain and clientId from Auth0 there, which you need to customize.
export function AuthProvider({ children }: AuthProviderProps) {
  const domain = 'dev-recnwmxdyhuu7o4o.us.auth0.com';
  const clientId = 'p8tBZWYCqzVoREVZduWDX3TDgKKZEfW2';

  return (
    <Auth0Provider
      domain={domain}
      clientId={clientId}
      authorizationParams={{
        redirect_uri: window.location.origin,
      }}
    >
      <AuthContextProvider>{children}</AuthContextProvider>
    </Auth0Provider>
  );
}
These variables are not sensitive regarding security, yet it's worth moving them out to an environmental variable or any other configuration outside the code to deploy the application into multiple stages (test, stage, production) where you have different Auth0 logins.
Step 4: Connecting React to Auth0
Now, we can connect all the dots together by configuring authentication for the React app shell component.
As you saw in the previous step, copy and paste the domain and clientId from the Auth0 application settings first. After that, you can configure your provider, as shown below.
import React from 'react';
import { Routes, Route, BrowserRouter } from 'react-router-dom';
import { ThemeProvider } from '@bit-bazaar/design.theme.theme-provider';
import { AuthProvider } from '@bit-bazaar/shell-app.auth.auth-provider';
import { Homepage } from '@bit-bazaar/shell-app.pages.homepage';
import { Blog } from './mfes/blog.js';
import { Store } from './mfes/storefront.js';
import { Layout } from './layout.js';

export function ShellApp() {
  return (
    <BrowserRouter>
      <AuthProvider>
        <ThemeProvider>
          <Routes>
            <Route path="/" element={<Layout />}>
              <Route index element={<Homepage />} />
              <Route path="store/*" element={<Store />} />
              <Route path="blog/*" element={<Blog />} />
              <Route path="*" element={<div>Not Found</div>} />
            </Route>
          </Routes>
        </ThemeProvider>
      </AuthProvider>
    </BrowserRouter>
  );
}
Once you configure these variables, AuthProvider knows which domain to redirect to as the login page, which is provided by Auth0. It uses the Auth0 SDK under the hood to manage the authentication state and to provide an auth context to the React app.
Another advantage is the AuthProvider is also capable of initializing your session once you login behind the scenes.
Then, you can include a login button that takes you to this login URL. A more comprehensive example with user profile information can be found here.
import React from 'react';
import { Button } from '@bit-bazaar/design.actions.button';
import { useAuth } from '@bit-bazaar/shell-app.auth.auth-provider';

export type AuthMenuProps = {};

export const AuthMenu = () => {
  const { loginWithRedirect } = useAuth();

  return (
    <Button
      sx={{
        color: 'white',
      }}
      variant="text"
      onClick={() => loginWithRedirect()}
    >
      Login
    </Button>
  );
};
This is sufficient to implement the signup-to-login flow. Now, let’s look at how to prevent users from viewing protected routes unless they are logged in.
Note: Remember, access control in React App has two sides; one is to show/hide or limit access to pages and screens based on user access permission (authorization). Then, you need to validate the APIs (or backend) consumed by the React App.
Step 5: Using AuthGuard
As the name suggests, you can use the AuthGuard component to protect Routes, which are allowed only if the user is logged in. A simple example looks as follows.
import React from 'react';
import {
  BrowserRouter as Router,
  Routes,
  Route,
  Navigate,
} from 'react-router-dom';
import { useAuth } from '@bit-bazaar/shell-app.auth.auth-provider';
import { AuthGuard } from '@bit-bazaar/shell-app.auth.auth-guard';
import { HomePage } from '@bit-bazaar/shell-app.pages.home-page';
import { ProfilePage } from '@bit-bazaar/shell-app.pages.profile-page'

export function ShellApp() {
  const { isLoading } = useAuth();

  if (isLoading) {
    return <div>Loading ...</div>;
  }

  return (
    <Routes>
      <Route path="/" element={<HomePage/>} />
      <Route
        path="/profile"
        element={<AuthGuard>{(user) => <ProfilePage user={user} />}</AuthGuard>}
      />
    </Routes>
  );
}
If you need to, you can pass the user object to the components to access logged-in user information.
Next Steps
Now you have a complete React microfrontend capable of authentication with Auth0. If you happen to use a different identity provider than Auth0, the approach is still the same; you only need to replace the Auth0 SDK inside AuthProvider with your new identity provider logic or its SDK.
Then, you need to configure authorization for your app. If you want a simpler approach, you can configure claims in Auth0, accessible by your frontend and API. Since the token is digitally signed by Auth0, the API can directly validate the token and accept these claims. However, remember that this approach has its limits if you plan to use fine-grained access control using claims.
- Different web servers and proxies have different maximum header sizes, but a common limit is around 8KB; therefore, it limits the maximum size of the JWT token (that includes claims).
- The larger the JWT token, the more it affects application performance since the JWT Token header needs to be sent to the server for each request.
- Immediate revocation of permission is impossible since the JWT token has an expiry time (typically 5 minutes, but you can configure this).
If your infrastructure can support serverside sessions or the frontend is served via a configuration web server, you can overcome these limitations by using a JWT + Cookie combination. For a better understanding, take a look at the following article.
Why Using Tokens and Cookies together is Better for Web Apps
I hope this article gives you a comprehensive overview of setting up authentication for a React microfrontend.
Thanks for reading! Cheers!
Learn More
- 6 Patterns for Microfrontends
- Web Authentication: Cookies vs. Tokens
- React OAuth Authentication with Firebase
- React Micro Frontend: Why Composability Matter?
React Microfrontend Authentication: Step by Step Guide was originally published in Bits and Pieces on Medium, where people are continuing the conversation by highlighting and responding to this story.
This content originally appeared on Bits and Pieces - Medium and was authored by Ashan Fernando
Ashan Fernando | Sciencx (2024-07-04T03:16:53+00:00) React Microfrontend Authentication: Step by Step Guide. Retrieved from https://www.scien.cx/2024/07/04/react-microfrontend-authentication-step-by-step-guide/
Please log in to upload a file.
There are no updates yet.
Click the Upload button above to add an update.
