This content originally appeared on DEV Community and was authored by ChigozieCO
Automation is queen in this side of our world, the more of your work you can automate, the better.
The use of Terraform is very necessary for cloud engineers in order to automate deployments of your infrastructure. Terraform is an infrastructure as code tool that lets you define infrastructure resources in human-readable configuration files that you can version, reuse, and share. You can then use a consistent workflow to safely and efficiently provision and manage your infrastructure throughout its lifecycle.
Terraform Provider and Initialize Terraform
You can find the complete terraform configuration code for the infrastructure we will be building today here.
To begin I will create a main.tf file and a provider.tf file for my root module. The first order of business is to configure the AWS provider for Terraform and initialize to get it ready to deploy AWS resources.
A provider is used by Terraform to interface with the API of whatever infrastructure you're trying to build. Since we are trying to build AWS infrastructure we will be using the AWS infrastructure for our configuration. If you were building in GCP or Azure you will be using a provider for those cloud services.
In the provider.tf file I will add the terraform block as well as the provider block, the terraform code block will allow terraform use the the AWS API build our infrastructure while the provider block will configure the AWS provider with the necessary credentials.
In the provider.tf file add the following lines of code:
terraform {
  required_providers {
    aws = {
      source = "hashicorp/aws"
    }
  }
}

provider "aws" {
  region = "us-east-1"
  shared_credentials_files = ["~/.aws/credentials"]
}
The great thing about terraform is that you do not have to have any of these codes memorized as you just start out with terraform, you can always refer to the Terraform documentation for help.
In the terraform block I specified AWS as the required provider with source as hashicorp/aws but I omitted the version argument as I would like terraform to download the latest version whenever it is initialized.
The provider block provides the information needed to access AWS specifically. In the provider block I specified the region argument, that is the only credential I will be hardcoding in my configuration. As I have already setup my AWS credentials using AWS configure with the AWS CLI I added the shared_credentials_file argument (if you have multiple profiles ensure you include the profile argument and supply the profile name) so Terraform will use that information to pick up these credentials and make use of them to build our infrastructure.
For a guide on how to configure your AWS credentials in the AWS CLI, check out this post of mine where I take you through the process.
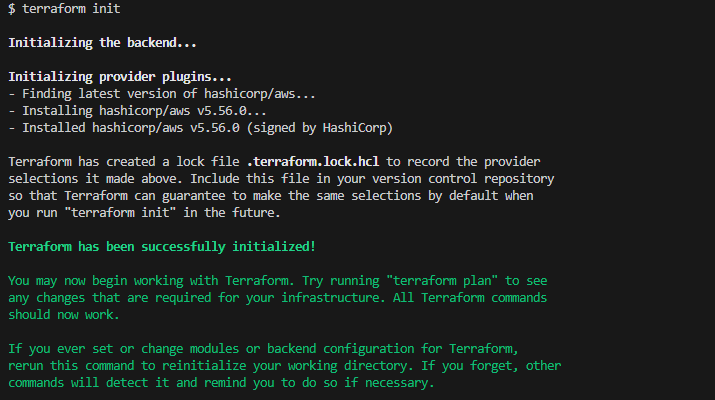
Now I am ready to run a terraform init to initialize the project so that terraform can download the provider required for this project and connect to AWS.
Ensure you are in your project directory and run the below command in your terminal:
terraform init
Terraform Modules
Terraform modules are a powerful feature that allows you to organize and reuse infrastructure configurations. Modules encapsulate groups of resources that are used together and can be referenced and instantiated multiple times within your Terraform configuration.
Modules are a great way to follow the Don't Repeat Yourself (DRY) principle of software development which states that code should be written once and not repeated. Modules encapsulate a set of Terraform config files created to serve a specific purpose.
Modules are used to create reusable components inside your infrastructure. There are primarily two types of modules depending on how they are written (root and child modules), and depending if they are published or not, we identify two different types as well (local and published).
Reusability is the best consideration while writing Terraform code. Repetition of the same configuration will be laborious because HCL is a declarative language and can be very wordy. Therefore, for optimal reusability, we should attempt to use modules as much as possible so be sure to define them at the beginning, as much as possible.
We will be writing our configuration as modules and then run the modules to build the configuration.
It is recommend to place modules in a modules directory when locally developing modules but you can name it whatever you like.
To begin I created the Modules directory, this is where all my modules will reside.
Create S3 Bucket Module
For my S3 bucket module, I created a directory named s3-bucket in the Modules directory. In this directory I create the following files main.tf, variables.tf, output.tf.
Create S3 Bucket
modules/s3-bucket/variables.tf
In the variables.tf I define the bucket name as a variable with the code below:
variable "bucket-name" {
  description = "The name of the S3 bucket"
  type        = string

  validation {
    condition     = (
      length(var.bucket-name) >= 3 && length(var.bucket-name) <= 63 &&
      can(regex("^[a-z0-9][a-z0-9-.]*[a-z0-9]$", var.bucket-name))
    )
    error_message = "The bucket name must be between 3 and 63 characters, start and end with a lowercase letter or number, and can contain only lowercase letters, numbers, hyphens, and dots."
  }
}
The validation simply checks that the bucket name is between 3 and 63 characters, start and end with a lowercase letter or number, and contains only lowercase letters, numbers, hyphens, and dots. This is necessary to prevent any error that AWS might throw as a result of wrong bucket naming convention.
The significance of using a variable file is for simplicity and easy refactoring of the code. In the event that we need to change the value of that variable, we will only need to change it in one place and the change will be picked up anywhere that variable is made reference to using the .var notation.
modules/s3-bucket/main.tf
Now to the creation of the S3 bucket, we will add the aws_s3_bucket resource block to the module's main.tf file as shown below.
# Create S3 Bucket
resource "aws_s3_bucket" "site-bucket" {
  bucket = var.bucket-name
  force_destroy = true
}
The bucket name is supplied by a variable and will be substituted with the value at creation.
modules/s3-bucket/outputs.tf
This is the file in which we will output some of the values we will use in the rest of our configurations.
Go ahead and create a new file called outputs.tf in the s3 bucket module add the below code to the file:
output "bucket_regional_domain_name" {
  description = "This is the bucket domain name including the region name."
  value = aws_s3_bucket.site-bucket.bucket_regional_domain_name
}
Add the S3 Bucket to the Root Module
main.tf
To test that this module works we will create an s3 bucket using this module we have just written. Head to the main.tf file of your root module, outside your Module directory and enter the below piece of code in the file.
module "s3-bucket" {
  source = "./Modules/s3-bucket"
  bucket-name = var.bucket-name
}
variables.tf
Create three new files also in your root module called variables.tf, outputs.tf and terraform.tfvars.
In the variables.tf add the code below
variable "bucket-name" {
  type = string
}
outputs.tf
In the outputs.tf add the following code:
output "bucket-name" {
  value = module.s3-bucket.site-bucket.bucket_regional_domain_name
}
We will make use of this output when creating our cloudfront distribution.
terraform.tfvars
In the terraform.tfvars file, enter the code below:
bucket-name = "<your unique bucket name>
⚠️ NOTE
Your .tfvars file should never be committed to version control, add this file to your .gitignore file. Check out my .gitignore file for files to add to yours.
You can also use this site to generate your gitignore files for this project and future projects.
In your terminal, run the terraform init command again, you must rerun the command when you add a module or change provider. If you fail to run it and run any other terraform command you will get the below error message.
Now you can run terraform plan to see what terraform plans to create in your AWS account.
To create the bucket, run
terraform apply
Whenever you run this command terraform will always ask you if you want to carry out this action, you can either answer yes or no. To avoid this question coming up you can directly include auto approve in the command as shown below:
terraform apply --auto-approve
If you followed along correctly, you would have successfully created an s3 bucket, we will destroy it and continue writing our terraform script as we are not just merely creating a bucket.
Run the command below to destroy the created bucket:
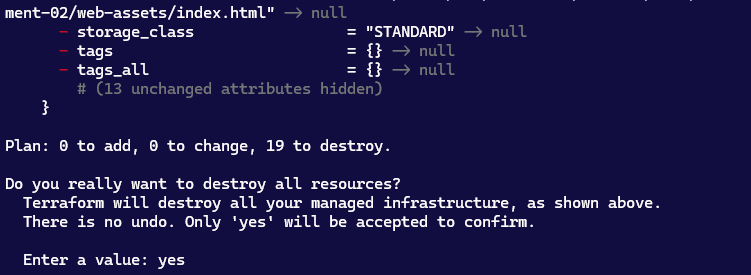
terraform destroy
TF alias for Terraform
Before we continue, I want to set a short alias for terraform as we will need to call terraform a whole lot. Setting terraform alias to be tf will help simplify things for us when we are calling our commands, so we will no longer need to explicitly call out terraform but now we call it tf eg tf apply instead of terraform apply. It helps us shorten our command.
We can do this by setting up an alias in the bash profile.
To open the bash profile for the terminal, I used the below command:
vi ~/.bash_profile
This is where we can set bash configurations, we set our alias by calling alias with the short form as seen:
alias tf="terraform"
To now use the command we set as alias we need to run that bash profile script first so that the change is applied.
source ~/.bash_profile
Now we can use tf instead of terraform
Upload Assets Into S3 Bucket
Before writing the code to upload our website assets into the bucket we should create a directory and save our assets. I will save this in our root module as web-assets and add my website assets in there.
modules/s3-bucket/main.tf
We will use the for_each meta arguments to upload our bucket assets, we are using this approach as we have multiple files to upload. this is useful when you create multiple resources with similar configurations.
It does not make sense to just copy and paste the Terraform resource blocks with minor tweaks in each block. Doing this only affects the readability and unnecessarily lengthens the IaC configuration files. Add the below code to your s3-bucket module main.tf file:
# Upload objects into the s3 Bucket
resource "aws_s3_object" "upload-assets" {
  for_each = fileset("${var.web-assets-path}", "**/*")
  bucket = aws_s3_bucket.site-bucket.bucket
  key = each.value
  source = "${var.web-assets-path}/${each.value}"
  content_type = lookup(var.mime_types, regex("\\.[^.]+$", each.value), "application/octet-stream")
}
The for-each will iterate through the files in the website directory. I used the fileset function to iterates over all files and directories in the specified path, making each file/directory available to the for_each loop in the resource definition.
The path isn't hardcoded, it is defined as a variable in the variable.tf file as you will see below.
The for_each loop over fileset returns file paths, not key-value pairs, this is why we use each.value as our key and not each.key.
We want the website to recognise each file type for it's correct respective MIME type and display it properly on the website which is why we used the lookup function in the content_type argument. lookup(map, key, default) is a function that searches for key in map and returns the associated value if found. If key is not found, it returns default.
The regex function extracts the file extension from each.value, which is the file name obtained from fileset in other to determine a more accurate MIME type.
modules/s3-bucket/variables.tf
Here we will define the variables we called in the piece of code above, add the below code to the file:
# Set the variable for the file path of the files to be uploaded to the bucket
variable "web-assets-path" {
  description = "This is the location of our website files"
  type = string
}

variable "mime_types" {
  description = "Map of file extensions to MIME types"
  type        = map(string)
  default = {
    ".html" = "text/html"
    ".css"  = "text/css"
    ".png"  = "image/png"
    ".jpg"  = "image/jpeg"
    ".jpeg" = "image/jpeg"
    ".pdf"  = "application/pdf"
    "json" = "application/json"
    "js"   = "application/javascript"
    "gif"  = "image/gif"
    # Add more extensions and MIME types as needed
  }
}
Update Root Module main.tf, variable.tf and terraform.tfvars Files
main.tf
we updated our module and so we need to update our root module configuration as well. Your root module's main.tf file should now look like this:
module "s3-bucket" {
  source = "./Modules/s3-bucket"
  bucket-name = var.bucket-name
  web-assets-path = var.web-assets-path
}
variable.tf
Your root module's variable.tf file should now look like this:
variable "bucket-name" {
  type = string
}

variable "web-assets-path" {
  type = string
}
terraform.tfvars
Your root module's terraform.tfvars file should now look like this:
bucket-name = "<your unique bucket name>
web-assets-path = "<the path to your website files (best to supply the absolute path)>
Create Hosted Zone in Route53
⚠️ Note
Even if you are still eligible for the AWS free tier, the Route53 service is never free. This hosted zone will attract a charge of $0.50 per month.
You need a custom domain name for this step, so if you don't already have one, pause, get one and continue along.
This step is going to be completed manually, initially I was going to import the resource into terraform after manually creating it but upon further consideration we have no reason to as I wouldn't want Terraform deleting the hosted zone.
The reason for creating the hosted zone manually is simply because when you create a hosted zone, you are given a new set of name servers which you will need to add to your custom domain configuration. Terraform does not have the infrastructure to complete this step and so your configuration will fail until you manually add your name servers to your custom domain yourself.
Since we already know this, we will manually create the hosted zone, add the name servers to our custom domain and then, using the terraform data resource, retrieve details of the created hosted zone into terraform to avoid any issues that might have arisen.
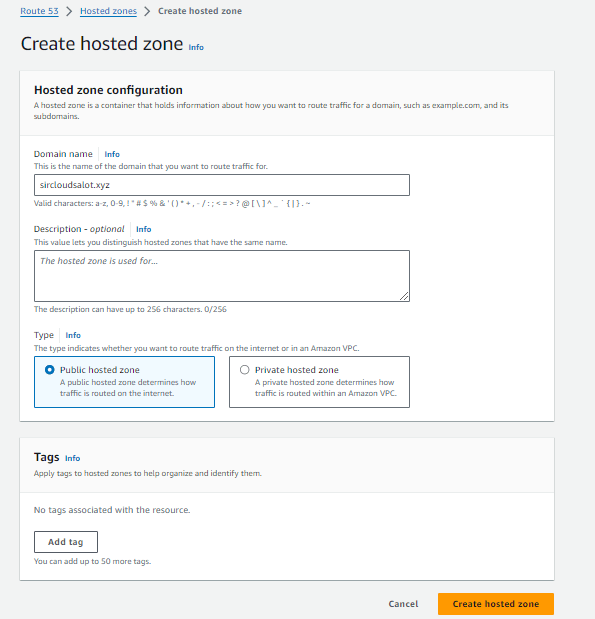
Create Hosted Zone
- Open your AWS management console.
- In
Servicesunder theNetwork and Content deliverycategory chooseRoute53 - Select
create hosted zone - It's pretty straightforward from there, enter your domain name in the space for
domain name. - Select
public hosted zoneundertype. - You can add a tag and description if you want.
- At the bottom of the page, click on
create hosted zone.
- Once your hosted zone has been created, open it to view details and copy the name servers supplied by AWS.
- Copy each name server and replace those already in our domain name with these new ones.
Retrieve the Details of the Hosted Zone Resource into Terraform Configuration
To add details of our hosted zone resource to terraform we will create a new module in the Module directory called route53.
Modules/route53/main.tf
Add the following code to the file:
# Retrieve information about your hosted zone from AWS
data "aws_route53_zone" "created" {
  name = var.domain_name
}
The above code might not look like much but it will retrieve the details of the hosted zone in our AWS account that matches the name we supply and then using it wherever we call that specific data resource in our configuration.
Modules/route53/variables.tf
You know the drill, add the declared variables to keep your code reusable.
# domain name variable
variable "domain_name" {
  description = "This is the name of the hosted zone."
  type = string
}
Create TLS/SSL Certificate and Validate it
This is not a one stage process in terraform, we will need to first create the resource and then validate it with another resource block.
Create Certificate
We will create our certificate before our cloudfront distribution as we will use our SSL certificate in our cloudfront distribution.
As usual, create a certificate directory in the Module directory which will house our certificate module. Create 3 new files in that directory main.tf, variable.tf and output.tf.
Modules/certificate/main.tf
# Create the TLS/SSL certificate
resource "aws_acm_certificate" "cert" {
  domain_name               = var.domain_name
  validation_method         = var.validation_method
  subject_alternative_names = var.subject_alternative_names

  # Ensure that the resource is rebuilt before destruction when running an update
  lifecycle {
    create_before_destroy = true
  }
}
Modules/certificate/variables.tf
Add the necessary variables to your variables file:
variable "domain_name" {
  description = "Domain name for which the certificate should be issued"
  type = string
}

variable "validation_method" {
  description = "Which method to use for validation."
  type = string
  default = "DNS"
}

variable "subject_alternative_names" {
  description = "Set of domains that should be SANs in the issued certificate."
  type = list(string)
  default = []
}
Modules/certificate/outputs.tf
Define the outputs we will need to reference in other modules
output "cert-arn" {
  value = aws_acm_certificate.cert.arn
}

output "domain_validation_options" {
  value = aws_acm_certificate.cert.domain_validation_options
}
Create the ACM Certificate Validation Record
Before we create the resource to validate the certificate, we need to create a DNS record in AWS Route 53, which is used to validate the domain ownership for an AWS ACM certificate. The DNS record details (name, value, type) are obtained from the ACM certificate's domain validation options.
We will create this record in route53 so head on to your Modules/route53/main.tf file. Add the following to your file:
Modules/route53/main.tf
# Create DNS record that will be used for our certificate validation
resource "aws_route53_record" "cert_validation" {
  for_each   = { for dvo in var.domain_validation_options : dvo.domain_name => {
    name     = dvo.resource_record_name
    type     = dvo.resource_record_type
    record   = dvo.resource_record_value
  } }

  name       = each.value.name
  type       = each.value.type
  records    = [each.value.record]
  ttl        = 60
  zone_id  = data.aws_route53_zone.created.zone_id
}
The code above will create a CNAME record in your domain's hosted zone which will be used to validate the certificate which you created. However if you try to apply the code to create te certificate and create the record at the same time, you will get an error message that looks like the own below
This is why we will run the terraform apply command in two stages as you will see eventually.
Modules/route53/variables.tf
Add the following to your route53 module variables file
variable "domain_validation_options" {
  description             = "The domain validation options from the ACM certificate."
  type                    = list(object({
    domain_name           = string
    resource_record_name  = string
    resource_record_type  = string
    resource_record_value = string
  }))
}
Validate the Certificate
The aws_acm_certificate resource does not handle the certificate validation in terraform, we need to use the aws_acm_certificate_validation resource to accomplish that.
As I earlier explained and you saw from the error message, the certificate first needs exist and the value of the domain_validation_options known first before terraform will honour our for_each statement, this is why we need to first create the certificate, then the record and then verify.
For the above reason we won't put the validation step in the certificate module but in the Route53 module, therefore open your Route53 module.
The code for the actual validation is seen below:
Modules/route53/main.tf
# Validate the certificate
resource "aws_acm_certificate_validation" "validate-cert" {
  certificate_arn = var.certificate_arn
  validation_record_fqdns = [for record in aws_route53_record.cert_validation : record.fqdn]

  depends_on = [aws_route53_record.cert_validation]
}
The depends_on argument will force terraform to create the aws_route53_record.cert_validation resource first before attempting to validate our certificate.
Modules/route53/variables.tf
Add the required variables to the module's variables.tf file
variable "certificate_arn" {
  type = string
}
Modules/route53/outputs.tf
Add the following to your route53 module outputs.tf file
output "dns_records" {
  value = aws_route53_record.cert_validation
}
We still have to create the CloudFront Distribution Alias Record, this is the record where we will set our cloudfront distribution domain name as an alias for our custom domain name. We will do this after creating our cloudfront distribution.
Create CloudFront Module
Now we can go ahead and create our cloudfront distribution. Create a cloudfront directory in the Modules directory and add create main.tf and variables.tf files in the directory.
Create Origin Access Control - OAC
The first thing we need to do is to create the Origin Access Control we will use in the configuration of our distribution. Do this by adding the code below to your main.tf file:
Modules/cloudfront/main.tf
# Create the access origin control that will be used in creating our cloudfront distribution with s3 origin
resource "aws_cloudfront_origin_access_control" "assign-oac" {
  name                              = var.oac-name
  description                       = "An origin access control with s3 origin domain for cloudfront"
  origin_access_control_origin_type = var.origin_access_control_origin_type
  signing_behavior                  = var.signing_behavior
  signing_protocol                  = var.signing_protocol
}
Modules/cloudfront/variables.tf
Declare the variables:
variable "oac-name" {
  description = "This is the name of the cloudfront origin Access control with s3 bucket origin domain"
  type = string
  default = "s3-bucket-oac"
}

variable "origin_access_control_origin_type" {
  description = "The origin type must be the same as the origin domain"
  type = string
  default = "s3"
}

variable "signing_behavior" {
  description = "Specifies which requests CloudFront signs."
  type = string
  default = "always"
}

variable "signing_protocol" {
  description = "Determines how CloudFront signs (authenticates) requests."
  type = string
  default = "sigv4" # The only valid value
}
Create Distribution
Now we can create our distribution. Add the following in the main.tf file:
Modules/cloudfront/main.tf
# Create CloudFront Distribution
resource "aws_cloudfront_distribution" "cdn" {
  origin {
    domain_name              = var.cdn-domain_name-and-origin_id
    origin_id                = var.cdn-domain_name-and-origin_id
    origin_access_control_id = aws_cloudfront_origin_access_control.assign-oac.id
  }

  default_cache_behavior {
    compress = true
    viewer_protocol_policy = "redirect-to-https"
    allowed_methods        = [ "GET", "HEAD" ]
    cached_methods         = [ "GET", "HEAD" ]
    target_origin_id       = var.cdn-domain_name-and-origin_id
    min_ttl                = 0
    default_ttl            = 3600
    max_ttl                = 86400

    forwarded_values {
      query_string = false
      cookies {
        forward    = "all"
      }
    }
  }

  restrictions {
    geo_restriction {
      restriction_type = var.restriction_type
    }
  }

  viewer_certificate {
    acm_certificate_arn            = var.acm_certificate_arn
    ssl_support_method             = "sni-only"
    minimum_protocol_version       = "TLSv1.2_2021"
    cloudfront_default_certificate = false
  }

  enabled             = true
  is_ipv6_enabled     = true
  default_root_object = var.default_root_object
  aliases             = [var.domain_name, "www.${var.domain_name}"]
}
Modules/cloudfront/variables.tf
Add the required variables
variable "restriction_type" {
  description = "Method that you want to use to restrict distribution of your content by country"
  type = string
  default = "none"
}

variable "default_root_object" {
  description = "Object that you want CloudFront to return when an end user requests the root URL."
  type = string
  default = "index.html"
}

variable "domain_name" {
  description = "your custom Domain name for which the certificate should be issued"
  type = string
}

variable "cdn-domain_name-and-origin_id" {
  type = string
}

variable "acm_certificate_arn" {
  type = string
}
Modules/cloudfront/outputs.tf
output "cloudfront-arn" {
  value = aws_cloudfront_distribution.cdn.arn
}

output "cloudfront_domain_name" {
  value = aws_cloudfront_distribution.cdn.domain_name
}

output "cloudfront_hosted-zone_id" {
  value = aws_cloudfront_distribution.cdn.hosted_zone_id
}
Configure S3 Bucket Permission
Now we need to add the specific bucket permissions, that cloudfront needs to be able to adequately interact with our s3 bucket, to our s3 bucket.
Head back to your s3 bucket module.
Modules/s3-bucket/main.tf
This is the policy that will allow our cloudfront distribution access to our s3 bucket and it's object through it's access origin control.
Add the code below to our s3 bucket module's main.tf file
Modules/s3-bucket/main.tf
# Add the permissions needed by cloudfront's origin access control to access the bucket and it's objects
resource "aws_s3_bucket_policy" "cloudfront-oac-policy" {
  bucket = aws_s3_bucket.site-bucket.bucket
  policy = jsonencode({
    Version = "2012-10-17",
    Statement = [
      {
        Sid = "AllowCloudFrontServicePrincipal",
        Effect = "Allow",
        Principal = {
          Service = "cloudfront.amazonaws.com"
        },
        Action = "s3:GetObject",
        Resource = "${aws_s3_bucket.site-bucket.arn}/*",
        Condition = {
          StringLike = {
            "aws:UserAgent" = "Amazon CloudFront"
          }
        }
      }
    ]
  })
}
Create CloudFront Distribution Alias Record
We will create a new module, specially for this, create a new module called alias, create two files main.tf and variables.tf.
Modules/alias/main.tf
# Retrieve information about your hosted zone from AWS
data "aws_route53_zone" "created" {
  name = var.domain_name
}

# Create an alias that will point to the cloudfront distribution domain name
resource "aws_route53_record" "alias" {
  zone_id                  = data.aws_route53_zone.created.zone_id
  name                     = var.domain_name
  type                     = "A"

  alias {
    name                   = var.cloudfront_domain_name
    zone_id                = var.cloudfront-zone-id
    evaluate_target_health = false
  }
}
Modules/alias/variables.tf
Declare the necessary variables as usual:
variable "domain_name" {
  description = "your custom domain name"
  type = string
}

variable "cloudfront_domain_name" {
  type = string
}

variable "cloudfront-zone-id" {
  type = string
}
Putting it all Together: Move Modules into the Root Module
It's now time to put our modules to use in building our infrastructure. We do this by calling the module in the main.tf file of our root module, this is our main configuration file.
We had previously added our s3-bucket module to our main.tf earlier in the project when we wanted to test out our s3-bucket module, now we will add the rest of our modules to the main.tf.
main.tf
Your final configuration in your main.tf of your root module should look like this:
# Create S3 bucket, upload objects into the bucket and set bucket policy.
module "s3-bucket" {
  source = "./Modules/s3-bucket"
  bucket-name = var.bucket-name
  web-assets-path = var.web-assets-path
}

# Create and validate TLS/SSL certificate
module "certificate" {
  source = "./Modules/certificate"
  domain_name = var.domain_name
  subject_alternative_names  = ["www.${var.domain_name}"]
  }

# Create OAC and cloudfront distribution,
module "cloudfront" {
  source = "./Modules/cloudfront"
  domain_name = var.domain_name
  cdn-domain_name-and-origin_id = module.s3-bucket.bucket_regional_domain_name
  acm_certificate_arn = module.certificate.cert-arn
  depends_on = [ module.route53 ]
}

# Import the hosted zone from AWS, create dns records for certificate validation, and create A and CNAME records.
module "route53" {
  source = "./Modules/route53"
  domain_name = var.domain_name
  domain_validation_options = module.certificate.domain_validation_options
  certificate_arn = module.certificate.cert-arn
  }

# Create an alias to point the cloudfront cdn to our domain name.
module "alias" {
  source = "./Modules/alias"
  domain_name = var.domain_name
  cloudfront_domain_name = module.cloudfront.cloudfront_domain_name
  cloudfront-zone-id = module.cloudfront.cloudfront_hosted-zone_id
  depends_on = [ module.cloudfront ]
}
variables.tf
Now we will declare the necessary variables, your final variable.tf file should look like this:
variable "bucket-name" {
  type = string
}

variable "web-assets-path" {
  type = string
}

variable "domain_name" {
  type = string
}
terraform.tfvars
Add your secrets to your *.tfvars file like so:
bucket-name = "<your unique bucket name>
web-assets-path = "<the path to your website files (best to supply the absolute path)>
domain_name = "<your custom domain name>"
Now we are all set to deploy our application.
Create the Infrastructure
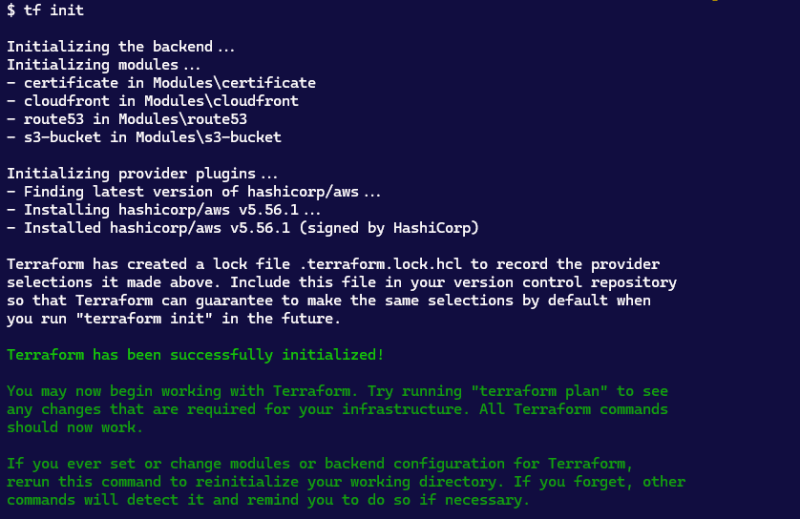
Install Modules
First run tf init to install all the added modules.
tf init
Validate Configuration
Next you can run the validate command to validate your configuration
tf validate
Create Infrastructure
As I already explained earlier the for_each function will only iterate on values that are already known at the time the apply command is , therefore if we were to apply before creating our certificate terraform will thrown an error.
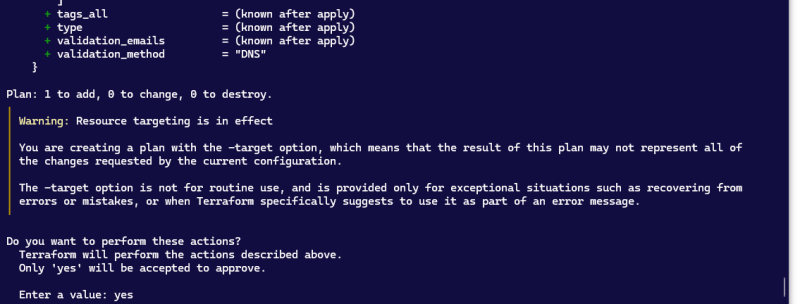
To avoid this error we will apply in two stages, first with the --target flag and then apply the whole configuration.
First run:
tf apply --target module.certificate
Lastly, create the remaining resources:
tf apply
Confirm Build
You can open your AWS console to see that the resources have been built.
Open your browser and navigate to your custom domain and you will see that your website is showing, here is mine.
Cleanup
Remember to clean up your environment when you are done. Don't leave the resources running in AWS to avoid unnecessary billing.
Use the destroy command:
tf destroy
This content originally appeared on DEV Community and was authored by ChigozieCO
ChigozieCO | Sciencx (2024-07-10T13:51:05+00:00) Deploy a Static Website with Route53, CloudFront and AWS Certificate using a Terraform Script. Retrieved from https://www.scien.cx/2024/07/10/deploy-a-static-website-with-route53-cloudfront-and-aws-certificate-using-a-terraform-script/
Please log in to upload a file.
There are no updates yet.
Click the Upload button above to add an update.

