This content originally appeared on Level Up Coding - Medium and was authored by Itsuki
In this article, Let’s check out how we can deal with Images in Rust using the image crate.
Specifically, we will be taking a look at
- Create a rust DynamicImage from an existing image, bytes, and base64 string
- Get image information such as dimension, color type and pixels
- Modify image: gray scaling, adjusting the contrast, brightening, cropping, resizing, and more!
- Save a rust DynamicImage to disk
As a bonus, I will also be sharing with you how we can open the image file created using the system default application.
Let’s get started!
Create a Rust Image
From File Path
To do read an image from path, we will be using ImageReader::open. This will return a ImageReader<std::io::BufReader<File>>. By calling decode() on it, we obtain a DynamicImage, an enumeration over all supported ImageBuffer<P> types. For convenience DynamicImage reimplements all image processing functions.
let image_path = "./pikachu.jpg";
let image_from_path = ImageReader::open(image_path)?.decode()?;
Yes, like always! Pikachu! The following is the image that I am testing on!

From Bytes
There are two different ways we can do this. One with ImageReader::new and one with load_from_memory.
Let’s first get our image as bytes using fs::read.
let image_bytes = fs::read(image_path)?;
We can then load our images like following.
let image_from_bytes_1 = image::ImageReader::new(std::io::Cursor::new(&image_bytes)).with_guessed_format()?.decode()?;
let image_from_bytes_2 = image::load_from_memory(&image_bytes)?;
From base64 Encoded string
This is a really common response type from image generation AIs. An example will be given by the following.
“data:image/png;base64,iVBORw0KGgoAAAANSUhEUgAAAyAAAAJYCAYAAACadoJw……”
To create a DynamicImage from it, three steps
- extract the raw content. The portion after data:image/png;base64,
- decode to byte
- Use the method we have above to create the DynamicImage
let base64_string = "data:image/png;base64,iVB......";
let raw_content_string = base64_string.trim_start_matches("data:image/png;base64,");
let decode_bytes = BASE64_STANDARD.decode(base64_string)?;
let img = image::load_from_memory(&decode_bytes)?;
// let img = image::ImageReader::new(std::io::Cursor::new(decode_bytes)).with_guessed_format()?.decode()?;
Get Image Info
Dimension
println!("dimensions: {:?}", image_from_bytes_1.dimensions());
// dimensions: (600, 565)
Color Type
println!("color: {:?}", image_from_bytes_1.color());
//color: Rgb8
Other possible color types are listed here.
Pixels Info
let pixel_iterator = image_from_bytes_1.pixels();
This will return an iterator over the pixels of the image. The iterator yields the coordinates of each pixel along with their value
Save Image to Disk
Before we get into image modification, let’s check out how we can save the DynamicImage object to disk so that we can visualize our modifications in the next part!
It is as simple as img.save(“./pikachu_new.jpg”)?;!
Modify Image
I will only include couple main ones here that you might find useful.
- GrayScale
- Blur
- Adjust Contrast
- Brighten
- Crop
- Resize
But there are many other interesting options provided, so play around with the crate to find out more about it!
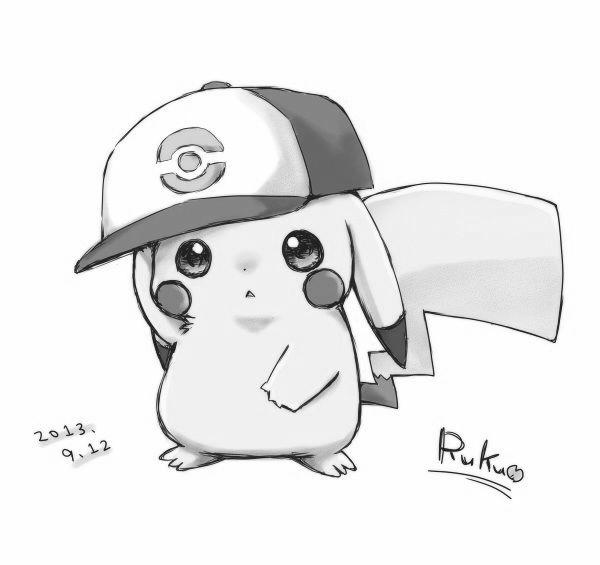
GrayScale
let gray = image_from_path.grayscale();
gray.save("./test/gray.jpg")?;
Blur
let blur = image_from_path.blur(10.0);
blur.save("./test/blur.jpg")?;
The parameter passed into the blur function is the sigma value to determine the amount of blurring applied to the image. A higher sigma value will result in more blurring, while a lower sigma value will result in less blurring.
A blur of 10.0 of our original image is the following.

Adjust Contrast
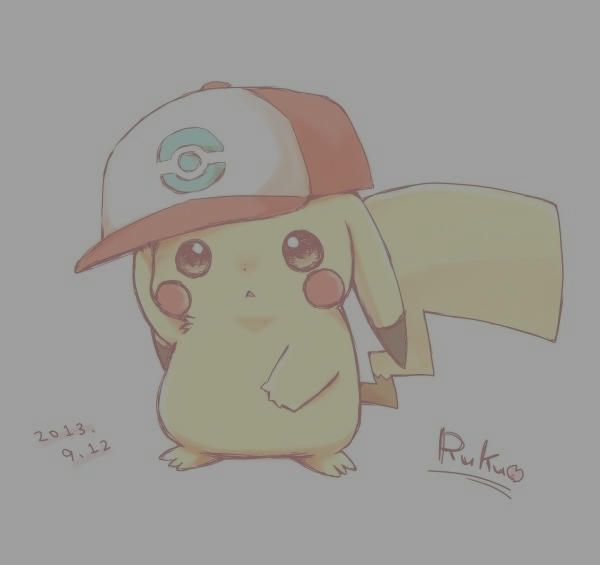
To Adjust the contrast of this image, we will be using adjust_contrast(c:f32) where c is the amount to adjust the contrast by. Negative values decrease the contrast and positive values increase the contrast.
let contrast = image_from_path.adjust_contrast(-50.0);
contrast.save("./test/contrast.jpg")?;
Brighten
let brighten = image_from_path.brighten(100);
brighten.save("./test/brighten.jpg")?;
The integer passed into the function is the amount to brighten each pixel by. Negative values decrease the brightness and positive values increase it.
Crop
To crop an image using a rectangle with left upper corner being point (x, y) and a size of (width, height), we can use the crop_imm(x, y, width, height) function.
    let crop = image_from_path.crop_imm(0, 0, 300, 300);
    crop.save("./test/crop.jpg")?;

There is another method for cropping: crop(…), but please avoid using it as it will be replace by the crop_imm wee have above.
Resize
Last but not least, we have resize.
let resize = image_from_path.resize(300, 300, image::imageops::FilterType::Gaussian);
resize.save("./test/resize.jpg")?;
The first and second parameter should be pretty obvious, it is the width and height of the resulting image.
The third parameter is the sampling filter that will be used when resizing the image. In addition to the Gaussian we have above, we can also choose from
- Nearest for Nearest Neighbor
- Triangle for Linear Filter
- CatmullRom for Cubic Filter
- Lanczos3 for Lanczos with window 3

Bonus: Open Image
After you create a new image, you might want to open it using the default program of the system.
To do so, we can use the open crate and simply call open::that(image_path)?
If you want to open it using a detached process which is really useful if the program ends up to be blocking or want to out-live your app, we can use open::that_detached(image_path)? instead.
Thank you for reading!
That’s all I have for today! Playing around with my super cute Pikachu made my day!
Hope your day is as good as mine!
Happy imaging!
Rust: Working with Images was originally published in Level Up Coding on Medium, where people are continuing the conversation by highlighting and responding to this story.
This content originally appeared on Level Up Coding - Medium and was authored by Itsuki
Itsuki | Sciencx (2024-08-09T12:57:20+00:00) Rust: Working with Images. Retrieved from https://www.scien.cx/2024/08/09/rust-working-with-images/
Please log in to upload a file.
There are no updates yet.
Click the Upload button above to add an update.
