This content originally appeared on Level Up Coding - Medium and was authored by Matan Cohen

Signals offer numerous benefits, including built-in granular reactivity, a simple API, concise and straightforward data flow, and much more.
This is why they are utilized in nearly all major frameworks, including Solid, Qwix, Angular, and Vue.
They’ve become so popular that there’s now a proposal to include them as part of the JavaScript language:
GitHub - tc39/proposal-signals: A proposal to add signals to JavaScript.
Signals are great, but how exactly do they work behind the scenes?
In this article, I’ll use SolidJs syntax, but the concepts apply to all frameworks that use signals. I’ll also explain a simplified version of the real implementations.
Let’s begin by exploring the most basic unit in the signals world: the Signal.
Signal
A Signal is a reactive data structure used to manage state within our application.
Let’s create a Signal!
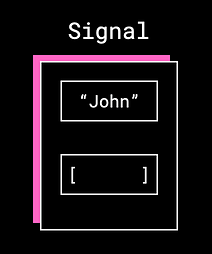
We create a box with a value (in this case “John”) and a list of subscribers.
Also we return an accessor (in this case name)and a setter (setName).
Accessors provide a way to access the data inside the signal; we cannot directly access the value.
The setter is used to update the data in the Signal, as direct access is not allowed.
Great, we have a way to store state, but we also need a way to react to changes in that state. For this, we can use Effect.
Effect
An Effect is our tool for reacting to changes in signals. Let’s use one and see how it works.
We’ve created a very basic Effect that calls the name accessor and prints the result to the console.
This is our little Effect, which contains an anonymous function.

To understand what happens when we create an Effect we need to introduce the tracking context.
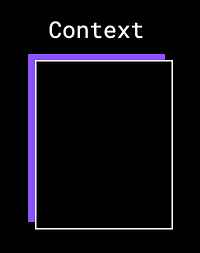
The tracking context is a global runtime stack that helps keep track of what is currently executing.
When we create an Effect, we push it onto the tracking context:
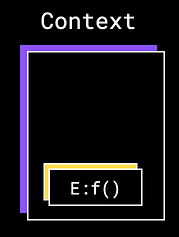
Once we push the Effect into the tracking context, we execute the function it contains.
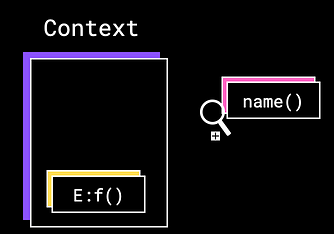
The magic happens when we execute any Accessor inside createEffect.
When we run an Accessor, we inspect the top of the tracking context. Then, we list the Effect at the top of the tracking context as a subscriber of the Signal connected to the Accessor.
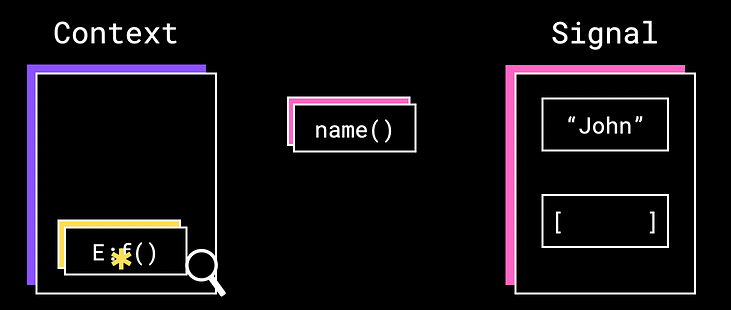
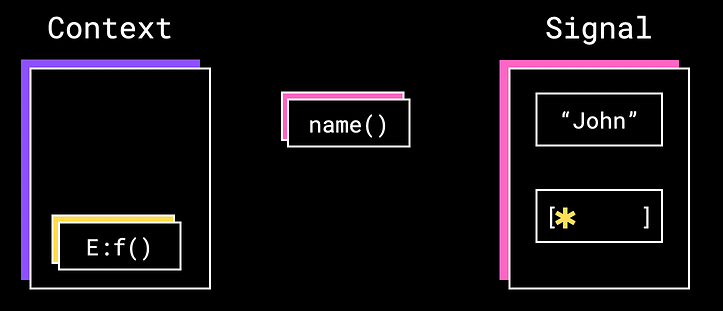
(The yellow asterisk represents the Effect).
After adding the Effect as a subscriber, we return the value that the Signal holds, in this case, John.
Then we print John to the console
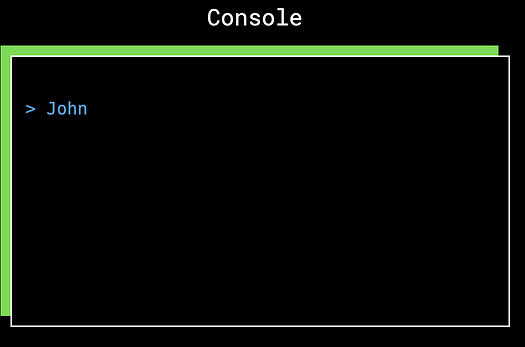
And remove the Effect from the tracking context:
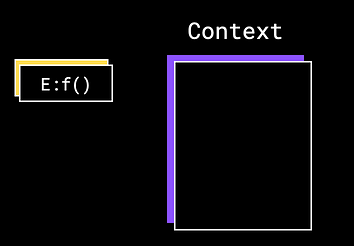
So, we printed to the console. What’s the big deal? To understand that, we need to call the setter setName.
Invoking a setter
When calling a Setter, we update the value held by the Signal.
Next, we inspect the list of subscribers, remove them from the list, and invoke each one.
We replace the value inside the Signal with “Jane”, remove the Effect from the list, and then invoke it.
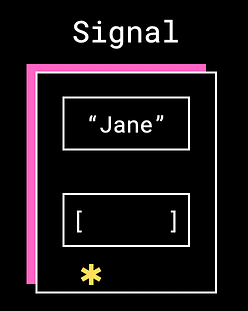
In this case this Effect:
This, in turn, prints “Jane”and repeats the process of registering itself as a subscriber of the original signal.

We have a reactive system that responds to state changes.
It’s easy to see how this system could be used for granular UI updates, essentially creating an Effect that renders a component only when a specific Signal changes.
We can also see how this system can scale as more components subscribe to more Signals.
All of these benefits come with no extra effort from the developer — subscriptions are handled automatically behind the scenes. In one word: awesome!

Memoization
If I asked you to find the product of 12 * 16, you’d need to think a little — perhaps doubling 6 * 2 and then adding the numbers, and so on.
But if I asked you again, you’d probably say 192 without any extra effort.
Sometimes it’s beneficial to remember computations we’ve already done instead of running them repeatedly.
This logic applies to us, and it also applies to Signals. We can use the createMemo function to implement this pattern with Signals.
What goes on behind the scenes when we invoke the createMemo function?
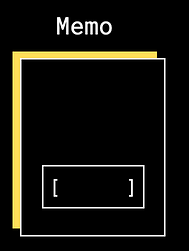
First, we create a Memo with an array of subscribers, similar to how we handle Signals.
Then we place a special wrapper function, M: f(), into the tracking context, just like we did with the Effect.
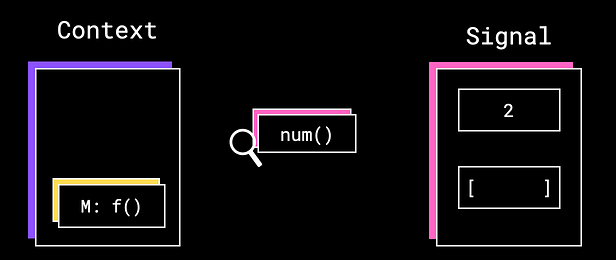
Then, we invoke the function passed as input to createMemo. When it runs, it calls num(), making M: f() a subscriber of the Signal.
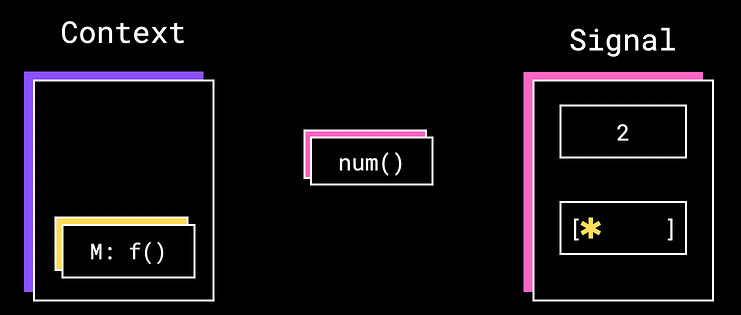
Then we save the result in Memo.
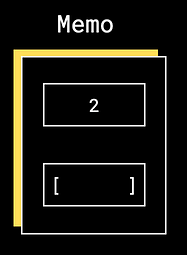
This essentially means that we can always return the saved value and avoid recalculating until the Signal we subscribed to changes.
let’s see what happens when we use memo() (return value of createMemo )
We have created an effect which invoke the memo function.
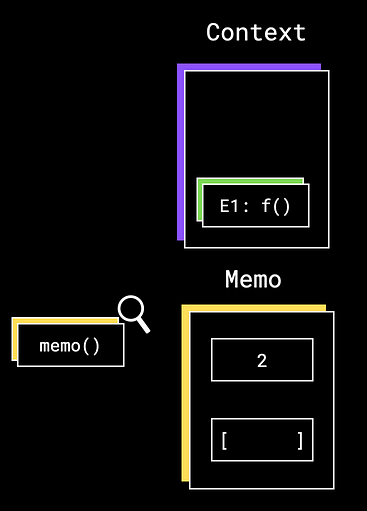
And once again, we see the same pattern as with the accessor function of a Signal — when it’s invoked, we look at the top of the tracking scope and register the Effect as a subscriber to the Memo.
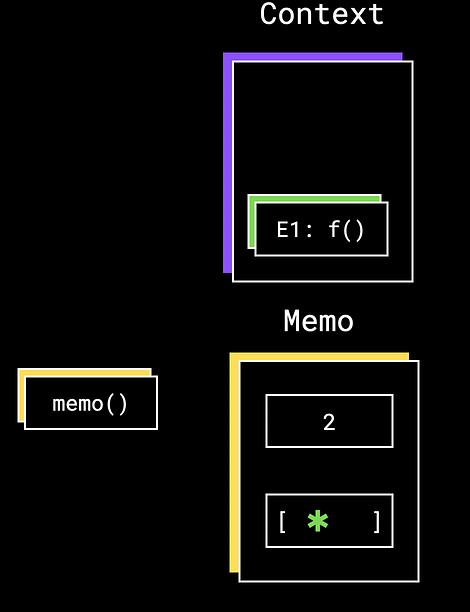
Then we print effect: 2, using the memoized value without rerunning the calculation—great success!
Let’s see how it all plays out when we change the value of the Signal.
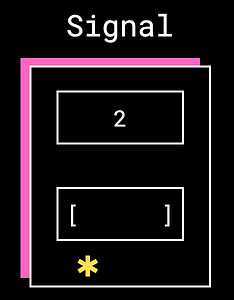
After changing the value of the Signal to 2, we invoke all the subscribers — in this case, the wrapper memo function.
Running the function again results in the following:
- The memo wrapper function is re-registered as a subscriber to the Signal.
- The value saved in the Memo is updated to 4.
- We invoke all Memo subscribers.
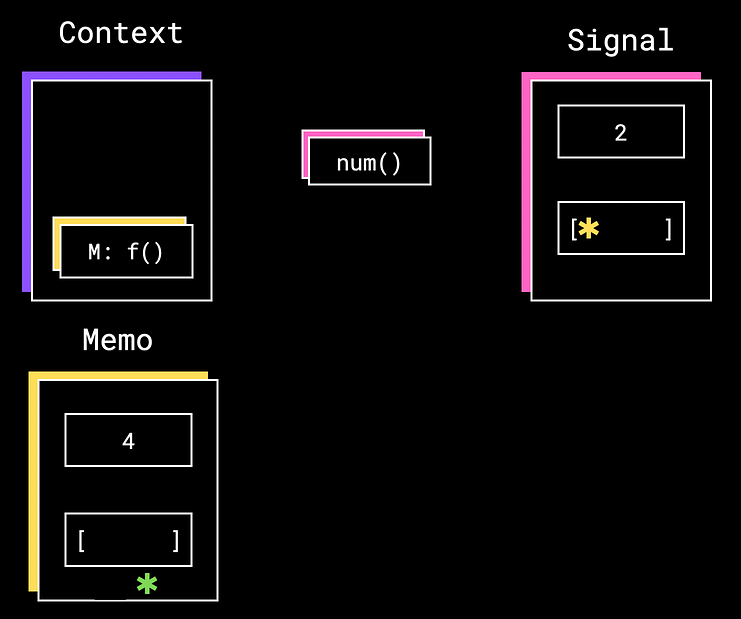
Then, invoking the subscribers of the Memo results in running the Effect and printing effect: 4.
All the subscribers are set back in place for the next Signal change :).
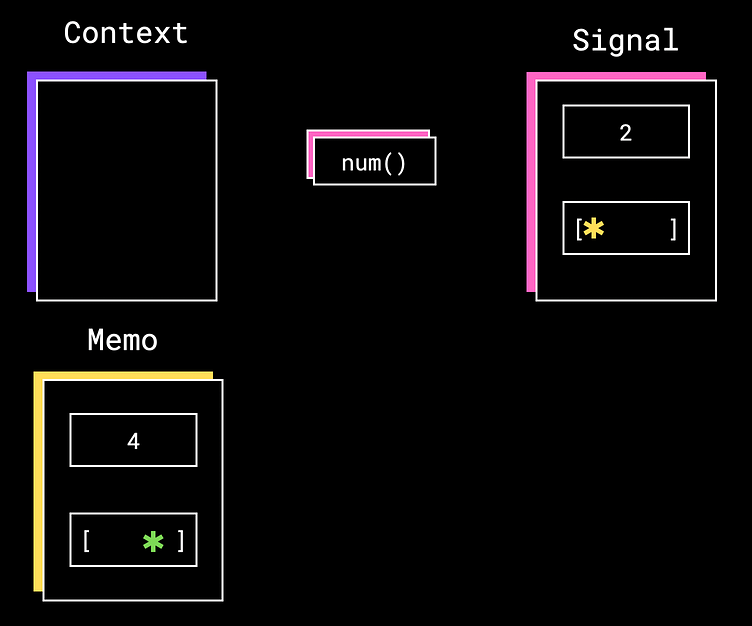
Basically, Memo allows us to create a graph of reactivity as large as we need, with a performance boost for memoizing heavy computations.
Remember to use createMemo when you want to avoid recalculating heavy computations repeatedly.
Sum up
We’ve explored how Signals work behind the scenes with their automatic subscription mechanism.
Then we explored how Effects work and subscribe to Signals using the tracking scope.
Then we learned how createMemo works and how it can be used to avoid recalculating heavy computations.
Signals are a powerful and popular tool in the frontend world. Now that you understand how they work, you can go build something amazing with them.
References
Signals behind the scenes was originally published in Level Up Coding on Medium, where people are continuing the conversation by highlighting and responding to this story.
This content originally appeared on Level Up Coding - Medium and was authored by Matan Cohen
Matan Cohen | Sciencx (2024-09-02T01:02:48+00:00) Signals behind the scenes. Retrieved from https://www.scien.cx/2024/09/02/signals-behind-the-scenes/
Please log in to upload a file.
There are no updates yet.
Click the Upload button above to add an update.
