This content originally appeared on DEV Community and was authored by KUMAR HARSH
Fun With HTML5 Canvas
click for project demo
On day-8 of javascript-30 we learnt the fundamentals of HTML5 Canvas. It was the most interesting challenge up until now where we made a sort of painting canvas and the results were pretty awesome.
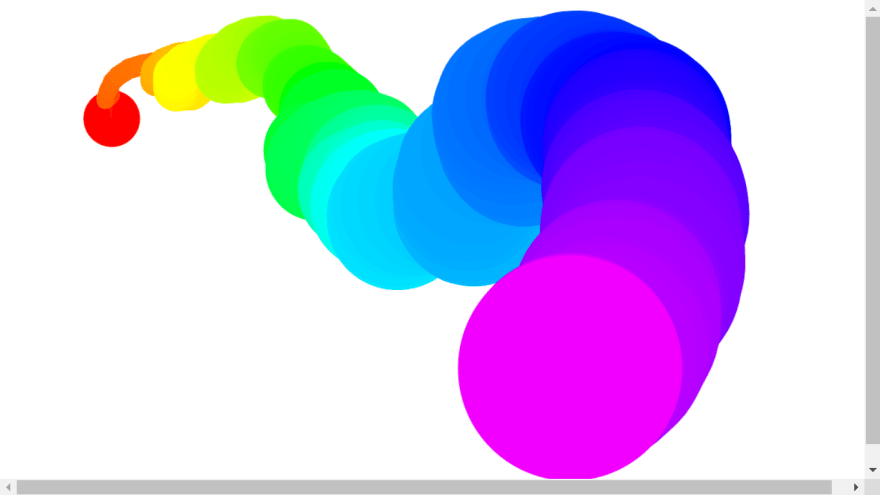
So we'll be making a canvas where if the user clicks down the mouse and drags he can draw on the canvas, and to fine tune it we would also use hsl() to change the colors as well.
Canvas on the web is something like Microsoft paint, where you get a block of actual pixels, you need to then draw on that.
Accoring to w3schools
The HTML element is used to draw graphics, on the fly, via JavaScript.The element is only a container for graphics. You must use JavaScript to actually draw the graphics.
First thing we do is add the canvas element
<canvas id="draw" width="800" height="800"></canvas>
then we grab that element
const canvas = document.querySelector("#draw");
Now we need one more important thing that is the context.
The thing is we don't draw directly on the canvas element in HTML, but we draw on something called the context. The context can either be 2d (which is what we will be working with) or 3d for stuff like video games and 3d rendering.
So we're going to grab the context
const ctx = canvas.getContext("2d");
We mention 2d that is we are asking for 2d context.
Note: the d in 2d must be small or else
getContext()returnsnull.
Now when we added the canvas element we gave it initial height and width of 800px but now size up our canvas to be the exact dimensions of the window before we do any of the drawing.
canvas.width = window.innerWidth;
canvas.height = window.innerHeight;
Now we'll need a couple of base settings like strokeStyle, lineCap, lineJoin, lineWidth
ctx.strokeStyle = "#BADA55";
ctx.lineJoin = "round";
ctx.lineCap = "round";
ctx.lineWidth = 75;
All the different properties can be read on w3schools.
Basically when you draw on something first of all there needs to be a color, end of line should be squared or rounded and so on.
On our canvas nothing happens on simply moving the mouse, unless we have the cursor down. So for that we will simply create a flag and initially set it false, then we attach eventListeners() to it and change it's value to true on cursor down and back to false on cursor up. We'll also use a mouseout event listener simply because if we click down and go out of the window and let go of the cursor and then comeback, it's still going to think the mouse is down since we never triggered a mouse up on that event.
let isDrawing = false;
canvas.addEventListener("mousemove", draw);
canvas.addEventListener("mousedown", (e) => {
  isDrawing = true;
  [lastX, lastY] = [e.offsetX, e.offsetY];
});
canvas.addEventListener("mouseup", () => (isDrawing = false));
canvas.addEventListener("mouseout", () => (isDrawing = false));
We'll see why we updated the variables lastX and lastY on mousedown shortly.
With this we have our Click and Drag functionality. We are all set to draw.
We use a couple of variables.
let lastX = 0;
let lastY = 0;
let hue = 0;
let direction = true;
Now we need the co ordinates while drawing hence the variables lastX and lastY.
We have a couple of issues at this point.
First one no matter where we tap on screen the initial coordinates is (0,0) so lines are drawn from Origin.
So we need to keep updating X and Y. We do so inside our draw function which is called mousemove event
[lastX, lastY] = [e.offsetX, e.offsetY];
It only solves half our problem as still initial line is started from origin so we update X and Y inside mousedown as well and since mousedown comes before mousemove our value of X and Y would be updated and we would have our cursor where we want from the start.
canvas.addEventListener("mousedown", (e) => {
  isDrawing = true;
  [lastX, lastY] = [e.offsetX, e.offsetY];
});
Now inside our draw() function we use hsl() to add colors to our lines and play with the stroke width.
function draw(e) {
  if (!isDrawing) {
    return;
  }
  ctx.strokeStyle = `hsl(${hue},100%,50%)`;
  ctx.lineWidth = hue;
  ctx.beginPath();
  //start from
  ctx.moveTo(lastX, lastY);
  //go to
  ctx.lineTo(e.offsetX, e.offsetY);
  ctx.stroke();
  [lastX, lastY] = [e.offsetX, e.offsetY];
  hue++;
  if (hue > 360) {
    hue = 0;
  }
  ctx.lineWidth++;
  if (lineWidth >= 75 || lineWidth <= 25) {
    direction = !direction;
  }

  if (direction) {
    ctx.lineWidth++;
  } else {
    ctx.lineWidth--;
  }
}
This part stops the function from running when they are not moused down.
if (!isDrawing) {
    return;
  }
In HSL, S stands for saturation and L for lightness so we use fixed values for them and update our H or hue.
//declared outside function
let hue = 0;
//inside draw function
ctx.strokeStyle = `hsl(${hue},100%,50%)`;
hue++;
  if (hue > 360) {
    hue = 0;
  }
Max value for hue is 360 so we reset it every time it reaches max value.
The value for [lastX, lastY] = [e.offsetX, e.offsetY]; offset is coming for the event e.
The last part is to update the stroke width. We start with a value of 75 and maintain a variable isDirection which keeps track of the value, and accordingly we keep increasing value of stroke to a certain point and then revert back to initial width.
//declared outside function
let direction = true;
//inside function
ctx.lineWidth++;
  if (lineWidth >= 75 || lineWidth <= 25) {
    direction = !direction;
  }

  if (direction) {
    ctx.lineWidth++;
  } else {
    ctx.lineWidth--;
  }
}
In the end we could also experiment with globalCompositeOperation() which gives effects like that of photoshop blend modes. Read more on MDN.
Additionally if we want the site to be functional on screen touch devices as well we do some tweaks to it. Read more MDN.
Here is the complete script.js code to avoid any confusion.
const canvas = document.querySelector("#draw");
const ctx = canvas.getContext("2d");
canvas.width = window.innerWidth;
canvas.height = window.innerHeight;

ctx.strokeStyle = "#BADA55";
ctx.lineJoin = "round";
ctx.lineCap = "round";
ctx.lineWidth = 75;
// ctx.globalCompositeOperation = "multiply";

let isDrawing = false;
let lastX = 0;
let lastY = 0;
let hue = 0;
let direction = true;

function draw(e) {
  if (!isDrawing) {
    return;
  }
  ctx.strokeStyle = `hsl(${hue},100%,50%)`;
  ctx.lineWidth = hue;
  ctx.beginPath();
  //start from
  ctx.moveTo(lastX, lastY);
  //go to
  ctx.lineTo(e.offsetX, e.offsetY);
  ctx.stroke();
  [lastX, lastY] = [e.offsetX, e.offsetY];
  hue++;
  if (hue > 360) {
    hue = 0;
  }
  ctx.lineWidth++;
  if (lineWidth >= 75 || lineWidth <= 25) {
    direction = !direction;
  }

  if (direction) {
    ctx.lineWidth++;
  } else {
    ctx.lineWidth--;
  }
}

canvas.addEventListener("mousemove", draw);
canvas.addEventListener("mousedown", (e) => {
  isDrawing = true;
  [lastX, lastY] = [e.offsetX, e.offsetY];
});
canvas.addEventListener("mouseup", () => (isDrawing = false));
canvas.addEventListener("mouseout", () => (isDrawing = false));
and with this our project for the day was completed.
GitHub repo:
Blog on Day-7 of javascript30
Blog on Day-6 of javascript30
Blog on Day-5 of javascript30
Follow me on Twitter
Follow me on Linkedin
DEV Profile

You can also do the challenge at javascript30
Thanks @wesbos , WesBos to share this with us! ??
Please comment and let me know your views
Thank You!
This content originally appeared on DEV Community and was authored by KUMAR HARSH
KUMAR HARSH | Sciencx (2021-06-08T18:00:27+00:00) JavaScript-30-Day-8. Retrieved from https://www.scien.cx/2021/06/08/javascript-30-day-8/
Please log in to upload a file.
There are no updates yet.
Click the Upload button above to add an update.


