This content originally appeared on DEV Community and was authored by Mariam Adedeji
In this article, I’d like to demonstrate how you can deploy a static website with AWS by uploading your website content into S3 bucket, configuring your bucket for website hosting and speeding up content delivery using AWS CloudFront.
First of all, let me explain some of the terminologies.
What is Amazon S3?
Amazon S3 (Simple Storage Service) is a service offered by AWS for object storage through a web service interface. It can be used to store or retrieve any amount of data such as documents, images, videos, etc.
S3 bucket is a resource in Amazon S3. It is a container where files and folders can be uploaded.
What is Amazon CloudFront?
Amazon CloudFront is a content delivery network (CDN) service offered by AWS. It is used to speed up content delivery and can be integrated with Amazon S3.
Benefits of using AWS S3 bucket
- Each object can contain up to 5TB of data.
- A resource can only be accessed by the owner until permission is granted to others which makes it more secure.
- It is cheap.
- You can enable Multi-Factor Authentication (MFA) delete on an S3 bucket to prevent accidental deletions and unintentional data loss.
Prerequisites
If you’d like to follow this tutorial, please make sure the following requirements are met.
- AWS account. You can sign up here and follow this tutorial in setting it up.
- A static website. If you don’t have one, you can clone this demo project.
Table of Contents
- Create an S3 bucket
- Upload web files to S3 bucket
- Secure S3 bucket through IAM policies
- Configure S3 bucket
- Serve content from S3 bucket with CloudFront
Now, let’s get into it!
Step 1 — Create an S3 bucket
You will need to create an S3 bucket to put your website’s files and folders.
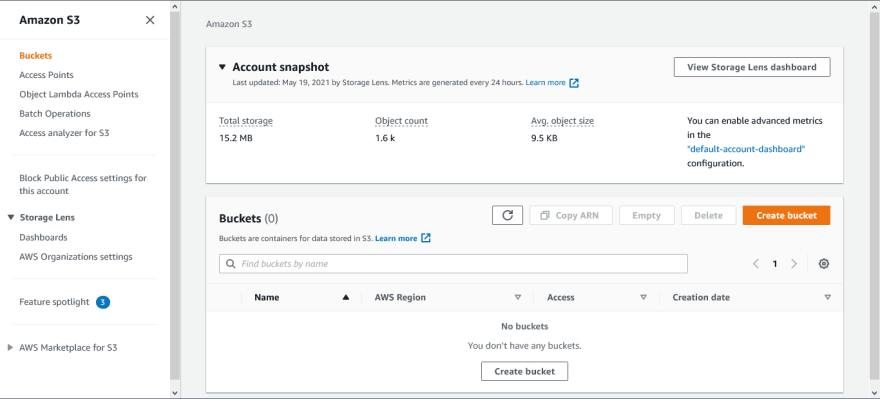
To do this, login into your AWS management console and click on Services on the top navbar. From the Services drop-down, select S3 from the Storage section. This should display the S3 dashboard.
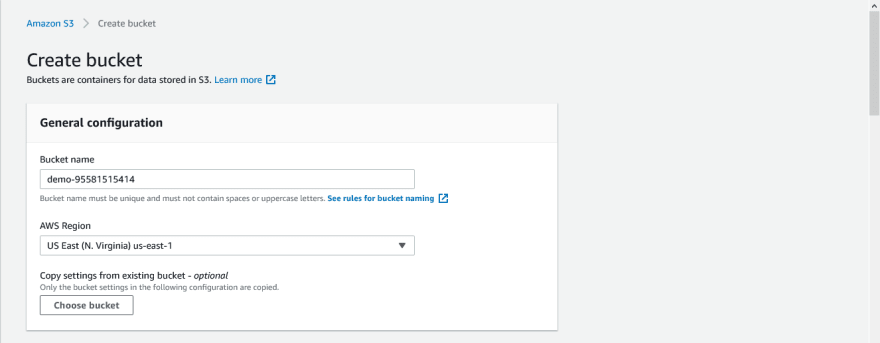
From the S3 dashboard, click on Create bucket. Give the bucket a unique name, the name you choose must be globally unique (for best practice, attach your AWS account ID to the name).
Next, choose your preferred AWS Region from the drop-down.
Under Block Public Access settings for this bucket section, uncheck the Block all public access checkbox and accept the acknowledgement. This is done to make the bucket accessible to the public because you are going to host a website in it.
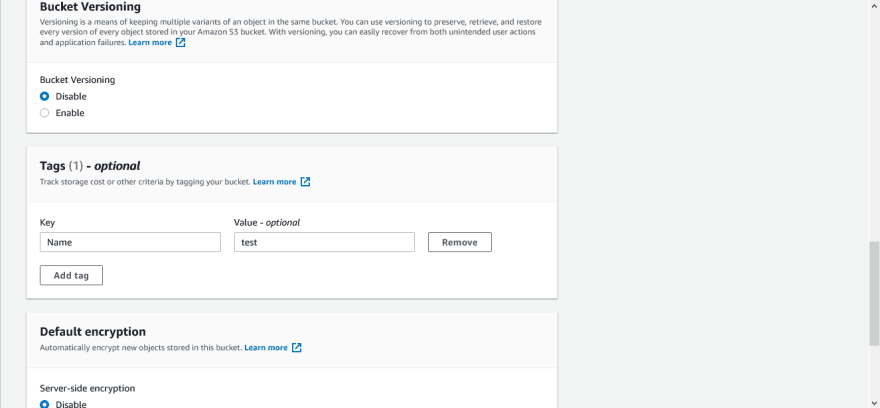
Click on disable for Bucket Versioning.
You can also Add tag to the bucket for easy identification.
Under Default encryption section, click on disable for Server-side encryption.
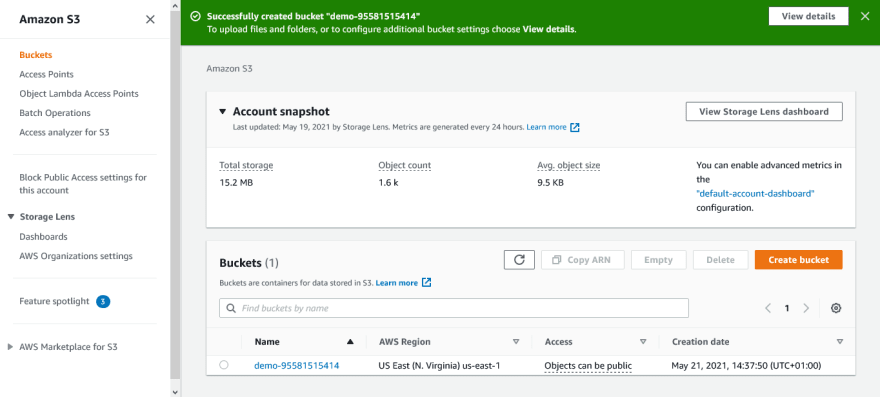
Then click on Create bucket.
Step 2 — Upload web files to S3 bucket
After creating the bucket, you need to upload your website’s files and folders into it.
From the S3 dashboard, click on the name of the bucket you just created.
On the Objects tab, you can see that the bucket is currently empty, click on the Upload button.
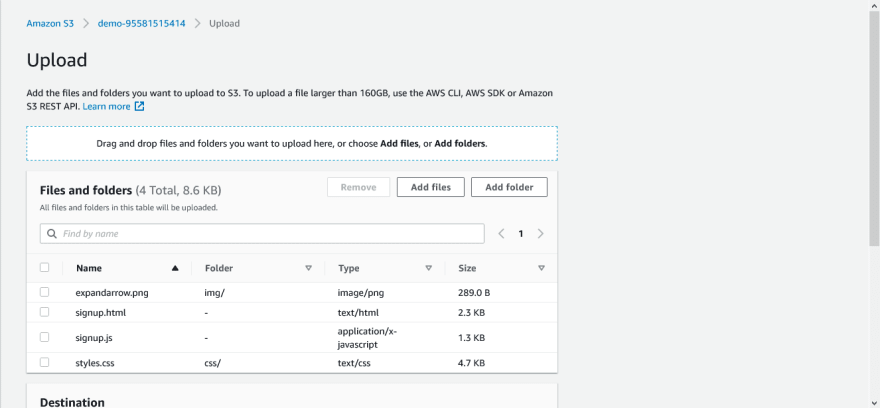
This should take you to the Upload page. Click Add files to add the website files and use Add folder to add the website folders.
Note: The whole website folder shouldn’t be added at once. Instead, add its content one after the other. For example, with the demo project linked up top, I uploaded my signup.html as a file, signup.js as a file, css as a folder and img as a folder.
After the necessary files and folders have been added, scroll down and click on Upload.
The uploading should be done in a few minutes depending on your network and content size. Also, please do not close the tab while the upload process is going on.
Step 3 — Secure S3 bucket through IAM policies
Now you need to add some policies to secure your bucket.
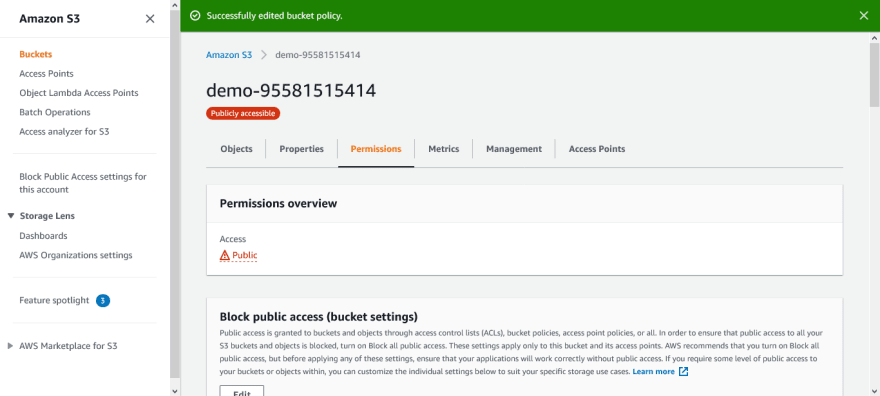
From the S3 dashboard, click on the name of the bucket, then click on Permissions tab. Scroll down to the Bucket policy section and click on its Edit button.
Add the following bucket policy to it and make sure to replace bucket-name with the name of your bucket.
{
"Version":"2012-10-17",
"Statement":[
 {
   "Sid":"AddPerm",
   "Effect":"Allow",
   "Principal": "*",
   "Action":["s3:GetObject"],
   "Resource":["arn:aws:s3:::bucket-name/*"]
 }
]
}
Then scroll down and click on Save changes.
This should change the bucket access to public, as shown below.
Step 4 — Configure S3 bucket
You need to specify the default page and error page for your website.
From the S3 dashboard, click on the name of the bucket, then click on the Properties tab.
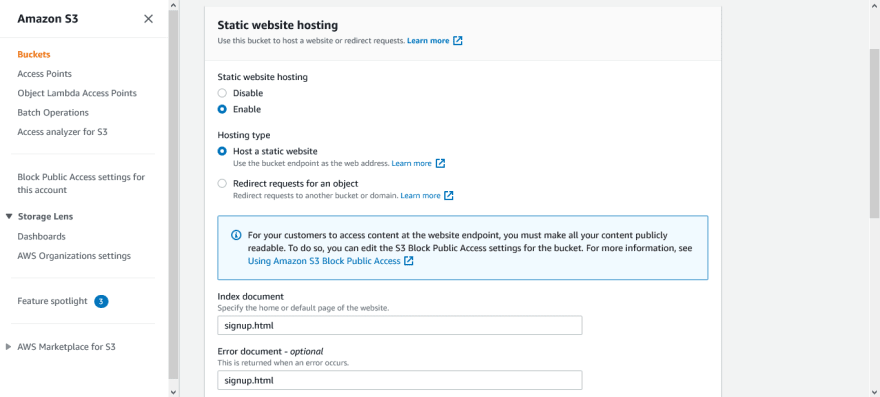
Scroll down to the Static website hosting section and click on its Edit button.
Select Enable for Static website hosting.
Also, select Host a static website for the Hosting type.
Enter the file for your Index document and Error document. The Error document is optional. I used signup.html for both Index document and Error document.
Scroll down and click on Save Changes.
After saving, If you click on the bucket website endpoint, it would display your website.
Step 5 — Serve content from S3 bucket with CloudFront
From the Services drop-down, scroll down to Networking & Content Delivery section and click on CloudFront. This should take you to the CloudFront dashboard.
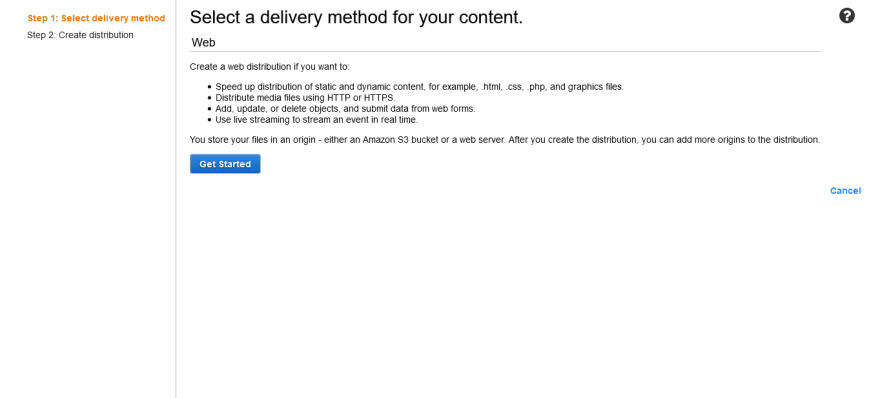
Click on Create Distribution. On Select a delivery method for your content page, click on Get Started under the Web section.
Under the Origin Settings section, click on the Origin Domain Name field and select the S3 bucket you created earlier. In the Origin Path field, enter / to indicate root level.
For Restrict Bucket Access, select Yes.
For Origin Access Identity, select Create a New Identity.
For Grant Read Permissions on Bucket, select Yes, Update Bucket Policy.
Scroll down to the Default Cache Behavior Settings section. For Viewer Protocol Policy, select Redirect HTTP to HTTPS.
Next, scroll down to the Distribution Settings section. Inside the Default Root Object field, enter the filename at the root level, which should be your landing page. I used signup.html as my Default Root Object.
Leave the rest of the options as default and click on Create Distribution.
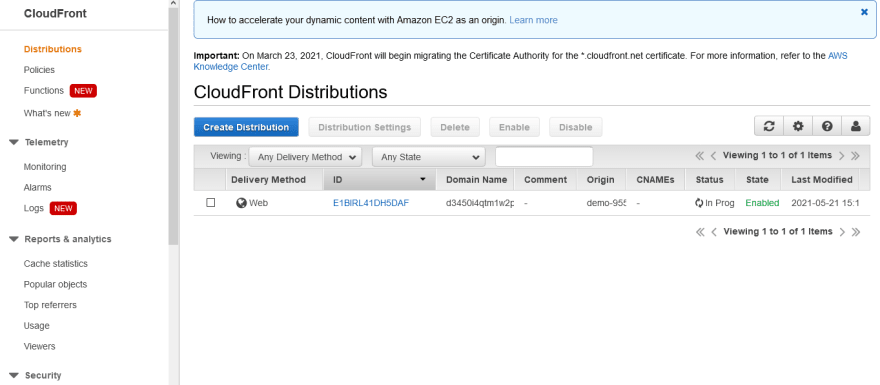
Now, you can see the distribution you created from the CloudFront dashboard. It might take a few minutes for it to be deployed.
After the CloudFront distribution has been deployed, copy the URL from the Domain Name column and paste it into your browser. Yay!? That’s it!
Now, you can access your website with:
- CloudFront domain name e.g d3450i4qtm1w2p.cloudfront.net
- Website endpoint e.g http://demo-95581515414.s3-website-us-east-1.amazonaws.com
- S3 object URL e.g https://demo-95581515414.s3.us-east-1.amazonaws.com/signup.html
You should now know how to host a static website with Amazon S3 and speed up the content delivery using AWS CloudFront. Even though you had to go through a few steps, you did it and you're awesome!
If you’ve found this article helpful, please leave a heart or a comment. If you have any questions or constructive feedback, please let me know in the comment section.
Also, don’t forget to follow me for more articles. Thank you!
This content originally appeared on DEV Community and was authored by Mariam Adedeji
Mariam Adedeji | Sciencx (2021-06-26T21:30:43+00:00) Hosting a Static Website with Amazon S3. Retrieved from https://www.scien.cx/2021/06/26/hosting-a-static-website-with-amazon-s3/
Please log in to upload a file.
There are no updates yet.
Click the Upload button above to add an update.

