This content originally appeared on Level Up Coding - Medium and was authored by Gabriel Borges
How to install and use WSA on any edition of Windows 11 (home, pro, enterprise or education) and run Android apps without any emulator!
Microsoft recently released Windows Subsystem for Android (aka WSA) for insiders, a feature for Windows that allows Android apps to be run without the need to set up any emulators at all. In this story, I will cover how to install it on any version of Windows 11, even if you are not a Windows Insider.
What is Windows Subsystem for Android?
Windows Subsystem for Android is a new Windows platform technology that allows android apps to run inside the OS without the need of an emulator, the subsystem includes the Linux kernel and the Android OS 11, it also includes the Amazon Appstore pre-installed, so you can easily install any Android app available there as if it is a Windows app.
Requirements
To install WSA, there are a couple of requirements, you will need a CPU capable of hardware virtualization, most of the CPU’s that Windows 11 supports have this feature, so it shouldn’t be an issue, but sometimes it isn’t enabled in the BIOS by default.
Step 1: Check if virtualization is enabled
To check if virtualization is enabled in the BIOS, search and open the command prompt in windows, in it, write “systeminfo” and press enter and wait it to run, it may take a few seconds but once it finishes, search for the “Hyper-V Requirements” section (usually it is the last one)
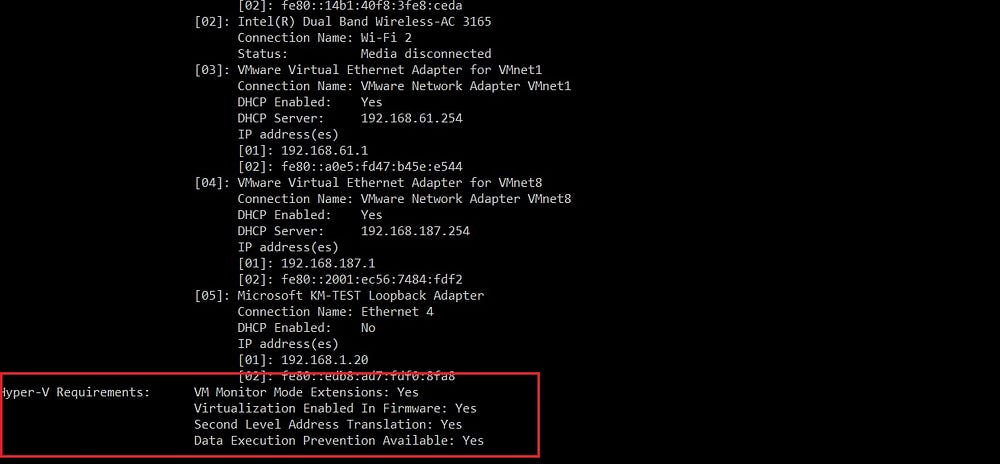
If “Virtualization Enabled in Firmware” says “No”, you will need to enable virtualization in the BIOS (More details at step 2), otherwise it is already enabled, you can skip step 2.
Step 2: Enable virtualization
The process of enabling virtualization can vary a lot depending on the motherboard manufacturer, but it can be summarized in a few steps:
- Turn off your computer and turn it on again, keep pressing the key to open the BIOS (usually it is Del, F1, F2, F4, F11, or F12)
- Once you get into the BIOS, search for the CPU configuration section, it can be called “CPU configuration”, “processor”, “Northbridge” or “Chipset” and may be under an “advanced” or “advanced mode” tab or menu.
- Now you need to look for the virtualization option and enable it, it can have different names such as “Hyper-V”, “Vanderpool”, “SVM”, “AMD-V”, “Intel Virtualization Technology” or “VT-X”.
- Now save and reboot your pc.
Here is a small video showing how to do that in an Asus motherboard with an Intel processor:
Step 3: Check your Windows edition
Another requirement of WSA is the Hyper-v, an optional feature of Windows that allows the creation of virtual machines, if you have Windows Enterprise, Pro or Education, the process is very simple, it only requires one command, for windows home tough, you need to upgrade windows or run a script to enable the feature manually.
To check what version of Windows you have, open settings, click on “system” and then on “about”, there you will find what edition of windows you have.
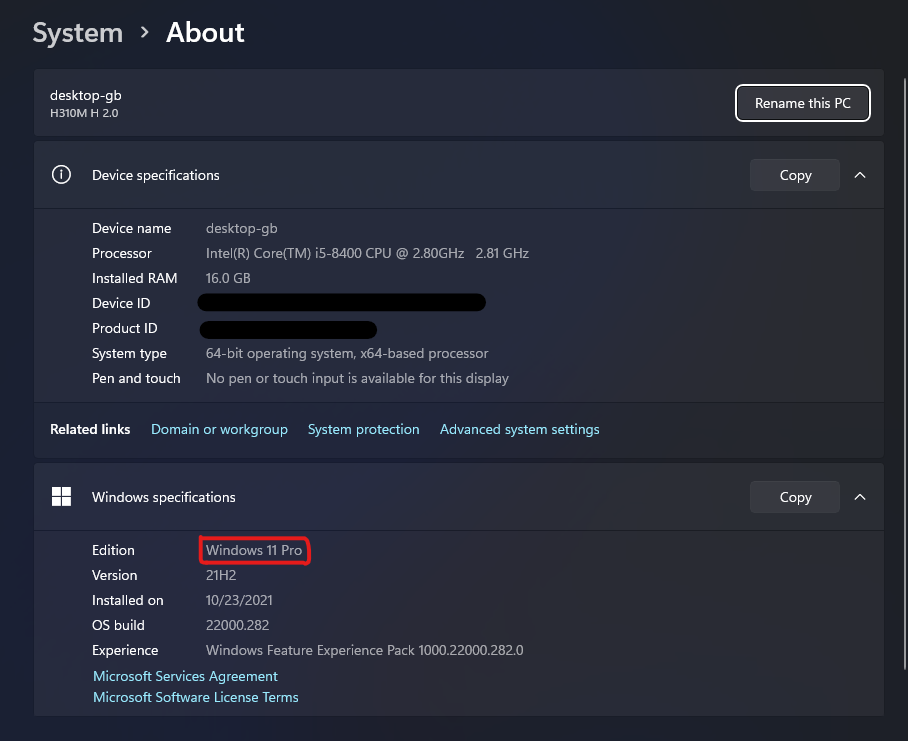
If you have Windows Enterprise, Pro or Education, go to step 4.1, if you don’t, go to step 4.2.
Step 4.1: Enable Hyper-V (Windows Enterprise, Pro or Education):
Enabling Hyper-V on Windows Enterprise, Pro or Education is very simple, open PowerShell with admin rights, type the command below and press ENTER:
Enable-WindowsOptionalFeature -Online -FeatureName Microsoft-Hyper-V -All
Once the installation is completed, restart your computer and Hyper-V should be installed. If you want, you can check the official Microsoft guide by clicking here.
Step 4.2: Enable Hyper-V (Windows 11 Home):
The best option to enable Hyper-V if you have Windows Home is to just upgrade to pro, but you can also force windows to enable it by creating a .bat file with the script below and running it with admin rights.
Once it is finished, restart your computer and Hyper-V should be enabled.
Installing Windows Subsystem for Android
The current preview version of WSA is only officially available for Windows Insiders, if you are one of them, all you have to do now is to search for Amazon Appstore on the Microsoft Store and that’s it! Now you can install and run android apps available at the appstore, but if you aren’t a Windows Insider, you will need to install it manually, but remember: this is a preview version of WSA, bugs and issues are expected, I haven’t found any myself, but keep that in mind.
First, let’s download the WSA package, to do that, click here to open an online tool that generates a direct link to the Microsoft Store package. On the first dropdown menu on the left, select “productId”, type “9P3395VX91NR”, which is the product ID for WSA and select “slow” for the dropdown menu on the right.

The link generator will come up with a list of all available links for this product ID, what we are looking for is a .msixbundle file with a little over 1 GB, for me it was the last item in the list.
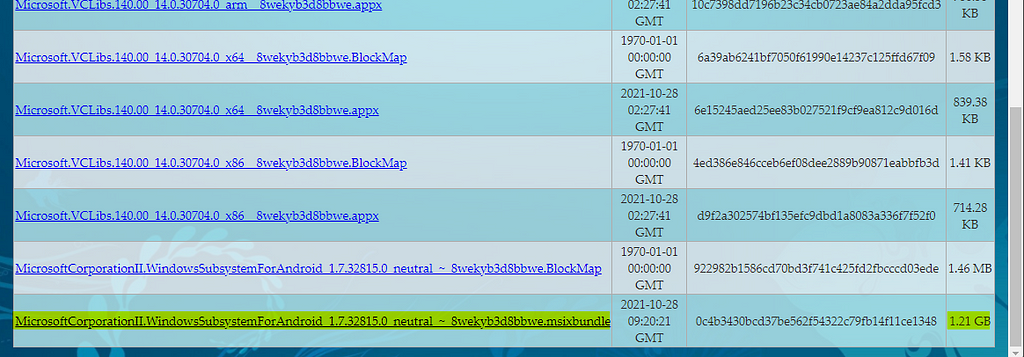
Right-click the file name and select “save as…”, then save it somewhere in your computer.
Now it is time to really install WSA, for that, open PowerShell with admin rights and execute the following command:
Add-AppxPackage -Path <path_to_msixbundle_file>
I saved the file to C:/, so the command for me was Add-AppxPackage -Path C:/MicrosoftCorporationII.WindowsSubsystemForAndroid_1.7.32812.0_neural__8wekyb3d8bbwe.Msixbundle .
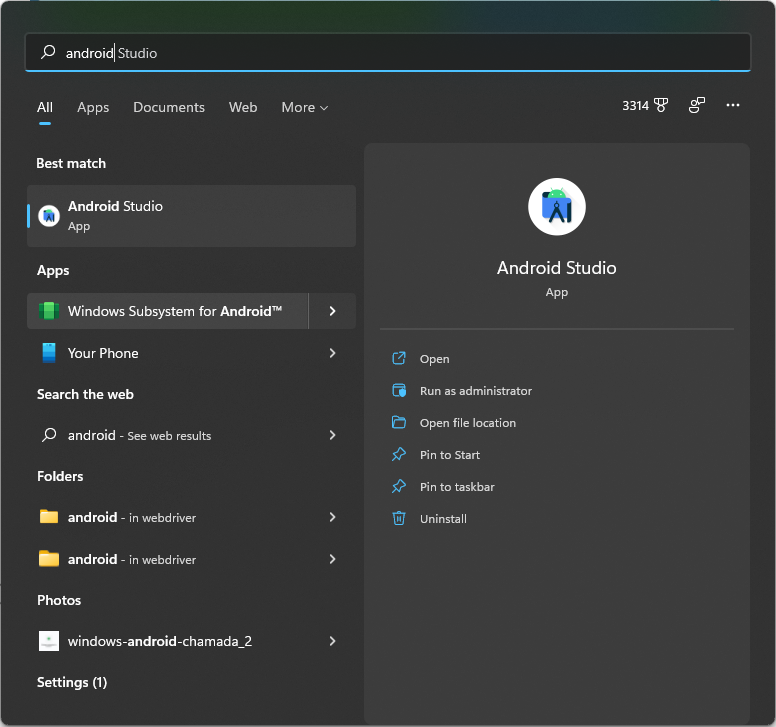
This will install WSA, now restart your computer, and it should appear in your start menu.
Using Windows Subsystem for Android
With WSA finally installed, we can use Android apps within Windows! First, let’s open the “Windows Subsystem for Android™” app and check the settings available here.
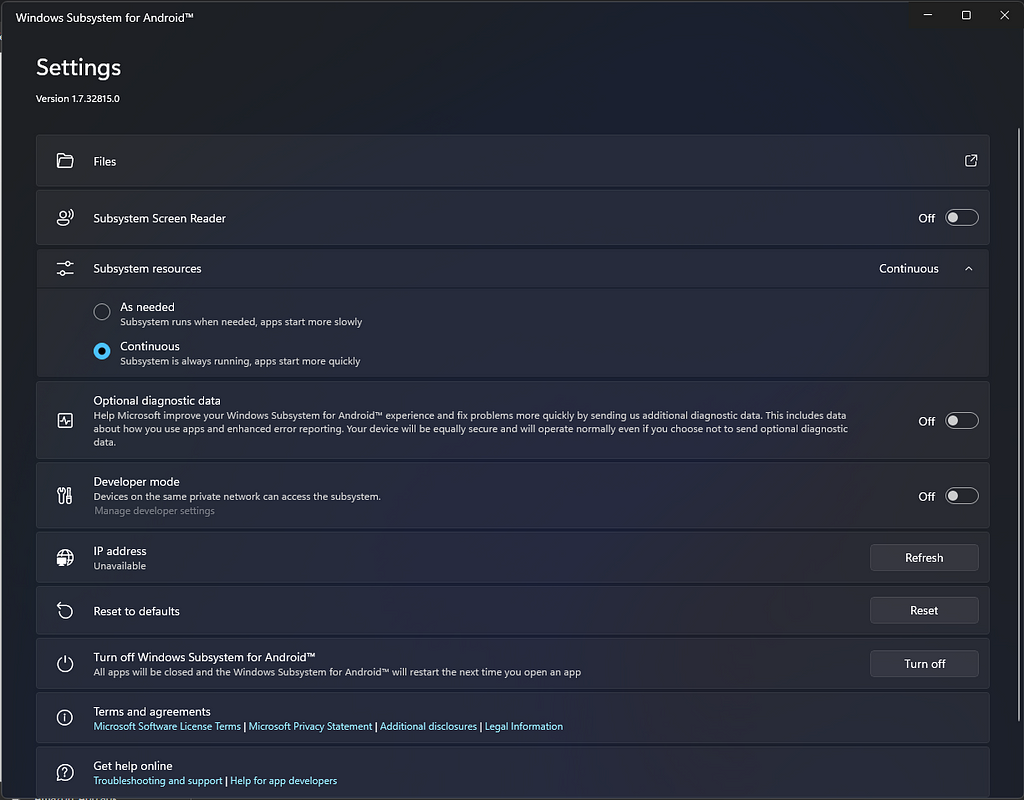
In the settings, you can set the subsystem resources to “continuous” to keep WSA opened all the time or “as needed” to start it every time you open an app and close it afterwards, I recommend using “as needed” since this feature is still in preview, and it will consume both CPU and memory resources (~1Gb of RAM) even if there is no app opened. In the settings you can also open the “Files” app to access the internal file system of WSA, reset to defaults, turn it off and even enable developer mode!
To install apps, you can open the Amazon Appstore, it has been installed with WSA by default, so you can search for it in the start menu, then just log in with your Amazon account and download the apps you want.
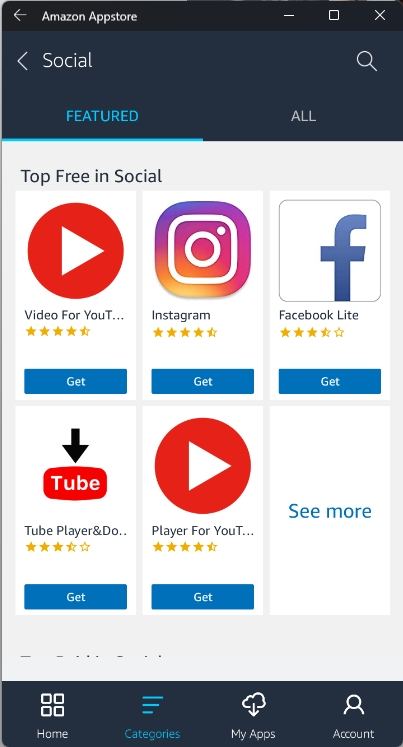
Every app you download will appear in the start menu as if it is a native Windows app, you can even right click them and uninstall directly from Windows!
Windows Subsystem for Android is a really great feature for Windows, and a much-needed one! The new M1 MacBooks can run iOS apps and ChromeOS can run Android apps, so supporting mobile apps on Windows was just a matter of time. WSA is not perfect, it has many glitches and may crash from time to time, but it is a good starting point for this feature, it has a lot of potential for end-users and developers, who can now develop and test apps within windows, with a resizable window and Bluetooth support! I will create a story on how to do it, so follow me if you don’t want to miss it!
Installing Windows Subsystem for Android in Windows 11 was originally published in Level Up Coding on Medium, where people are continuing the conversation by highlighting and responding to this story.
This content originally appeared on Level Up Coding - Medium and was authored by Gabriel Borges
Gabriel Borges | Sciencx (2021-10-29T02:49:58+00:00) Installing Windows Subsystem for Android in Windows 11. Retrieved from https://www.scien.cx/2021/10/29/installing-windows-subsystem-for-android-in-windows-11/
Please log in to upload a file.
There are no updates yet.
Click the Upload button above to add an update.
