This content originally appeared on DEV Community and was authored by Shubhendra Singh Chauhan
In this article, you'll learn how to build an explorer app that lets you view existing files and upload new files to your AWS S3 bucket.
Overview
We will divide this tutorial into two parts:
- In the first part, we will build the UI of the Explorer app in ToolJet.
- In the second part, we will connect the AWS S3 data source to our app and will create and connect queries to UI components.
💡 ToolJet has a feature to import apps from the dashboard. I have exported the source code of the Explorer app into the JSON file and you can use this file to import the app into your ToolJet account.
Check out the source code here .
Prerequisites
- AWS account with S3 service activated and having at least one bucket with some objects(any type of file).
- At least one IAM user with Access key - Programmatic access enabled. Learn to create one here.
- ToolJet (https://github.com/ToolJet/ToolJet): It is a free and open-source, low-code platform that allows you to quickly build tools.
Building the Explorer UI
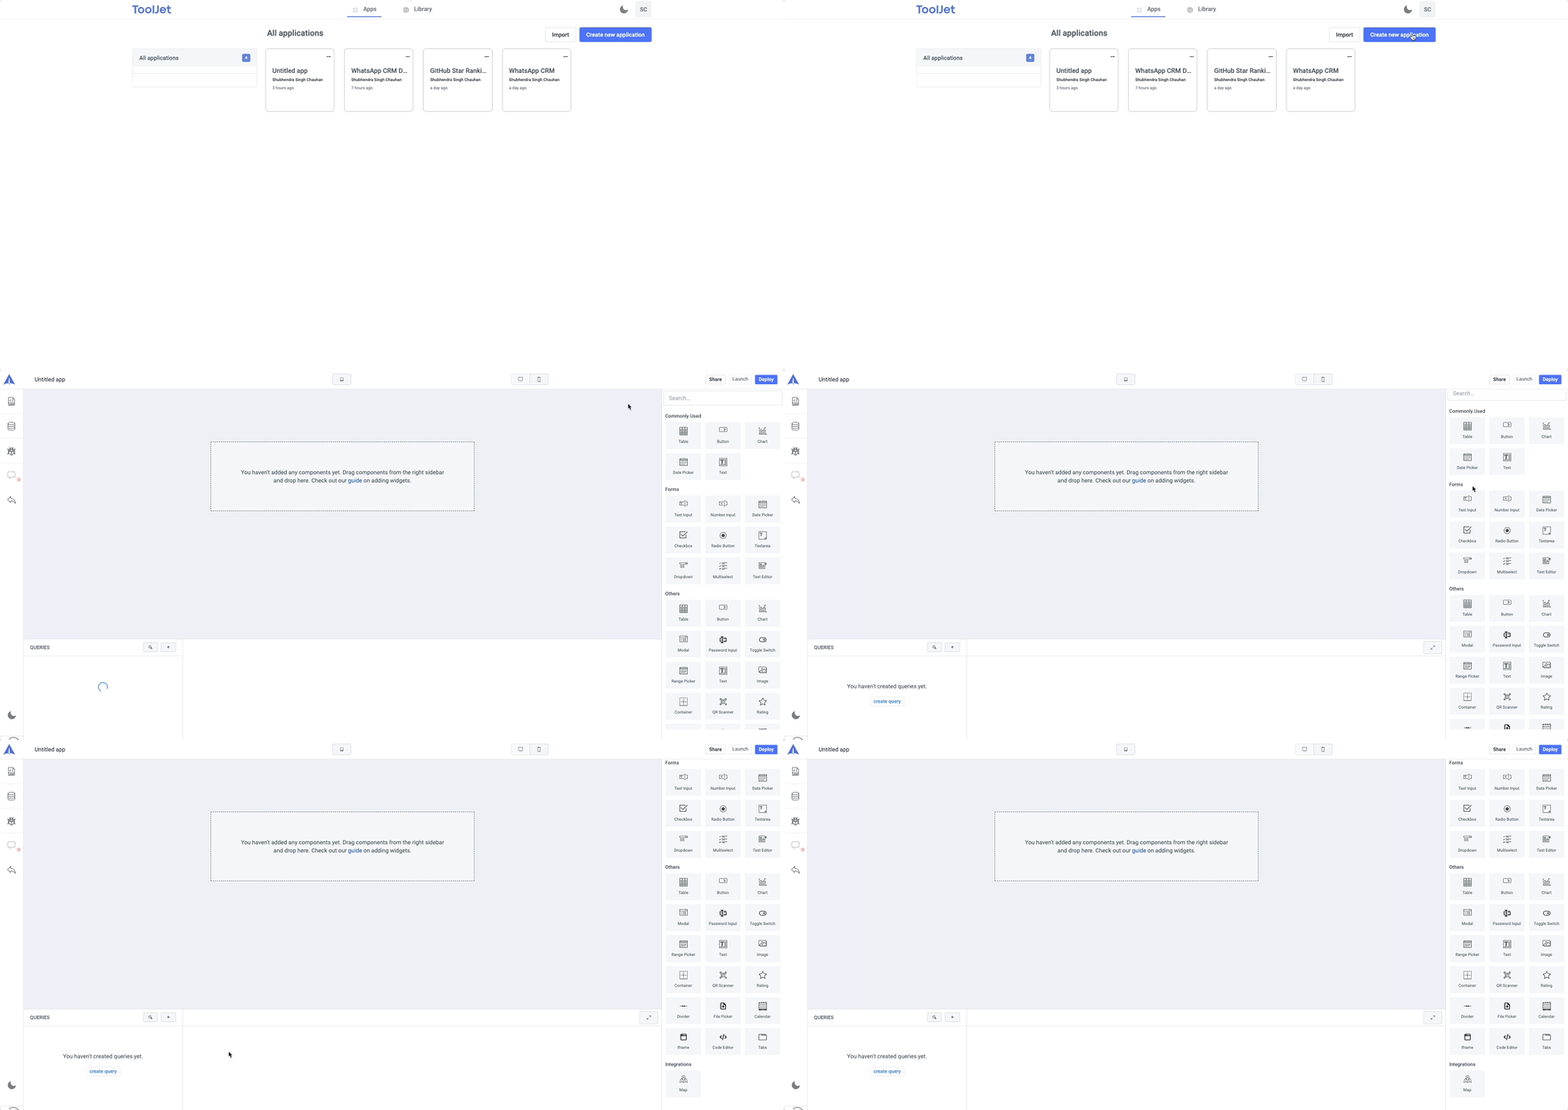
Let's start with building the UI for Explorer. Login to the ToolJet and then on the dashboard, click on the Create new application button to create a new app. Once the app has been created, you will be redirected to the visual app editor. You can change the name of the app by editing the default name i.e Untitled app from the top left of the app builder.
Visual app editor has 4 divisions:
- At the center is the App builder, where you'll build the UI of the app.
- At the bottom is the Query editor, where you'll be creating queries.
- On the right sidebar, you'll find Widget Manager that has a list of built-in widgets and components. You can drag and drop to start laying out your user interface.
- On the left sidebar, you'll see the Datasource manager. From here, you can add a new datasource or edit an existing datasource.
Let's build the UI
To build the UI, you’ll need to drag and drop the following components from the Widget Manager(at the left sidebar) and place them accordingly.
Here is my version configuration of components for building the UI:
- A Container as header and Text widget, to give a title to the app i.e AWS S3 File Explorer
- A Dropdown widget, that we will be connected to a query to list the buckets
- A Button, that will have an on-click action set to list all the files from the selected bucket in the dropdown.
- A Table, that will list all the contents of the selected bucket in the dropdown.
- Another Container, that will have nested components like a Text box, File Picker, and a Button. This will be used to upload the file to the selected bucket.
💡 See the documentation to learn more about customizing the widgets and making the UI more beautiful. ✨
Connecting to AWS S3
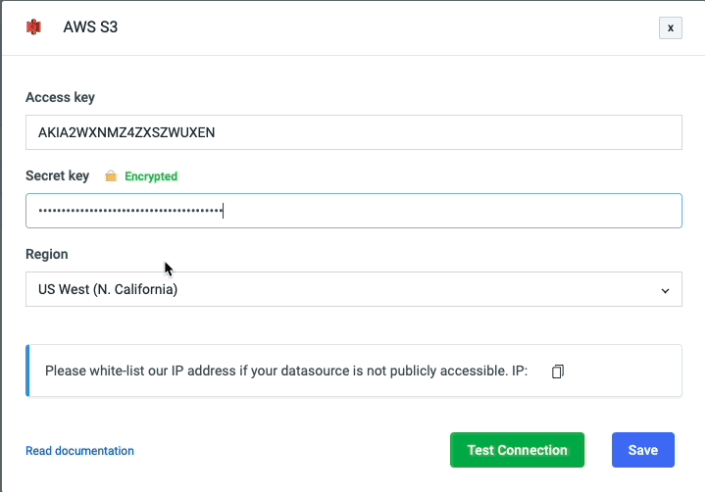
Now that we have built the UI of our app, let's connect the datasource to our app. Go to the Datasource manager on the left sidebar and click on Add datasource. ToolJet offers integrations for several datasources such as Airtable, Elasticsearch, Cloud Firestore, REST API, GraphQL, etc. We will select AWS S3 from the datasource dialog window.
The AWS S3 datasource requires the following information to establish a connection:
- Access Key ID
- Secret Key
- Region: AWS service region.
Learn how to fetch the Access Key and Secret Key from the following guide: Generate AWS access key & secret
Once you have entered the required information, click on Test Connection to check if the connection is established or failed. Then Save the datasource.
Creating Queries
Now that we have successfully connected the AWS datasource let's move on to create queries. Queries will perform actions such as reading the files and buckets from S3 and uploading files to a bucket.
For the Explorer app, we will need three queries:
1. A query to fetch the list of all buckets.
2. A query to fetch all the objects in the bucket selected by the user.
3. A query to upload the file from the local machine to the bucket selected by the user.
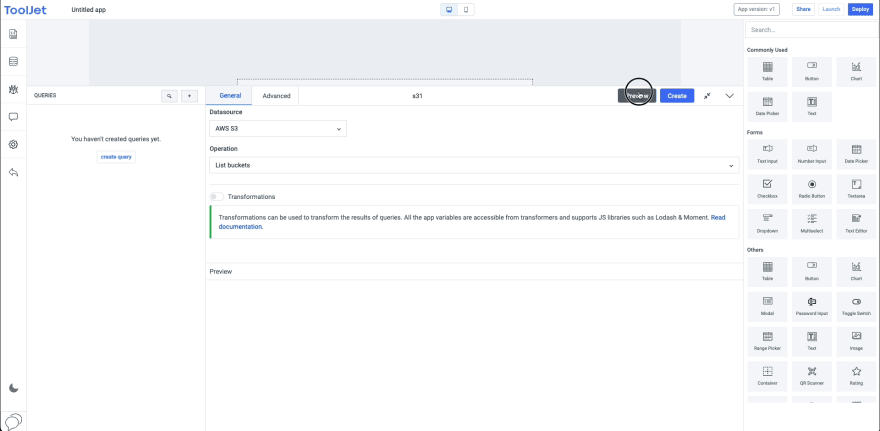
1. Let’s build the first query to fetch the list of buckets:
- Go to the Query Editor and click on the
+button to add a new query. - Select the datasource as AWS S3 from the dropdown.
- From the Operation dropdown, select List buckets.
- Rename this query as
getBucketsfrom the center of the query editor - Go to the Advanced tab of the Query Editor, and toggle the
Run this query on page load?this will allow this query to run when the app is published. - Now click on the Save button to save our first query.
💡 Click on the Preview button on the top right of the Query Editor to verify the results of the query. You’ll get the results in the Preview section of Query Editor.
Connecting our first query to the dropdown widget
- Click on the Dropdown widget open the Inspect Panel on the right sidebar.
- We will now link the query to update the Option values and Option labels. We will enter
{{queries.getBuckets.data.Buckets.map(bucket => bucket['Name'])}}, here we are fetching thedatafrom thegetBucketsquery (i.e our first query) and we are using themapfunction to create an array ofName. - Run the query from the sidebar in Query Editor and you’ll see that the dropdown now includes the list of buckets from your S3.
💡 ToolJet will auto-suggest your queries and let you simply select the one you want.
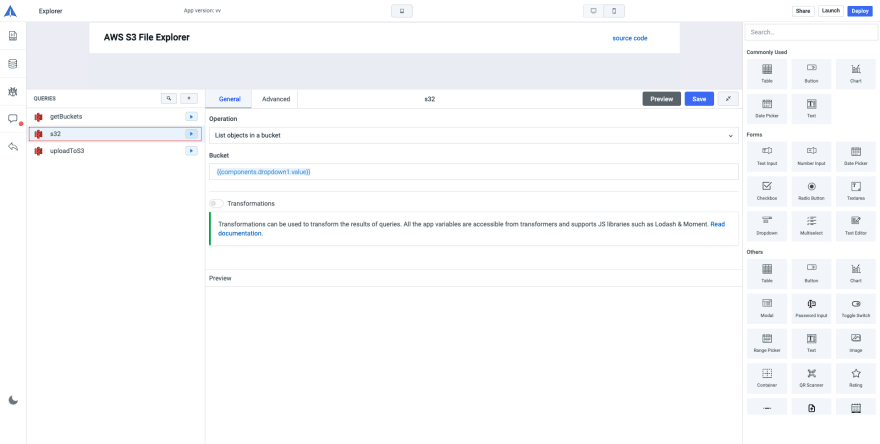
2. Let’s build the second query to fetch the list of objects in the selected bucket:
- Create a new query from the query editor.
- From the Operations dropdown, select
List objects in a bucket. - In the bucket field, enter
{{components.dropdown1.value}}- here we are getting thevalue(i.e. the selected bucket) from thedropdown1(i.e. the dropdown widget) - Now click on the Save button to save our second query.
Connecting our second query to the Table:
- Click on the Table to open the inspect panel on the right sidebar.
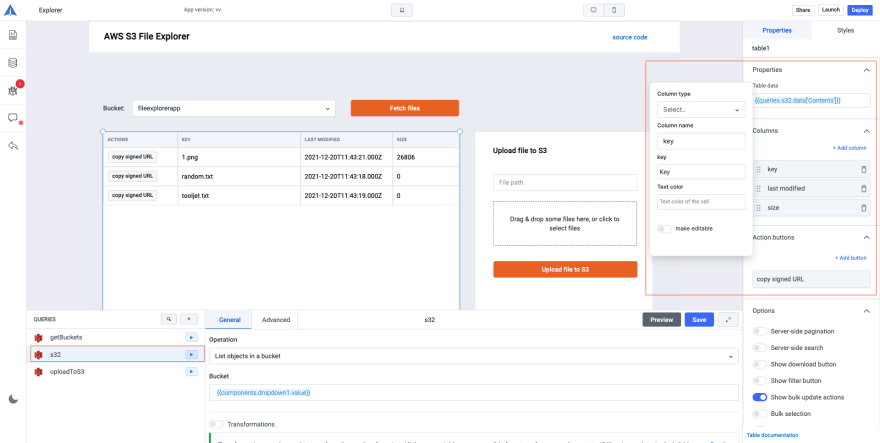
- We will want the table to reference the data fetched from the query, so in the Table data property, we will enter
{{queries.s32.data['Contents']}}- hereq32is the query that we created, and the content objects fetched are stored indata. - Now add appropriate columns to our table and add properties to them:
-
Key: A key is a unique identifier for an object within a bucket. Every object in a bucket has exactly one key. In the
Namefield of this column enter Key and in theKeyfield enter Key. -
Last modified: Every object in a bucket has a few default metadata including the date and time an object was last modified, size of object, etc. We will create a column for this and will Name it
Last Modifiedand will enter Key asLastModified. -
Size: In the Name field enter
Sizeand in the Key field enterSize.
-
Key: A key is a unique identifier for an object within a bucket. Every object in a bucket has exactly one key. In the
Now let's build the last query to upload file to the selected bucket:
1. Add a new query from the query editor and name it uploadToS3
2. From the Operations dropdown, select Upload object.
3. In the Bucket field enter {{components.dropdown1.value}} to get the value (i.e. the selected bucket) from the dropdown1 (i.e. the dropdown widget).
4. In the Key field enter {{ components.textinput1.value + '/'+ components.filepicker1.file[0].name}} to get the value i.e. the File Path from the text box and the key(Name) of the object from the File Picker.
5. In the Content type enter {{components.filepicker1.file[0].type}}
6. In the Upload data field enter {{components.filepicker1.file[0].type}} - here it’s fetching the content i.e. the file or object from the File Picker.
7. Click on Save to save this query.
💡 For this query, we will not toggle on the
Run this query on page load?since this is only required when we want a query to run automatically whenever the app is opened.
Connecting our last query to the file picker:
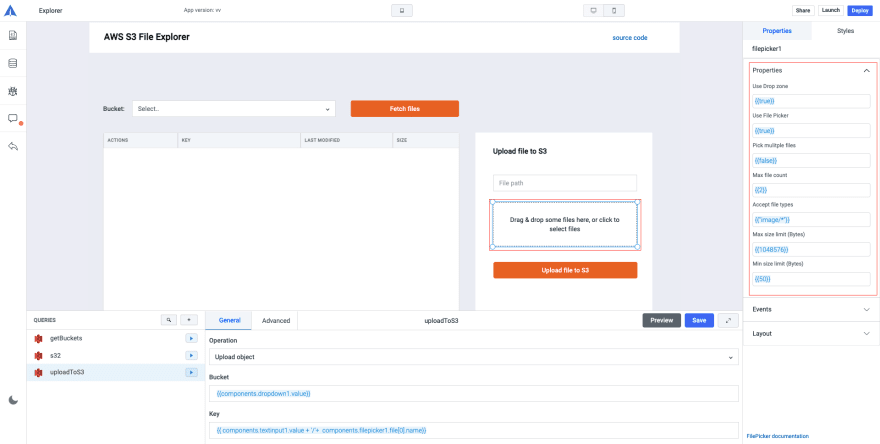
- Click on the File Picker widget to open the Inspect panel on the right sidebar.
- We will use the File Picker with its default properties. We’re using Images as the default Accept file type. You can change according to your needs. Learn more about its properties here.
- Now, let’s drag and drop an image file to the file picker or click on the file picker to open the window and choose an image file.
Now that we have connected our queries, let’s add events to our buttons:
-
Fetch Files(Button1)
- Click on the button to Open the Inspect panel.
- Change the button text to Fetch Files or whatever looks good to you.
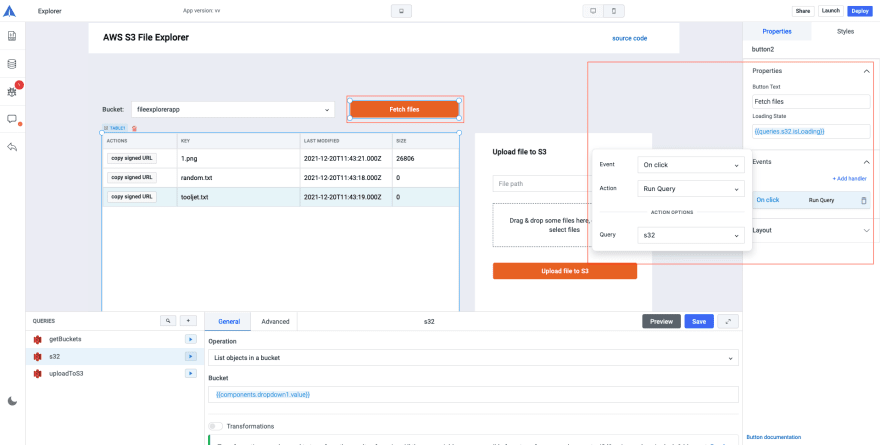
- In the Loading State field add
{{queries.s32.isLoading}}. The loading state shows a loading skeleton for the button.isLoadingproperty to get the status of the query. - In the Events section, click on
Add a handler. - In the Event dropdown select
On click, In Action dropdown selectRun query, and in Query dropdown selects32. Now, we have set up the fetch files button to successfully get the list of objects from the bucket and display it on the table. 🎉
-
Upload files(Button2)
- Click on the button to Open the Inspect panel.
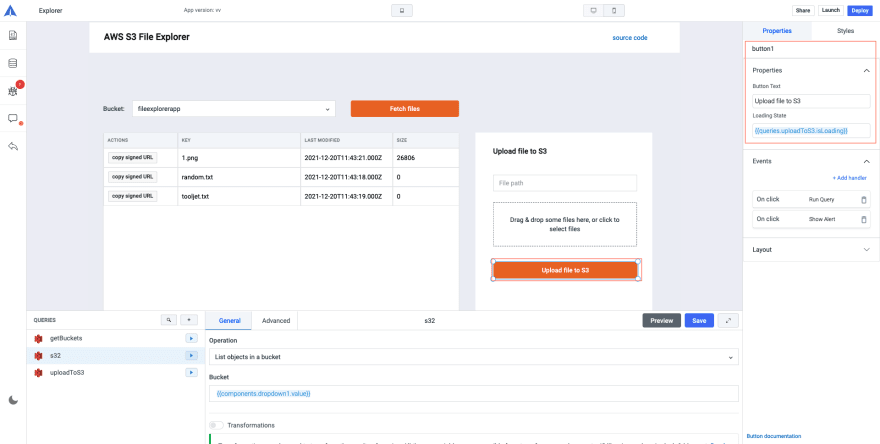
- Change the button text to Upload Files.
- In the Loading State field add
{{queries.uploadToS3.isLoading}}. - For this button, we will add two event handlers- one to run the
uploadToS3query and the second to show an upload successful alert. - For the first event handler, select
On clickEvent,Run QueryAction, and chooseuploadToS3query from Query dropdown. - For the second one, Choose
On clickEvent,Show alertAction,Successas Alert type, and enter theUpload successfulas the Message.
Now, we have successfully set up our second button to run the query to upload the file from the file picker.
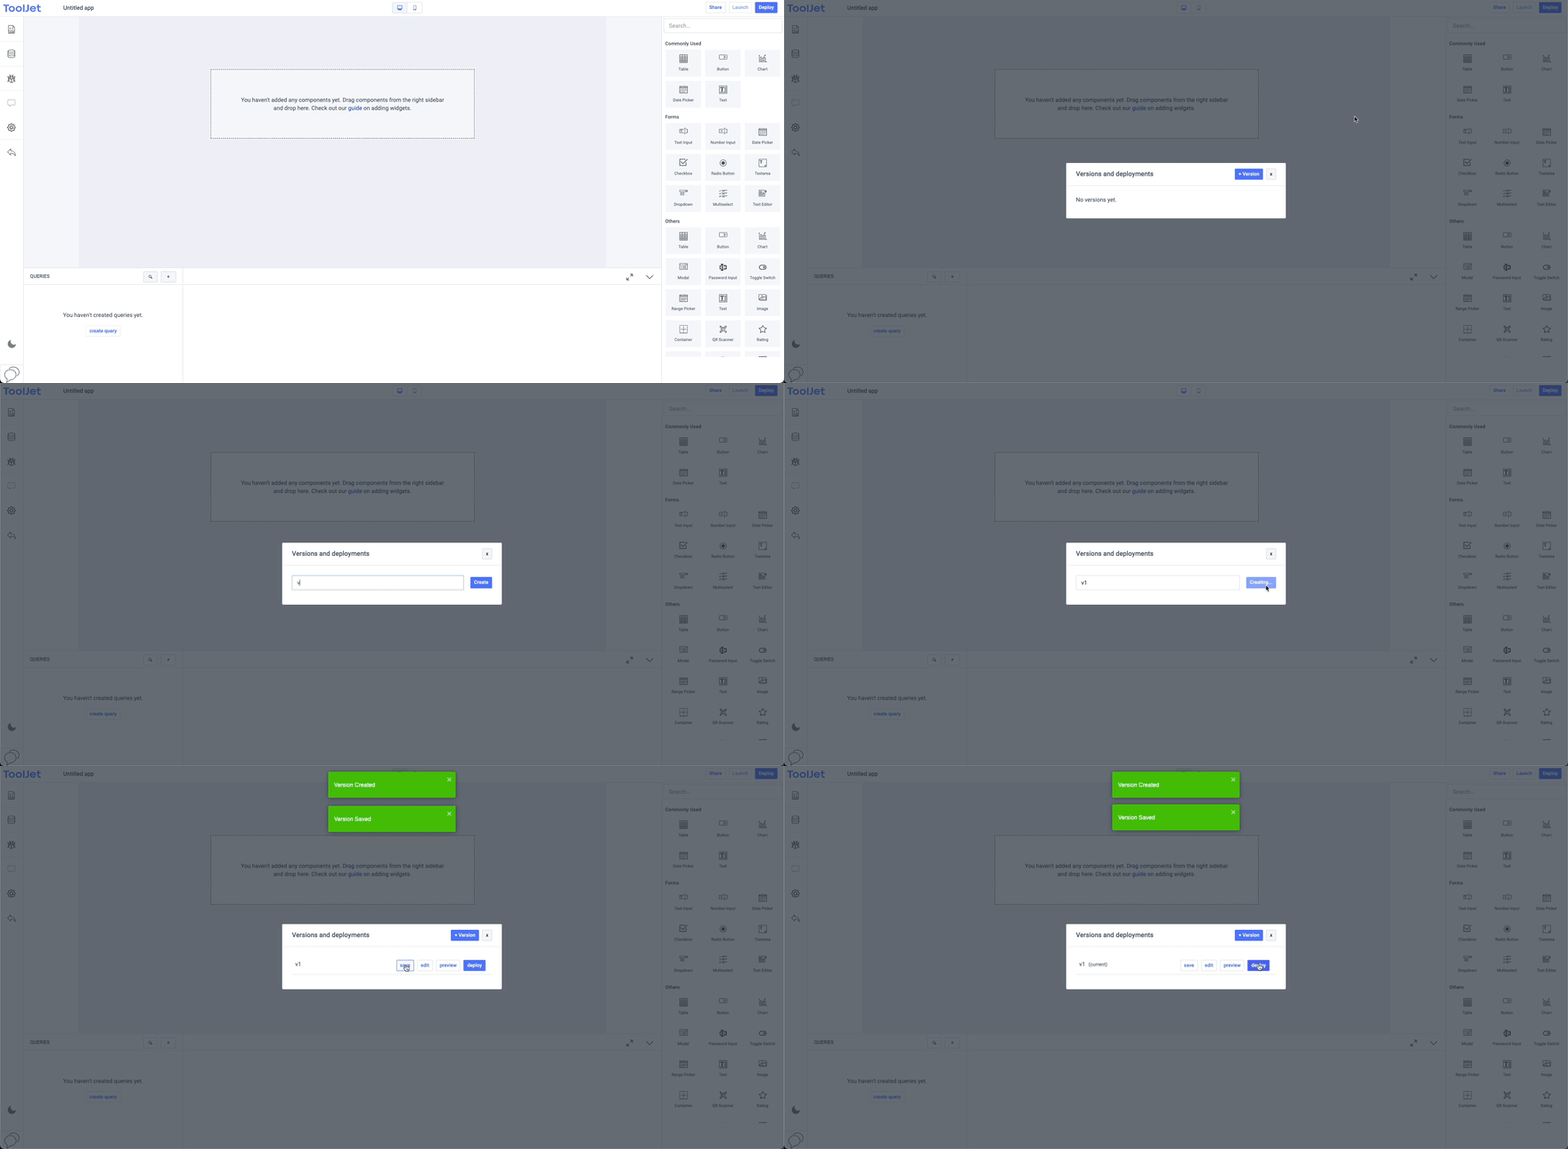
Let's make the app live
To do this just click on the Deploy button on the top-right corner. On the dialog box:
- Click on the +Version button to create a version of the app
- Click on the Save button to save the progress and then click on the Deploy button to deploy on the server
And voila! You’ve just built an app to view and upload files directly to your S3 bucket using low-code. 🎉
This content originally appeared on DEV Community and was authored by Shubhendra Singh Chauhan
Shubhendra Singh Chauhan | Sciencx (2021-12-22T12:36:50+00:00) Building an AWS S3 file explorer app within 30 minutes using ToolJet. Retrieved from https://www.scien.cx/2021/12/22/building-an-aws-s3-file-explorer-app-within-30-minutes-using-tooljet/
Please log in to upload a file.
There are no updates yet.
Click the Upload button above to add an update.


