This content originally appeared on DEV Community and was authored by Yann IRBAH
This is the first part of a multi-part tutorial:
- PART 1: Presentation and project setup
In the past few years, we saw the rise of an "EverythingOps" trend: DevOps, ChatOps, GitOps, AIOps ...
At the same time, Notion has become one of the most popular productivity tools. From knowledge base to CRM, the possibilities seem endless.
On the other hand, PaaS are evolving, and a new generation of developers platforms is emerging, like Qovery.
So what if we could manage our applications deployments directly from Notion, using Qovery?
The Project
Notion released their API last year, opening the door to a wide range of new possibilities. Since they did, I started thinking about all the fun things I could do with it. (Yes, Notion has become an un-productivity tool to me).
On the other hand, I also have an unhealthy obsession with Kubernetes and cloud platforms.
Since Qovery has a pretty powerful API, allowing us to quickly automate applications deployment on Kubernetes, I was curious to see how far we could integrate both.
This tutorial will show you how to integrate Qovery and Notion to directly manage application deployments on a Kubernetes cluster from our Notion workspace and see how far we can go.
So if you would like to be part of the next big thing, a.k.a. NotionOps, follow me, and let's do it.
Will it be useful? Probably not, but you will still learn things about Notion and Qovery APIs.
Will it be fun? Absolutely!
Prerequisites
To follow along with this tutorial, you will need:
- A Qovery account with a cluster ready and some familiarities with Qovery
- The Qovery CLI installed on your machine
- A Notion account and some familiarities with Notion
- Node.js 16 + yarn
Project Setup
Let's first create a simple Node project:
mkdir notion-ops
cd notion-ops
yarn init
You can leave the default and press enter for all the options.
Create an index.js file at the root of the project, with the following content:
console.log("Hello World!");
Now edit your package.json file, and add a script to launch your program with yarn. It should look like the following:
{
  "name": "notion-ops",
  "version": "1.0.0",
  "main": "index.js",
  "license": "MIT",
  "dependencies": {},
  "devDependencies": {},
  "scripts": {
    "start": "node index"
  },
}
Run the following command:
yarn index
If you see the greeting message, the setup is done.
Now let's get to the exciting stuff.
Connect to the Qovery API
Get a Qovery API token
The first thing we need to do is connect to the Qovery API.
You can find the API documentation here: https://api-doc.qovery.com
The first thing we'll need to do is grab an API token. At the time of writing, the only way to get an API token is through the API itself. It will be added to the console soon.
First, grab your temporary token the following way:
qovery auth
cat ~/.qovery/context.json | jq -r .access_token
If you don't have jq installed, you should because it's a handy tool to manipulate JSON. Otherwise, you can just skip the | jq part and copy the access_token from the JSON output.
Now you need to get your Qovery organization ID. Go to the Qovery console and copy it from the URL in your browser. It will look something like this:
https://console.qovery.com/platform/organization/<ORGANIZATION_ID>/...
The token you got previously expires quickly. Unless you want to refresh it every hour, it's better to get a longer-lived API token:
export QOVERY_TOKEN=<YOUR_TEMPORARY_TOKEN>
export QOVERY_ORGANIZATION=<YOUR_ORGANIZATION_ID>

curl -v -X POST -H "Content-Type: application/json" \
  -H "Authorization: Bearer $QOVERY_TOKEN" \
   https://api.qovery.com/organization/$QOVERY_ORGANIZATION/apiToken
You should get a JWT token out of this call.
Prepare to make API calls
We'll use axios to make API calls. Add it to your project dependencies:
yarn add axios
Since we don't want to hardcode our API token and other settings, we'll use environment variables instead, using dotenv:
yarn add dotenv
Finally, create a .env file at the root of your project, with the following content:
QOVERY_API_TOKEN=<YOUR_API_TOKEN>
QOVERY_ORGANIZATION_ID=<YOUR_ORGANIZATION_ID>
Query the Qovery API
Now we are ready to call the Qovery API from our Node application. We will implement a simple call to get all the projects in our organization. If you've got none, you should create one.
At this point, it doesn't need to have environments and applications.
Add an src/apis folder at the root of your projects, and create a qovery.js file:
const axios = require('axios');

const qoveryAPIToken = process.env.QOVERY_API_TOKEN;
const qoveryOrganizationID = process.env.QOVERY_ORGANIZATION_ID;

const qoveryClient = axios.create({
  baseURL: 'https://api.qovery.com',
  headers: {'Authorization': 'Bearer ' + qoveryAPIToken}
});

exports.listProjects = async () => {
  const res = await qoveryClient.get(`/organization/${qoveryOrganizationID}/project`);

  return res.data.results.map(({id, name, description}) =>(
    {
      id,
      name,
      description
    }
  ));
}
We'll put all the calls to the Qovery API in this file.
We first require axios, the library we'll use to make HTTP requests to the API.
- Then, we read the values we defined in our
.envfile. - We initialize an HTTP client with basic settings to query the API.
- Finally, we export a method for reading projects from the Qovery API, and we filter only the keys we are interested in before returning the result.
Edit your index.js file so it looks like this:
require("dotenv").config();
const qoveryClient = require("./src/apis/qovery");

qoveryClient.listProjects()
  .then((projects) => console.log("QOVERY PROJECTS:", projects))
  .catch((e) => console.log("ERROR:", e.message));
- The first line requires
dotenvand loads the content of the.envfiles into the environment, so we can access the variables usingprocess.env.MY_VARIABLE - We call our
listProjects()function and log the results.
Run your yarn start script, you should get an output similar to this one:
QOVERY PROJECTS: [
  {
    id: '5c006cc1-f14e-46bf-955b-87b976a9bb14',
    name: 'My Project',
    description: 'A sample Qovery project'
  }
]
Congratulation, you can query the Qovery API.
Connect to the Notion API
Now it's time to connect to the Notion API. The process is a little more involved but fear not, it's still quite easy.
Create a Notion integration
- Go to https://www.notion.so/my-integrations.
- Click on
New integration. - Give it a meaningful name like
NotionOps With Qovery. - Select the workspace you would like this integration to take place in. You must have the right to add integrations to this workspace.
- You can leave the defaults for the
Content capabilitiesand selectNo user informationforUser capabilitiessince we won't need them.
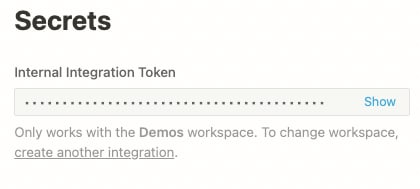
Click Submit. You will be redirected to your integration page. Copy the secret token and add it to your .env file.
QOVERY_API_TOKEN=<YOUR_API_TOKEN>
QOVERY_ORGANIZATION_ID=<YOUR_ORGANIZATION_ID>
NOTION_INTEGRATION_TOKEN=<YOUR_NOTION_INTEGRATION_TOKEN>
Create a Notion page and share it with the integration
Next, we'll create a sample page to test our Notion integration. Create a new page at the root of your workspace and name it NotionOps.
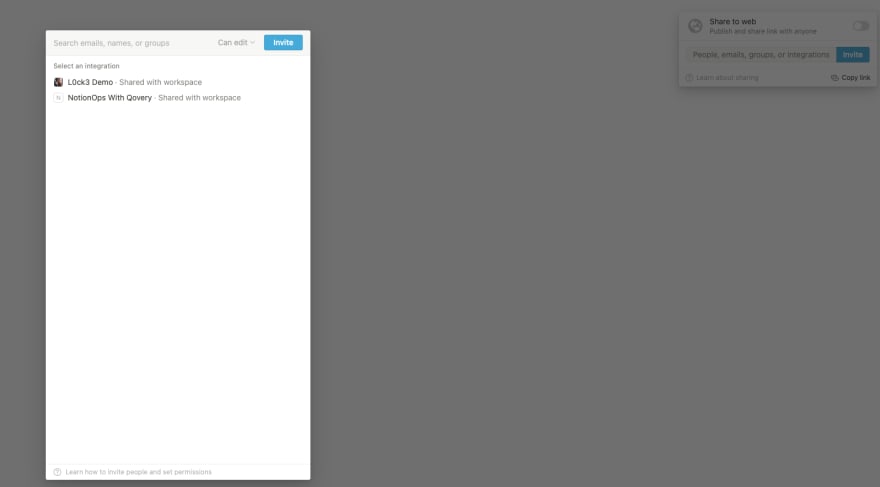
On the top right corner of your page, click on the Share button, and share the page with your integration.
We'll also need the ID of the page. Click on Share then Copy link. You should get something like this: https://www.notion.so/<YOUR_WORKSPACE>/NotionOps-<PAGE_ID>.
Add the <PAGE_ID> part to your .env file:
QOVERY_API_TOKEN=<YOUR_API_TOKEN>
QOVERY_ORGANIZATION_ID=<YOUR_ORGANIZATION_ID>
NOTION_INTEGRATION_TOKEN=<YOUR_NOTION_INTEGRATION_TOKEN>
NOTION_PAGE_ID=<YOUR_NOTION_PAGE_ID>
It should be good. Let's write some code now.
Query the Notion API
You can find the API documentation for Notion here: https://developers.notion.com/reference/intro
Notion offers a JavaScript SDK to make our lives easier. Let's add it to our project:
yarn add @notionhq/client
Like we did for the Qovery API, add a new src/apis/notion.js file:
const { Client } = require("@notionhq/client");

const notion = new Client({ auth: process.env.NOTION_INTEGRATION_TOKEN });
const notionPageID = process.env.NOTION_PAGE_ID;

exports.getNotionPage = async () => {
  const response = await notion.pages.retrieve({ page_id: notionPageID });

  return response;
}
- Require the Client from the Notion SDK.
- Initialise the client with our integration token.
- Export a function retrieving our page via the Notion API.
Edit the index.js file to call this new function:
require("dotenv").config();

const qoveryClient = require("./src/apis/qovery");
const notionClient = require("./src/apis/notion");

qoveryClient.listProjects()
  .then((projects) => console.log("QOVERY PROJECTS:", projects))
  .catch((e) => console.log("ERROR", e.message));

notionClient.getPage()
  .then((page) => console.log("NOTION PAGE:", page))
  .catch((e) => console.log("ERROR", e.message));
Rerun your program with yarn start. You should get an output similar to this one:
QOVERY PROJECTS: [
  {
    id: '5c006cc1-f14e-46bf-955b-87b976a9bb14',
    name: 'Demo Rails',
    description: ''
  }
]
NOTION PAGE: {
  object: 'page',
  id: 'fb7ac97a-4783-4b2f-91b4-9b0b3ddefce0',
  created_time: '2022-02-11T16:02:00.000Z',
  last_edited_time: '2022-02-11T16:22:00.000Z',
  cover: null,
  icon: null,
  parent: { type: 'workspace', workspace: true },
  archived: false,
  properties: { title: { id: 'title', type: 'title', title: [Array] } },
  url: 'https://www.notion.so/NotionOps-fb7ac97a47834b2f91b49b0b3ddefce0'
}
Conclusion
Congratulations, you now have successfully connected to both Notion and Qovery APIs.
In the next part of this tutorial, we'll read from the Qovery API to automatically create a dashboard in Notion, showing our projects, environments, and application with their running statuses. Stay tuned!
This content originally appeared on DEV Community and was authored by Yann IRBAH
Yann IRBAH | Sciencx (2022-02-14T13:46:01+00:00) NotionOps – Part 1: Presentation and project setup. Retrieved from https://www.scien.cx/2022/02/14/notionops-part-1-presentation-and-project-setup/
Please log in to upload a file.
There are no updates yet.
Click the Upload button above to add an update.


