This content originally appeared on DEV Community and was authored by DEV Community
Note: This is a really long article. If you prefer video and want to build this along with me, you can watch a recording on YouTube. I also uploaded the code to Github.
There's nothing like building a simple, run-of-the-mill to-do list when learning a new framework. It teaches you the basics of creating, reading, updating, and deleting data from various levels of the technology stack, including the front-end, back-end, and database.
This post explains how to build such a list using the new Hotwire and Stimulus frameworks from Basecamp. We will start with a new Rails app from scratch and learn about Hotwire and Stimulus as we build our list.
I am also going to use Tailwind to style our app, but it's not a requirement and the code examples should still work without it. But, if you haven't worked with Tailwind, I highly recommend that you give it a try.
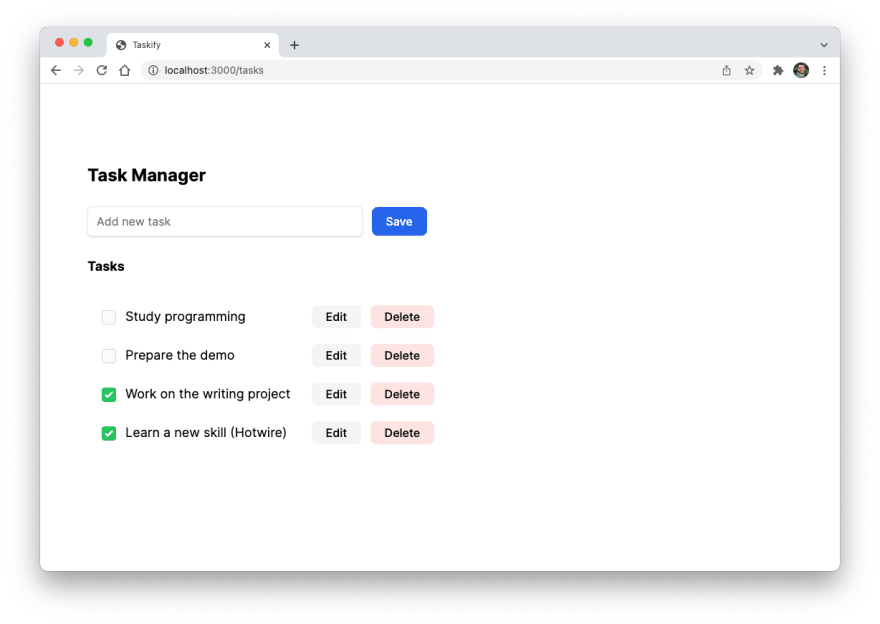
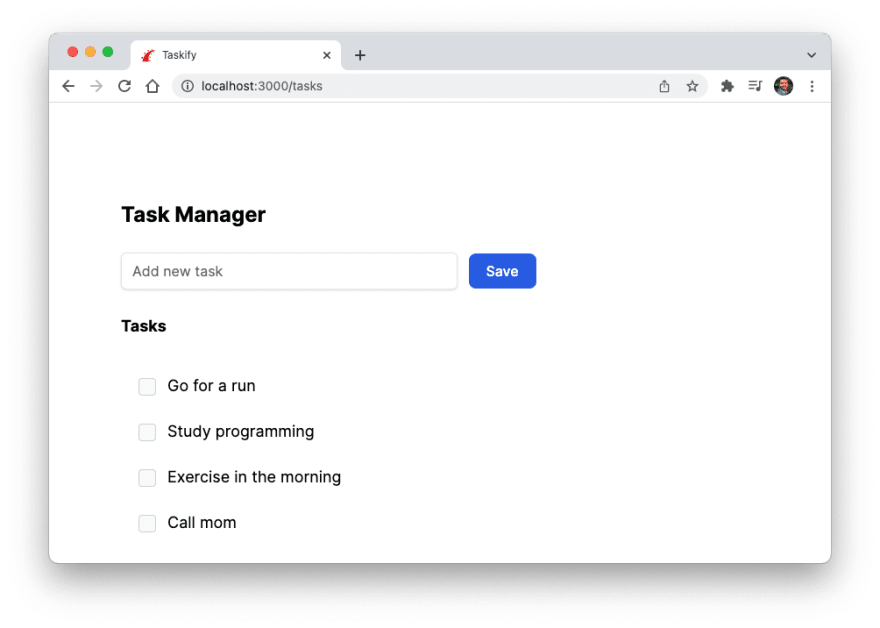
Before we start coding, this is a quick preview of what we are going to build. It's a simple CRUD application. You can add new tasks, edit existing ones, delete a task, and also complete them.
I'll assume that you have installed the required dependencies for building a Rails app. If not, just follow the getting started guide and you should be all set. For this application, I will use the following stack:
- Ruby on Rails
- Hotwire (Turbo Drive + Stimulus)
- Sqlite
- Tailwind CSS
With that out of the way, let's start by creating a new Rails app.
Step 1: Create a new Rails application
Run the following command to create a new Rails application in a new terminal window. I will call my app taskify.
➜ rails new taskify
➜ cd taskify
Open the app in your favorite editor. I will use Rubymine.
➜ mine .
Let's run the app to make sure everything is set up correctly. Use the following command to start the server and visit the https://localhost:3000 URL to see your app.
➜ bin/rails server
If everything works, Rails should greet you with the following screen.
Step 2: Install Tailwind
Now you could build this task manager without Tailwind, just using plain CSS, but since I started learning Tailwind, I've gotten fond of it and like to use it in all my projects. If you don't want to use it (I highly suggest that you give it a try), the rest of the tutorial should still work for you.
First, install the tailwindcss-rails gem that makes the setup painless.
➜ bin/bundle add tailwindcss-rails
Then run the Tailwind installer, which will set up Tailwind for you, additionally setting up the foreman, which makes running the Tailwind very easy. For more details, check out my post on Foreman.
➜ bin/rails tailwindcss:install
The next step is to configure the template paths in the config/tailwind.config.js file. Tailwind watches these files to generate the final CSS. However, the tailwindcss-rails gem does it automatically for you, also setting the tailwind directives in the application.tailwind.css file.
module.exports = {
  content: [
    './app/helpers/**/*.rb',
    './app/javascript/**/*.js',
    './app/views/**/*',
  ],
  theme: {
    extend: {},
  },
  plugins: [],
}
Finally, launch the Foreman script that will launch the Rails server and the Tailwind CLI to watch for changes in your HTML or ERB files and generate the CSS.
➜ bin/dev
19:25:54 web.1  | started with pid 29201
19:25:54 css.1  | started with pid 29202
Note: Make sure you've already stopped the Rails app using ctrl + c that you launched earlier. Otherwise, the following command will throw an error saying "a server is already running".
If everything worked, you should still be greeted by the Rail logo if you reload your browser. We are now ready to start building our task manager.
Step 3: Create the Task resource
Now, we could take the easy way out and generate a rails scaffold instead of a resource, which will set up everything for us, including the routes, controller actions, views, style, etc. But we want to really learn how to build this task manager step-by-step, so we will take the long route. However, I promise that you will learn a lot in the process.
We need a Task model for our task manager, which has description and completed attributes. So let's generate the Task resource using the rails generate resource command. This command creates an empty model, controller, and migration to create the tasks table.
➜ bin/rails generate resource task description:string{200} completed:boolean
A resource is any object that you want users to be able to access via URI and perform CRUD (or some subset thereof) operations on can be thought of as a resource. source
Running this command will create a 20220212031029_create_tasks.rb migration file under the db/migrate directory. The exact name will be different as Rails uses the timestamp to generate the name of the migration file.
This file should have the following content.
class CreateTasks < ActiveRecord::Migration[7.0]
  def change
    create_table :tasks do |t|
      t.string :description, limit: 200
      t.boolean :completed

      t.timestamps
    end
  end
end
Let's run the migration to create the tasks table.
➜  bin/rails db:migrate
== 20220212031029 CreateTasks: migrating ======================================
-- create_table(:tasks)
   -> 0.0021s
== 20220212031029 CreateTasks: migrated (0.0022s) =============================
If you open your SQLite database using a database viewer such as DB Browser, you should see a tasks table in the database.
Step 4: Set up the home route
Next, we will change the routes.rb file to change the home page to the tasks page instead of the Rails welcome page. For this, open the routes.rb file and add the following directive at the top.
Rails.application.routes.draw do
  root "tasks#index"

  resources :tasks
end
Rails recommends to put the root route at the top of config/routes.rb, as it will be matched first, as this is the most popular route of most Rails applications.
Now restart your Rails app, and reload the browser. You should see an error.
Rails throws this error because we haven't created our index action yet. We will do that in the next step.
Step 5: Build the Home (index) Page
In addition to the migration, the generate resource command should have also created an empty TasksController for you.
class TasksController < ApplicationController
end
Let's create our first action that will display all the tasks. In this action, we will fetch all the tasks from the database.
class TasksController < ApplicationController
  def index
    @tasks = Task.all
  end
end
Creating action is not enough. If you reload the page, you should see a different error because we didn't create the template (view) corresponding to this action.
Let's fix that. In the app/views/tasks directory, add a file named index.html.erb.
<h1 class="font-bold text-2xl">Task Manager</h1>
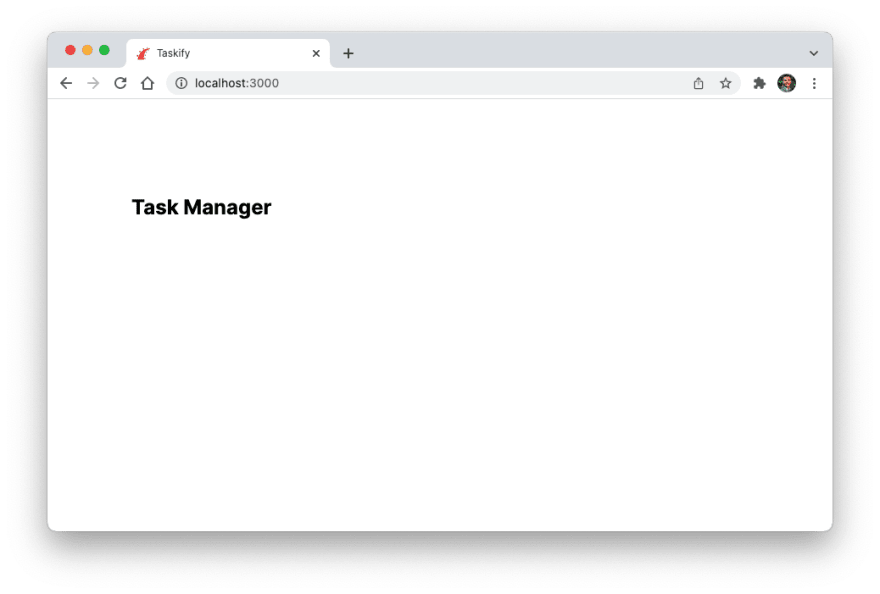
If you reload the browser now, the words "Task Manager" should greet you. If you see something like this, that means Tailwind is working correctly, too.
Step 6: Ability to create new tasks
A task manager without any tasks is boring. So let's add a form using which the users can add new tasks.
Start by creating a new task in the index action on our TasksController. Our form will use this as the default task.
class TasksController < ApplicationController
  def index
    @tasks = Task.all
    @task = Task.new
  end
end
Next, we will create the form partial by adding a _form.html.erb file in the app/views/tasks directory. This form has an input field and a button to submit the task.
<%= form_with(model: task, class: "mb-7") do |form| %>
  <div class="mb-5">
    <%= form.text_field :description, placeholder: "Add new task", class: "inline-block shadow rounded-md border border-gray-200 outline-none px-3 py-2 mt-2 w-96" %>
    <%= form.submit "Save", class: "btn py-2 ml-2 bg-blue-600 text-white" %>
  </div>
<% end %>
Add the following code to the index.html.erb file to display this form partial on the home page.
<h1 class="font-bold text-2xl">Task Manager</h1>

<div class="mt-4">
  <%= render "form", task: @task %>
</div>
Notice that we are rendering the form as a partial, so we can reuse it later, possibly in a separate page that lets users add more details to a task.
Partials allow you to break the rendering process into more manageable chunks. With a partial, you can move the code for rendering a particular piece of a response to its own file.
Finally, add some style in the application.tailwind.css file, so our buttons look good. I've also removed the flex class on my main element in the application.html.erb file to keep things simple.
@tailwind base;
@tailwind components;
@tailwind utilities;

@layer components {
    .btn {
        @apply mt-3 rounded-lg py-1 px-5 inline-block font-medium cursor-pointer;
    }
}
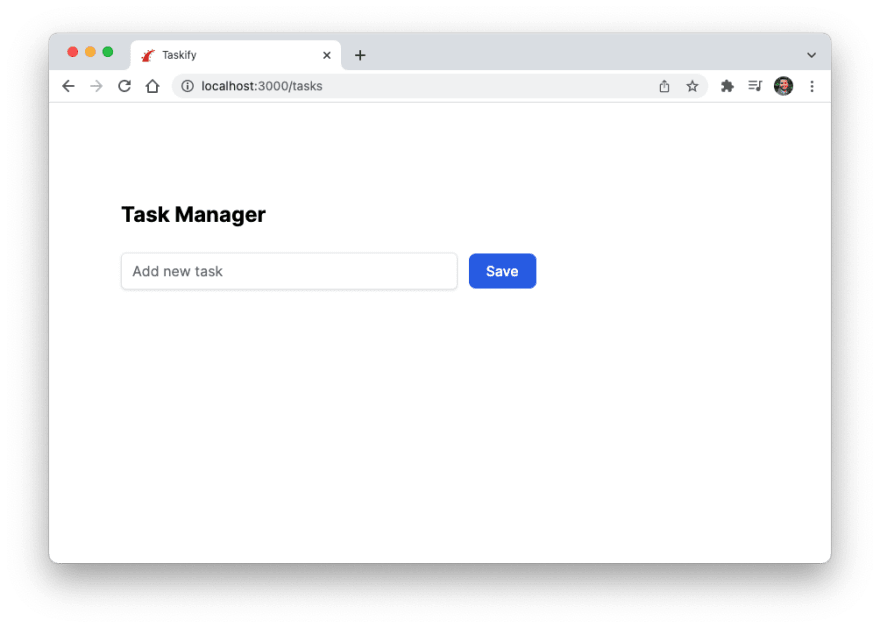
Now reload the page. You should see something like this:
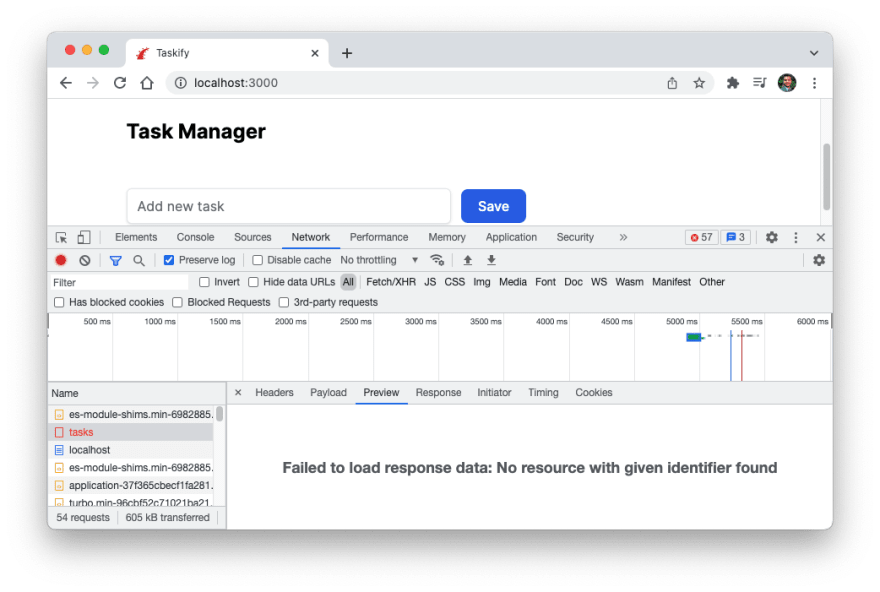
If you add some text and click "Save", the page reloads. However, opening the Devtools shows an error in the networks tab because we are not handling form submissions on the back-end.
Let's fix it by adding a create action on the TasksController.
class TasksController < ApplicationController
  def create
    @task = Task.new(task_params)

    respond_to do |format|
      if @task.save
        format.html { redirect_to tasks_url, notice: "Task was successfully created" }
      else
        format.html { render :new, status: :unprocessable_entity }
      end
    end
  end

  private

  def task_params
    params.require(:task).permit(:description)
  end
end
You might wonder why are we using
task_paramsmethod instead of fetching them directly fromparamshash. This technique allows you to choose which attributes should be permitted for mass updating and thus prevent accidentally exposing that which shouldn't be exposed.
requireis used to mark parameters as required, andpermitis used to set the parameter as permitted and limit which attributes should be allowed for mass updating. source
Finally, update the index.html.erb template to show the notice message at the top.
<% if notice.present? %>
  <p class="py-2 px-3 bg-green-50 mb-5 text-green-500 font-medium rounded-lg inline-block" id="notice">
    <%= notice %>
  </p>
<% end %>

<h1 class="font-bold text-2xl">Task Manager</h1>

<div class="mt-4">
  <%= render "form", task: @task %>
</div>
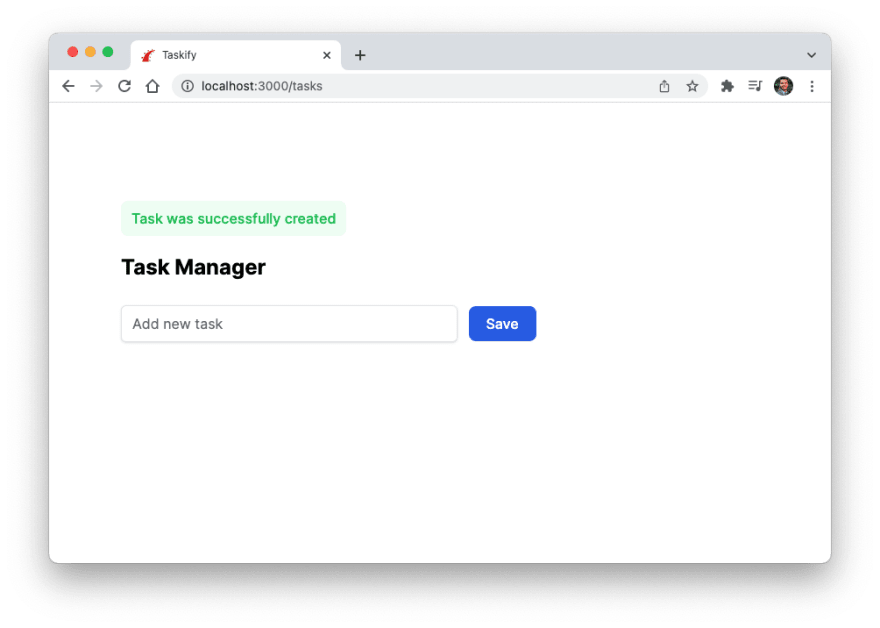
Let's add a new task and hit the Save button. You should see the success message, saying that the task was successfully saved in the database.
But, wait? Where is my task? It's not showing up because we haven't added any code on our view template to display the tasks. Let's fix that by adding the following code (the last div below) in the index.html.erb file.
<% if notice.present? %>
  <p class="py-2 px-3 bg-green-50 mb-5 text-green-500 font-medium rounded-lg inline-block" id="notice">
    <%= notice %>
  </p>
<% end %>

<h1 class="font-bold text-2xl">Task Manager</h1>

<div class="mt-4">
  <%= render "form", task: @task %>
</div>

<div id="tasks">
  <h1 class="font-bold text-lg mb-7">Tasks</h1>

  <div class="px-5">
    <%= render @tasks %>
  </div>
</div>
We are again using the task partial in the <%= render @tasks %> statement, which is a shortcut for looping over each task and rendering the _task partial for that task. Also, remember that we had set the @tasks variable in our index action on the TasksController.
So let's create the _task partial by creating a _task.html.erb file in the app/views/directory.
<div class="block mb-2">
  <%= task.description %>
</div>
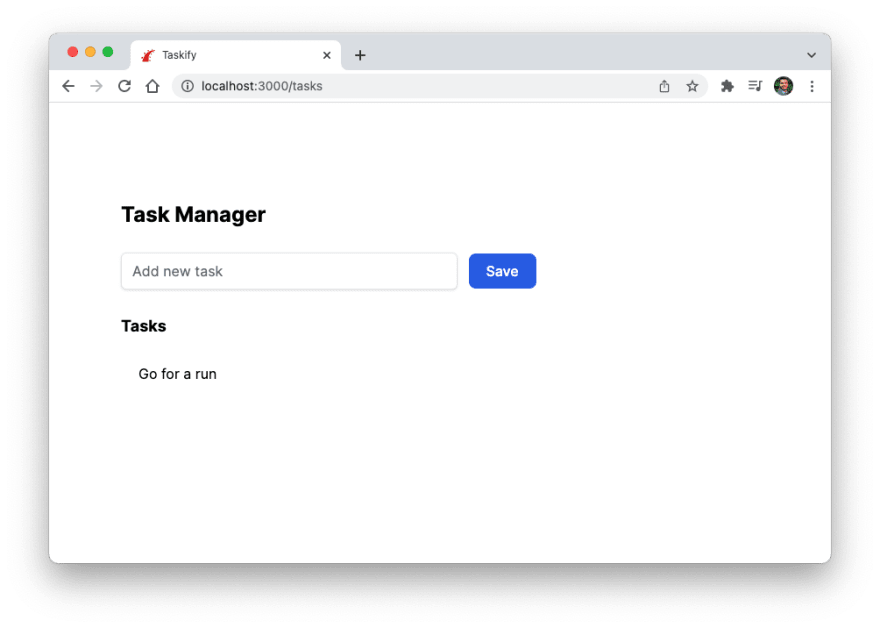
If you reload the page, you will see our first task. Hey, we did it!
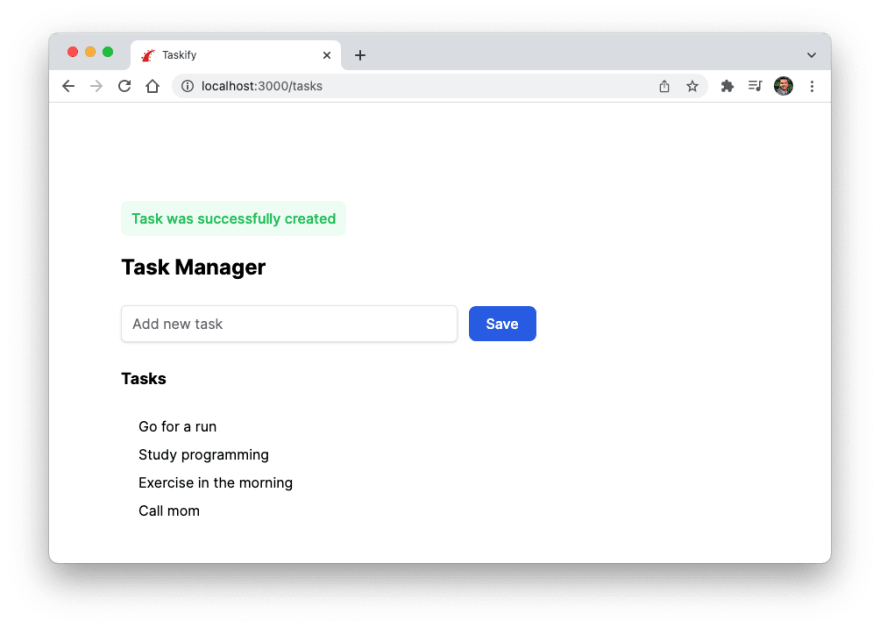
Go ahead and add a few more tasks.
At this point, you might be wondering, "Hey, you said we were going to use Hotwire in this tutorial. When are we going to get to that part?" If so, I have a surprise for you. We are already using Hotwire. At least, a sub-framework of it, called Turbo Drive, which is activated by default in a Rails 7 app.
Notice that the browser is not doing a full page reload when we add a new task. It also feels very responsive. The server redirects you to the index page whenever you click the button. However, you can see that the browser is not reloading the page, and your task shows up automatically. What gives?
The answer is the Turbo Drive framework that's part of the Hotwire stack. It's working behind the scenes to make your application faster.
How does Turbo Drive work?
Turbo Drive intercepts all clicks on anchor links to the same domain. When you click a link or submit a form, Turbo Drive does the following:
- Prevent the browser from following the link,
- Change the browser URL using the History API,
- Request the new page using a fetch request
- Render the response HTML by
- replacing the current element with the response
- merging the element’s content.
The JavaScript window and document objects and the element persist from one rendering to the next. The same goes for an HTML form. Turbo Drive converts Form submissions turned into fetch requests. Then it follows the redirect and renders the HTML response. As a result, your browser doesn't have to reload, and the app feels much faster.
To see how the app will behave without Hotwire, disable the Turbo Drive framework by adding following line in the application.js file.
Turbo.session.drive = false
Now if you try to add a task, you can verify that the browser did a full reload like traditional web applications.
That said, some of you (project managers, mostly) must have noticed that there's no way to complete our tasks. What fun is there to keep piling more and more tasks, without having a way to complete them? We need a checkbox that will mark a task as complete or incomplete.
We will use another Hotwire framework called Stimulus to achieve this. As advertised, it is a modest JavaScript framework for the HTML you already have. I love the way it describes itself on the home page.
Stimulus is a JavaScript framework with modest ambitions. It doesn’t seek to take over your entire front-end—in fact, it’s not concerned with rendering HTML at all. Instead, it’s designed to augment your HTML with just enough behavior to make it shine.
Step 7: Use Stimulus to complete the tasks
First, let's wrap our task in a form to add a checkbox. Add the following code in the _task.html.erb file.
<div class="block">
  <%= form_with(model: task, class:"text-lg inline-block my-3 w-72") do |form| %>
    <%= form.check_box :completed,
                       class: "mr-2 align-middle bg-gray-50 border-gray-300 focus:ring-3 focus:ring-blue-300 h-5 w-5 rounded checked:bg-green-500" %>
    <%= task.description %>
  <% end %>
</div>
Reloading the page shows the beautiful checkbox next to our task.
Next, we will add a data-controller attribute in our index.html.erb template. I have skipped the rest of the code for brevity. You are only adding the data-controller="tasks" attribute on the div element rendering the tasks.
...
<div class="px-5" data-controller="tasks">
  <%= render @tasks %>
</div>
In Stimulus, we mark our elements of interest by annotating their data attributes, such as data-controller and data-action.
Stimulus continuously monitors the page waiting for HTML data-controller attributes to appear. For each attribute, Stimulus looks at the attribute’s value to find a corresponding controller class, creates a new instance of that class, and connects it to the element.
For this data-controller to work, we need to add a tasks_controller.js file in the app/javascript directory. Add the following code to this file.
import { Controller } from "@hotwired/stimulus"

export default class extends Controller {
    connect() {
        console.log(this.element)
    }
}
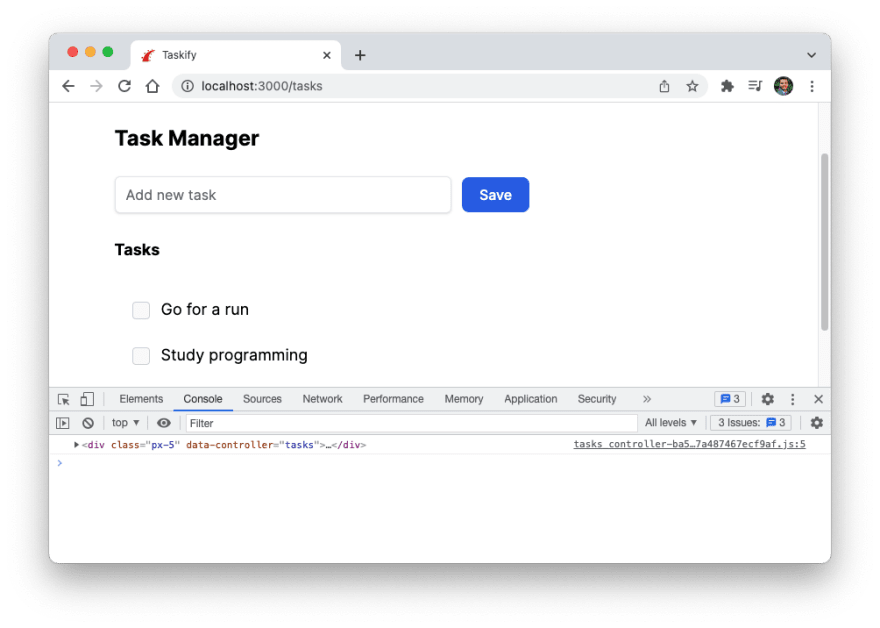
Stimulus calls the connect method each time it connects a controller to the document. Simply reload the page and open the dev tools window to test it's working. You should see the following output in the console. That means Stimulus has connected the element to our controller.
Next, we will make a back-end request whenever the user clicks the checkbox. For this, update the task partial (_task.html.erb) by adding the data attribute.
<div class="block">
  <%= form_with(model: task, class:"text-lg inline-block my-3 w-72") do |form| %>
    <%= form.check_box :completed,
                       data: {
                         id: task.id,
                         action: "tasks#toggle"
                       },
                       class: "mr-2 align-middle bg-gray-50 border-gray-300 focus:ring-3 focus:ring-blue-300 h-5 w-5 rounded checked:bg-green-500" %>
    <%= task.description %>
  <% end %>
</div>
When Rails renders this template, it spits out the following HTML.
<input data-id="1" data-action="tasks#toggle" class="mr-2 .." type="checkbox" value="1" name="task[completed]" id="task_completed">
- The
data-idattribute is not specific to Stimulus, but we are using it to pass the task id to the controller so that we can pass it to the server. - The
data-actionattribute tells Stimulus that whenever a user clicks on this checkbox, call thetogglemethod defined on the controller in thetasks_controller.jsfile.
Note: The data-action attribute must be nested inside an element that's getting connected to the Stimulus controller. In our case, the task partial is rendered inside our div element in the index template. That's how Stimulus knows which method to call.
Now add the toggle method in our tasks_controller file, which makes a JavaScript fetch call to the server. Again, Stimulus will call this method whenever the user clicks the checkbox.
import { Controller } from "@hotwired/stimulus"

export default class extends Controller {
    connect() {
        console.log(this.element)
    }

    toggle(e) {
        const id = e.target.dataset.id
        const csrfToken = document.querySelector("[name='csrf-token']").content

        fetch(`/tasks/${id}/toggle`, {
            method: 'POST', // *GET, POST, PUT, DELETE, etc.
            mode: 'cors', // no-cors, *cors, same-origin
            cache: 'no-cache', // *default, no-cache, reload, force-cache, only-if-cached
            credentials: 'same-origin', // include, *same-origin, omit
            headers: {
                'Content-Type': 'application/json',
                'X-CSRF-Token': csrfToken
            },
            body: JSON.stringify({ completed: e.target.checked }) // body data type must match "Content-Type" header
        })
          .then(response => response.json())
          .then(data => {
             alert(data.message)
           })
    }
}
There are a few points to note in the above method.
- The
togglemethod takes the event as a parameter. We can access the checkbox element from thetargetproperty of the event. - We retrieve the task
idfrom the data attribute on the element, which we set earlier. Then we pass theidin the URL. - We are passing the
csrfTokenin the header. Read more Cross-Site Request Forgery here. - The body contains whether the checkbox was selected or not, letting the server know if the task is completed or marked incomplete.
With the front-end ready, let's add the back-end code to handle this POST request from the browser. There are two steps to it.
- Add a route in the
routes.rbfile that tells the router to call thetoggleaction on the TasksController, whenever a POST request is made with a specific URL pattern.
Rails.application.routes.draw do
  # ...
  post "tasks/:id/toggle", to: "tasks#toggle"
end
- Add the
togglemethod on the TasksController finds the task using theidand updates thecompletedattribute.
def toggle
  @task = Task.find(params[:id])
  @task.update(completed: params[:completed])

  render json: { message: "Success" }
end
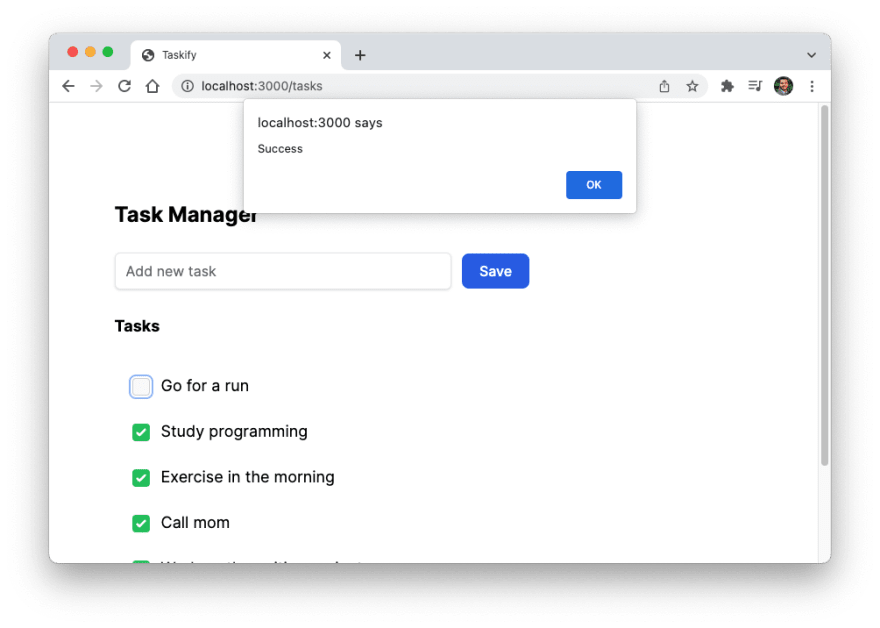
You're all set! Go ahead and mark a few tasks complete (of course, after you've finished them in the real world). To make sure the changes were persisted in the database, reload the page, and you should see the completed tasks checked off.
Step 8: Add the edit and delete features
As the last step, we will allow the users of our task manager to edit and delete their tasks. Let's start by adding the corresponding actions in the tasks_controller.rb file.
class TasksController < ApplicationController

  def edit
    @task = Task.find(params[:id])
  end

  def update
    @task = Task.find(params[:id])
    respond_to do |format|
      if @task.update(task_params)
        format.html { redirect_to tasks_url, notice: "Task was successfully updated" }
      else
        format.html { render :edit, status: :unprocessable_entity }
      end
    end
  end

  def destroy
    @task = Task.find(params[:id])
    @task.destroy
    redirect_to tasks_url, notice: "Post was successfully deleted."
  end

end
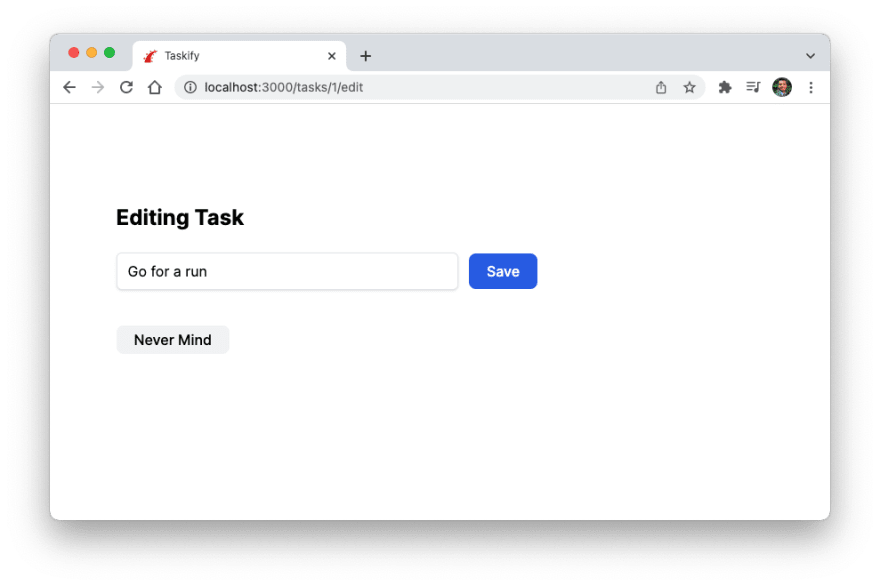
The edit action finds the task that we want to edit, and the corresponding view displays the edit form. Add the edit.html.erb file in the app/views/tasks directory with the following code.
<div>
  <h1 class="font-bold text-2xl mb-3">Editing Task</h1>

  <div id="<%= dom_id @task %>">
    <%= render "form", task: @task %>
    <%= link_to "Never Mind", tasks_path, class: "btn mb-3 bg-gray-100" %>
  </div>
</div>
Finally, add the edit and delete buttons next to the task, in the _task.html.erb file.
<div class="block">
  <%= form_with(model: task, class:"text-lg inline-block my-3 w-72") do |form| %>
    ...
  <% end %>

  <%= link_to "Edit", edit_task_path(task),
              class: "btn bg-gray-100"
  %>
  <div class="inline-block ml-2">
    <%= button_to "Delete", task_path(task),
                  method: :delete,
                  data: { action: "tasks#delete" },
                  class: "btn bg-red-100" %>
  </div>
</div>
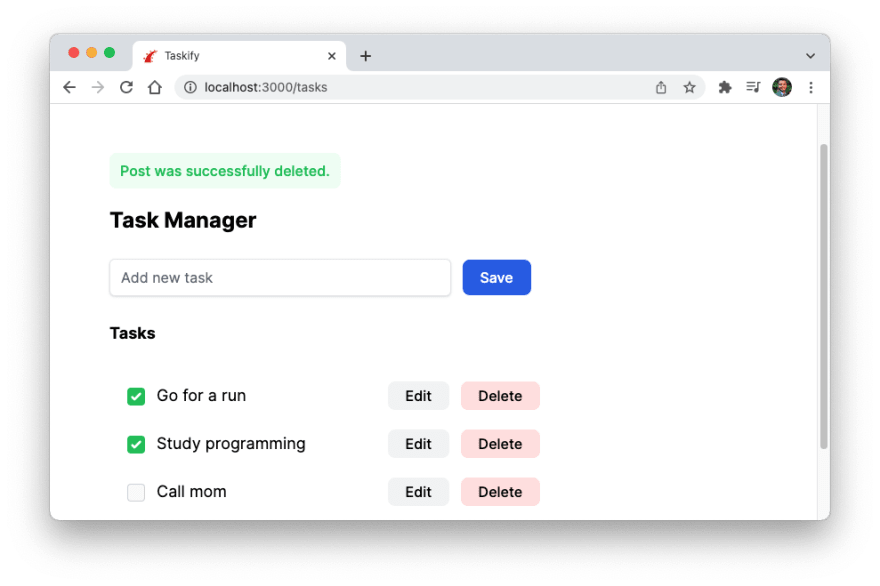
That's it. Reload the page, and you should see our buttons to edit and delete the tasks. Clicking the Delete button should delete that task, without a full page reload.
Clicking the Edit button should show you the form with the task in it. After making changes, it should redirect you to the home page. Again, without a full page reload. Turbo Drive makes the fetch request, gets the response, and replaces the DOM content.
That's it. Congratulations, you have just implemented a full-featured CRUD task manager using Ruby on Rails and Hotwire frameworks.
Wow, that was a really long article. I hope it was helpful. If you find any mistakes (both in the code or my writing) or know better approaches than what I have, please let me know. I am learning this along with you, too.
This content originally appeared on DEV Community and was authored by DEV Community
DEV Community | Sciencx (2022-02-23T00:06:31+00:00) Building a To-Do List Using Hotwire and Stimulus. Retrieved from https://www.scien.cx/2022/02/23/building-a-to-do-list-using-hotwire-and-stimulus/
Please log in to upload a file.
There are no updates yet.
Click the Upload button above to add an update.

