Introduction to Cascade Layers in CSS

How to use Cascade Layers in CSS

Cascade layers are the latest addition to CSS. They allow developers to control the specificity and the source order across multiple CSS files. As a result, developers can minimize the CSS collisions and avoid unexpected style changes in their applications.

In this article, let’s better understand how CSS collisions can happen without cascade layers.

Why Do We Need Cascade Layers?

Every developer must have faced a situation where they wanted to override some CSS styles to avoid style conflicts. The main reason for this issue is CSS specificity. CSS uses specificity to decide which styles are applied to which element. And also, styles with higher specificity can override styles with lower specificity. As the codebases grow, it becomes impossible to keep track of all the style definitions, leading to inevitable conflicts.

In the example below, I created 2 buttons and defined multiple styles using element names, id, and class names to change the background color. As you can see, styles defined using class names have higher specificity than those defined using attribute names. Further, styles defined using ids have a higher specificity than those defined using class names.

https://medium.com/media/e8cc528cd628e09bd1ef55dc9c95635f/href

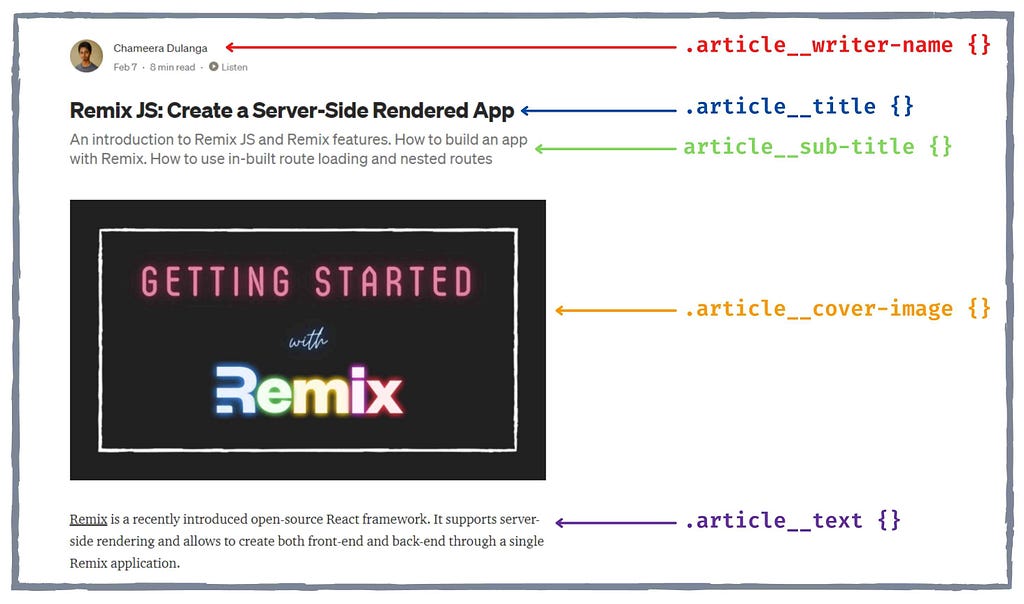
Different solutions have been introduced to overcome this problem. But, none of them have been 100% effective, like cascade layers. For example, the BEM naming convention was introduced as a preventive mechanism for CSS overriding. There, a single class name is given for everything, and all the styles are placed in the same specificity plane.

The following code shows an example of the BEM convention:

However, these solutions were not 100% effective when working with design systems and 3rd party styles. So, let’s see how cascade layers solve this problem.

How to Use Cascade Layers

Cascade layers introduce a new layer to the CSS cascade. They are defined using @layer notation, and they always have higher precedence than the specificity of a selector. The code below shows a simple example of defining a cascade layer.

@layer base-layer {
button {
background-color: red;
padding: 10px;
color: white
}
}

In the above example, I have named the cascade layer as base layer. Likewise, you can use suitable names for the layers.

The specificity of cascade layers depends on the order they are defined. Layers that are defined later have a higher specificity compared to the layers which were defined first.

Let’s consider a simple example with a button and 3 cascade layers:

https://medium.com/media/6056ab95ddee2edde46ae339471c4cf3/href

In the above example, I have created 3 cascade layers named base-layer,theme-layer, and utilities-layer. As you can see, the background color of the button is blue since utilities-layer has the highest specificity. If you change the order of the layers, the button’s background color will change.

Defining cascade layers seems pretty straightforward. However, there are several important things you need to be aware of before using cascade layers.

Important Things to Remember## 1. You can import CSS files as layers

In addition to defining layers from scratch, you can directly import CSS files as layers using the layer() function. I have imported 4 CSS files into 3 in the above example layers. The order of these layers is decided based on their first appearance in the code. So, the base layer will have the lowest specificity while the components layer will have the highest.

However, there can be mistakes when the number of imports increases. So, it is best to declare the order of the layers manually at the top of the file.

@layer base,
theme,
layouts,
components;

2. Nested cascade layers

Cascade layers also support nesting. You can define the nested layer architecture first and update each layer with attributes. When updating, nested layers can be easily accessed using dot notation.

@layer base{
@layer theme, components
}

@layer base{
...
}

@layer base.theme{
...
}

@layer base.components{
...
}

3. Supports unnamed layers

We defined the cascade layers with specific names in all the above examples. But, it is not necessary to have a name for a cascade layer. You can define layers as anonymous, and their specificity will be decided based on the placement.

@layer base{
...
}

@layer {
...
}

@layer components{
...
}

In the above example, the anonymous layer will have a higher specificity than that base layer. However, if you define an anonymous layer, you won’t be able to update it later.

4. Unlayered styles has the highest specificity

Since cascade layers are the latest feature in CSS, creators wanted to have a smooth transition from current style definitions to cascade layers. So, they decided to treat unlayered styles as the highest prioritized ones regardless of their placement.

https://medium.com/media/e6bc06a280068e44aa72e71b8ec1c6b9/href

5. !important inverts cascade specificity

Although unlayered styles have a higher specificity than layered ones, you can increase the specificity of cascade layers by using the !important notation. In the following example, I have modified the cascade layer with !important, and the background color of the buttons has changed to blue.

https://medium.com/media/e6bc06a280068e44aa72e71b8ec1c6b9/href

Also, !important can reverse the specificity of layers.

@layer base{
... !important;
...
}

@layer components{
... !important;
...
}

@layer {
... !important;
...
}

In a normal situation, the base layer will have the lowest specificity of the above example, while unlayered styles have the highest specificity. But, since we have used !important, the order of specificity will be changed as follow:

# 1. !important base
# 2. !important components
# 3. !important unlayered
# 4. unlayered
# 5. components
# 6. base

6. @layer is not for scoping

Cascade layers do not provide scoping. So, you need to scope the styles within layers manually. For example, if you want to apply styles to paragraphs inside a card element, it is best to scope the styles as follow:

@layer {
.card a {

}
}

Browser Support

Currently, the latest versions of Google Chrome, Firefox, and Safari browsers support cascade layers by default.

  • Chrome/Chromium 99+
  • Firefox 97+
  • Safari 15.4+

So, please make sure that your browser is up to date before running the examples given in this article.

Build with independent components for speed and scale

Instead of building monolithic apps, build independent components first and compose them into features and applications. It makes development faster and helps teams build more consistent and scalable applications.

Bit offers a great developer experience for building independent components and composing applications. Many teams start by building their Design Systems or Micro Frontends, through independent components.
Give it a try →

An independently source-controlled and shared “card” component. On the right => its dependency graph, auto-generated by Bit.

Conclusion

In this article, I have discussed the importance of cascade layers and how it changes the way a developer defines styles with examples. Although it is fairly new, cascade layers can be introduced as the ultimate solution to avoid CSS conflicts in your applications.

However, you might have to wait a bit before using cascade layers in your production-level applications due to the lack of browse support. But, it will be better to get some first-hand experience sooner since cascade layers are the future of CSS.

I hope you have found this article interesting. Thank you for reading.

Learn More


Introduction to Cascade Layers in CSS was originally published in Bits and Pieces on Medium, where people are continuing the conversation by highlighting and responding to this story.


This content originally appeared on Bits and Pieces - Medium and was authored by Chameera Dulanga

How to use Cascade Layers in CSS
Cascade layers are the latest addition to CSS. They allow developers to control the specificity and the source order across multiple CSS files. As a result, developers can minimize the CSS collisions and avoid unexpected style changes in their applications.

In this article, let’s better understand how CSS collisions can happen without cascade layers.

Why Do We Need Cascade Layers?

Every developer must have faced a situation where they wanted to override some CSS styles to avoid style conflicts. The main reason for this issue is CSS specificity. CSS uses specificity to decide which styles are applied to which element. And also, styles with higher specificity can override styles with lower specificity. As the codebases grow, it becomes impossible to keep track of all the style definitions, leading to inevitable conflicts.

In the example below, I created 2 buttons and defined multiple styles using element names, id, and class names to change the background color. As you can see, styles defined using class names have higher specificity than those defined using attribute names. Further, styles defined using ids have a higher specificity than those defined using class names.

Different solutions have been introduced to overcome this problem. But, none of them have been 100% effective, like cascade layers. For example, the BEM naming convention was introduced as a preventive mechanism for CSS overriding. There, a single class name is given for everything, and all the styles are placed in the same specificity plane.

The following code shows an example of the BEM convention:
However, these solutions were not 100% effective when working with design systems and 3rd party styles. So, let’s see how cascade layers solve this problem.

How to Use Cascade Layers

Cascade layers introduce a new layer to the CSS cascade. They are defined using @layer notation, and they always have higher precedence than the specificity of a selector. The code below shows a simple example of defining a cascade layer.

@layer base-layer {
button {
background-color: red;
padding: 10px;
color: white
}
}

In the above example, I have named the cascade layer as base layer. Likewise, you can use suitable names for the layers.

The specificity of cascade layers depends on the order they are defined. Layers that are defined later have a higher specificity compared to the layers which were defined first.

Let’s consider a simple example with a button and 3 cascade layers:

In the above example, I have created 3 cascade layers named base-layer,theme-layer, and utilities-layer. As you can see, the background color of the button is blue since utilities-layer has the highest specificity. If you change the order of the layers, the button's background color will change.

Defining cascade layers seems pretty straightforward. However, there are several important things you need to be aware of before using cascade layers.

Important Things to Remember## 1. You can import CSS files as layers

In addition to defining layers from scratch, you can directly import CSS files as layers using the layer() function. I have imported 4 CSS files into 3 in the above example layers. The order of these layers is decided based on their first appearance in the code. So, the base layer will have the lowest specificity while the components layer will have the highest.

However, there can be mistakes when the number of imports increases. So, it is best to declare the order of the layers manually at the top of the file.

@layer base,
theme,
layouts,
components;

2. Nested cascade layers

Cascade layers also support nesting. You can define the nested layer architecture first and update each layer with attributes. When updating, nested layers can be easily accessed using dot notation.

@layer base{
@layer theme, components
}

@layer base{
...
}

@layer base.theme{
...
}

@layer base.components{
...
}

3. Supports unnamed layers

We defined the cascade layers with specific names in all the above examples. But, it is not necessary to have a name for a cascade layer. You can define layers as anonymous, and their specificity will be decided based on the placement.

@layer base{
...
}

@layer {
...
}

@layer components{
...
}

In the above example, the anonymous layer will have a higher specificity than that base layer. However, if you define an anonymous layer, you won’t be able to update it later.

4. Unlayered styles has the highest specificity

Since cascade layers are the latest feature in CSS, creators wanted to have a smooth transition from current style definitions to cascade layers. So, they decided to treat unlayered styles as the highest prioritized ones regardless of their placement.

5. !important inverts cascade specificity

Although unlayered styles have a higher specificity than layered ones, you can increase the specificity of cascade layers by using the !important notation. In the following example, I have modified the cascade layer with !important, and the background color of the buttons has changed to blue.

Also, !important can reverse the specificity of layers.

@layer base{
... !important;
...
}

@layer components{
... !important;
...
}

@layer {
... !important;
...
}

In a normal situation, the base layer will have the lowest specificity of the above example, while unlayered styles have the highest specificity. But, since we have used !important, the order of specificity will be changed as follow:

# 1. !important base
# 2. !important components
# 3. !important unlayered
# 4. unlayered
# 5. components
# 6. base

6. @layer is not for scoping

Cascade layers do not provide scoping. So, you need to scope the styles within layers manually. For example, if you want to apply styles to paragraphs inside a card element, it is best to scope the styles as follow:

@layer {
.card a {

}
}

Browser Support

Currently, the latest versions of Google Chrome, Firefox, and Safari browsers support cascade layers by default.

  • Chrome/Chromium 99+
  • Firefox 97+
  • Safari 15.4+

So, please make sure that your browser is up to date before running the examples given in this article.

Build with independent components for speed and scale

Instead of building monolithic apps, build independent components first and compose them into features and applications. It makes development faster and helps teams build more consistent and scalable applications.

Bit offers a great developer experience for building independent components and composing applications. Many teams start by building their Design Systems or Micro Frontends, through independent components.
Give it a try →
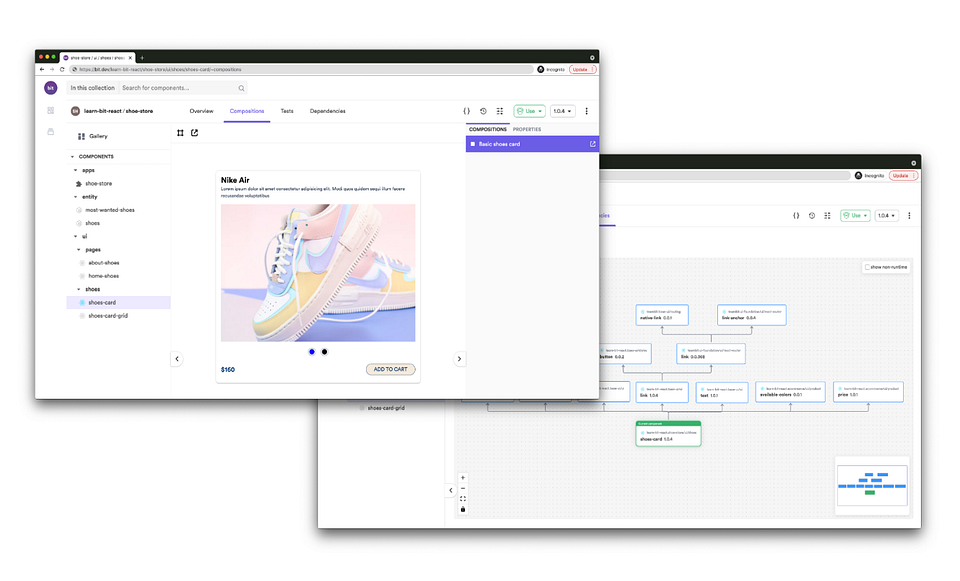
An independently source-controlled and shared “card” component. On the right => its dependency graph, auto-generated by Bit.

Conclusion

In this article, I have discussed the importance of cascade layers and how it changes the way a developer defines styles with examples. Although it is fairly new, cascade layers can be introduced as the ultimate solution to avoid CSS conflicts in your applications.

However, you might have to wait a bit before using cascade layers in your production-level applications due to the lack of browse support. But, it will be better to get some first-hand experience sooner since cascade layers are the future of CSS.

I hope you have found this article interesting. Thank you for reading.

Learn More


Introduction to Cascade Layers in CSS was originally published in Bits and Pieces on Medium, where people are continuing the conversation by highlighting and responding to this story.


This content originally appeared on Bits and Pieces - Medium and was authored by Chameera Dulanga


Print Share Comment Cite Upload Translate Updates
APA

Chameera Dulanga | Sciencx (2022-03-09T09:25:27+00:00) Introduction to Cascade Layers in CSS. Retrieved from https://www.scien.cx/2022/03/09/introduction-to-cascade-layers-in-css/

MLA
" » Introduction to Cascade Layers in CSS." Chameera Dulanga | Sciencx - Wednesday March 9, 2022, https://www.scien.cx/2022/03/09/introduction-to-cascade-layers-in-css/
HARVARD
Chameera Dulanga | Sciencx Wednesday March 9, 2022 » Introduction to Cascade Layers in CSS., viewed ,<https://www.scien.cx/2022/03/09/introduction-to-cascade-layers-in-css/>
VANCOUVER
Chameera Dulanga | Sciencx - » Introduction to Cascade Layers in CSS. [Internet]. [Accessed ]. Available from: https://www.scien.cx/2022/03/09/introduction-to-cascade-layers-in-css/
CHICAGO
" » Introduction to Cascade Layers in CSS." Chameera Dulanga | Sciencx - Accessed . https://www.scien.cx/2022/03/09/introduction-to-cascade-layers-in-css/
IEEE
" » Introduction to Cascade Layers in CSS." Chameera Dulanga | Sciencx [Online]. Available: https://www.scien.cx/2022/03/09/introduction-to-cascade-layers-in-css/. [Accessed: ]
rf:citation
» Introduction to Cascade Layers in CSS | Chameera Dulanga | Sciencx | https://www.scien.cx/2022/03/09/introduction-to-cascade-layers-in-css/ |

Please log in to upload a file.


There are no updates yet.
Click the Upload button above to add an update.

You must be logged in to translate posts. Please log in or register.