This content originally appeared on Modern Web Development with Chrome and was authored by Paul Kinlan
Last week I got a trained a simple model that will detect if an image looks like a link or a button. It was fun and I learnt a lot.
This article is less about the ML model and more about how I made a TensorflowJS Preact Component using Deno and Fresh and some of the snags I hit so that you don't have to hit them.
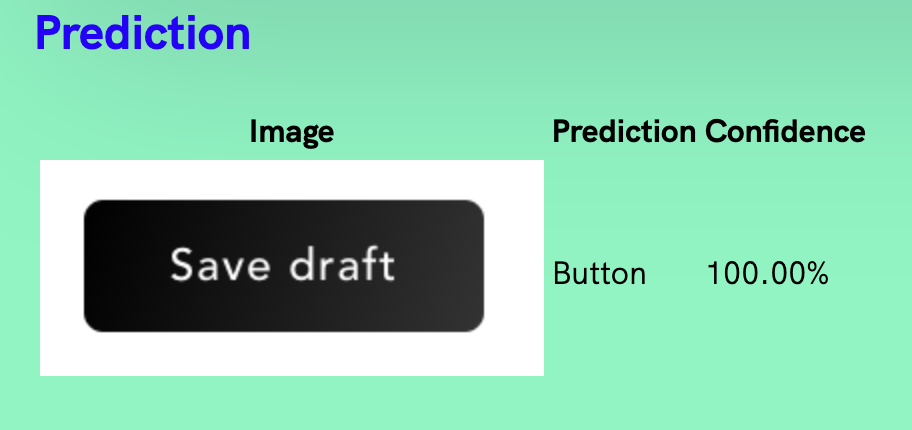
The Demo itself might not make sense, so I will give some context first. I trained the ML model in Google Colab, and while it has a handy little script that lets me upload files it is incredibly slow, so I wanted a way to drag and drop many images on a page and have it automatically classify the images. If you try the demo just take a screen shot of a button or a link with about 10px of padding around it like so  ) and it will output something like the following:

I also wanted an excuse to get a model into "production".
The Code is built around Deno and Fresh, and broadly it was a lot of fun to get started. I really liked how quick it is to deploy (feels significantly faster than Vercel). I did struggle with the documentation, for example the docs around islands are sparse and it implies that it runs in the client - so I naturally thought I could just include my file-drop Custom Element, however I ran in to a number of problems where because it is rendering on the server it doesn't have access to DOM Element APIs and thus would not buidl. I had to rely on a handy hint from Luca Casonato.
if (IS_BROWSER) {
  await import("https://esm.sh/file-drop-element");
}
After that, using the Web Component in an island is just like using it in the browser.
interface FileDropProps {
  accept: string;
  multiple?: boolean;
}

export default function FileDrop(props: FileDropProps) {
  const [accept] = useState(props.accept);
  const [multiple] = useState(props.multiple);
  const tensorFlow = useRef(null);
  let [files, setFiles] = useState("");
  let x: FileDropEvent;

  const onFileDrop: FileDropEvent = (event) => {
    setFiles(event.files);
  }

  const onFileSelect: Event = (event) => {
    setFiles(event.target.files);
  }

  return (
    <div>
      <file-drop onfiledrop={onFileDrop} accept={accept} multiple={multiple}>
	...
  )
}
Although now that I think about it, is it just a functionless element sent on the request? I should check... It feels like the docs could be a little clearer.
Integrating TensorFlow was surprisingly straight forwards (and can be seen completely here).
The first thing that I had to do was include Tensorflow as a global <script src="https://cdn.jsdelivr.net/npm/@tensorflow/tfjs@latest/dist/tf.min.js"></script> on my index route, and then I created the component as follows.
export function TensorFlow({ url, files }) {
  const [model, setModel] = useState();
  const [predictions, setPredictions] = useState();

  useEffect(async () => {
    const newModel = await tf.loadLayersModel(url);

    setModel(newModel);
  }, [url]); // When the URL changes, refetch the model

  useEffect(async () => {
    console.log("Analysing", files);

    const predictionsResults: PredictionResult[] = []
    for (const file of files) {
      const fileUrl = URL.createObjectURL(file)
      predictionsResults.push({ prediction: await analyse(fileUrl, model), fileUrl });
    }

    setPredictions(predictionsResults);
  }, [files]);

  return (
    <div>
      <h2>Prediction </h2>
      <div>{model == null ? 'Loading Model' : (predictions != null) ? renderPredictions(predictions) : ''}</div>
    </div>
  );
}
And it can be used as follows <TensorFlow url="/model/model.json" files={files} ref={tensorFlow}></TensorFlow>.
I was quite happy with this structure because it allows you to control which model TensorFlow should use, and which files it accepts (which is specific to my usecase).
The only thing that is special here is that I only want to instantiate the model when the property changes, and I only want to run the prediction when the input files array changes.
And that's it. It just worked.
Next up will be integrating this Tensorflow model into a custom Lighthouse Audit.
This content originally appeared on Modern Web Development with Chrome and was authored by Paul Kinlan
Paul Kinlan | Sciencx (2023-01-12T11:10:43+00:00) Creating a web app with deno, fresh and Tensorflow. Retrieved from https://www.scien.cx/2023/01/12/creating-a-web-app-with-deno-fresh-and-tensorflow/
Please log in to upload a file.
There are no updates yet.
Click the Upload button above to add an update.
