
This content originally appeared on Bits and Pieces - Medium and was authored by Fernando Doglio
Sounds too good to be true, doesn’t it? Well, it’s not.

We’ve all been there, working on a brand new site, we hear that the designer is ready with the mockups, and the next thing we know, they’re sending us the actual mockup, that Photoshop image.
Sure, we can use it to start getting the different graphic assets out, and slowly but surely begin to build our components and our website.
But what if I told you there is a faster way? What if I told you there is a product that turns those designs into actual code?
That’s right, today we’re going to review AnimaApp.
What is AnimaApp?
AnimaApp allows developers to generate code from a design, with nothing but a click.
It sounds magical, I know, but if you consider how fast AI is advancing these days, this sounds about right.
There are some limitations of course, Anima is limited to “understanding” designs from:
- Figma
- Sketch
- AdobeXD
- Storybook
And from those, it’s able to write code for React and Vue, plus the HTML and CSS of course. You can even export the code and use it to bootstrap your project. The free plan allows for a few exports, and if you really want to start using it, you’ll have to go with a paid plan.
The code generation capabilities are very interesting, you can pick the framework, and within it, you can also decide the type of syntax (like class-based components vs functional components for React) and how to structure your CSS.
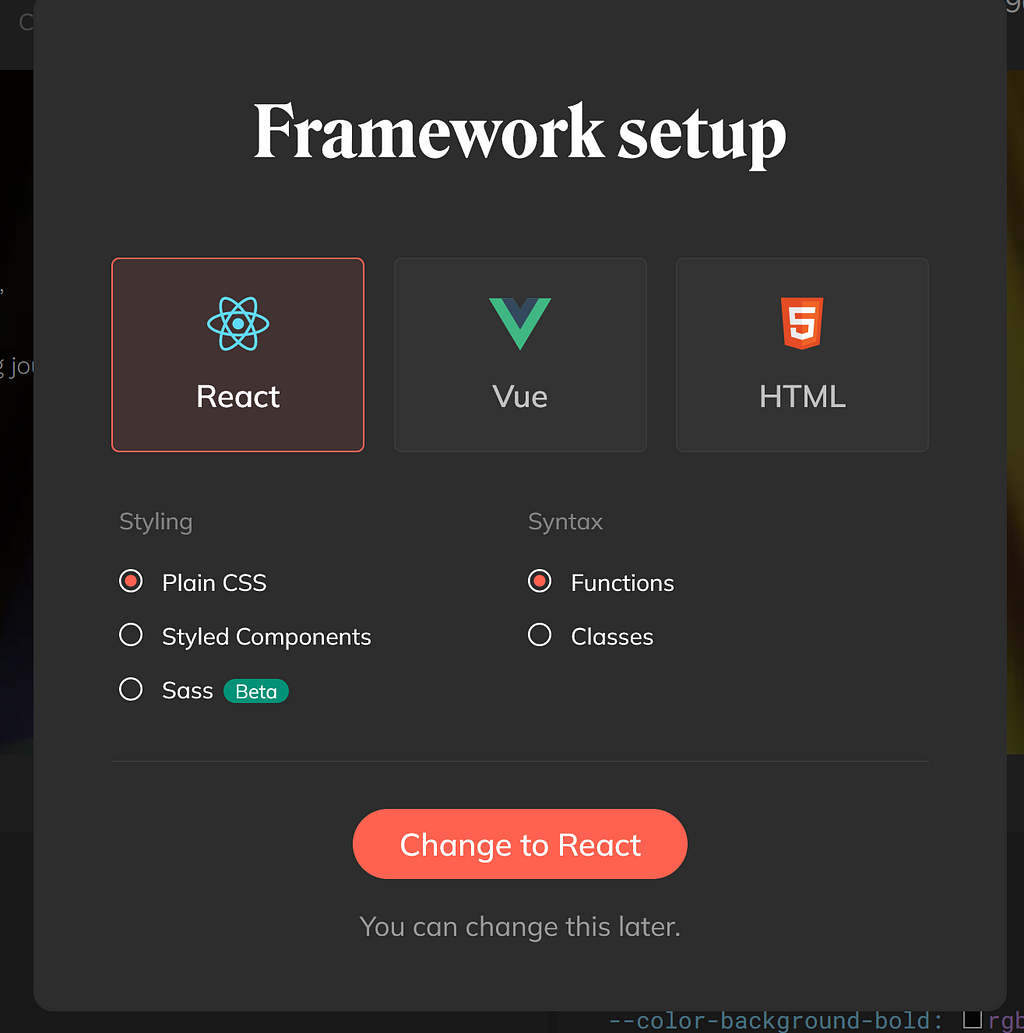
But wait, what kind of code are you going to get out of this? Is it going to be a simple mega component where all images are shown? Or are you going to have multiple components based on the different elements of the design?
Let’s see.
What kind of code is Anima writing for me?
You’ll be happy to know that indeed, you’re getting some fancy code and not the simple image wrapper that you would expect.
Look at this output from the sample project available for free on the platform :
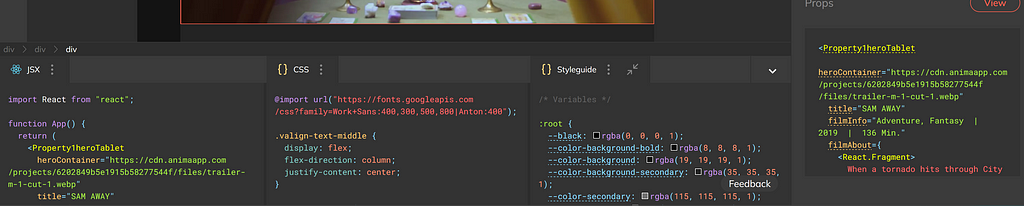
You can see on the far left (your left), the JSX code, in the middle you have the CSS and on the far right, you can see the selected component. In that box, you see which properties is the component using.
Here is the code from the screenshot:
And that is the result of inspecting the hero component of the website.
Is this the code you would’ve written? Maybe not, but it’s a damn fine starting point.
You can even open the code inside a CodeSandbox session and tinker with it before you use it on your own project.
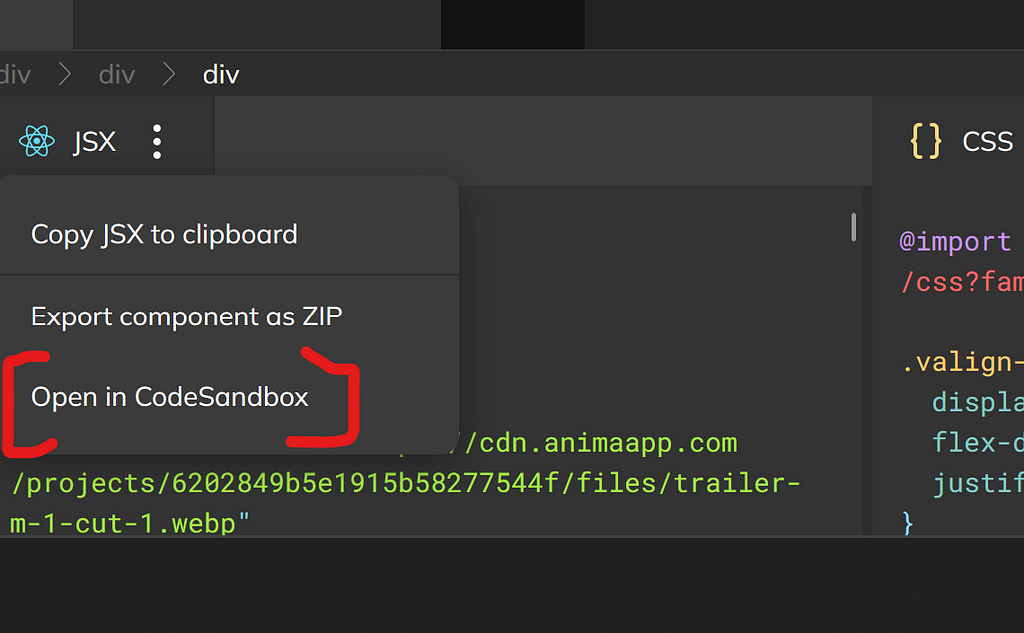
Of course any changes you make to the code in the sandbox won’t be visible inside your Anima project. So that would be more of a toy to understand what changes you have to make to finally make the code your own.
How does it work?
For the purpose of this tutorial, I’m going to give Figma + React examples, but feel free to use the combination you feel more comfortable with.
Once you have your design ready on your favorite (and compatible) design system, you can:
- Create a new project
- From the new project page, click on the “Import” button:
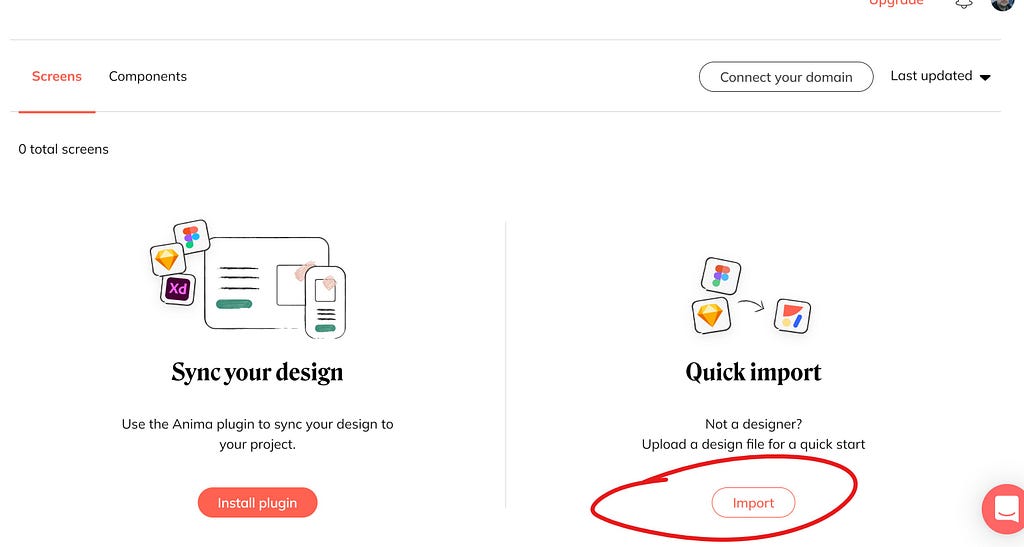
3. Enter your Figma URL and let the importer do the work.
Once you’ve gone through the importing process, you’ll have the site ready on your dashboard.
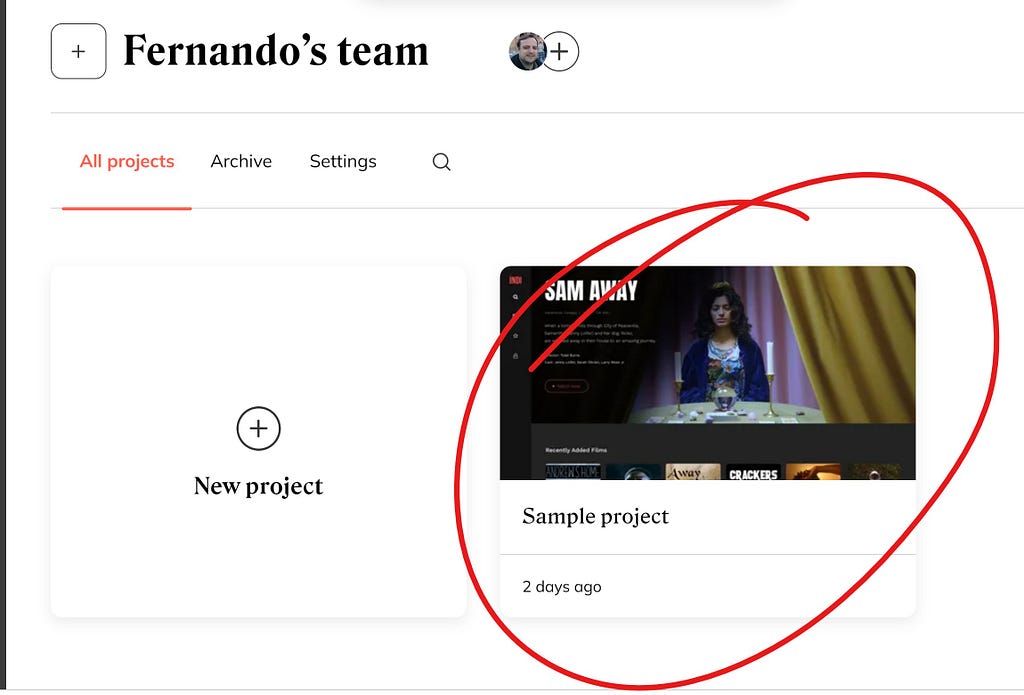
You can see in the above screenshot what the imported project looks like.
In particular, if you create a brand new account, you should have the same project on your screen (this is a demo project).
Open it to explore the generated code.
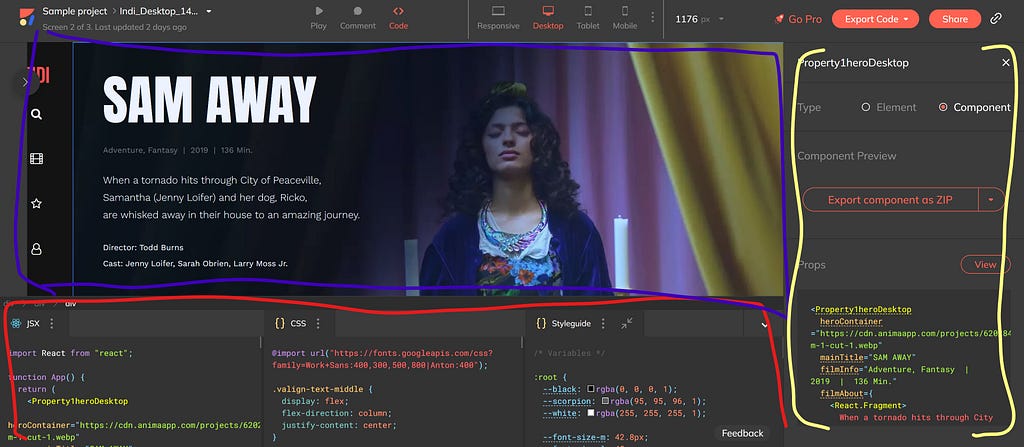
Check out the three main sections:
- The red section is where you’ll see the actual code generated. The JSX, and CSS.
- On the top section, the blue, is where you’ll see the preview. There you’ll be able to click on the different sections of the site. The component you click on will be displayed in the red section.
- The yellow right section is the detailed view of the selected component. You’ll see how to use that component and how it is currently being used (including props).
When you’re ready, click on the “Export code” button and download a ZIP file with the entire design turned into code.
And that’s it, export the code into a folder, run npm install and you should be on your way.
All in all, the process can take you around 5–10 minutes, depending on your design. That is considerably less time than having to code the whole thing yourself. Even if you’re not building a complex application, I would argue that you would not be able to write all the needed HTML/CSS/JS in those 10 minutes.
In that case, I think it’s safe to say that AnimaApp can help you improve your dev flow quite significantly if you’re part of a team that works with any of the already-mentioned design systems.
Have you tried AnimaApp already? Are you going to now that you know about it?
Bonus: Take UI creation to the next level with reusable components

Bit’s open-source tool help 250,000+ devs to build apps with components.
Turn any UI, feature, or page into a reusable component — and share it across your applications. It’s easier to collaborate and build faster.
Split apps into components to make app development easier, and enjoy the best experience for the workflows you want:
→ Micro-Frontends
→ Design System
→ Code-Sharing and reuse
→ Monorepo
Learn more
- How We Build Micro Frontends
- How we Build a Component Design System
- Bit - Component driven development
- 5 Ways to Build a React Monorepo
- How to Create a Composable React App with Bit
- Sharing JavaScript Utility Functions Across Projects
Turn Your Figma Designs into Code with a Single click was originally published in Bits and Pieces on Medium, where people are continuing the conversation by highlighting and responding to this story.
This content originally appeared on Bits and Pieces - Medium and was authored by Fernando Doglio
Fernando Doglio | Sciencx (2023-01-28T07:12:28+00:00) Turn Your Figma Designs into Code with a Single click. Retrieved from https://www.scien.cx/2023/01/28/turn-your-figma-designs-into-code-with-a-single-click/
Please log in to upload a file.
There are no updates yet.
Click the Upload button above to add an update.