This content originally appeared on Telerik Blogs and was authored by Petar Grigorov
Check out these more advanced tips for verifying your PDF’s images with Test Studio.
Whether it’s for platform compatibility, document integrity, security, size, compression, rich media support, ISO standardization, accessibility, archiving or just ease of creation and use, Portable Document Format—PDF—is one of the most widely used document formats in both personal and professional settings alike. One of my colleagues goes even further in describing it as “the alpha and omega of document processing for any business” in a blog post.

Image source: Unsplashed
Progress Telerik Test Studio is an easy-to-use automation tool for functional UI, load/performance and API testing for any web and desktop applications. Whether you’re going codeless or choosing its code-based capabilities, Test Studio provides solutions for the entire team, empowering everyone—from junior testers to senior devs, PMs to QA leads—to achieve max productivity in agile software delivery environments. I could also go even further and describe it as “automated testing that just works.”
As a good beginner’s guide on how to get started with PDF automation testing with Telerik Test Studio, I’d recommend the aforementioned publication. This and of course the official documentation. The purpose of the current blog post, however, is to take you one step further and unveil some advanced tips, tricks and even fun (or maybe not so much) experiments. The main topic will focus on image verification in a PDF file of your choice.
Understanding PDF Structure
PDFs are composed of various elements such as text, images and graphics organized in a structured manner. Their file structure can be divided into several sections:
- Document catalog: The root of the document structure
- Pages: Representations of individual pages within the PDF
- Content streams: Sequences of instructions that describe the appearance of a page
- Resources: Collections of objects like fonts and images used by the content streams
By embedding images as background elements within the content stream and providing correct layering and resource management, PDFs can maintain a consistent and visually appealing layout across different platforms and devices. If such image is a bitmap (e.g., JPEG or PNG), it is embedded directly into the PDF as an image object. To use an SVG as a background, the SVG must be converted into a format that PDF can interpret natively.
Counting Challenges
Let’s say that there is exactly such a PDF as described above. Real-life quality assurance scenarios would require answering questions like:
“How can I validate the header/footer properties?”
“How can I check if the entire text in an input box is visible or not?”
“How can I achieve two images comparison in % of matching?”
“Is the watermark present throughout all of the pages of the PDF file?”
Listing all such questions would render the blog post TL;DR, so let’s fast-forward to the explanation of why trying to automate an image embedded as a background in a PDF file can turn even the most seasoned automation testers into puzzled seasoned automation testers. In other words, the image element is not available in the Document Object Model—the mighty DOM.

Image source: Unsplashed
Solving Challenges
When a PDF file is open for validation with Test Studio, it looks and feels like you’re working inside a webpage with the same functionality for recording elements and execution. Technically, Test Studio starts its built-in PDF viewer server and displays the file inside, parsed to an HTML page. All of that happens seamlessly so you do not have to worry about starting and maintaining the PDF viewer server.
From then on, you can validate any element inside the PDF file the way you’re used to from automating webpages—hover over and choose the desired action from the context menu. Usually, in such cases, it is crucial to use Test Studio’s pixel-by-pixel image verification feature along with the element by image feature.
However, when an image element is not recognized in the DOM, try to stay cool and then adapt—overcoming and improving are even more crucial.

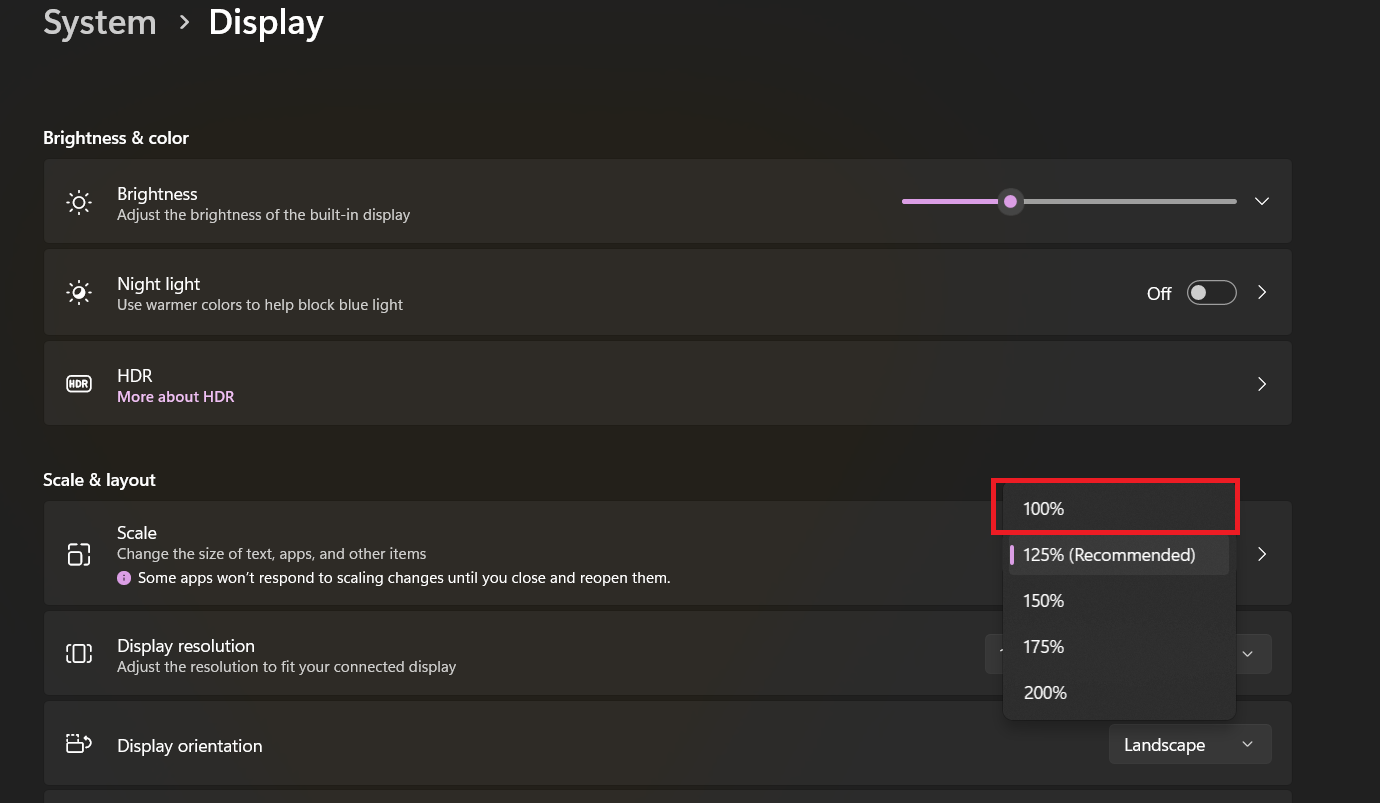
Before creating a test script with Telerik Test Studio, please make sure to have your monitor’s scaling set to 100%. A reminder that this is not related to the screen resolution, but rather to the Windows OS System Settings:
I created a sample web test called “True,” opening a PDF file (called Report.html.pdf) created out of the Test Studio Reports section’s HTML export. When you attach a recorder with hover over element highlighting enabled to the PDF file, it will look like this:
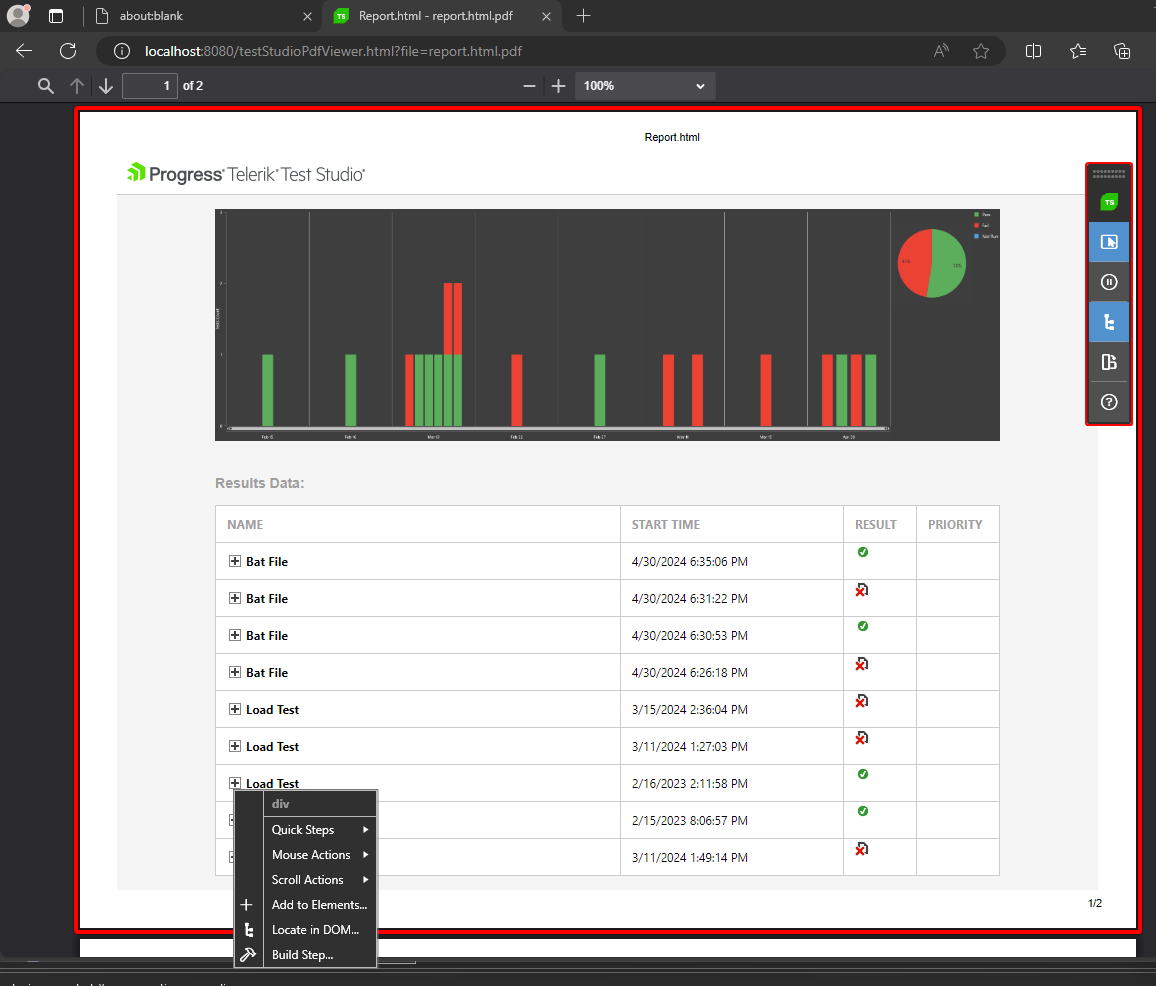
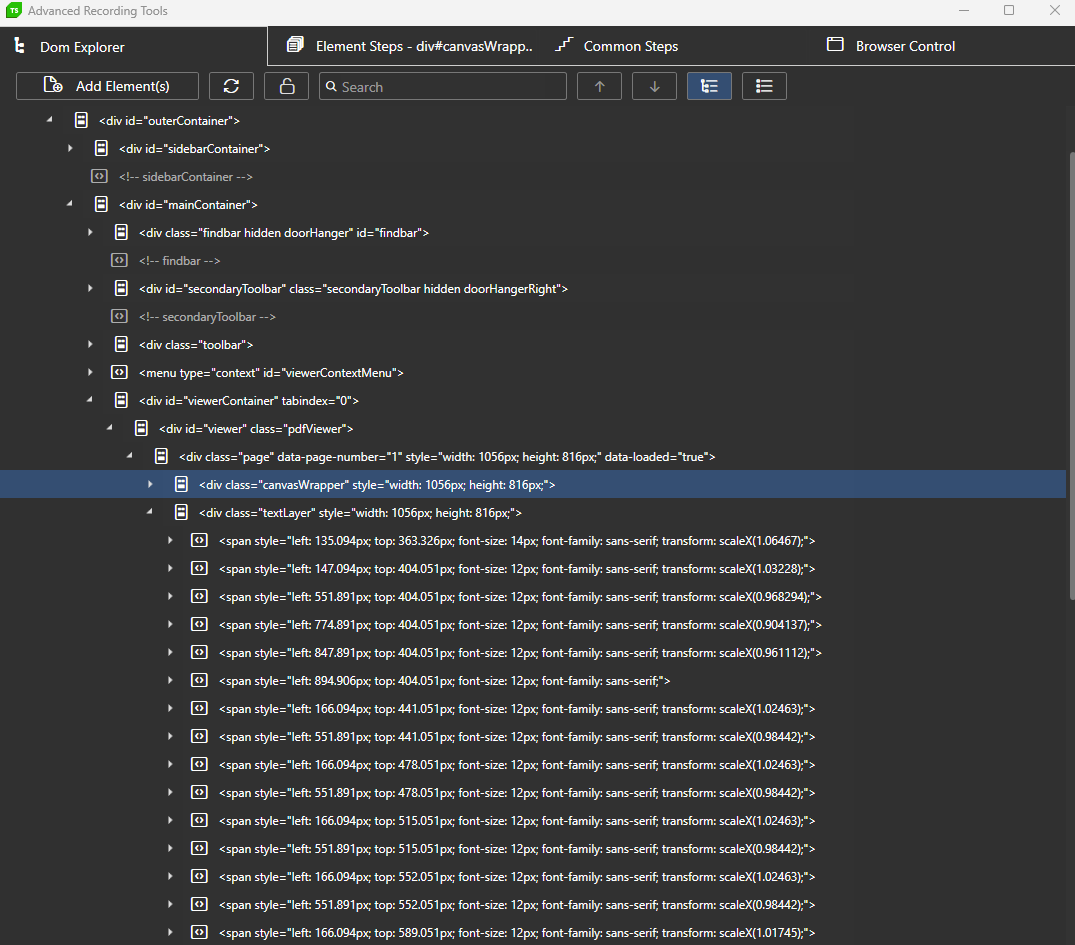
Exploring the DOM (via the “Locate in DOM” option) should bring the following result, only showing a 1056 x 816px canvasWrapper div, which contains the Progress Telerik Test Studio logo in the header, the results graph and the results data grid.
In order to verify that the Progress Telerik Test Studio logo is visible, I took the following steps:
Adapt
- While the Recorder was on and the
canvasWrapperhighlighted, I created a dummy element and called it “FooElement.”
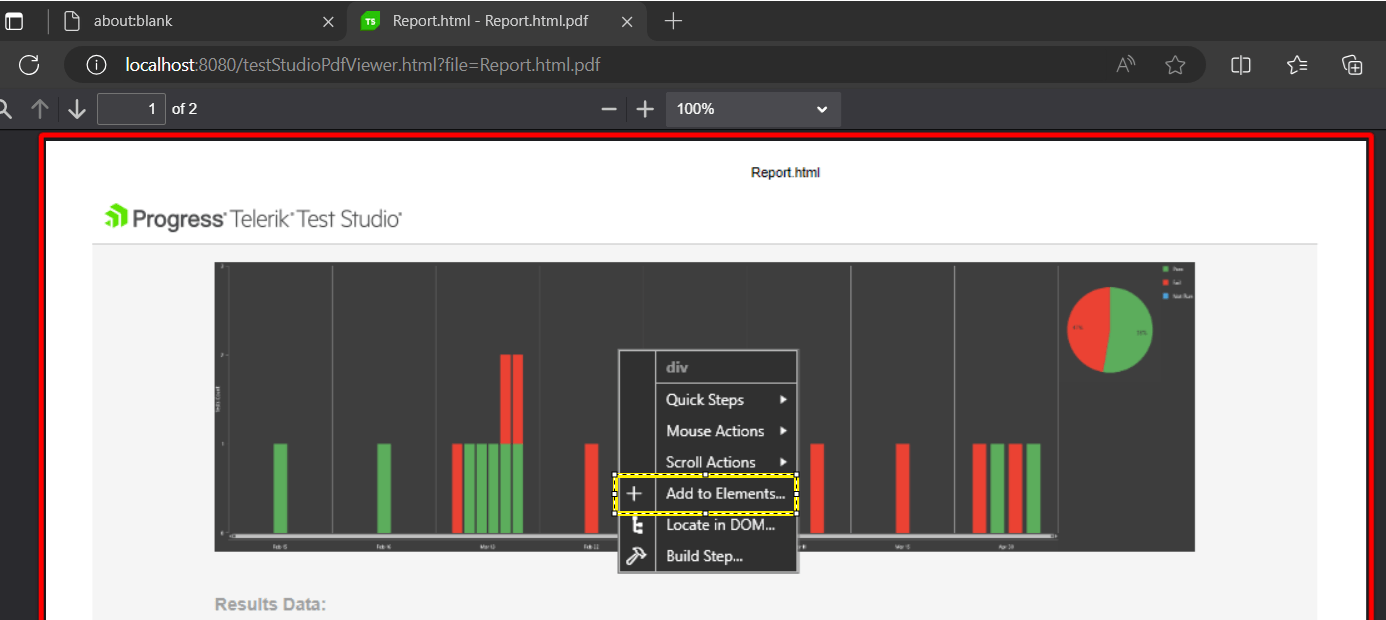
- I found the new element from the Elements repository >> clicked on Step Builder >> Verifications and selected Visible. (If you need additional details how to exactly do that, check the verification steps docs.)
- The following step was created:
Verify element ‘FooElement’ ‘is’ visible, with itsSearchByImageFirstproperty set toTrue.

Overcome
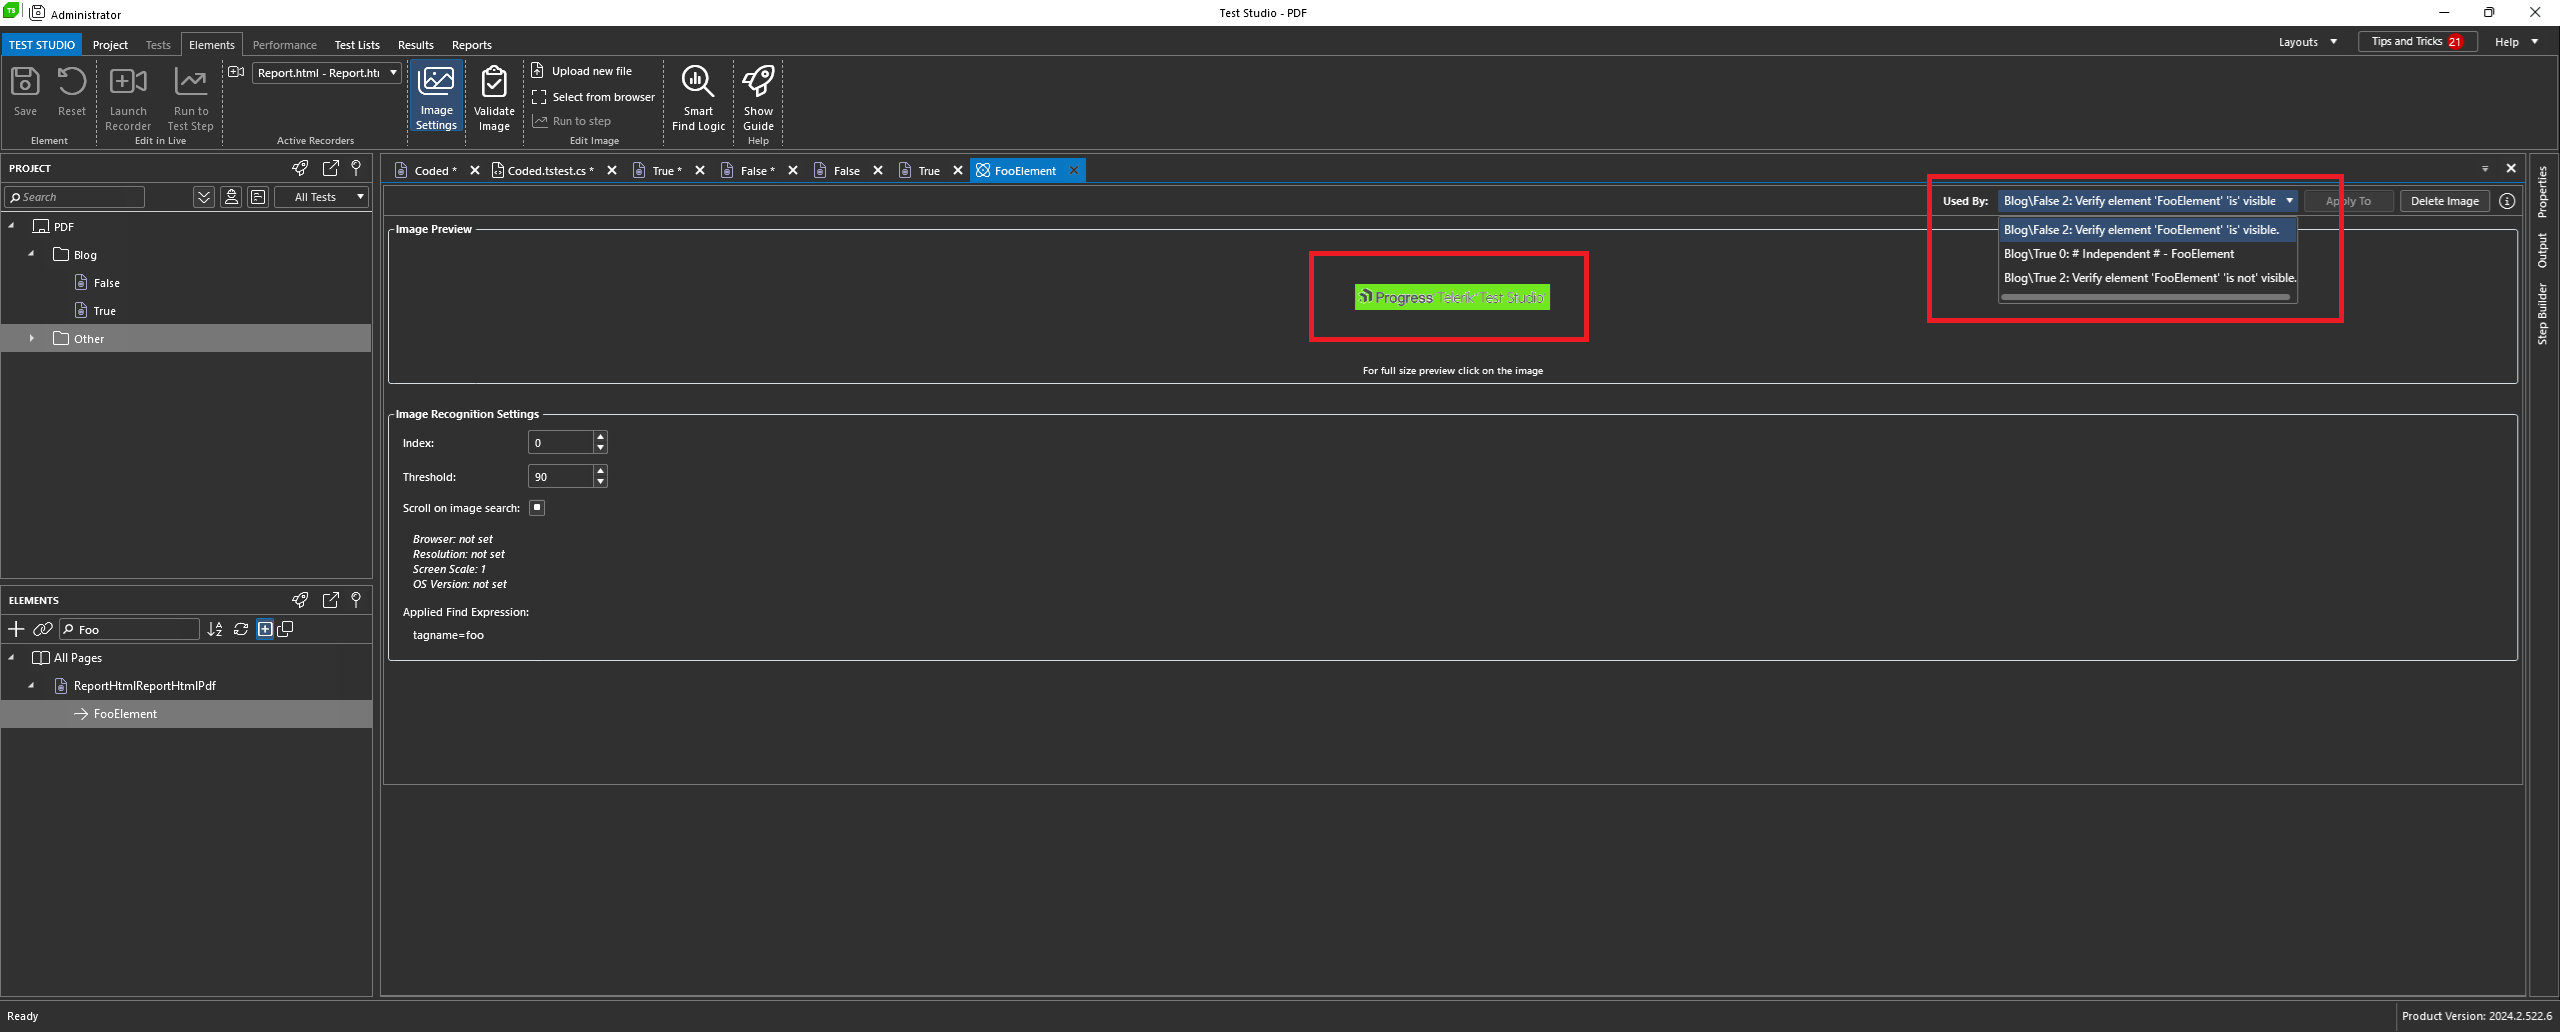
- I edited the element’s attributes (i.e.,
tagname = foo) by assigning them dummy values, so it could not be found by Test Studio default Smart Find Logic.

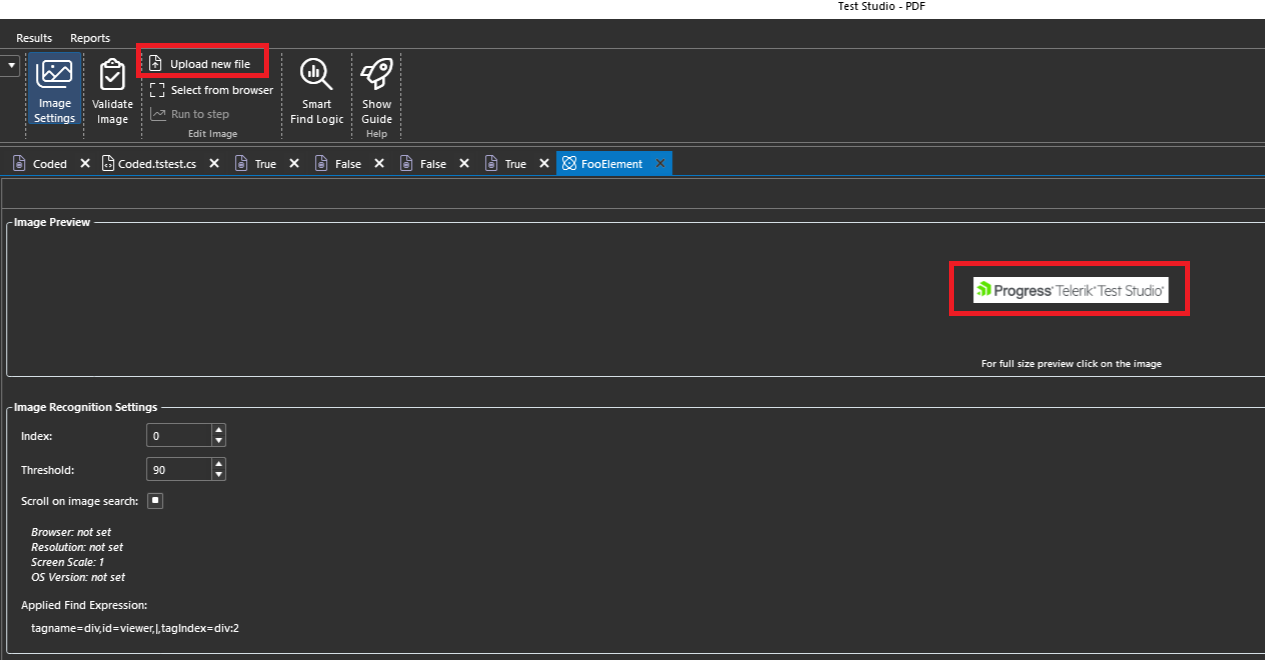
- I modified the element’s image with the one I need for the logo verification only.
Upon running the test, the result is successful, as the new logo image is found in the PDF file. Note that such verification checks the visibility property of the element. If an element is marked visible but scrolled off the current window, the verification will still pass but it’s not actually visible on the current screen or inside the scroll window.

Improve
I wanted to make sure the validation is not false positive, so added two additional scenarios:
- I unchecked the
IsVisibleproperty to make sure the step would fail upon execution

- I copied the original test (
IsVisibleis checked) to a new one, calledFalse, but this time uploaded an additional and slightly different logo for the element image. Note that you can upload more than one image to an element and have different steps use different images.
Upon running the new test, the result fails as expected, as the modified logo is not present in the PDF file.

Following the flow applied for the logo validation, you could do the same for the graph image or any other and achieve the same results.
Improvise
The improvise part is always tricky, but nevertheless I decided to add it. Using some C# code, I might be able to calculate if an element is visible or not. It would require asking the browser for the current screen coordinates of the view window, whether that’s a scroll window or the browser window. Then I’d ask the browser for the current screen coordinates of the target element I want to verify. Then I’d calculate whether the two rectangles intersect. If the two rectangles intersect, then the element is visible. If they do not intersect, then the element is not visible. But that is pretty advanced and maybe worthy of a separate blog post.
I could go even further and take a snapshot of the entire browser or just a portion of it via ActiveBrowser.Window.GetBitmap(). Then, using System.Drawing namespace, crop an area and save it, and finally compare it to another image that I am using as a reference standard. I did this to experiment with Mean Squared Error (MSE), which is a common metric used in image comparison to measure the difference between two images.
MSE quantifies the average of the squares of the differences between corresponding pixel values of the two images. MSE is a mathematical formula used to calculate the average squared difference between the original (reference) image and the modified (test) image. The lower the MSE, the more similar the two images are. A higher MSE indicates greater dissimilarity.
Just to give you a glimpse of what’s necessary to be done in advance before MSE is fully relied on, you need to:
- Align the images – Check that both images are of the same dimensions. If not, resize them appropriately.
- Subtract pixel values – For each corresponding pixel in the two images, compute the difference.
- Square the differences – Square each difference to ensure all values are positive.
- Sum the squared differences – Add up all the squared differences.
- Average the sum – Divide the total by the number of pixel pairs to get the mean squared error.
Although that approach would provide endless opportunities, the maintenance of the code would eventually become a burden, so I’d prefer to stick to the low/no code approach. What would you do in such a case? Let us know in the comments section.
And if you haven’t done so, give Test Studio a try for free:
Happy testing!
This content originally appeared on Telerik Blogs and was authored by Petar Grigorov
Petar Grigorov | Sciencx (2024-07-11T07:54:19+00:00) Tips on Advanced PDF Automation with Test Studio. Retrieved from https://www.scien.cx/2024/07/11/tips-on-advanced-pdf-automation-with-test-studio/
Please log in to upload a file.
There are no updates yet.
Click the Upload button above to add an update.

