
This content originally appeared on Level Up Coding - Medium and was authored by Guilherme Oliveira
Every year when I receive Google’s email about my storage service subscription it gets me thinking: “Well, maybe I could create my own solution to save my files. It couldn’t be that hard“. And since it requires a machine running continuously, it doesn’t take long before this evolves into:
“I totally should create my own solution to store and my files, run and host my data-related projects, and help a bunch of cool technological stuff that would make me proud!
Usually, this feeling lasts around 2 weeks and it disappears. This time I decided to do something about it before it happened.
In the following paragraphs will be sharing the overall process of using an old laptop to set up my current home server environment. There are important highlights on how I solved the biggest problems I faced so the reader (future myself included) can easily use it as reference when trying to self host applications.
Making the first choices
Which hardware to use? Choosing where to host my server.
Basically a server is simply a computer that has a high availability to serve a function so It’s possible to create one from any piece of hardware I can run an Operational System on. Some of the easier options to a home lab are:
- Repurposing an old personal computer: Is not that uncommon for any It professional or enthusiast to have at least one old laptop on the house that is not used anymore. Since the basic system of a server is much lighter than that of a personal computer, that old hardware is likely sufficient for most applications.
- Virtualizing a system on the cloud: Any cloud provider such as AWS or specialized services to host virtual machines offers solutions to within minutes have your own linux system running remotely in a physical structure probably more reliable than your old laptop. Those can cost only a few dollars per month or even be available within a free plan if you are using only a small computational power and storage.
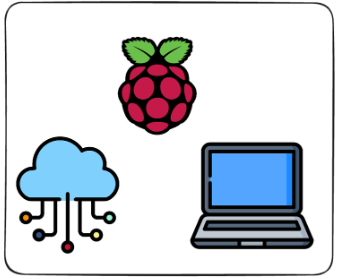
- Buying a low cost hardware: Acquiring a Raspberry pi or mini pc can be very advantageous not only for using little space but also leaving more space for upgrades and sometimes having more advanced capabilities that may not be expected in older computers such as USB 3.0 or a more modern network board.
Fortunately I had already and old laptop at home that even though had already physical problems with its keyboard, battery and screen was internally working well with it’s decent i5 processor and 8gb or ram. Choosing to use it I had no initial cost involved and ended up with much more computational power than I expected to need.
Which software to use? Choosing what to host on my server.

Again, there are many possibilities regarding operational systems to use on the server. Al all my options were linux based, so most of the things can be performed any of them. The difference comes from the specificity of the system that can have multiple focuses. They can be divided in 3 main catelgories:
- Network Attached Systems (NAS): Allowing to robust and securely storage and share data NAS systems natively offer options to create redundant data storage, manage access profiles. TrueNas is enterprise solution with a open source community edition highly suitable for residential usage.
- Hypervisors: Focused on managing virtual machine and containers, can be a very robust and flexible solution. The most famous of this operational systems is the open-souce Proxmox Environment.
- General Purpose Linux OS: Maybe the simpler way to start with a server is to just use the linux distribution of preference and start developing the solutions wanted. It can be done directly in the system or with docker containers. This approach does not include any features specific for home servers and allow the user to more easily adjust the robustness and complexity of its application. Ubuntu and debian are excelent choices with a enormous communities end can be start being used as servers even in their desktop version.
For simplicity sake, I chose to start using my server in my desktop version of ubuntu that I already used im my old computer then changed to the latest ubuntu desktop version. This choice is also suitable for my learning purposes, as it allowed me to configure the system without predefined features, unlike other specialized systems.
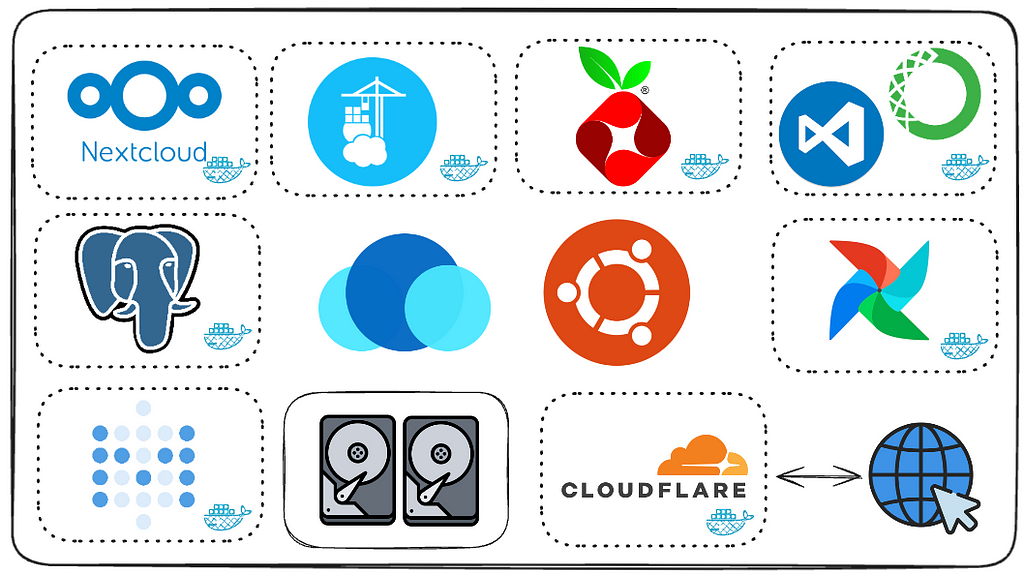
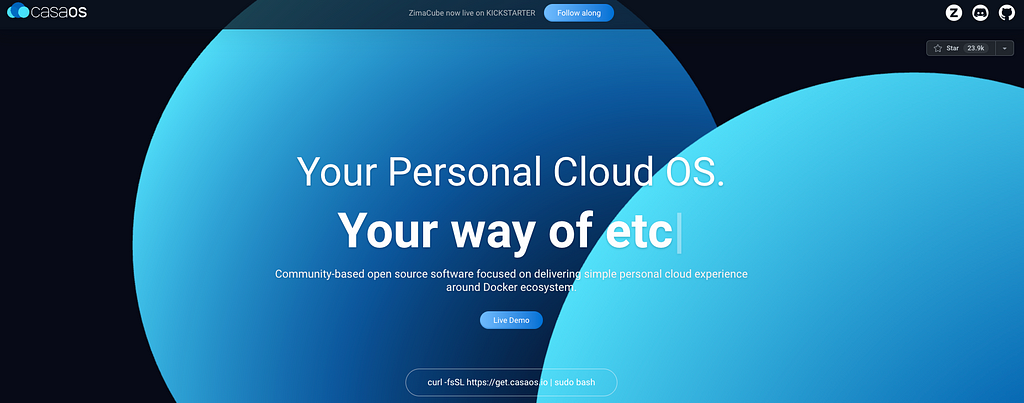
A great addition: Casa OS
Casa OS is open-source software that simplifies and provides a very user-friendly experience for managing and monitoring home lab applications. Despite the name it is not a OS per se, but a software that runs on top of a linux system. One of the advantages is that all the experience it proposes is based around a docker ecosystem, so when something goes wrong in the process of adding a service, removing all traces of it and starting a new container with a fresh application only takes some moments.
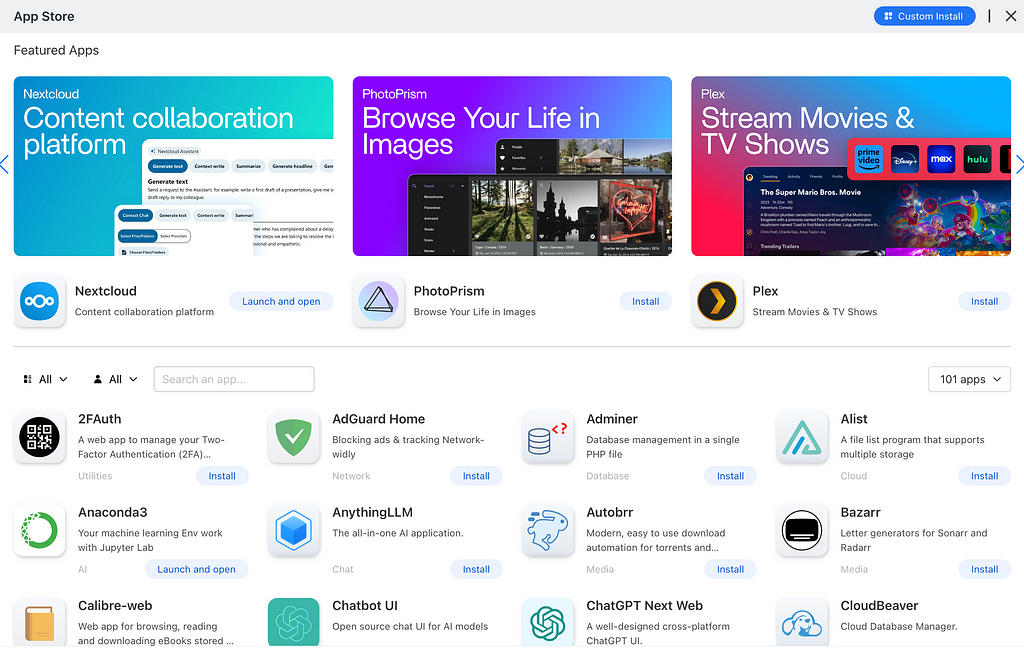
Once installed, CasaOS provides a dashboard to monitor computer resources, network traffic and a very elegant way to install and manage docker containers. In its app store you can, in a few clicks, pull and run a image from docker hub and be redirected to its address by clicking on the app icon. It also comes with a File Manager app that allows the user to visualize data on storage devices and easily share it with your local network. You don’t lose any ability or freedom to manage docker containers or even serve applications installed directly on the main OS, but it can be a huge help.
Initial Setup
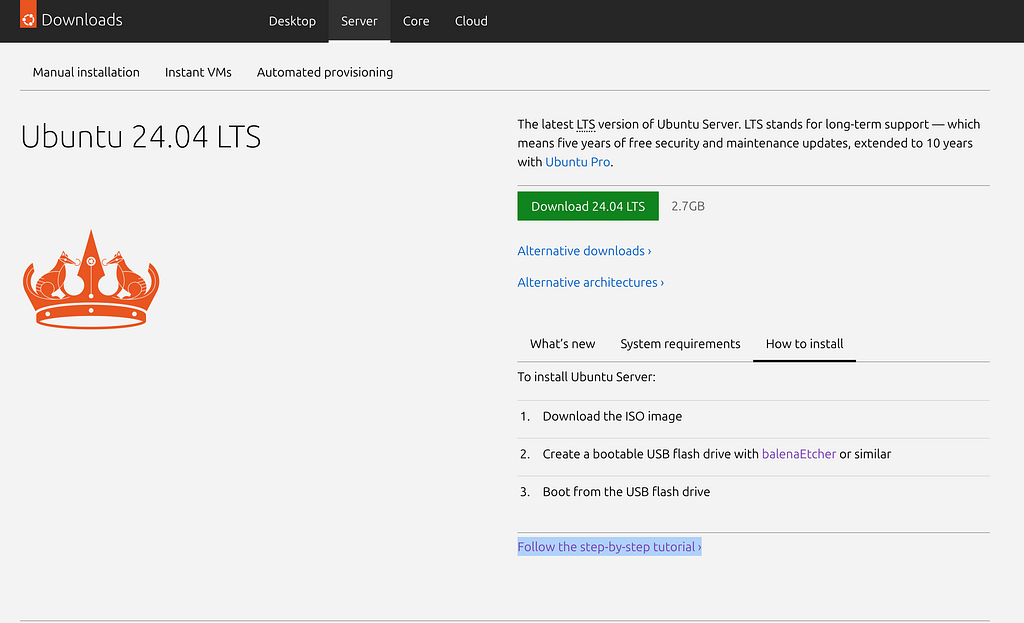
Ubuntu server
Even though not as user-friendly as the desktops versions, installing ubuntu server can be very easy and straightforward. At https://ubuntu.com/download/server#how-to-install the latest version can be found alongside a step-by-step tutorial. With the ISO image a software such as balenaEtcher can be used to create a bootable USB drive. From that point all is needed is to boot the server machine with the USB drive and follow the instructions. It is interesting to make note on the local Ip address from the ‘networking’ step.
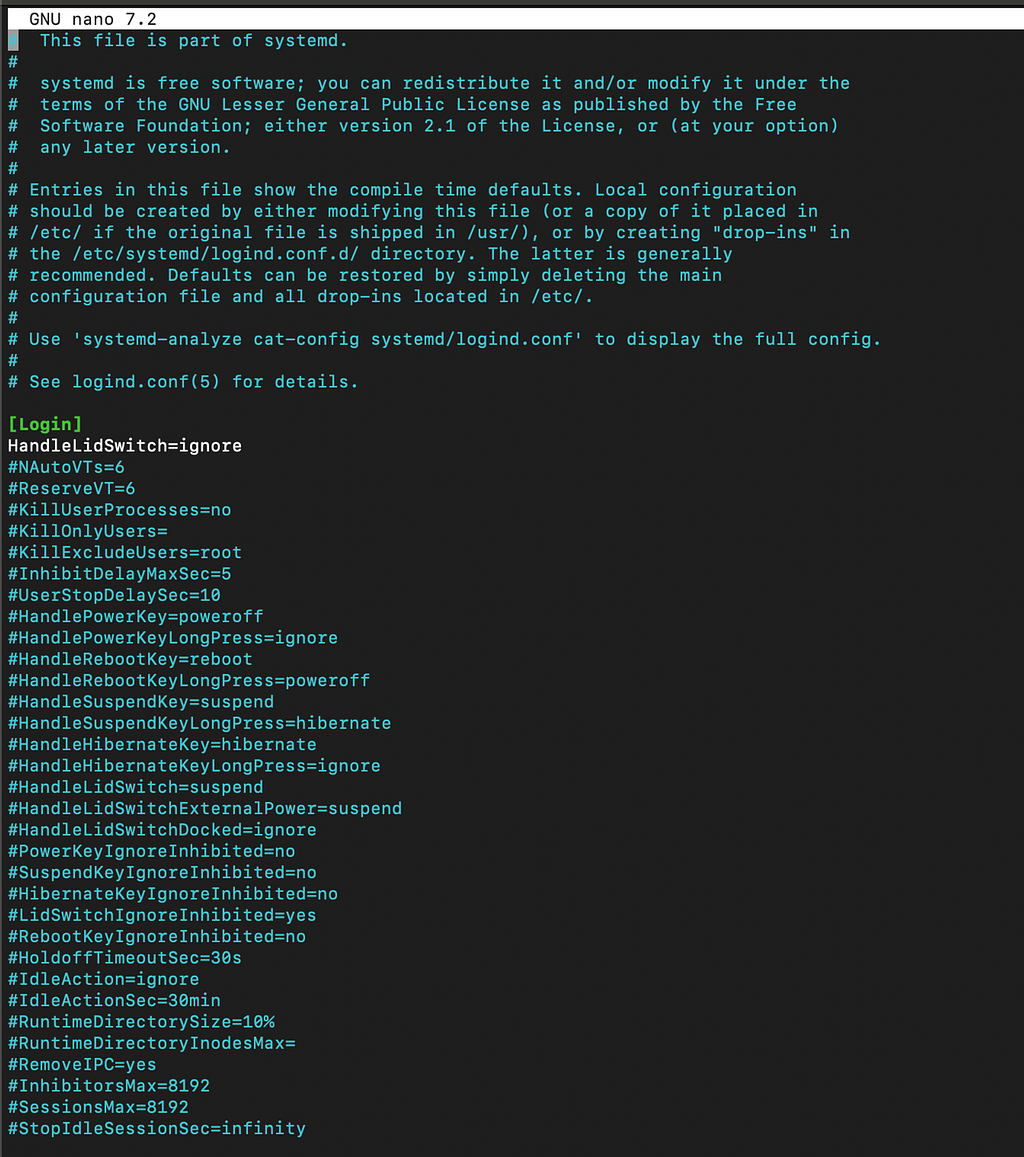
t the end of the installation, the machine will reboot. If you’re using a laptop, you’ll need to update a specific configuration file to keep the computer running even when the lid is closed. The file for this configuration is /etc/systemd/logind.conf and add HandleLidSwitch=ignore to the file and save it. The rest of the file is commented with the default values. Once the file is updated running systemctl restart systemd-logind.service is going to make the changes take place.
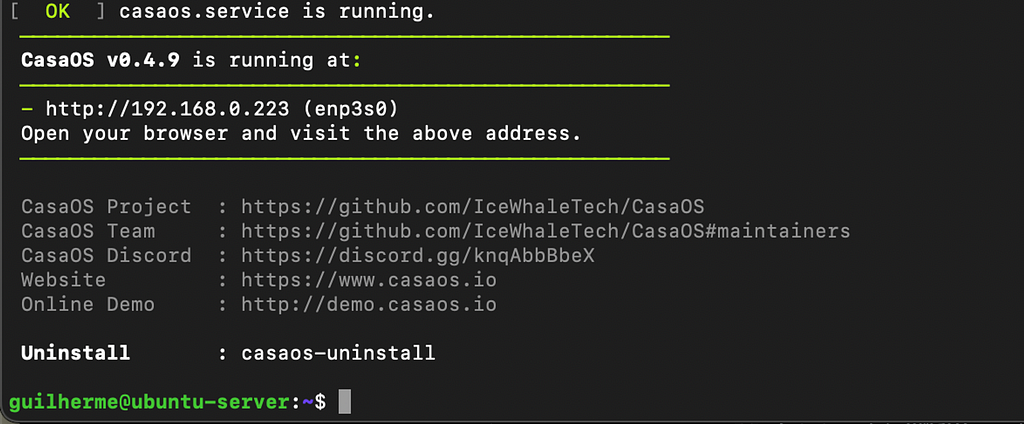
If it wasn’t noted from the installation process, the local ip address can be obtained with the command hostname -I . ‘192.168.0.223’ in the example bellow. After that, the lid can be closed and every other step can be done in another in the same local network.

To do that, on the other computer terminal (For mac and Linux) or command prompt (Windows) the ssh connection that will allow to control the server is made by using the command ssh user@local_ip_address and them authenticating with the password defined ad the installation. From that point every command is executed on the server machine.

Casa OS
Installing casa os can is simple in a new ubuntu installation, the necessary commands are:
- sudo apt-get update: Make sure you system can access the latest packages available
- sudo apt install curl: Install the curl tool on your system, which is necessary for downloading the Casa OS installation script.
- curl -fsSL https://get.casaos.io | sudo bash: Download the Casa OS installation script and then execute it.
After running those, the following text appears indicating the beginning of the installation.
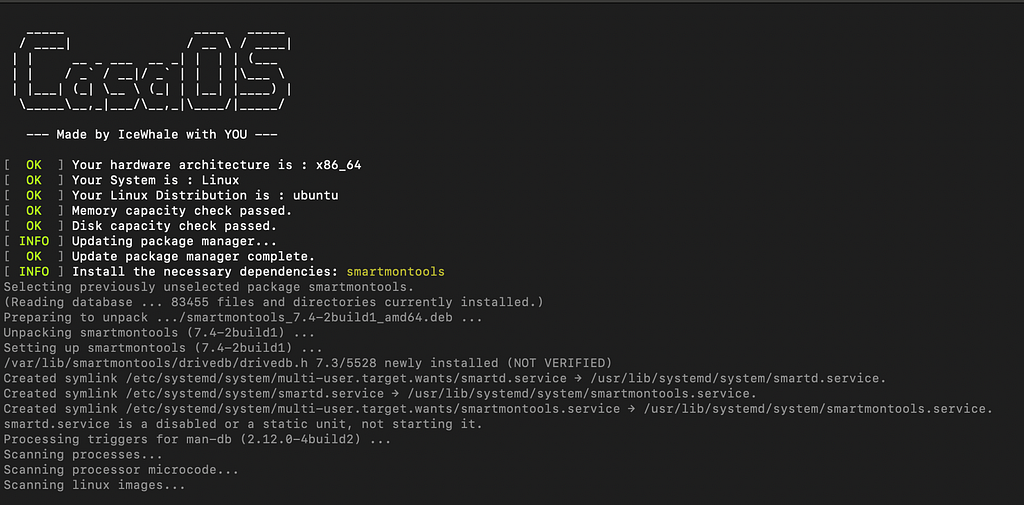
The script is going to install all the dependencies and end when the software is running and available in the local network.
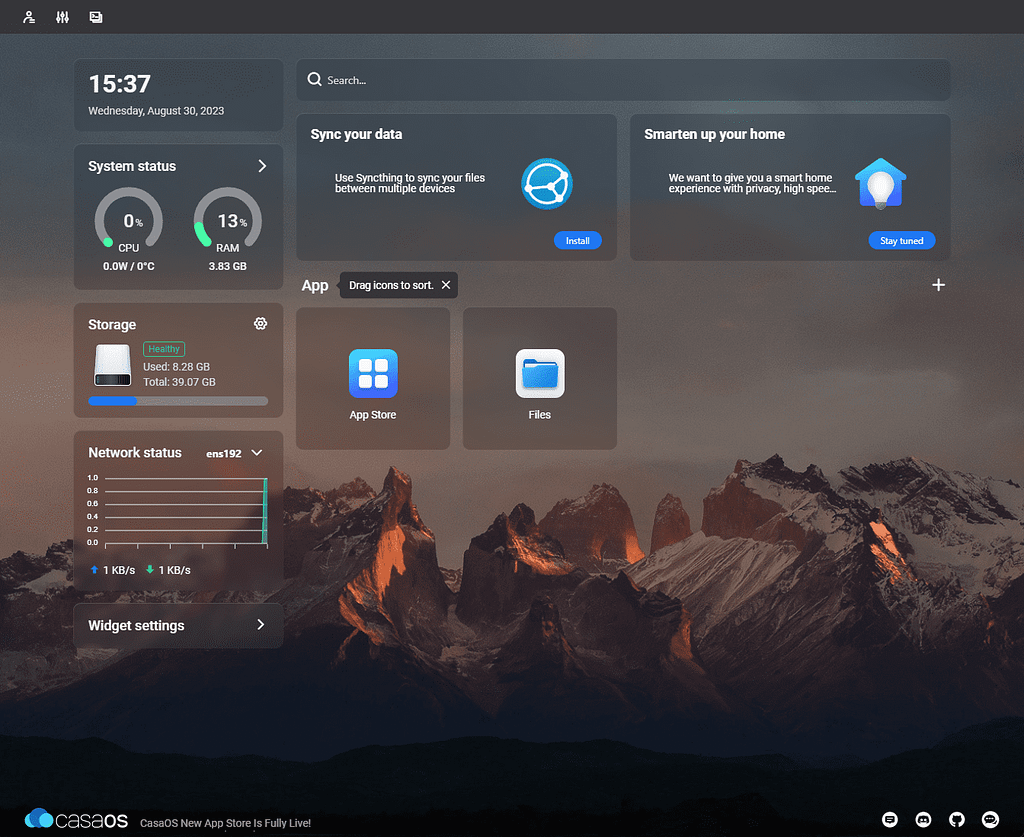
After accessing the local address in the Internet browser of choice, a prompt to create a user and password is going to appear and after logging in for the fist time, the initial interface finally appears. This environment, though sipmle, contains very usefull featuetures such as:
- General management icons (top left corner), from where the main machine logs can be viewed, the terminal accessed and account and general Casa OS settings updated.
- System monitoring Dashboard, containing compute resources usage status, storage units available and network usage metrics.
- App icons, wich of them redirecting the user to a specific port in the host computer where the Web UI of the service should be.
Serving applications
Made to work around docker ecosystem, Casa OS provides a simplified and friendly experience to install containers from it's APP store. There are dozens of images with predefined configurations ready to be deployed in some clicks. Once installed, an icon is going to be added to the dashboard to redirect from where the user should bee able to can start interacting with it.
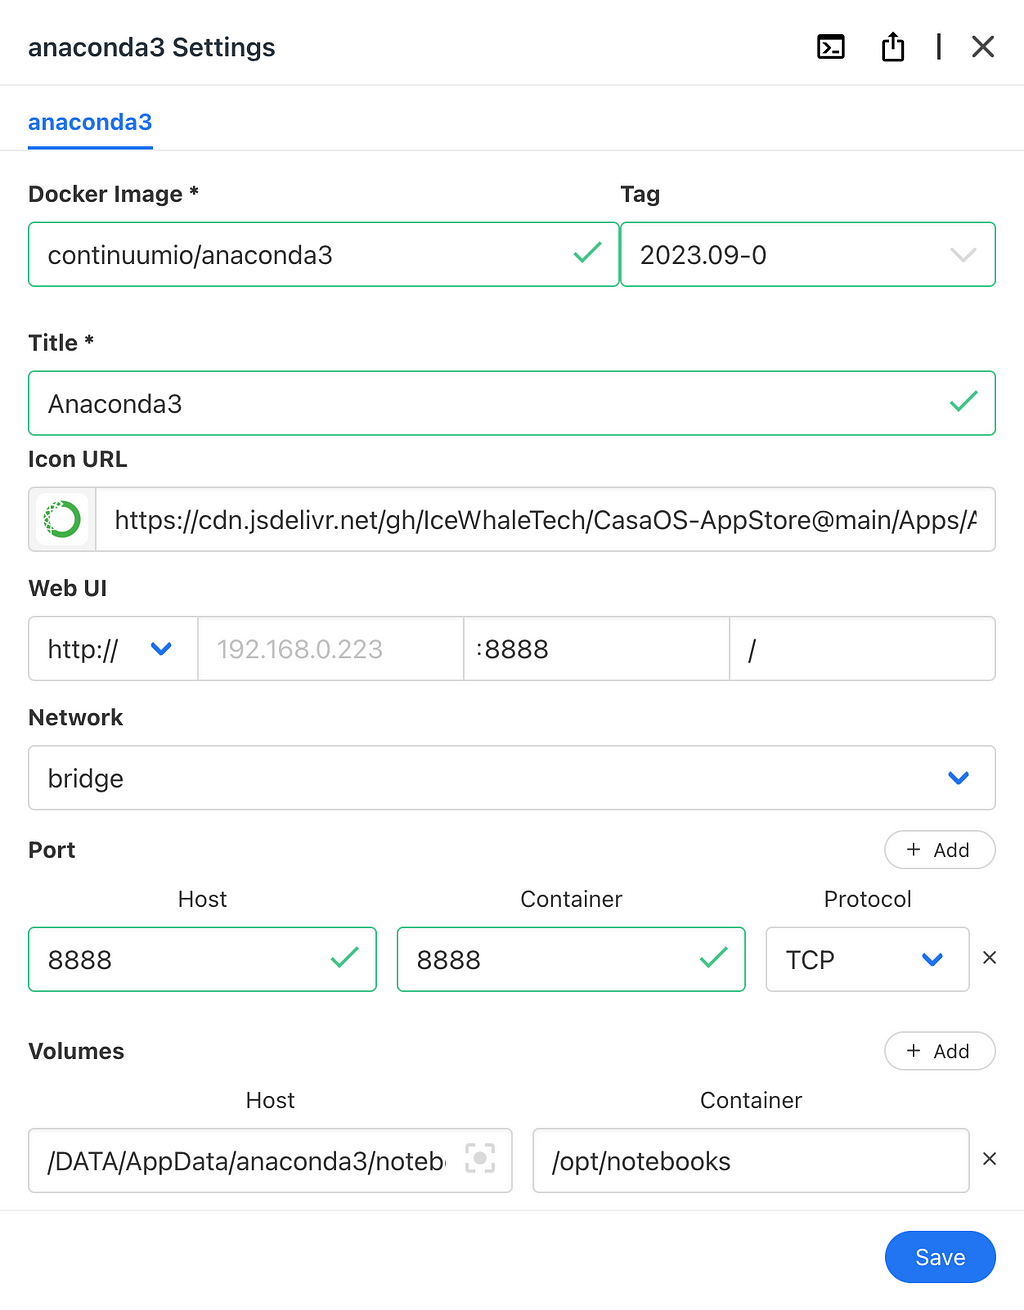
It’s also possible to customize installations or create new ones using the container settings page. This approach is very similar to creating a docker-compose file in a friendly user interface. It's also possible to import those settings from a docker-compose file or docker CLI commands. After the installation, this page is also useful to verify logs and access the container terminal directly.
One of the biggest learnings of this comes from the fact that even with the help the Casa OS ecosystem, for almost every container installed there was at least one pitfall or caveat that was needed to understand in order to make it work properly. The next lines dedicated to mentioning some of those containers and what should one additionally know before try using them.
Portainer

- Function: The industry’s "most user-friendly container management platform" allows the user have a lot control over the deployment and maintenance of containers. Also, it is great to execute tests.
- Caveats: The version installed by the CasaOS app store contains a bug that doesn’t allow access to the container’s console. Don't stick to the default option this time.
Pi-hole
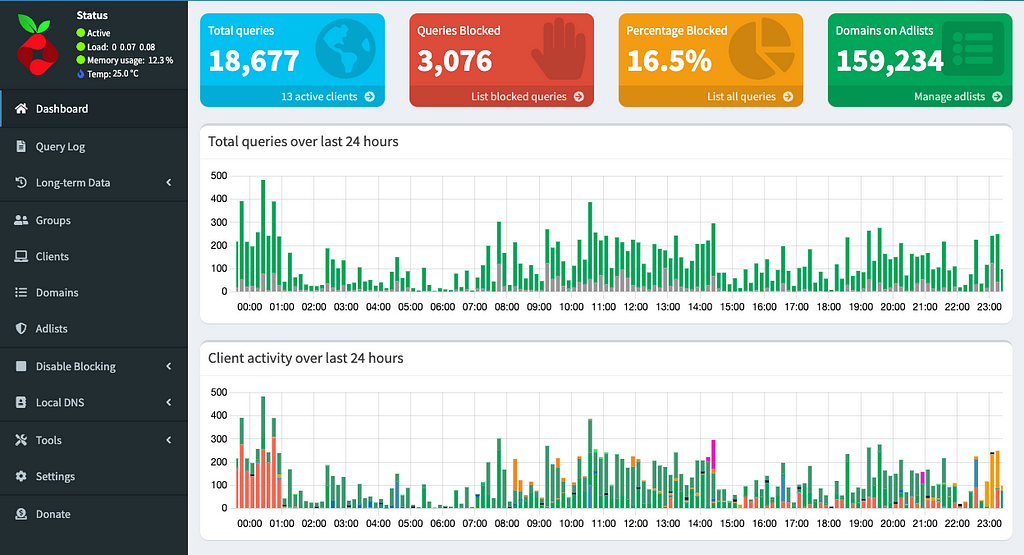
- Function: Pi-hole acts mainly as a DNS sinkhole, basically monitoring the network traffic and blocking undesired domains. By default it comes with a list of almost 160k domains related to adds but there are plenty available online.
- Caveats: For Pi-hole to work, the machine it’s running on needs to be added as a DNS server in the router’s configurations. When using ubuntu, the default DNS port (port 53) on the machine is already being used by Ubuntu’s internal DNS server. To install Pi-hole on port 53, it’s necessary to disable this native Ubuntu DNS service.

NextCloud
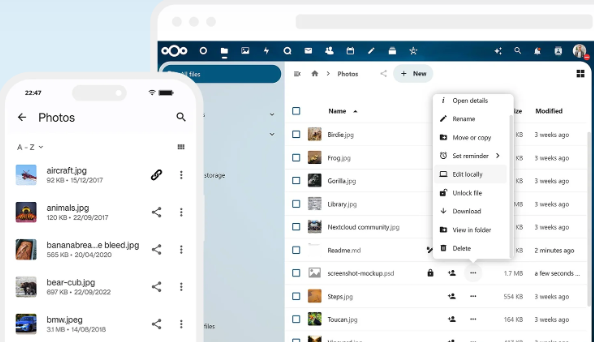
- Function: Nextcloud is a suite of client-server software that proposes to be a self hosted alternative for cloud services. With it, its possible to easily manage multiple users. It also cantais mobile apps with functionalities to even automatically backup files.
- Caveats: The basic installation is pretty straightforward and uses a SQLite database. In order to use the auto uploading features is recommended use other database such as Postgres that requires extra effort. Additionally, it also blocks the installation if some external device is selected to storage files. This reddit discussion provides a solution for it.
Code/Anaconda
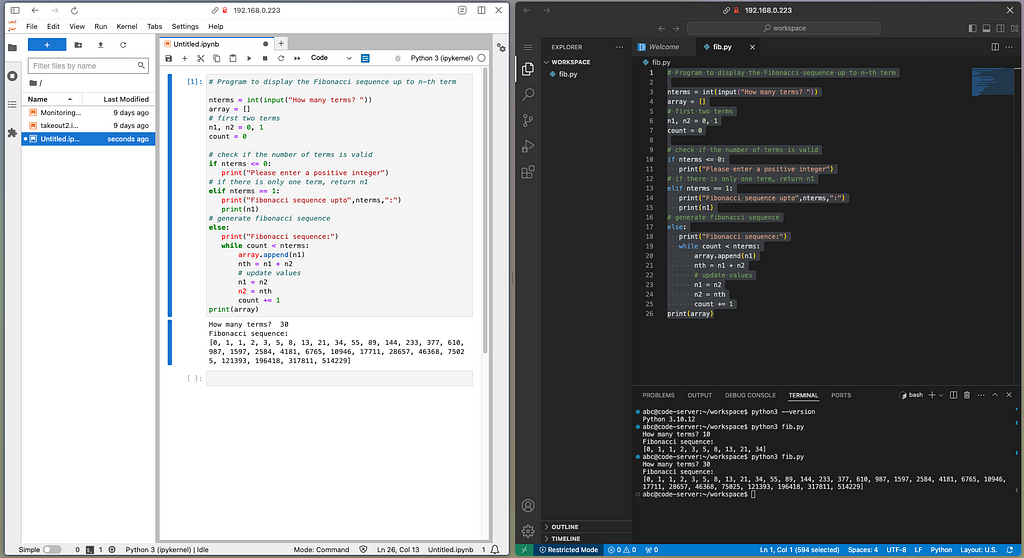
- Function: Anaconda and Code server are he chosen tools for development. The first one provides a jupiter interface ready to develop data applications, leveraging and a Jupyter server that can be easily accessed by every computer, so there is no need to use only the server UI. On a more general approach, code serer provides a complete development environment, with a large variety of plugins to install.
- Caveats: In order to log in UI and access the Jupyter server the user need to use a token that is shown on the installation logs. For code-server, it's important to notice that it doesn't come with any program or programming language pre-installed.
Airflow
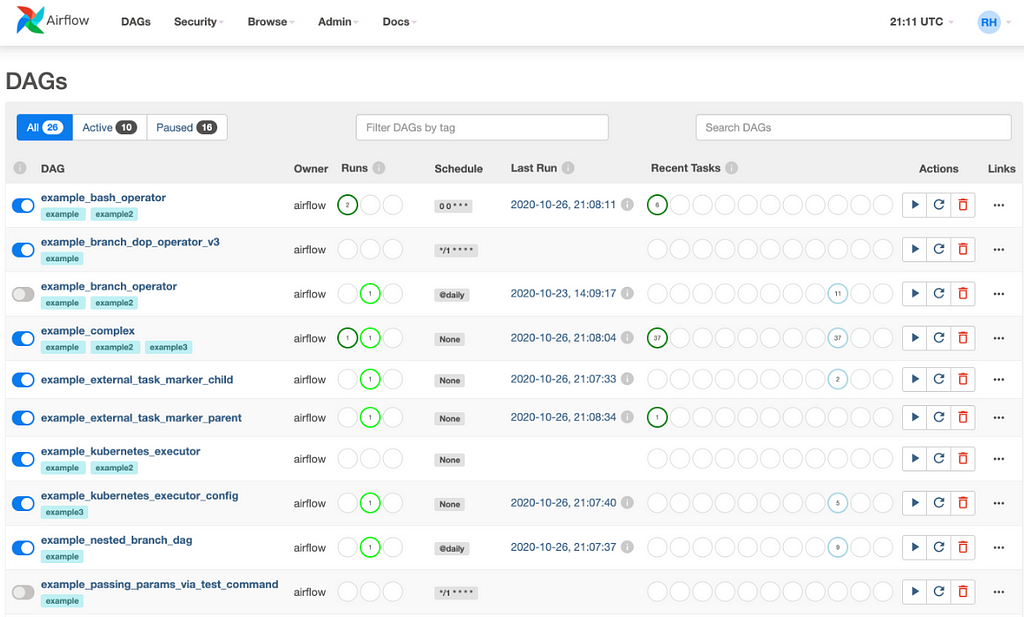
- Function: Airflow is a largely used orchestration tool for developing, scheduling, and monitoring batch-oriented workflows. It is open source and contains a complete variety of functionalities and a very large online community.
- Caveats: Since it uses multiple services, install airflow using Casa OS features is, at least, challenging. Following official installation tutorial using the console is the easier option. Installing for other methods will make the Casa Os automatic icon not work completely, but the user is also able to create custom ones pointing to the intended UI port.
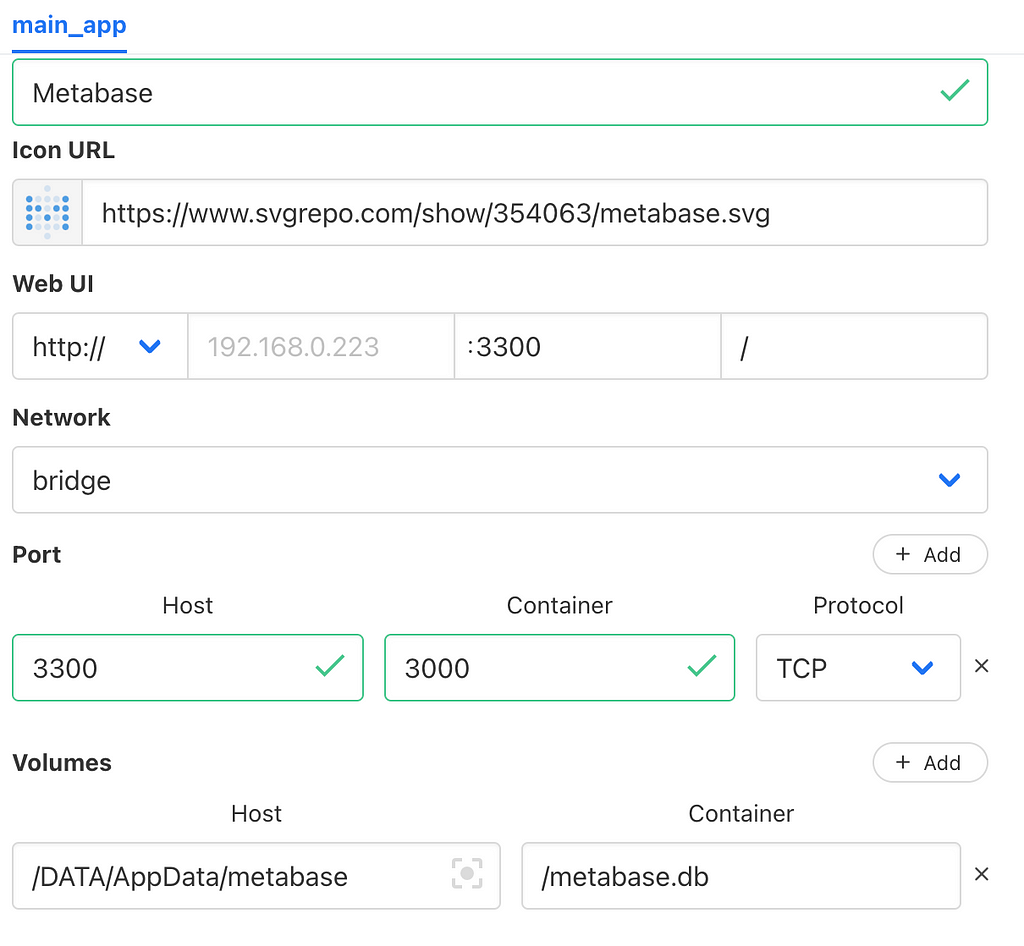
Metabase
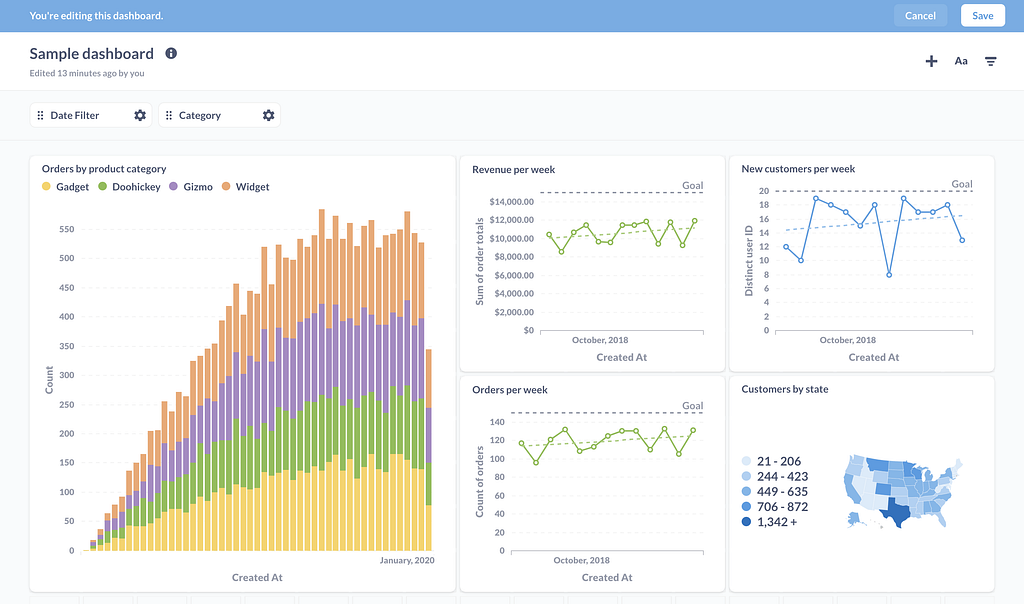
- Function: Being most popular open-spurce BI solution, Metabase provides a vary complete set of features to connect to and explore databases, create dynamic dashboards and manage multiple users, each with specific permissions.
- Caveats:One thing not easily found on the forums is how to save the settings (users, connections, dashboards…) once the container is turned off. For that, the file a volume syncing with the container file /metabase.db needs to be created on the host machine.
Cloudflare tunel
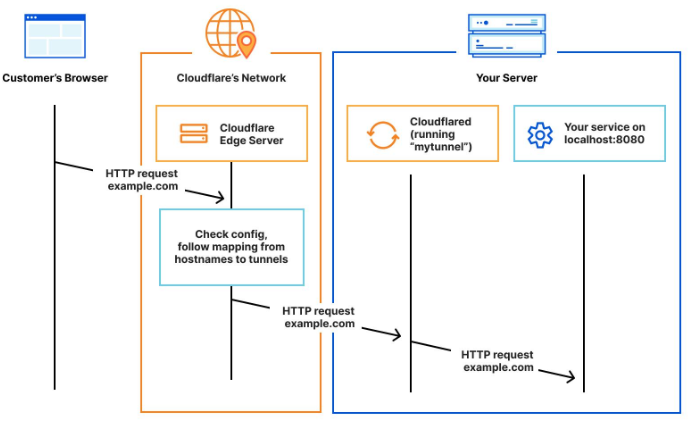
- Function: There are multiple ways to make the self-hosted services available from outside the local network, each with it's pros and cons. One of the simpler ones, is to use Tunnels from Cloudflare zero-trust framework. In a nutshell, it relies on a service, that can be run on a docker container, that creates a secure connection between a port in the server machine and Cloudserver network that used another secure connection the the rest of the internet.
- Caveats: Even though creating a tunnel can be free for development and testing purposes, a domain name is needed. Oen cn be bought directly from Cloudflare. Also, since it relies on the tunner service, once the container running it is shut down, it stopps working.
Conclusion and next steps
Setting up a home server with an old laptop, Ubuntu, and CasaOS has been both effective and rewarding. The challenges and learning curves have provided valuable insights, enabling me to host various applications on a self-managed server, which offers both flexibility and cost savings.
This experience has allowed me to gain greater control over my data and projects, while also deepening my understanding of server management and containerized applications. Moving forward, this server will play a crucial role in expanding my technical skills and developing new projects. It will serve as a reliable platform for testing and deploying data-driven applications and providing useful services to my household.
Transforming an old laptop into a fully functional home server has equipped me with practical skills and a greater appreciation for open-source technology. With numerous opportunities ahead, this server will be central to unlocking potential and bringing new ideas to life.
Creating a Docker-driven Home Server Experience on Ubuntu with CasaOS was originally published in Level Up Coding on Medium, where people are continuing the conversation by highlighting and responding to this story.
This content originally appeared on Level Up Coding - Medium and was authored by Guilherme Oliveira
Guilherme Oliveira | Sciencx (2024-08-15T20:04:38+00:00) Creating a Docker-driven Home Server Experience on Ubuntu with CasaOS. Retrieved from https://www.scien.cx/2024/08/15/creating-a-docker-driven-home-server-experience-on-ubuntu-with-casaos/
Please log in to upload a file.
There are no updates yet.
Click the Upload button above to add an update.