This content originally appeared on Telerik Blogs and was authored by Hassan Djirdeh
Explore the basics of using Vue with Firebase, including setting up a new project and leveraging some Firebase features to read and update information on the database.
Vue.js is a progressive framework for building user interfaces, while Firebase can be understood to be a suite of backend services that include real-time databases, authentication and hosting. Integrating these two technologies allows developers to create dynamic, responsive applications with minimal setup time.
In this article, we’ll explore the basics of using Vue with Firebase, including setting up a new project and leveraging some Firebase features to read and update information on our database.
Firebase
To start using Vue with Firebase, we’ll first need to set up a new Firebase project and then integrate it with our Vue application. Let’s go through some steps of creating a new Firebase project.
We’ll first sign in to the Firebase Console and create a new project.
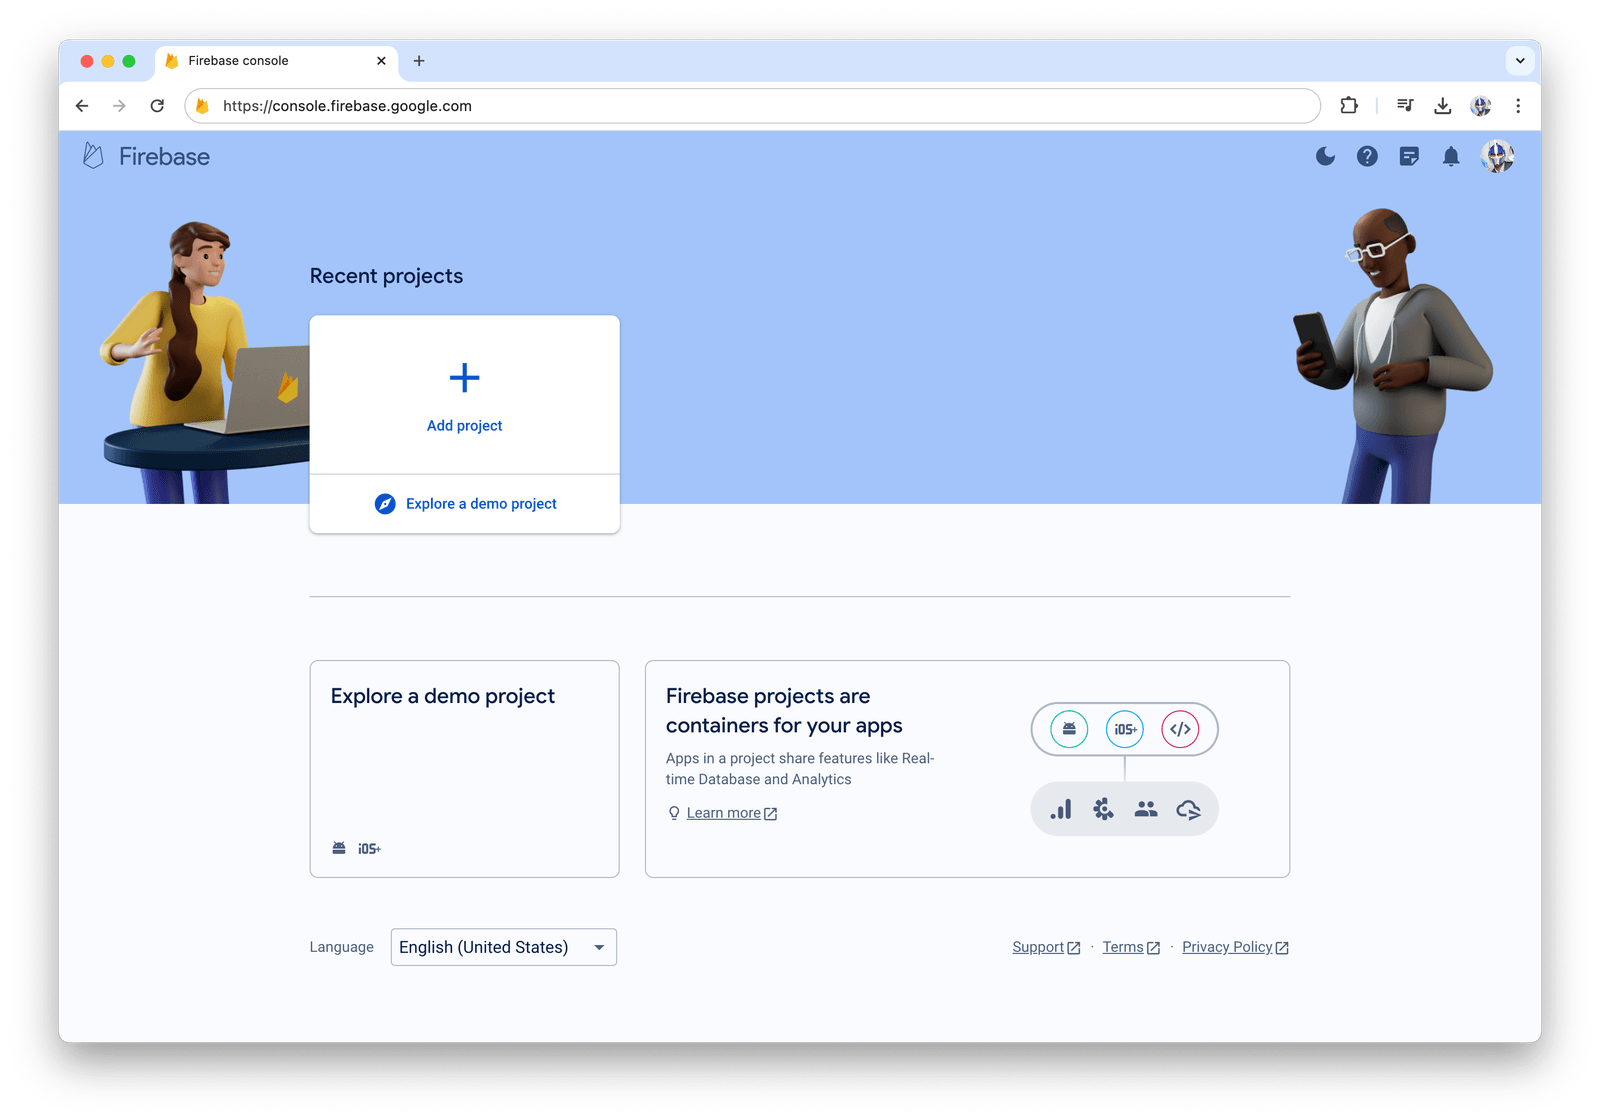
We’ll follow the prompts to create a new Firebase project and when complete, we’ll be able to visit our new project dashboard.
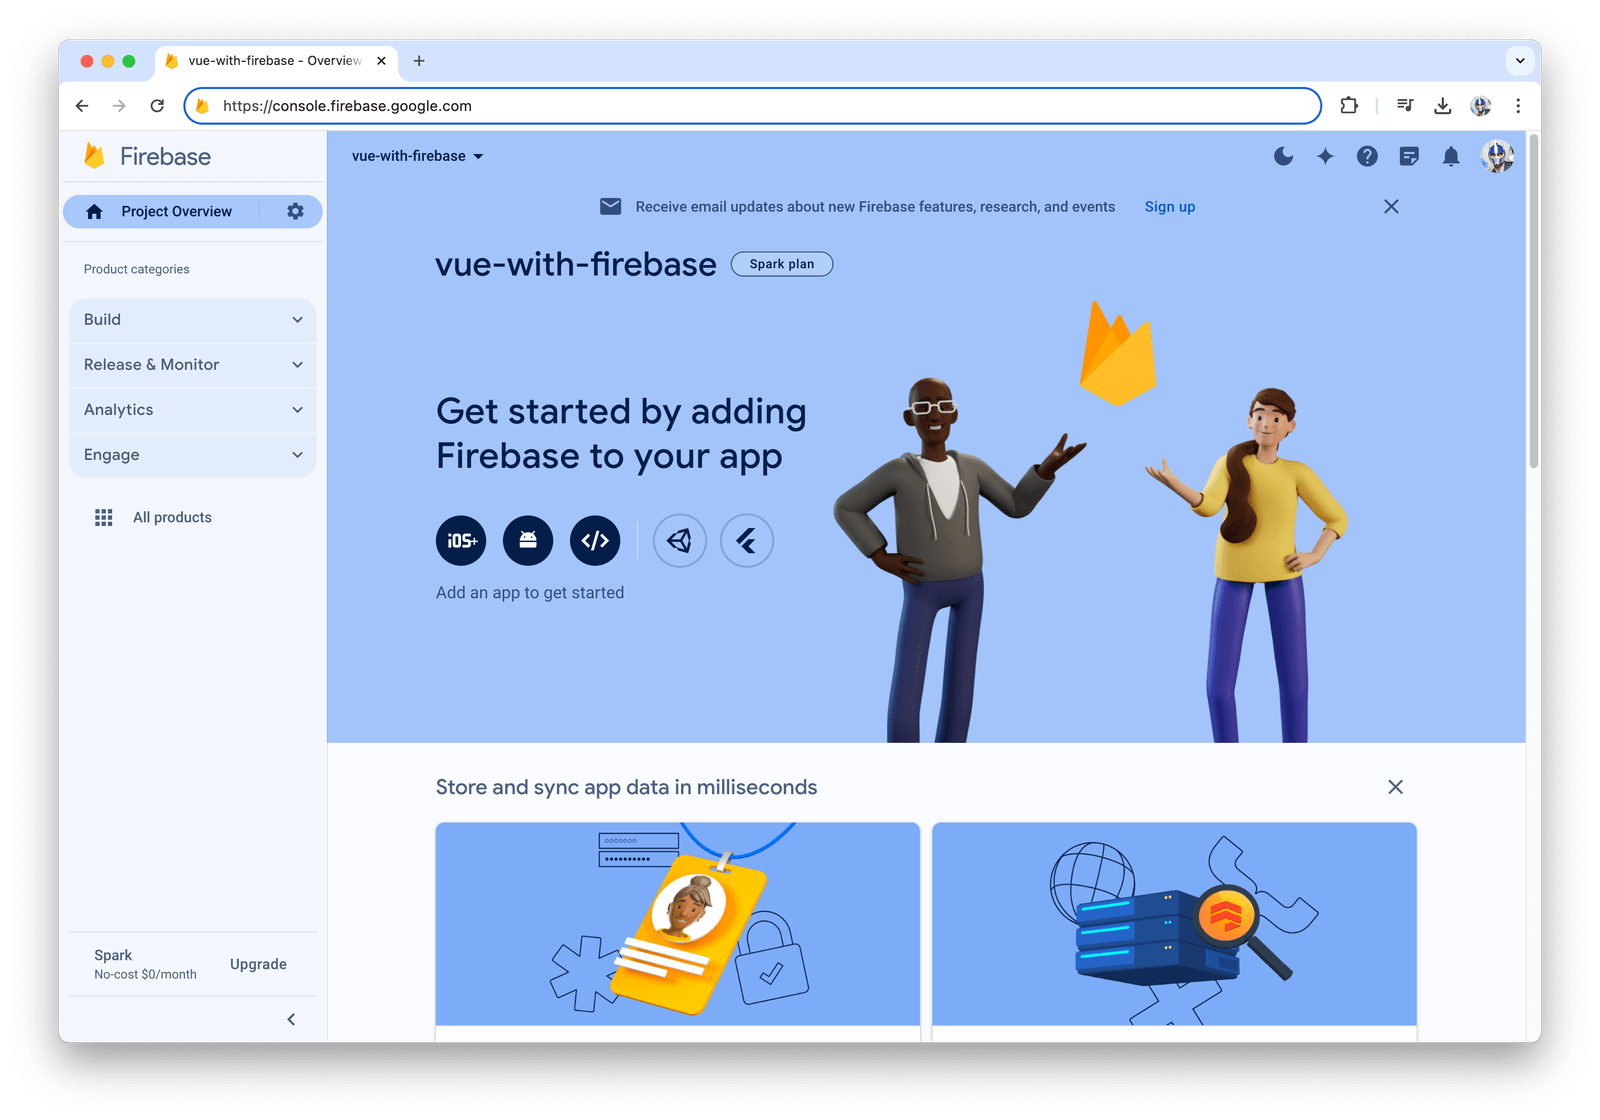
Firebase offers two different databases, Real-time Database and Firestore Database. We’ll use the Firestore Database as it offers a more flexible and scalable database for web and mobile applications.
In the Firestore Database setting within the Firebase project dashboard, we’ll go ahead and create a new Firestore Database. As we create the database, we’ll ensure to create it in test mode allowing us to develop and test quickly.

In the Project Overview page of the Firebase dashboard, we’ll register a new web app for our Firebase project to integrate Firebase services directly into our web application. When the web project has been created, we’ll be given some instructions on how to install Firebase into our web project and begin using the SDK to interact with our database from our web project.
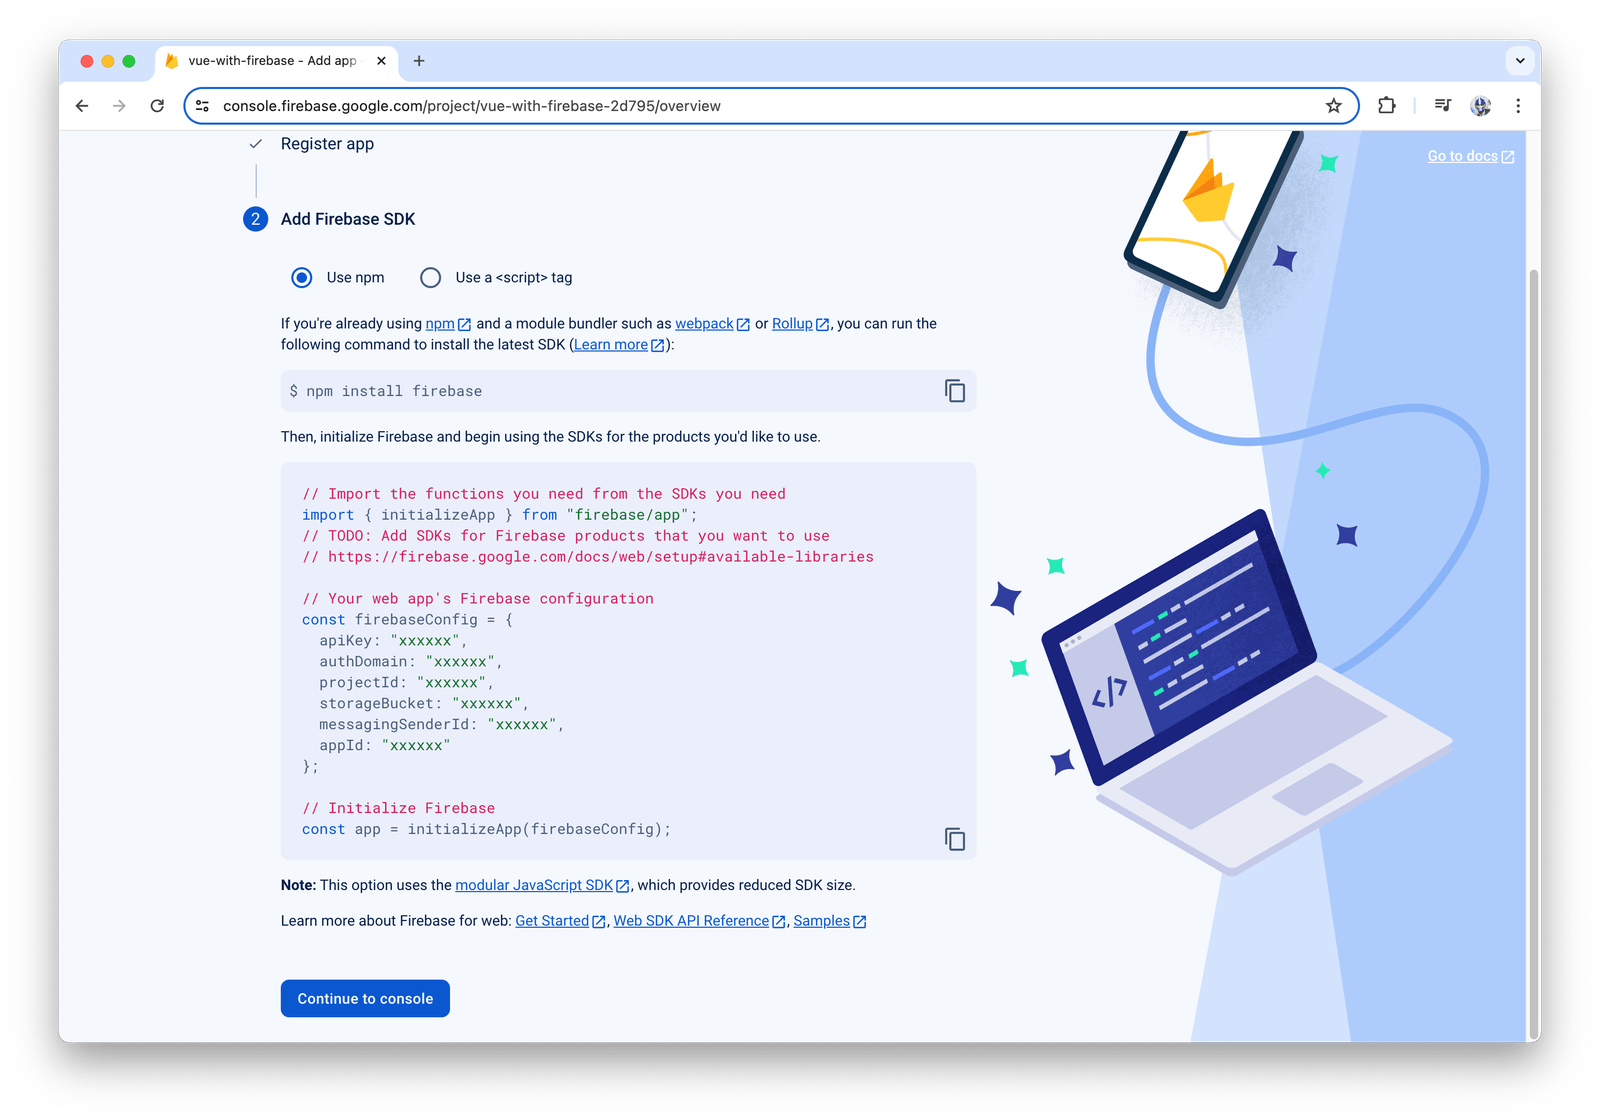
With our Firebase database created, we can now move toward creating our Vue project.
Vue
The Vue documentation recommends the use of Vite for a modern, fast and efficient development setup of a Vue project. We’ll use create-vue, the recommended official Vue project scaffolding tool, to start a Vite-powered Vue project.
With an up-to-date version of Node.js already installed, we can use the following command to create a Vue project.
npm create vue@latest
When the new Vue project is installed, a new directory is created with a pre-configured Vite/Vue project.

To run our Vue application, we can use the following command:
npm run dev
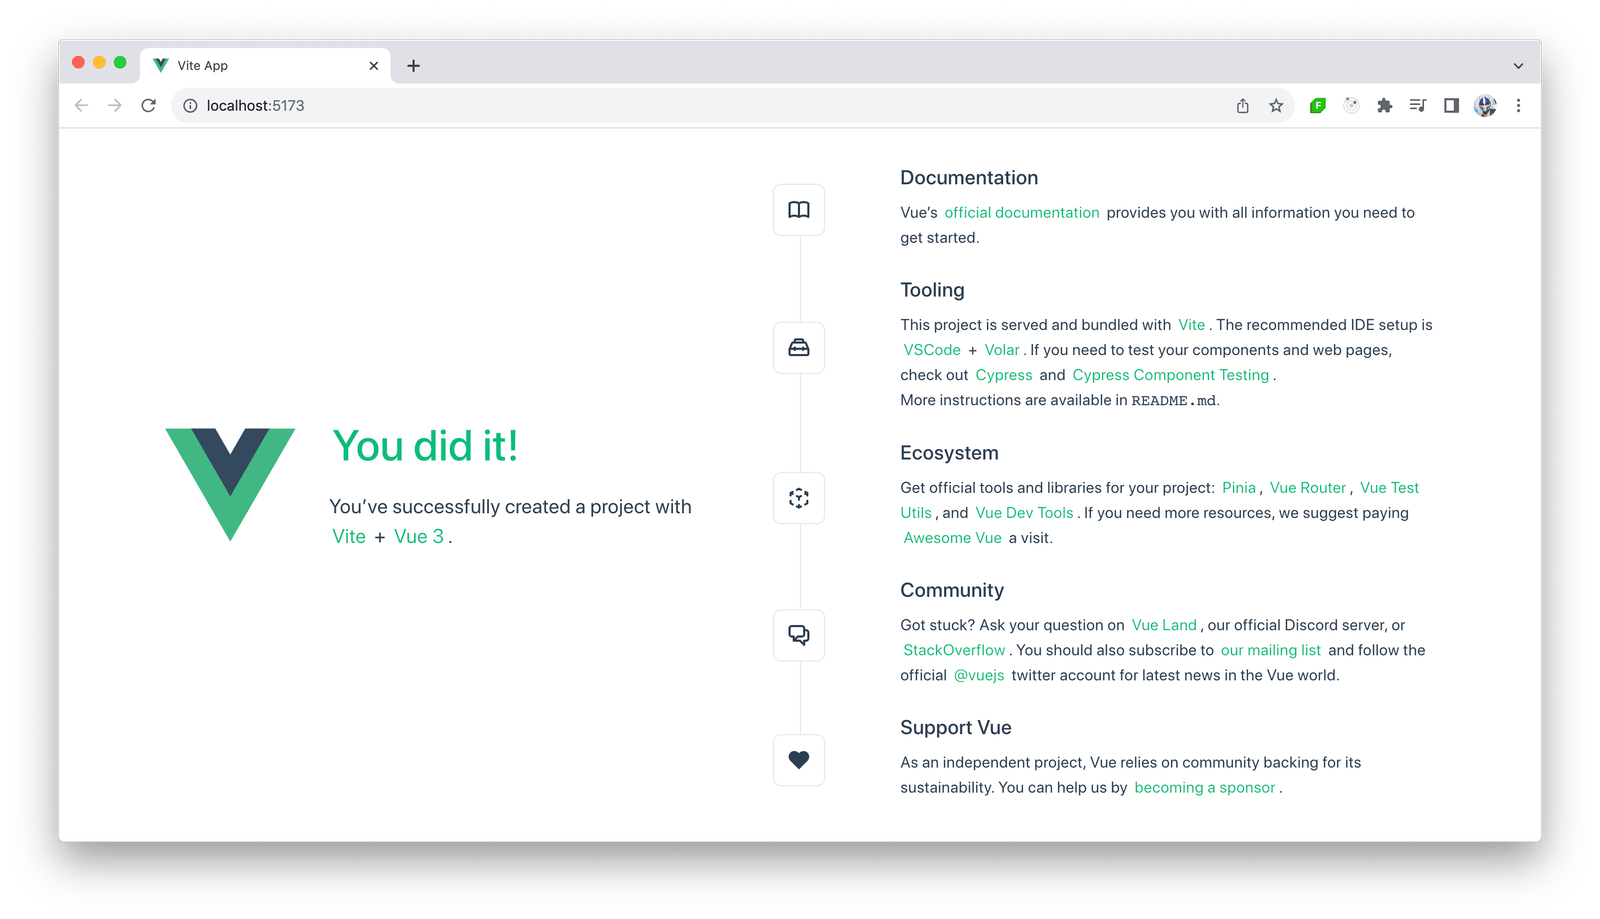
The above command launches the application on http://localhost:5173:
Integrating Firebase into Our Vue Project
To integrate Firebase into our Vue project, we’ll install and use two separate libraries:
- firebase – the main SDK for interacting with Firebase’s suite of features, such as authentication, database and storage
- vuefire – official Firebase bindings for Vue applications
In our Vue project directory, we’ll run the following commands to install the above libraries:
npm install firebase vuefire
In our entry point main.js file, we’ll follow the steps outlined in the Getting Started guide of the VueFire docs to properly initialize Firebase within our Vue application.
First, we’ll import the initializeApp() function and then initialize Firebase with our project’s specific configuration details:
import { createApp } from "vue";
import { initializeApp } from "firebase/app";
import App from "./App.vue";
// ..

export const firebaseApp = initializeApp({
  apiKey: "xxxx",
  authDomain: "xxxx",
  projectId: "xxxx",
  storageBucket: "xxxx",
  messagingSenderId: "xxxx",
  appId: "xxxx",
});

const app = createApp(App);
app.mount("#app");
The configuration values above (apiKey, authDomain, etc.) can be obtained through our Firebase project console. For security and flexibility, these should ideally be part of Environment Configuration variables, especially in production applications.
Next, we’ll import and install the VueFire Vue plugin to integrate Firebase’s real-time data capabilities into our Vue components.
import { VueFire } from "vuefire";
import { initializeApp } from "firebase/app";
import App from "./App.vue";
// ...

export const firebaseApp = initializeApp(/* ... */);

const app = createApp(App);

// install the VueFire plugin
app.use(VueFire, { firebaseApp });

app.mount("#app");
With this change, our Vue app has now successfully integrated with our Firebase project. In our Vue components, we’ll have access to composables like useFirebaseApp(), useFirestore() and useDatabase().
To test things out, we’ll add a new collection and database to our Firebase database, through the Firebase console, that contains two sets of todo items with each todo containing id, title and completed fields.
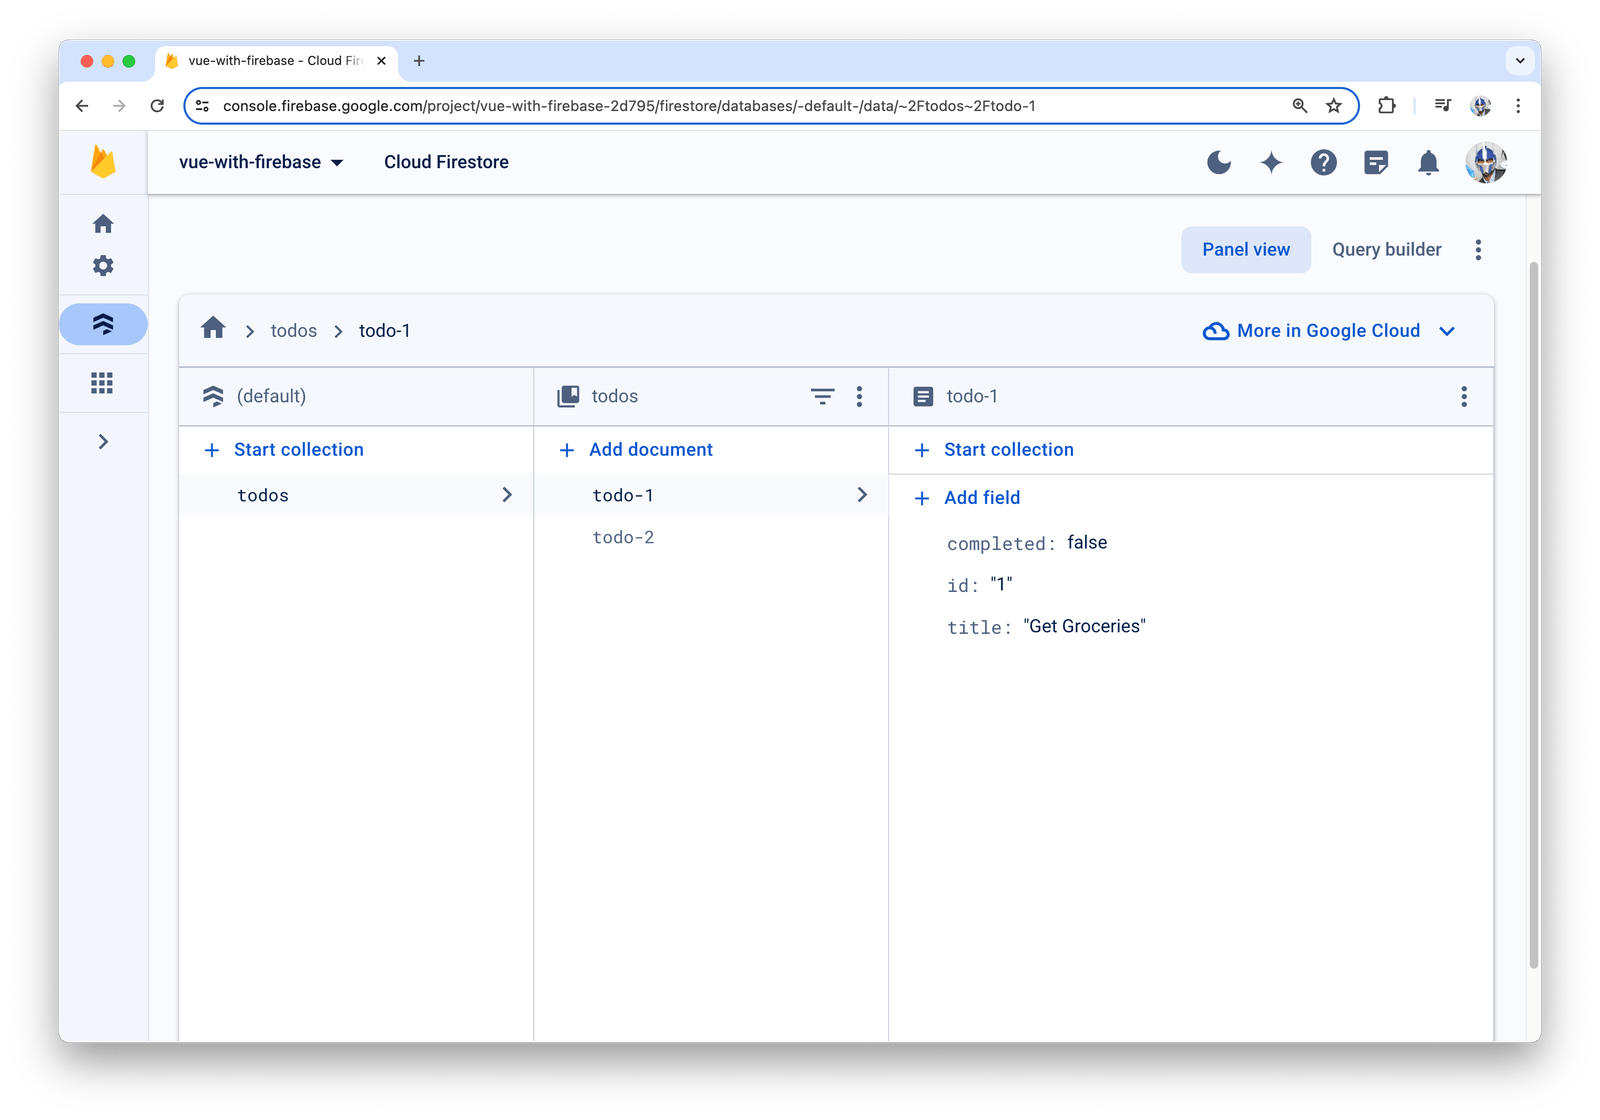
In Firebase, a collection denotes a group of documents that share the same fields, while a document represents a single data entry and is stored in a collection as a set of key-value pairs.
In our Vue application, we’ll create a <TodosList /> component that aims to display a list of to-do items fetched from the Firestore database in real time. In the component <script setup>, we’ll import the getFirestore() and collection() functions from firebase/firestore, and the useCollection() function from vuefire. We’ll also import the firebaseApp instance we’ve created in the root main.js file.
<script setup>
  import { getFirestore, collection } from "firebase/firestore";
  import { useCollection } from "vuefire";
  import { firebaseApp } from "@/main";
</script>

<template></template>
To access the Firestore database, we’ll use the getFirestore() function and pass in the firebaseApp instance. To then access the collection we’ve recently created, we’ll use the useCollection() function from vuefire and reference the "todos" collection.
<script setup>
  import { getFirestore, collection } from "firebase/firestore";
  import { useCollection } from "vuefire";
  import { firebaseApp } from "@/main";

  const db = getFirestore(firebaseApp);
  const todos = useCollection(collection(db, "todos"));
</script>

<template></template>
With the todos collection available to us, we can now loop through the todo items with the v-for directive in our component template and display the title and completed status of each todo.
<script setup>
  import { getFirestore, collection } from "firebase/firestore";
  import { useCollection } from "vuefire";
  import { firebaseApp } from "@/main";

  const db = getFirestore(firebaseApp);
  const todos = useCollection(collection(db, "todos"));
</script>

<template>
  <ul>
    <li v-for="todo in todos" :key="todo.id">
      <p>{{ todo.title }}</p>
      <p>
        <sub>completed: {{ todo.completed }}</sub>
      </p>
      <br />
    </li>
  </ul>
</template>
We’ll then render the <TodosList /> component in the parent <App /> instance.
<script setup>
  import TodosList from "./components/TodosList.vue";
</script>

<template>
  <TodosList />
</template>
With this change, we’ll be presented with the list of todo items from our todos collection in our Firebase database.
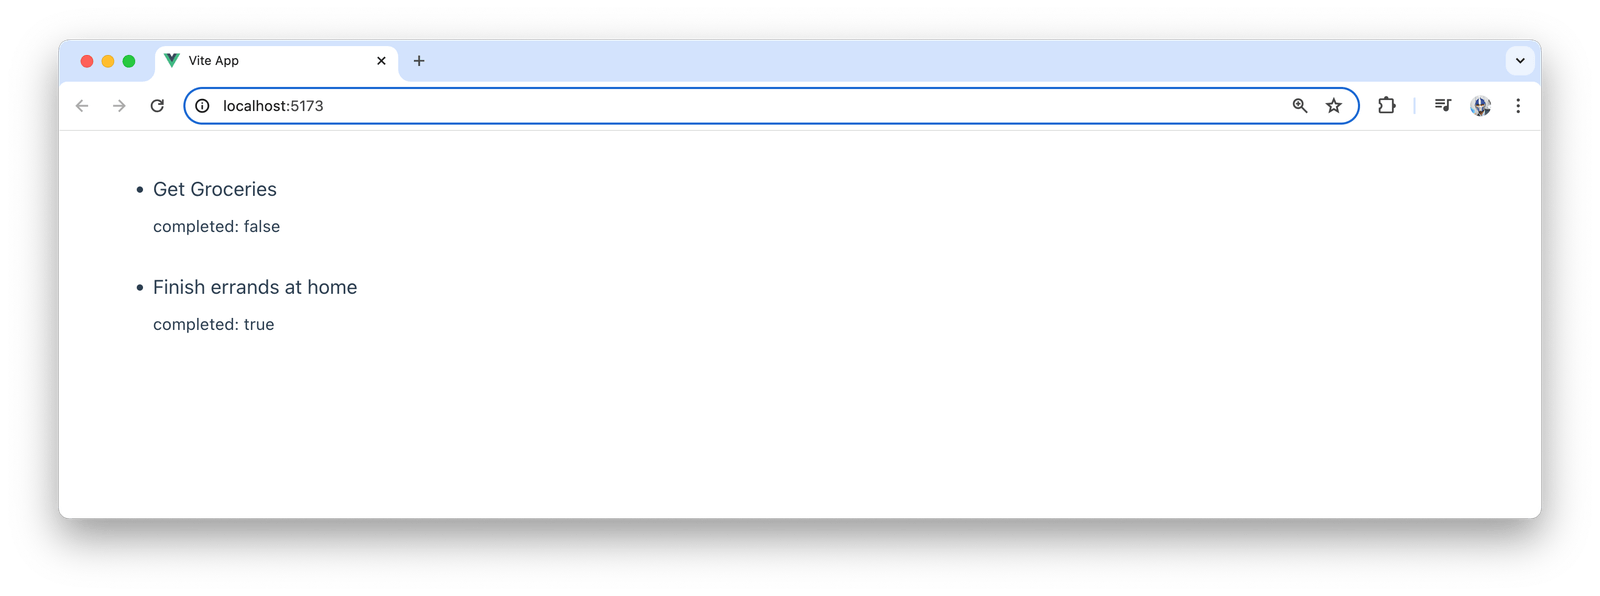
Next, we’ll attempt to create a simple form that when filled will add a new todo document to our todos collection in our database. We’ll update the template to have an input for both the title and completed status of the new todo item, and we’ll have a button that when triggered will add the todo to the collection.
<script setup>
  import { ref } from "vue";
  // ...
  // ...

  const newTodoTitle = ref("");
  const newTodoCompleted = ref(false);

  const addTodo = async () => {
    if (newTodoTitle.value.trim()) {
      // add to collection
    }
  };
</script>

<template>
  <!-- ... -->
  <div>
    ---
    <p>
      <label>Title: </label>
      <input v-model="newTodoTitle" placeholder="Add new todo" />
    </p>
    <p>
      <label>
        <input type="checkbox" v-model="newTodoCompleted" />
        Completed
      </label>
    </p>
    <button @click="addTodo">Add Todo</button>
  </div>
</template>
We’ll now attempt to add new todo items to our Firestore database using a simple form interface. To achieve this, we’ll use the addDoc() function from firebase/firestore to insert new documents into our todos collection with fields for the title and completion status.
<script setup>
  import { ref } from "vue";
  import { getFirestore, collection, addDoc } from "firebase/firestore";
  // ...
  // ...

  const newTodoTitle = ref("");
  const newTodoCompleted = ref(false);

  const addTodo = async () => {
    if (newTodoTitle.value.trim()) {
      await addDoc(collection(db, "todos"), {
        id: "3",
        title: newTodoTitle.value,
        completed: newTodoCompleted.value,
      });
      // set the form inputs back to initial state
      newTodoTitle.value = "";
      newTodoCompleted.value = false;
    }
  };
</script>

<template>
  <!-- ... -->
  <div>
    ---
    <p>
      <label>Title: </label>
      <input v-model="newTodoTitle" placeholder="Add new todo" />
    </p>
    <p>
      <label>
        <input type="checkbox" v-model="newTodoCompleted" />
        Completed
      </label>
    </p>
    <button @click="addTodo">Add Todo</button>
  </div>
</template>
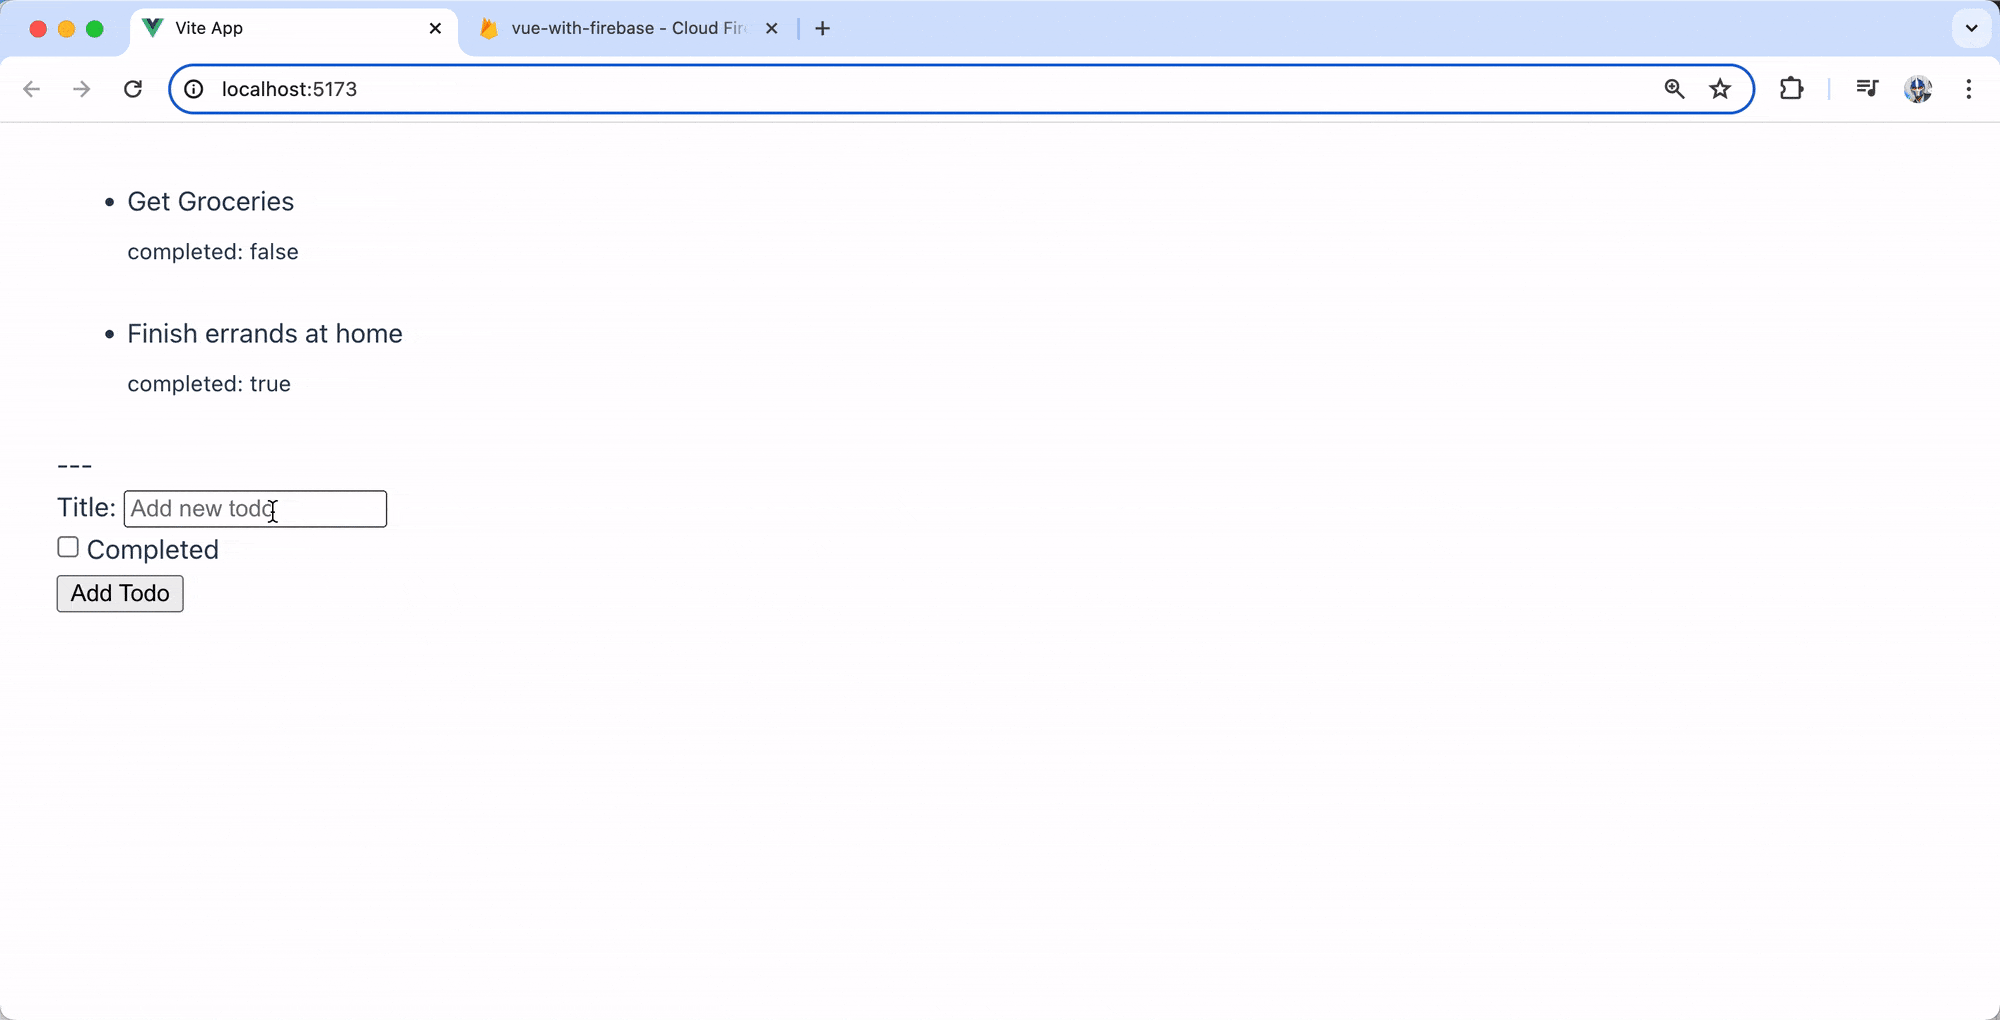
With this change, when the “Add Todo” button is clicked, it adds a new document to the Firestore todos collection, containing the todo item’s title and completion status. This addition will be reflected in any component that subscribes to the todos collection due to the real-time capabilities of Firestore.
Wrap-up
In this article, we’ve covered the essentials of integrating Vue.js with Firebase, demonstrating how we can set up a new project, configure Firebase within a Vue application and leverage VueFire to create dynamic, real-time web applications.
As you continue to develop with Vue and Firebase, explore further features such as Firebase Authentication for handling user accounts, Firebase Cloud Functions for running server-side logic and Firebase Storage for managing file uploads. Each of these services integrates seamlessly with Vue and VueFire, enhancing an application’s capabilities and allowing you to provide a richer user experience.
For more information, be sure to check out the official Firebase and VueFire documentation!
This content originally appeared on Telerik Blogs and was authored by Hassan Djirdeh
Hassan Djirdeh | Sciencx (2024-08-15T14:28:25+00:00) Vue Basics: How to Use Vue with Firebase. Retrieved from https://www.scien.cx/2024/08/15/vue-basics-how-to-use-vue-with-firebase/
Please log in to upload a file.
There are no updates yet.
Click the Upload button above to add an update.
