This content originally appeared on Telerik Blogs and was authored by Jefferson S. Motta
In this post, I’ll walk you through creating your first Angular Report Viewer.
Data will be accessed using a C# .NET 8 RESTful service, and queries will be conducted on Microsoft SQL Server. Let me start by talking about Telerik Reporting.
About Telerik Reporting
Progress Telerik Reporting is a tool that enables the creation, viewing and exporting of rich, interactive, reusable reports. It offers a REST service that allows us to generate reports in various formats, including PDF, Excel and HTML.
There are various advantages to using REST with Telerik Reporting for Angular. REST is a simple, lightweight protocol that may be used with any computer language. It enables us to design a scalable and adaptable architecture readily integrated with other systems. RESTful services are also stateless, meaning they do not store client information, making them more secure and easier to manage.
We can construct a robust, easy-to-use, scalable and configurable reporting solution by combining REST and Telerik Reporting for Angular. Reports can be generated in various formats and integrated with other systems, making communicating information across your organization easy.
Report Designers
Telerik Reporting provides tools for designers to create and configure reports. They support many report definitions, including Type Report Definitions, Declarative Report Definitions and Code Report Definitions. They also offer wizards and templates for common report scenarios, including band reports, invoicing, product catalogs, etc.
One option for working with reports in Angular is to integrate the Web Report Designer into an Angular application.
Data Source Elements
These elements link the report to data from multiple sources, such as databases, web services, business objects, static files, etc. The Telerik.Reporting API model can be used to configure them externally or programmatically.
Report Viewers
These interface components let us show and interact with a report document in the application’s UI. They cover many technologies, including Angular, React, Blazor, HTML5/JS, ASP.NET Core, WinUI, WPF, Windows Forms, etc. They can process and render the report using a remote or embedded reporting engine.
We may utilize the HTML5 Report Viewer with Telerik Reporting with Angular, a JavaScript widget that can be inserted into any online application. We may alternatively utilize the Angular Report Viewer, a wrapper component that provides the functionality and settings of the HTML5 Report Viewer.
There is also a Native Angular Report Viewer where the jQuery dependency is dropped. You’ll need a Kendo UI for Angular license to use the native report viewer, which is included in the Telerik DevCraft license—my personal recommendation for the most robust development experience.
Creating Our Angular Report
We start by creating our Angular project. I used the name angularreportsolution.
npx @angular/cli@16 new angularreportsolution
Choose if you like routing. It’s necessary to choose SCSS:

After that, the installation of jQuery:
npm install jquery
Add jQuery to the angular.json:
1....
2. “architect”: {
3.        “build”: {
4.          "builder": "@angular-devkit/build-angular:browser",
5.          “options”: {
6.            “outputPath”: “dist/angularreportsolution”,
7.            “index”: “src/index.html”,
8.            “main”: “src/main.ts”,
9.            “polyfills”: [
10.              “zone.js”
11.            ],
12.            "tsConfig": "tsconfig.app.json",
13.            “inlineStyleLanguage”: “scss”,
14.            “assets”: [
15.              “src/favicon.ico”,
16.              “src/assets”
17.            ],
18.            “styles”: [
19.              “src/styles.scss”
20.            ],
21.            “scripts”: []
22.          },
23.
24....
Now you will add (if you have an existing project) or replace "scripts": [] with:
"scripts": ["./node_modules/jquery/dist/jquery.js"]
Installing the Telerik Report Viewer
You may receive a 403 Forbidden error, so you must register and log in to npmjs.com before performing this step.
npm login --registry=https://registry.npmjs.org --scope=@progress
And now, we run the command to install the viewer:
npm install @progress/telerik-angular-report-viewer
Configuring the Project
At the Angular Index.html, add the theme in the head. You can choose another theme. Here is a list of themes.
1.<link rel="stylesheet" href="https://kendo.cdn.telerik.com/themes/7.0.2/classic/classic-main.css" />
Add the Telerik Reporting Module at the app.module.ts angular file:
Insert the import on the top, Line 1 in the sample below, and TelerikReportingModule into the imports array, Line 10 in the sample below.
Sample app.module.ts:
1.import { TelerikReportingModule } from '@progress/telerik-angular-report-viewer';
2.
3.@NgModule({
4.  declarations: [
5.    AppComponent
6.  ],
7.  imports: [
8.    BrowserModule,
9.    AppRoutingModule,
10.    TelerikReportingModule
11.  ],
12.  providers: [],
13.  bootstrap: [AppComponent]
14.})
15.export class AppModule { }
At the app.component.ts, add the viewerContainerStyle:
1.import { Component } from '@angular/core';
2.
3.@Component({
4.  selector: ‘app-root’,
5.  templateUrl: './app.component.html',
6.  styleUrls: ['./app.component.scss']
7.})
8.export class AppComponent {
9.  title = 'Angular Report Solution';
10.
11.  viewerContainerStyle = {
12.    position: ‘relative’,
13.    width: ‘1000px’,
14.    height: ‘800px’,
15.    [‘font-family’]: ‘ms sans serif’
16.};
17.
18.}
Add the HTML code to the app.component.html file:
1.<tr-viewer
2.    [containerStyle]="viewerContainerStyle"
3.    [serviceUrl]="'https://angularnet8report.jsmotta.com.br/api/reports'"
4.    [reportSource]="{
5.        report: ‘Dashboard.trdp’,
6.        parameters: {}
7.    }”
8.    [viewMode]="'INTERACTIVE'"
9.    [scaleMode]="'SPECIFIC'"
10.    [scale]="1.0">
11.</tr-viewer>
In Line 3, we input our REST service. I’m using a service that is already working with the AdventureWorks database.
[serviceUrl]="'https://angularnet8report.jsmotta.com.br/api/reports'"
At this point, you can run and open the sample working online:
ng serve
Open the browser at localhost port 4200:
http://localhost:4200/
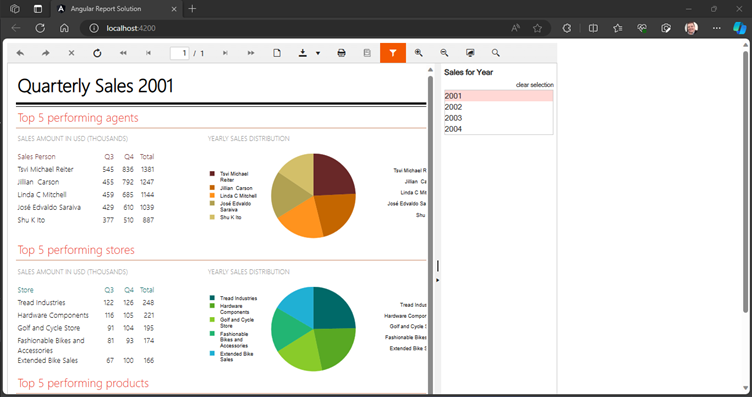
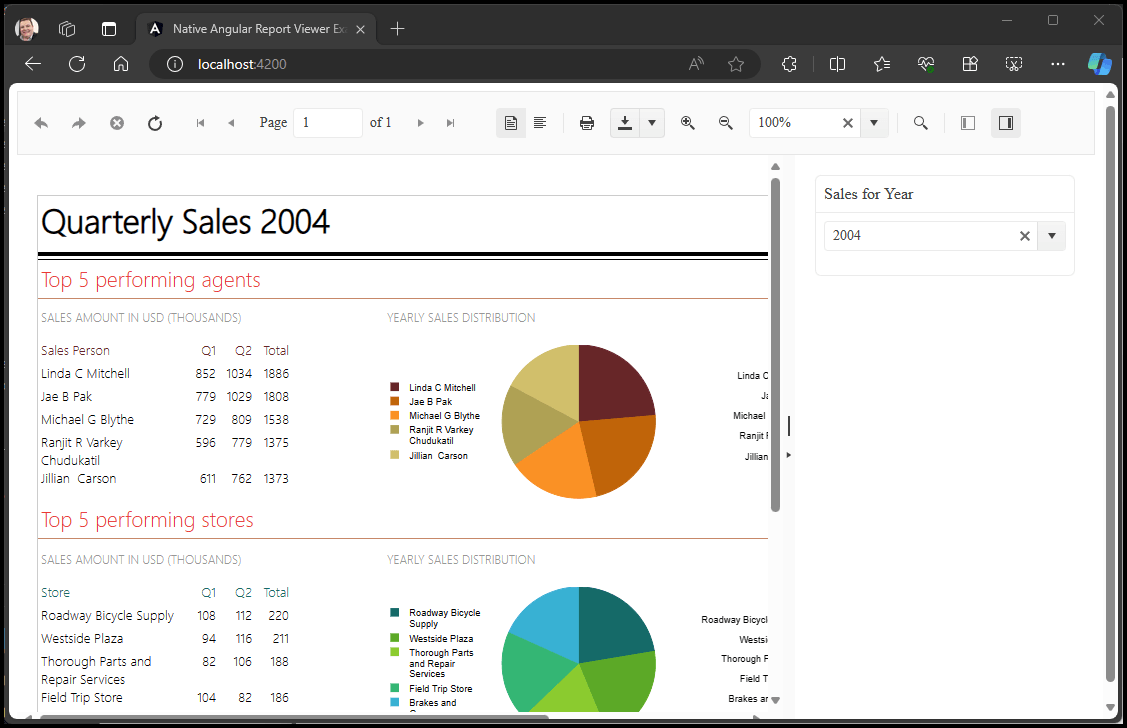
The image below shows the result you can expect if everything is OK:
Configuration on the Backend
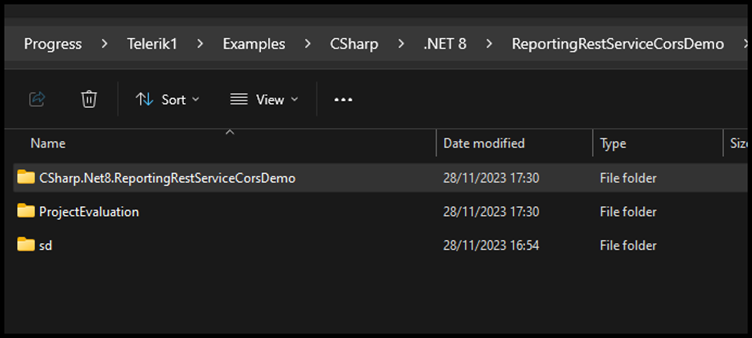
We can start from the template in the Progress installation folder.
In the backend, you will set the connection string on appsettings.json.
Tip: You can choose any name for the connection string.
1. "AllowedHosts": "*",
2. "ConnectionStrings": {
3.   "AdventureWorksConnectionString": {
4.     "connectionString": "Data Source=(local);Initial Catalog=AdventureWorks;Integrated Security=SSPI",
5.     "providerName": "System.Data.SqlClient"
6.   }
7. }
In this case, we specified the report for rendering by the Angular Report Viewer to be Dashboard.trdp.
1.<reporting-angular-viewer
2.    #viewer
3.    height="100vh"
4.    [reportSource]="{
5.        report: 'Dashboard.trdp',
6.        parameters: { ReportYear: 2004 }
7.    }"
8.    [serviceUrl]="'http://localhost:59657/api/reports/'"
9.    viewMode="interactive"
10.    [keepClientAlive]="true"
11.    (reportLoadComplete)="reportLoadComplete($event)" >
12.</reporting-angular-viewer>
Tip: There are other templates for you to explore:
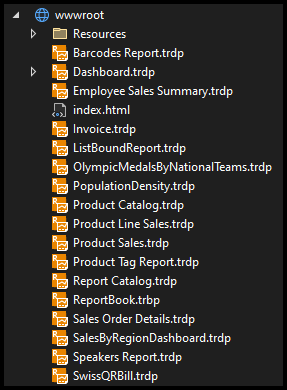
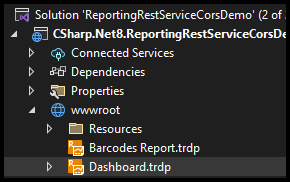
Open the Telerik Report Designer by double-clicking on the file:
Select the data source and define the property ConnectionString you previously defined on appsettings.json. Tip: The name should be exactly the same in the settings.
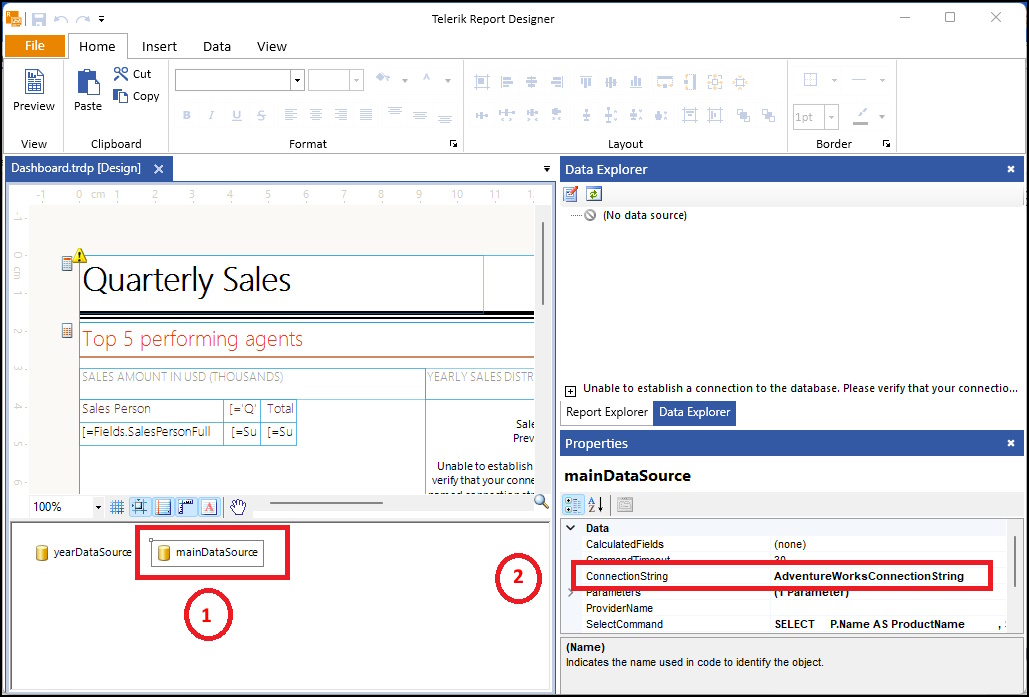
Tip: Do it in both data sources.
This is the result:
Don’t Miss a Thing
Check at the port to use on localhost:
1.[serviceUrl]="'http://localhost:59657/api/reports/'"
Check the reportsPath to point the desired path to the templates/report definitions (TRDP, TRDX and TRBP files):
1.var reportsPath = builder.Environment.WebRootPath;
2.
3.// Configure dependencies for ReportsController.
4.builder.Services.TryAddSingleton<IReportServiceConfiguration>(sp =>
5.    new ReportServiceConfiguration
6.    {
7.        // The default ReportingEngineConfiguration will be initialized from appsettings.json or appsettings.{EnvironmentName}.json:
8.        ReportingEngineConfiguration = sp.GetService<IConfiguration>(),
9.
10.        // In case the ReportingEngineConfiguration needs to be loaded from a specific configuration file, use the approach below:
11.        //ReportingEngineConfiguration = ResolveSpecificReportingConfiguration(sp.GetService<IWebHostEnvironment>()),
12.        HostAppId = "Net8RestServiceWithCors",
13.        Storage = new FileStorage(),
14.        ReportSourceResolver = new TypeReportSourceResolver()
15.                                .AddFallbackResolver(
16.                                    new UriReportSourceResolver(reportsPath))
17.    });
To update your telerik-angular-native-report-viewer, run the command:
1.npm i @progress/telerik-angular-native-report-viewer
Conclusion
I gave an essential guide for using Angular to open Telerik Reporting templates. Login and routing processes must also be considered for deployment in a production environment. The setup of Microsoft SQL Server settings is accessible, as we can see.
Remember to call the support team anytime you need help, even during the evaluation period.
If you have any questions about this article, please contact me via LinkedIn. I am available to help you from dev to dev. I do speak Brazilian Portuguese and English.
Try It for Yourself
I highly recommend the full suite of Telerik and Kendo UI tools from Progress. Try out the bundle now, free for 30 days:
References
- Working Demo: https://telerik23angularreportsolution.jsmotta.com.br
- GitHub: https://github.com/jssmotta/Telerik23AngularReportSolution
- Themes: https://docs.telerik.com/kendo-ui/styles-and-layout/less-themes/less-themes-migration
- Report Viewer: https://docs.telerik.com/reporting/embedding-reports/display-reports-in-applications/web-application/angular-report-viewer/how-to-use-angular-report-viewer-with-angular-cli
- Native Angular Report Viewer: https://docs.telerik.com/reporting/embedding-reports/display-reports-in-applications/web-application/native-angular-report-viewer/how-to-use-with-reporting-service
This content originally appeared on Telerik Blogs and was authored by Jefferson S. Motta
Jefferson S. Motta | Sciencx (2024-08-29T08:17:57+00:00) From Scratch to Success: Setting Up Telerik Reporting with Angular. Retrieved from https://www.scien.cx/2024/08/29/from-scratch-to-success-setting-up-telerik-reporting-with-angular/
Please log in to upload a file.
There are no updates yet.
Click the Upload button above to add an update.
